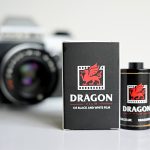
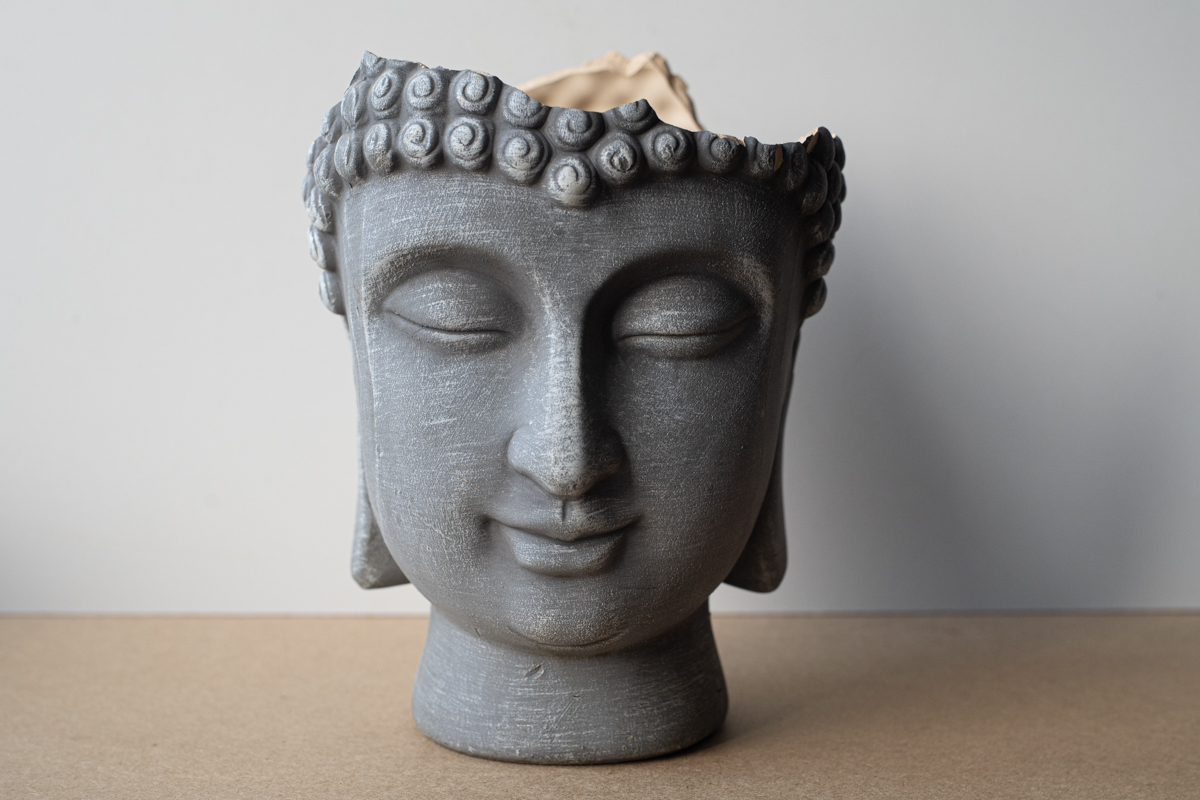
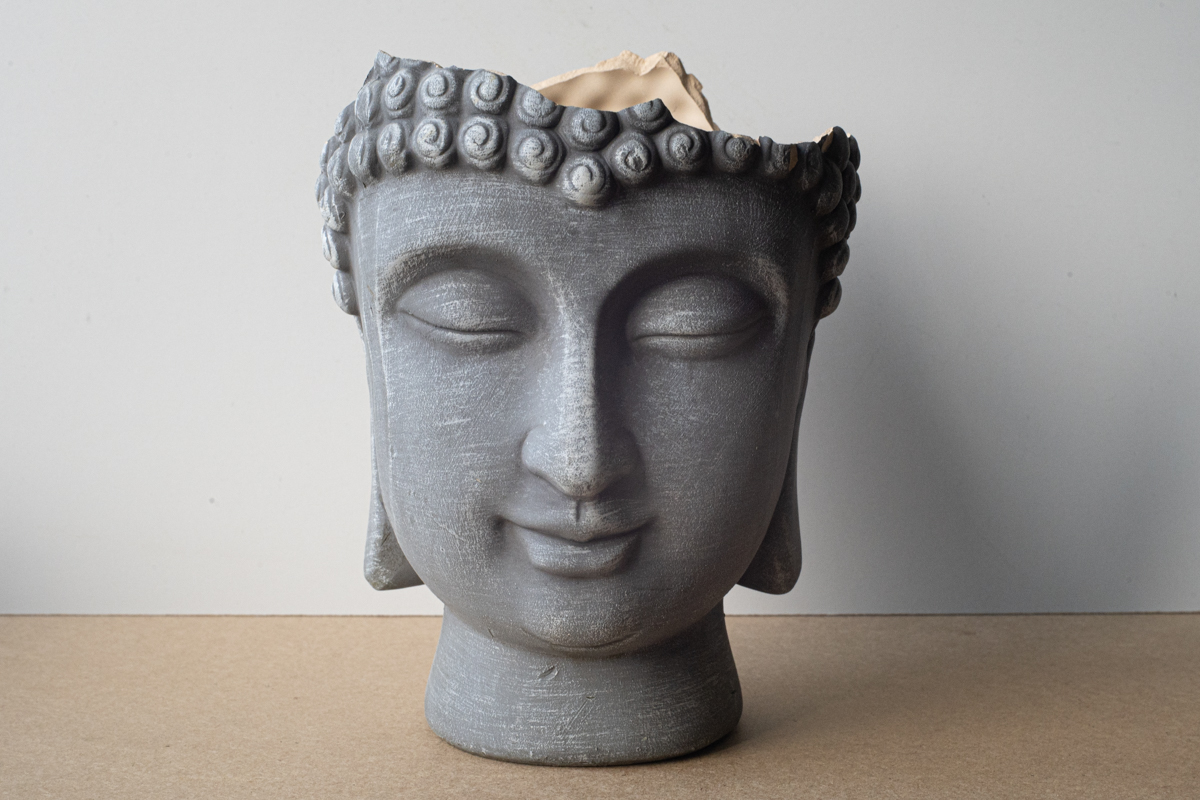
“New” Film. Dragon No1 Film.
New Arrival?
The arrival of yet another rebranded film can elicit drastically different reactions. On one side, there’s a weariness, a longing for the familiar era of 1980s film photography, making the thought of further changes unwelcome. On the other, a sense of opportunity arises, with the question “What other films are out there to try?” finally finding a potential answer.
Svema NK2-SH. This was a film I’d never encountered before. It took the initiative of two dedicated individuals, venturing into the realm of obscure films and giving them a visual makeover (complete with, perhaps, a dragon or two if that’s your thing), for it to even come to my attention.
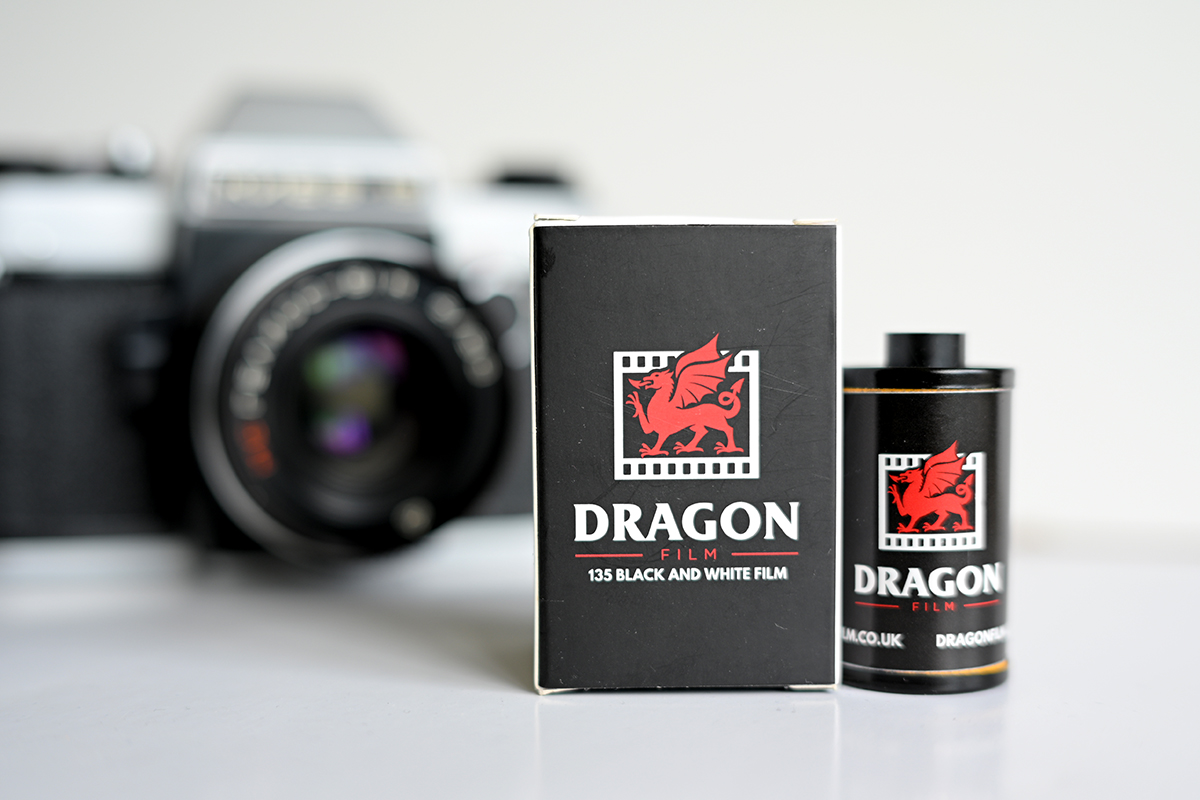
So here is a “Newly Packaged” film on the market. Dragon No1 Film. They call it their No.1 Film because they have a few more different films available. I guess thats a good way of branding your films without wasting too much time thinking of a funky name for them. And they make it no secret that it is rebranded.
This film is FRESH stock. Fresh Svema NK2-SH. A film that is already rebranded by a couple of companies and Dragon approached me and sent me a roll of their No.1 film to try out. And I liked it that much I decided to show the SFLaB YouTube Subscribers recently in a video.
Svema NK2-SH was originally a motion picture emulsion. But these days the same emulsion has been placed on photographic film so don’t expect to see the traditional motion picture sprocket holes.
To be honest, Svema NK2-SH was a film I’d never heard of, and I’m quite certain it would have remained that way had it not been for the team at Dragon. My conversations with them over the past year regarding darkroom printing have built a level of trust that made me willing to give this unfamiliar film a shot. And if you’re wondering what the letters and numbers relate to, well, Svema is a manufacturing plant in Ukraine. And I had an interesting comment on the video regarding.
Svema NK-2SH (Свема НК-2Ш). NK-2 was produced by Tasma [Та́сма (rus. ТАтарские Светочувствительные МАтериалы and tat. тасма́ — ribbon)], while NK-2SH – Shostkinsk chemical plant (Шосткинский химический комбинат), this is the main Svema factory located in Shostka, Ukraine. NK stands for “negative kinofilm”. “2” is sensitivity (there were 4, while №2 was most popular 90 ISO). To confuse you more, there was also KN-2 (КН-2 – кинонегатив, rus. kinonegativ, i.e. film negative but the ISO of this one was 32).
And it is confusing too when you read the films and cameras from that side of the world. So thanks for that @Sedokun on YouTube.
What’s it like?
I only had one roll to experiment with. And when you have one roll you don’t want to mess things up. I’m not talking about the shoot. Moreover I’m talking about the development. I used some of the film sparingly to make a few development tests before I spent time shooting photographs. I used ID-11 at 1 part to 1 part on my rotary processor and I ended up with a time of 8.5 Minutes at 20°. I only tested for the leader density. You can see the tests I did on the video.
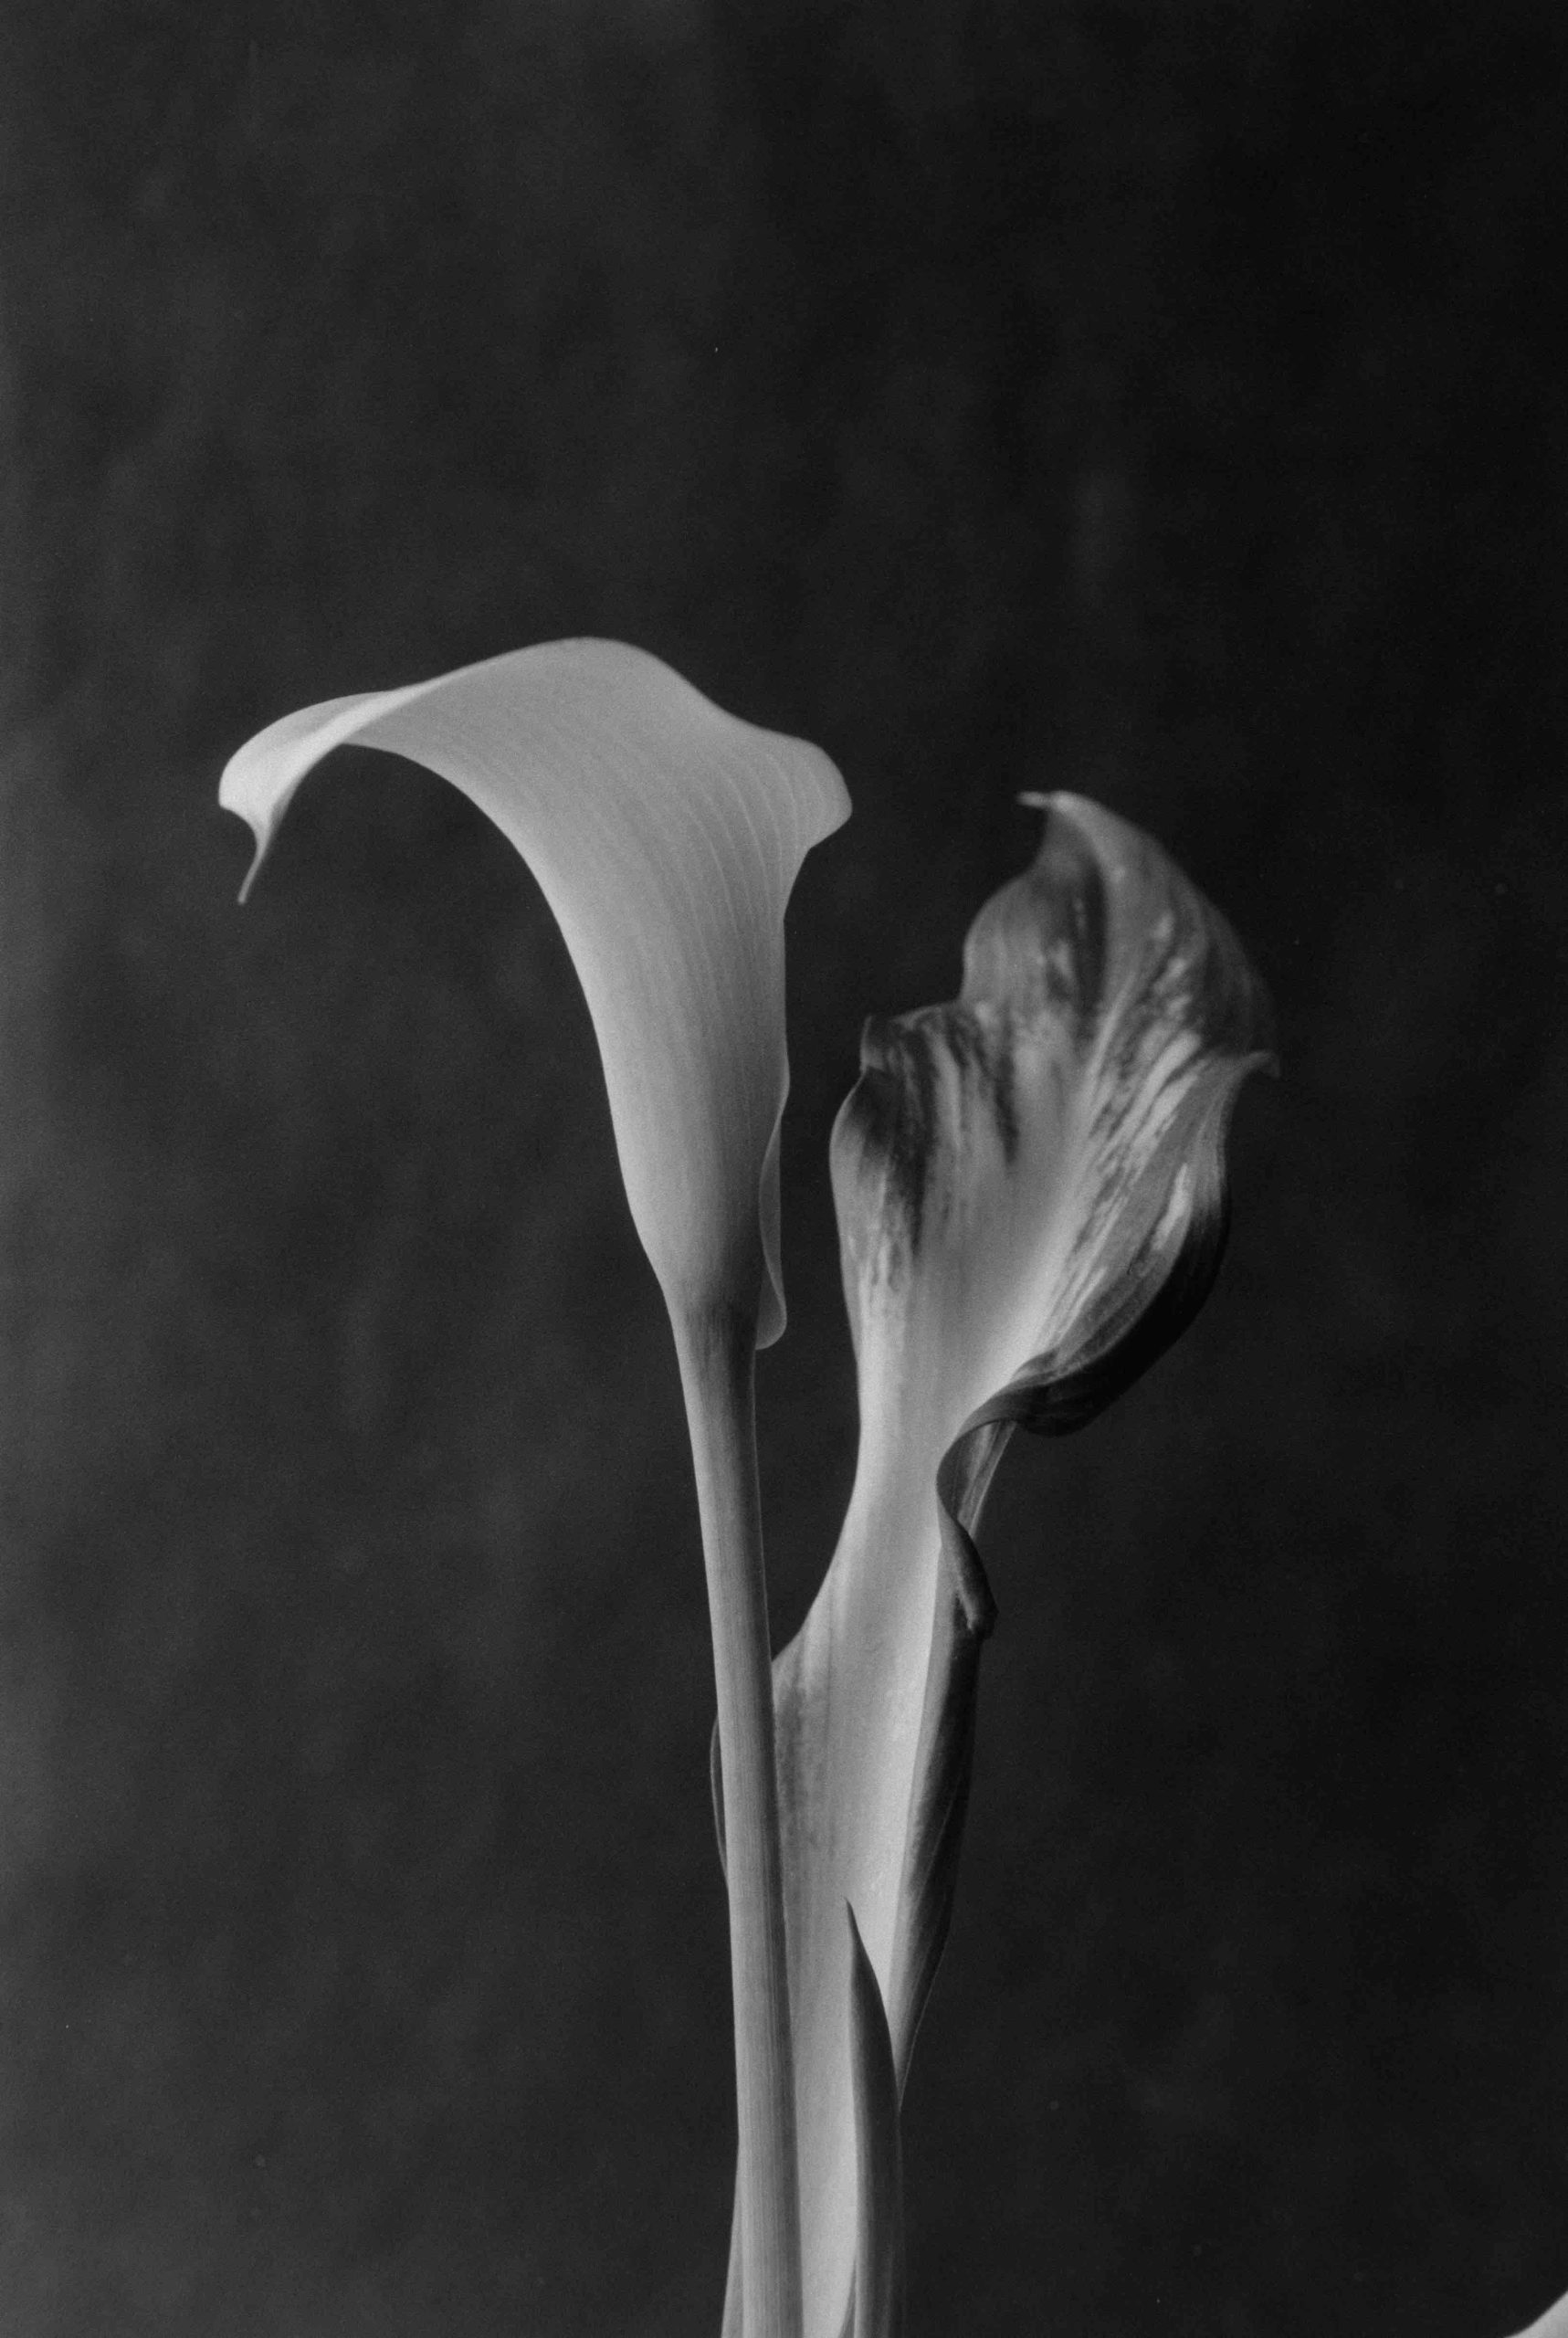
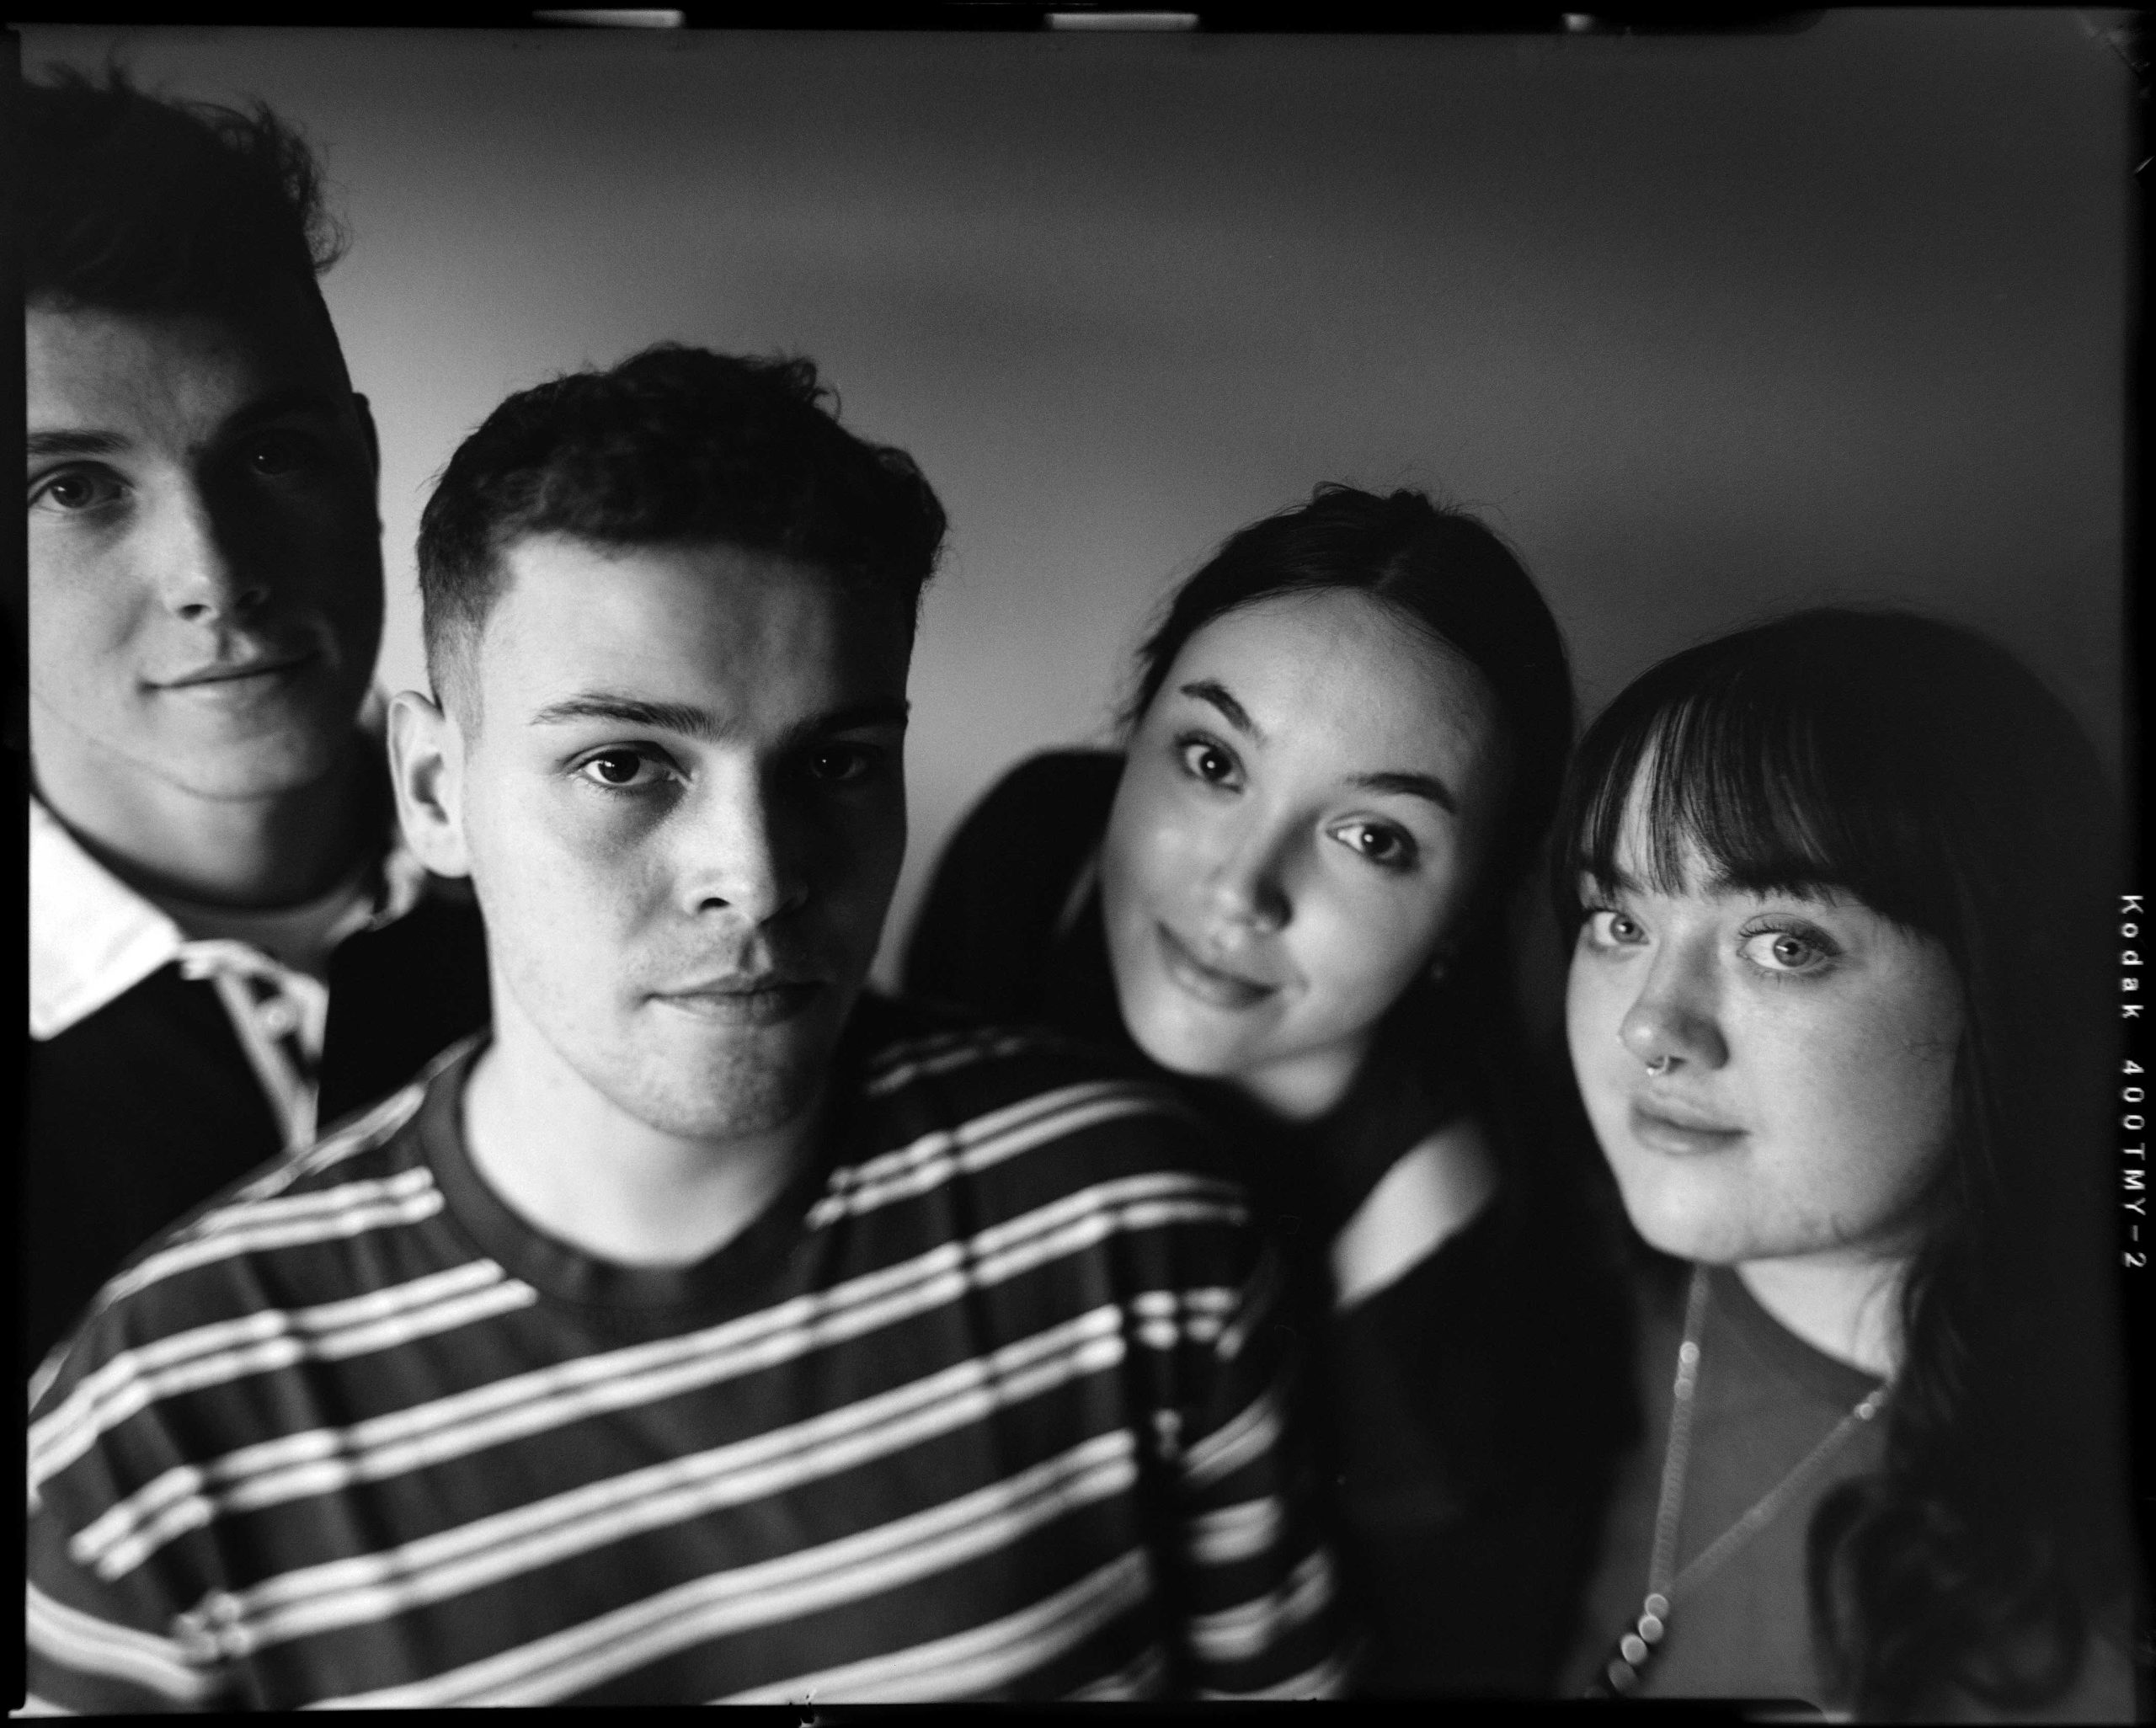
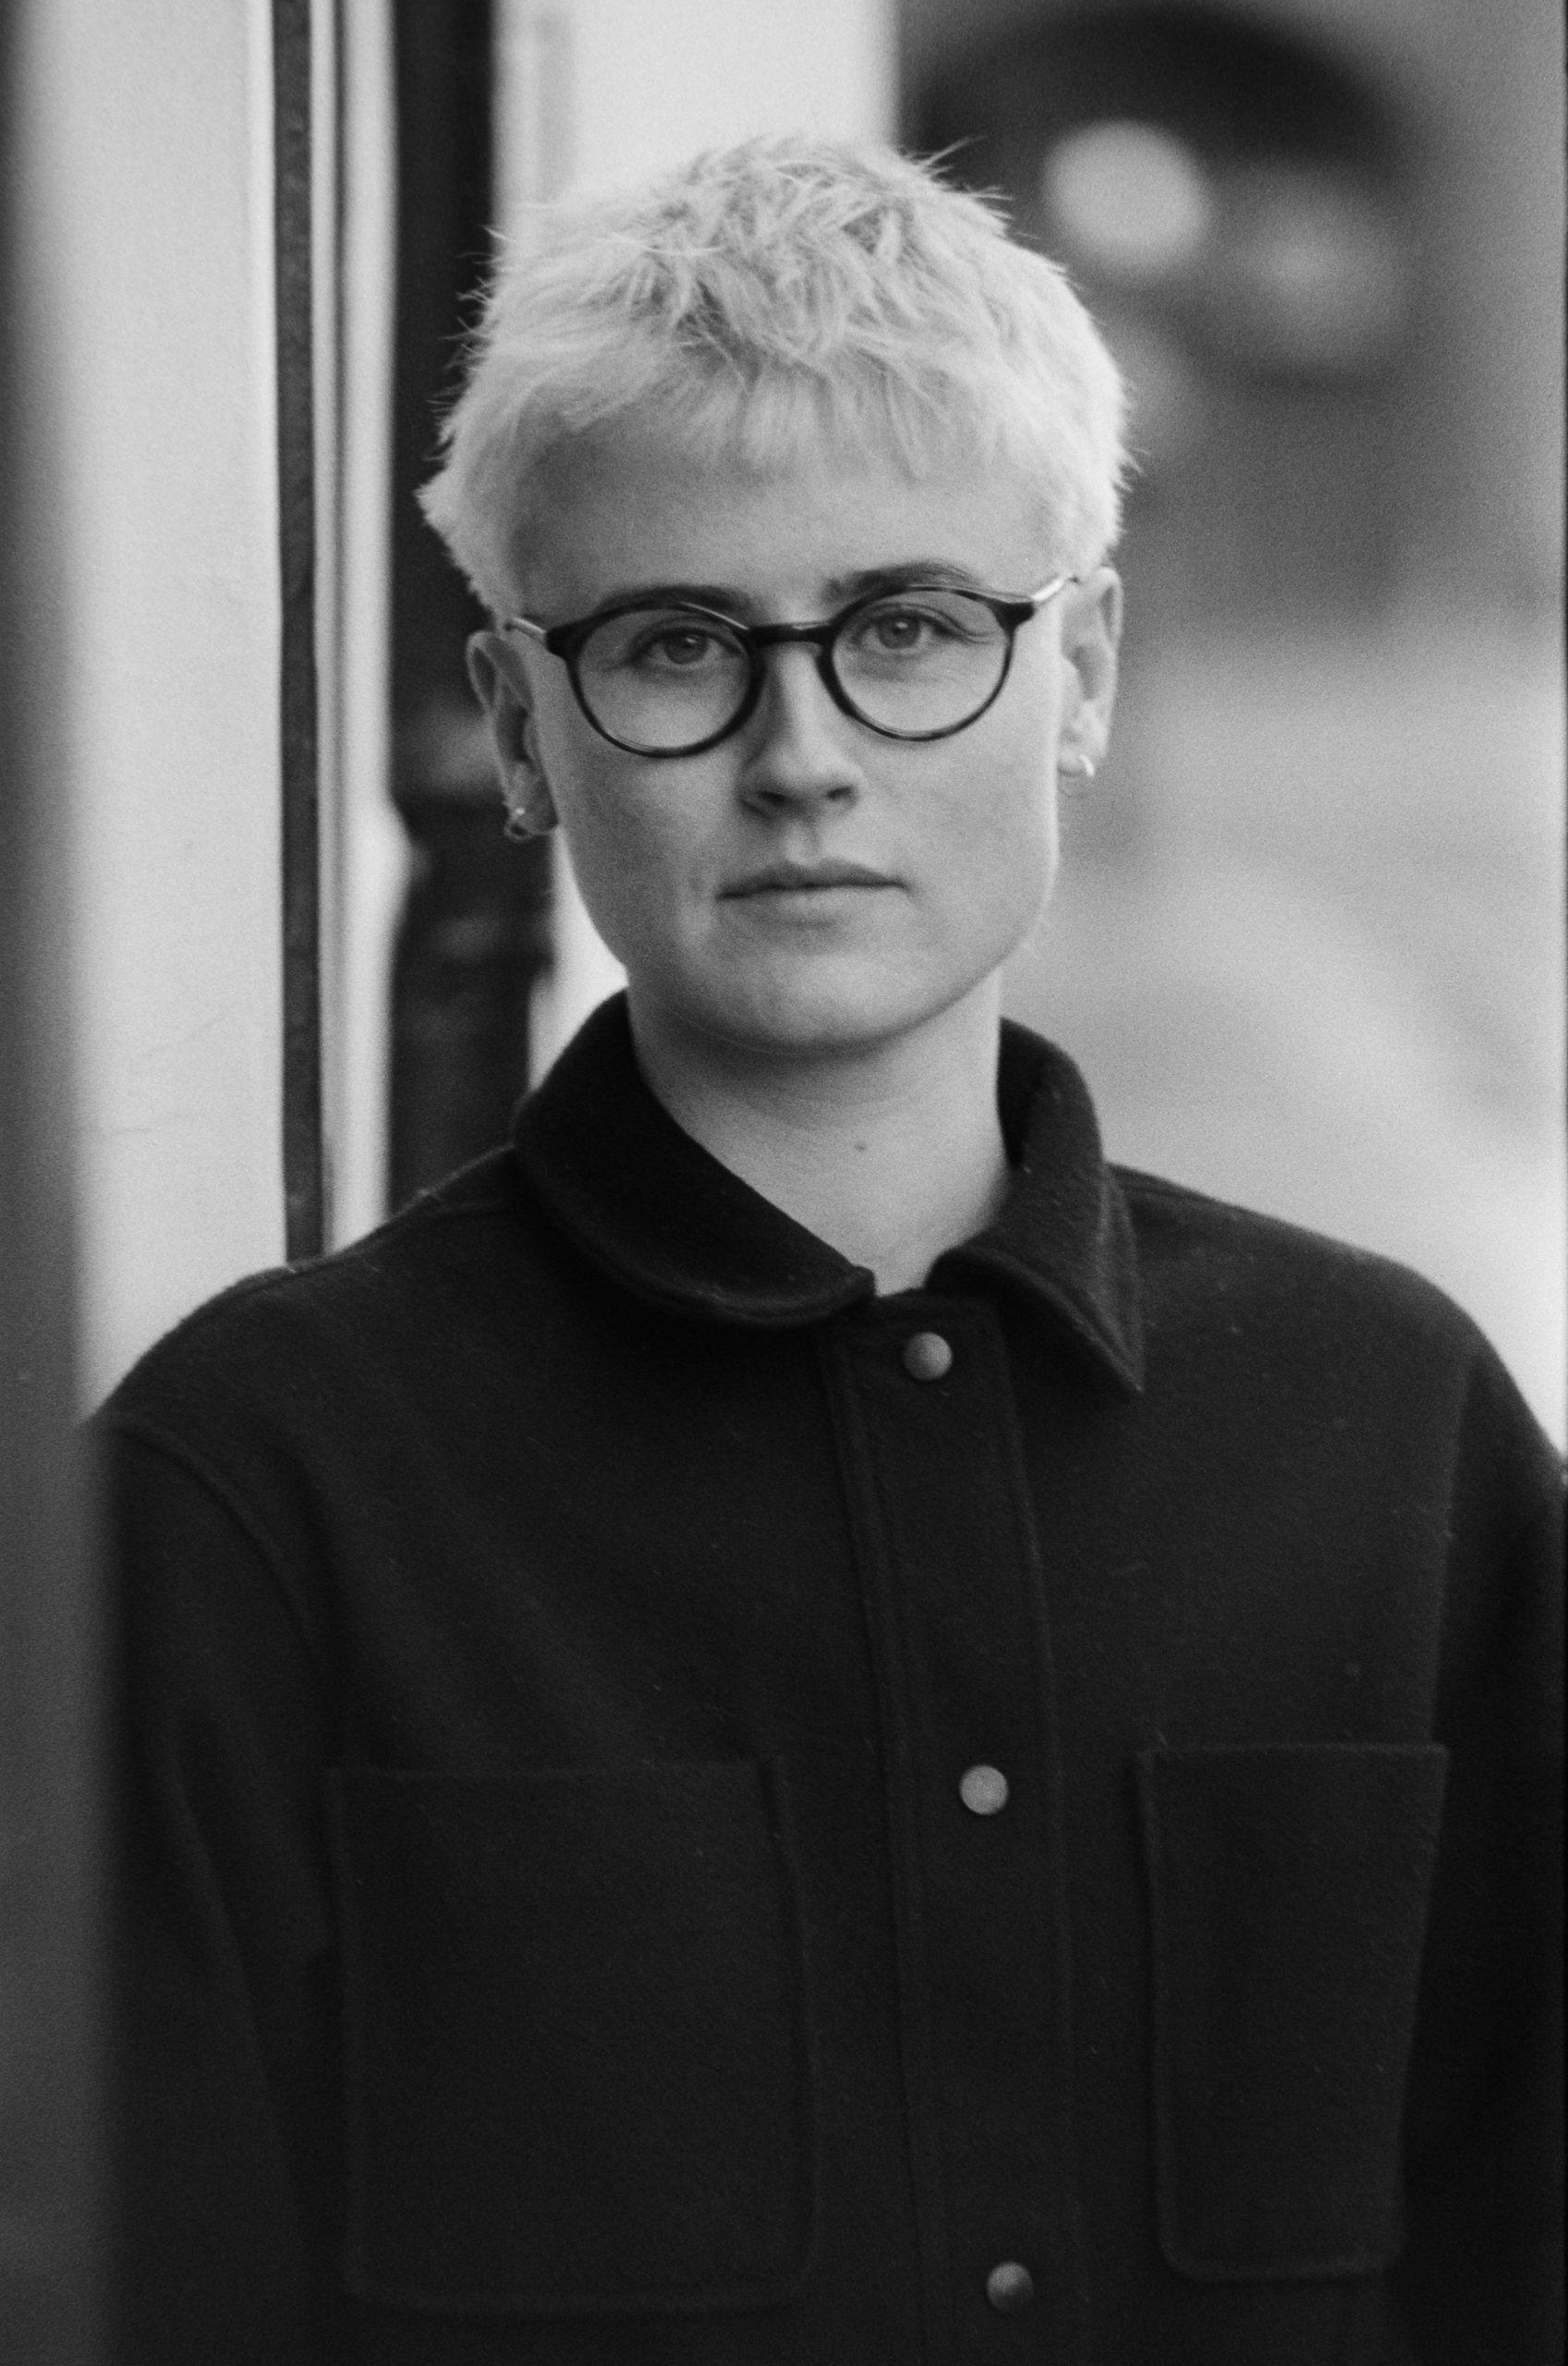
For my first roll of Svema NK2-SH, I opted for a portrait study to evaluate its skin tone reproduction. My niece kindly agreed to model in the sunny back garden, providing the perfect opportunity to shoot in both direct light and diffused shade (where a scrim played a vital role in softening potential under-eye, cheekbone, and neck shadows). Once I had a few portraits in the bag, I carefully removed the film from the camera and moved on to the development stage.

This was in shade and I must admit I was stunned at the tonality, contrast and very very fine grain! I didn’t shoot the film at box speed. For some reason I decided to shoot it at 50ISO and overexpose. The negatives did look a bit heavy with the extra exposure but as you can see easily manageable. I scanned these into photoshop and adjusted the contrast levels. Exactly the same what I would do in the darkroom with contrast filters, this being a contrast 5.

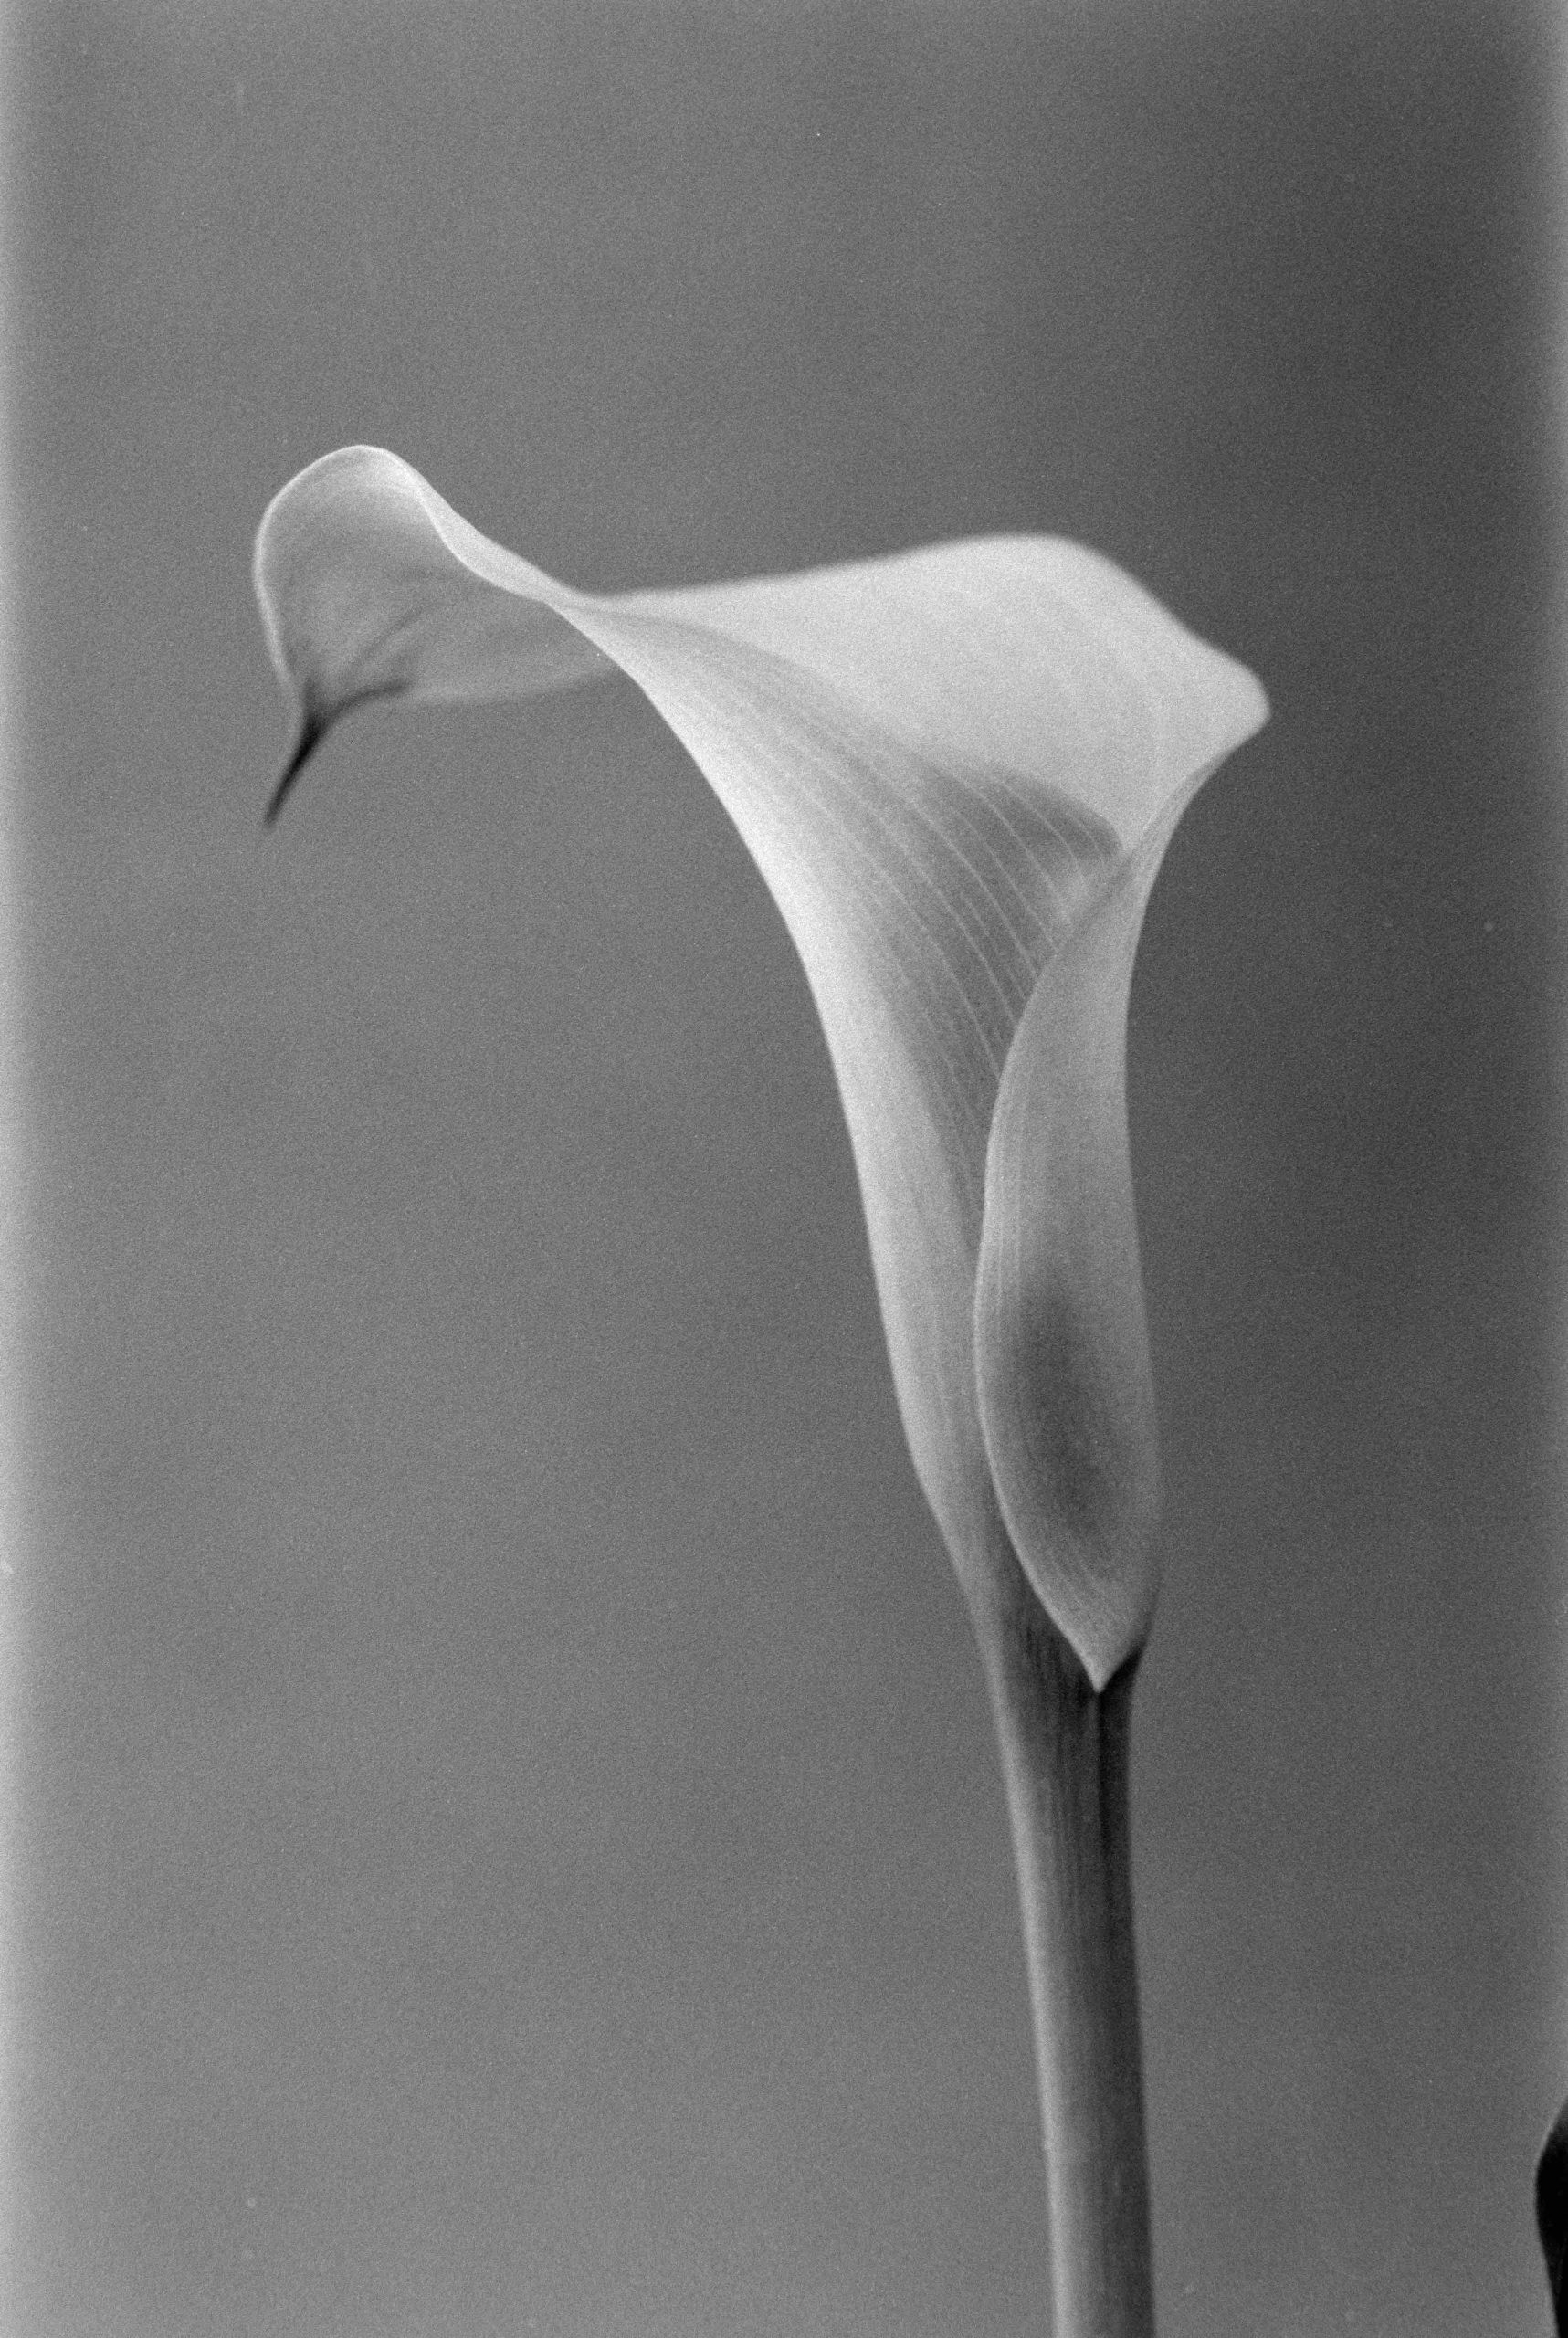
And this was in sunlight using a scrim (diffuser).
The fine grain makes this film perfect for smooth looking portraits. Which got me thinking of other uses. Street, Scapes, Still Life.
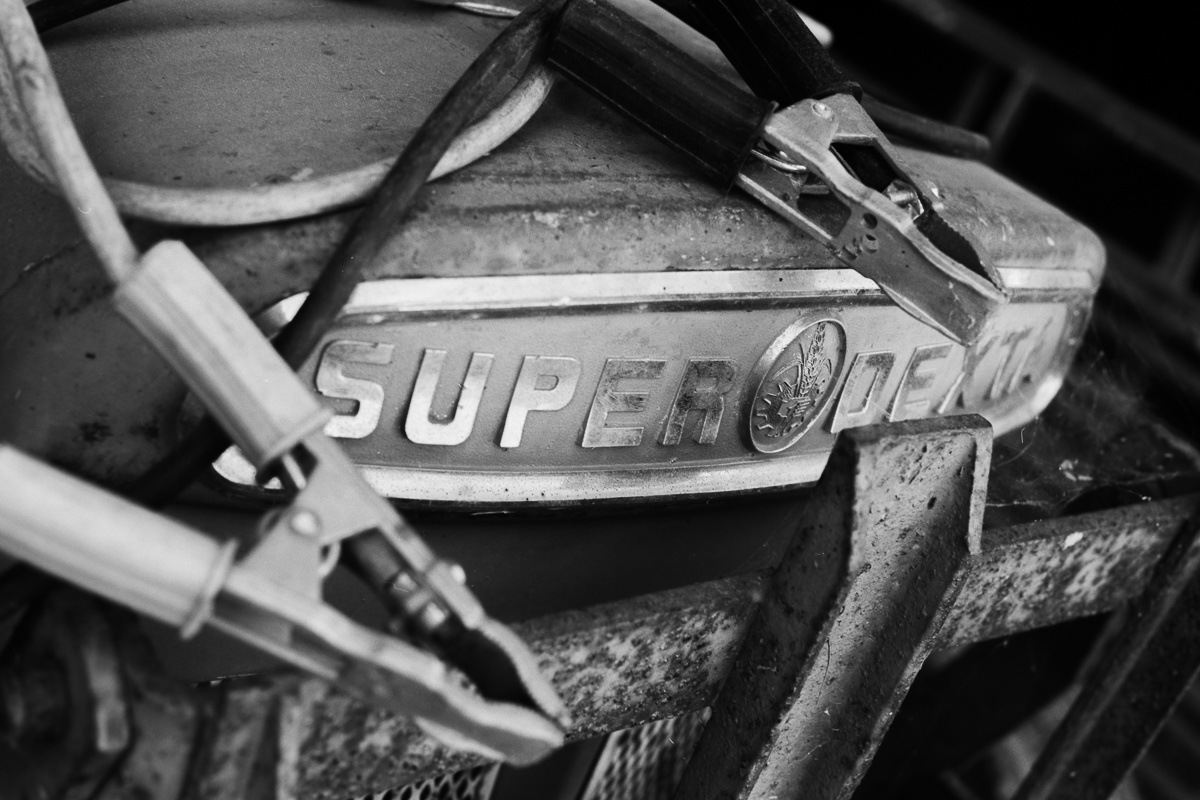
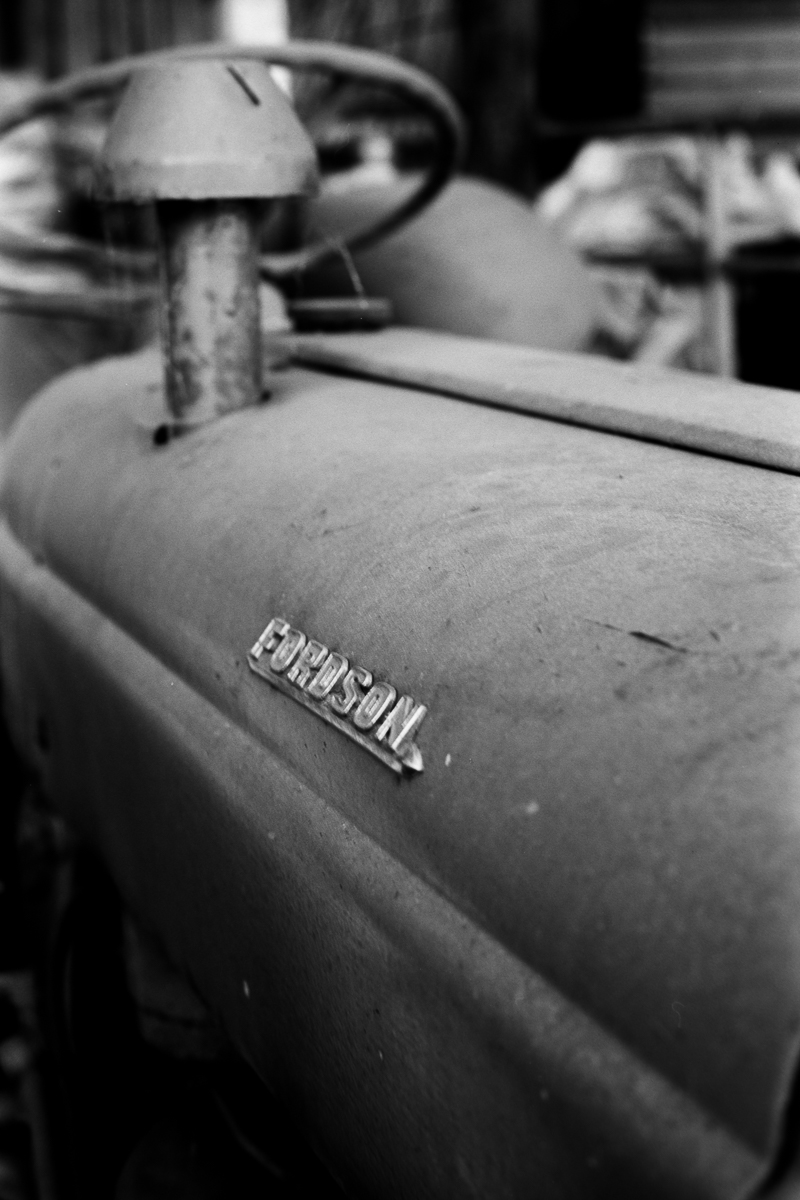
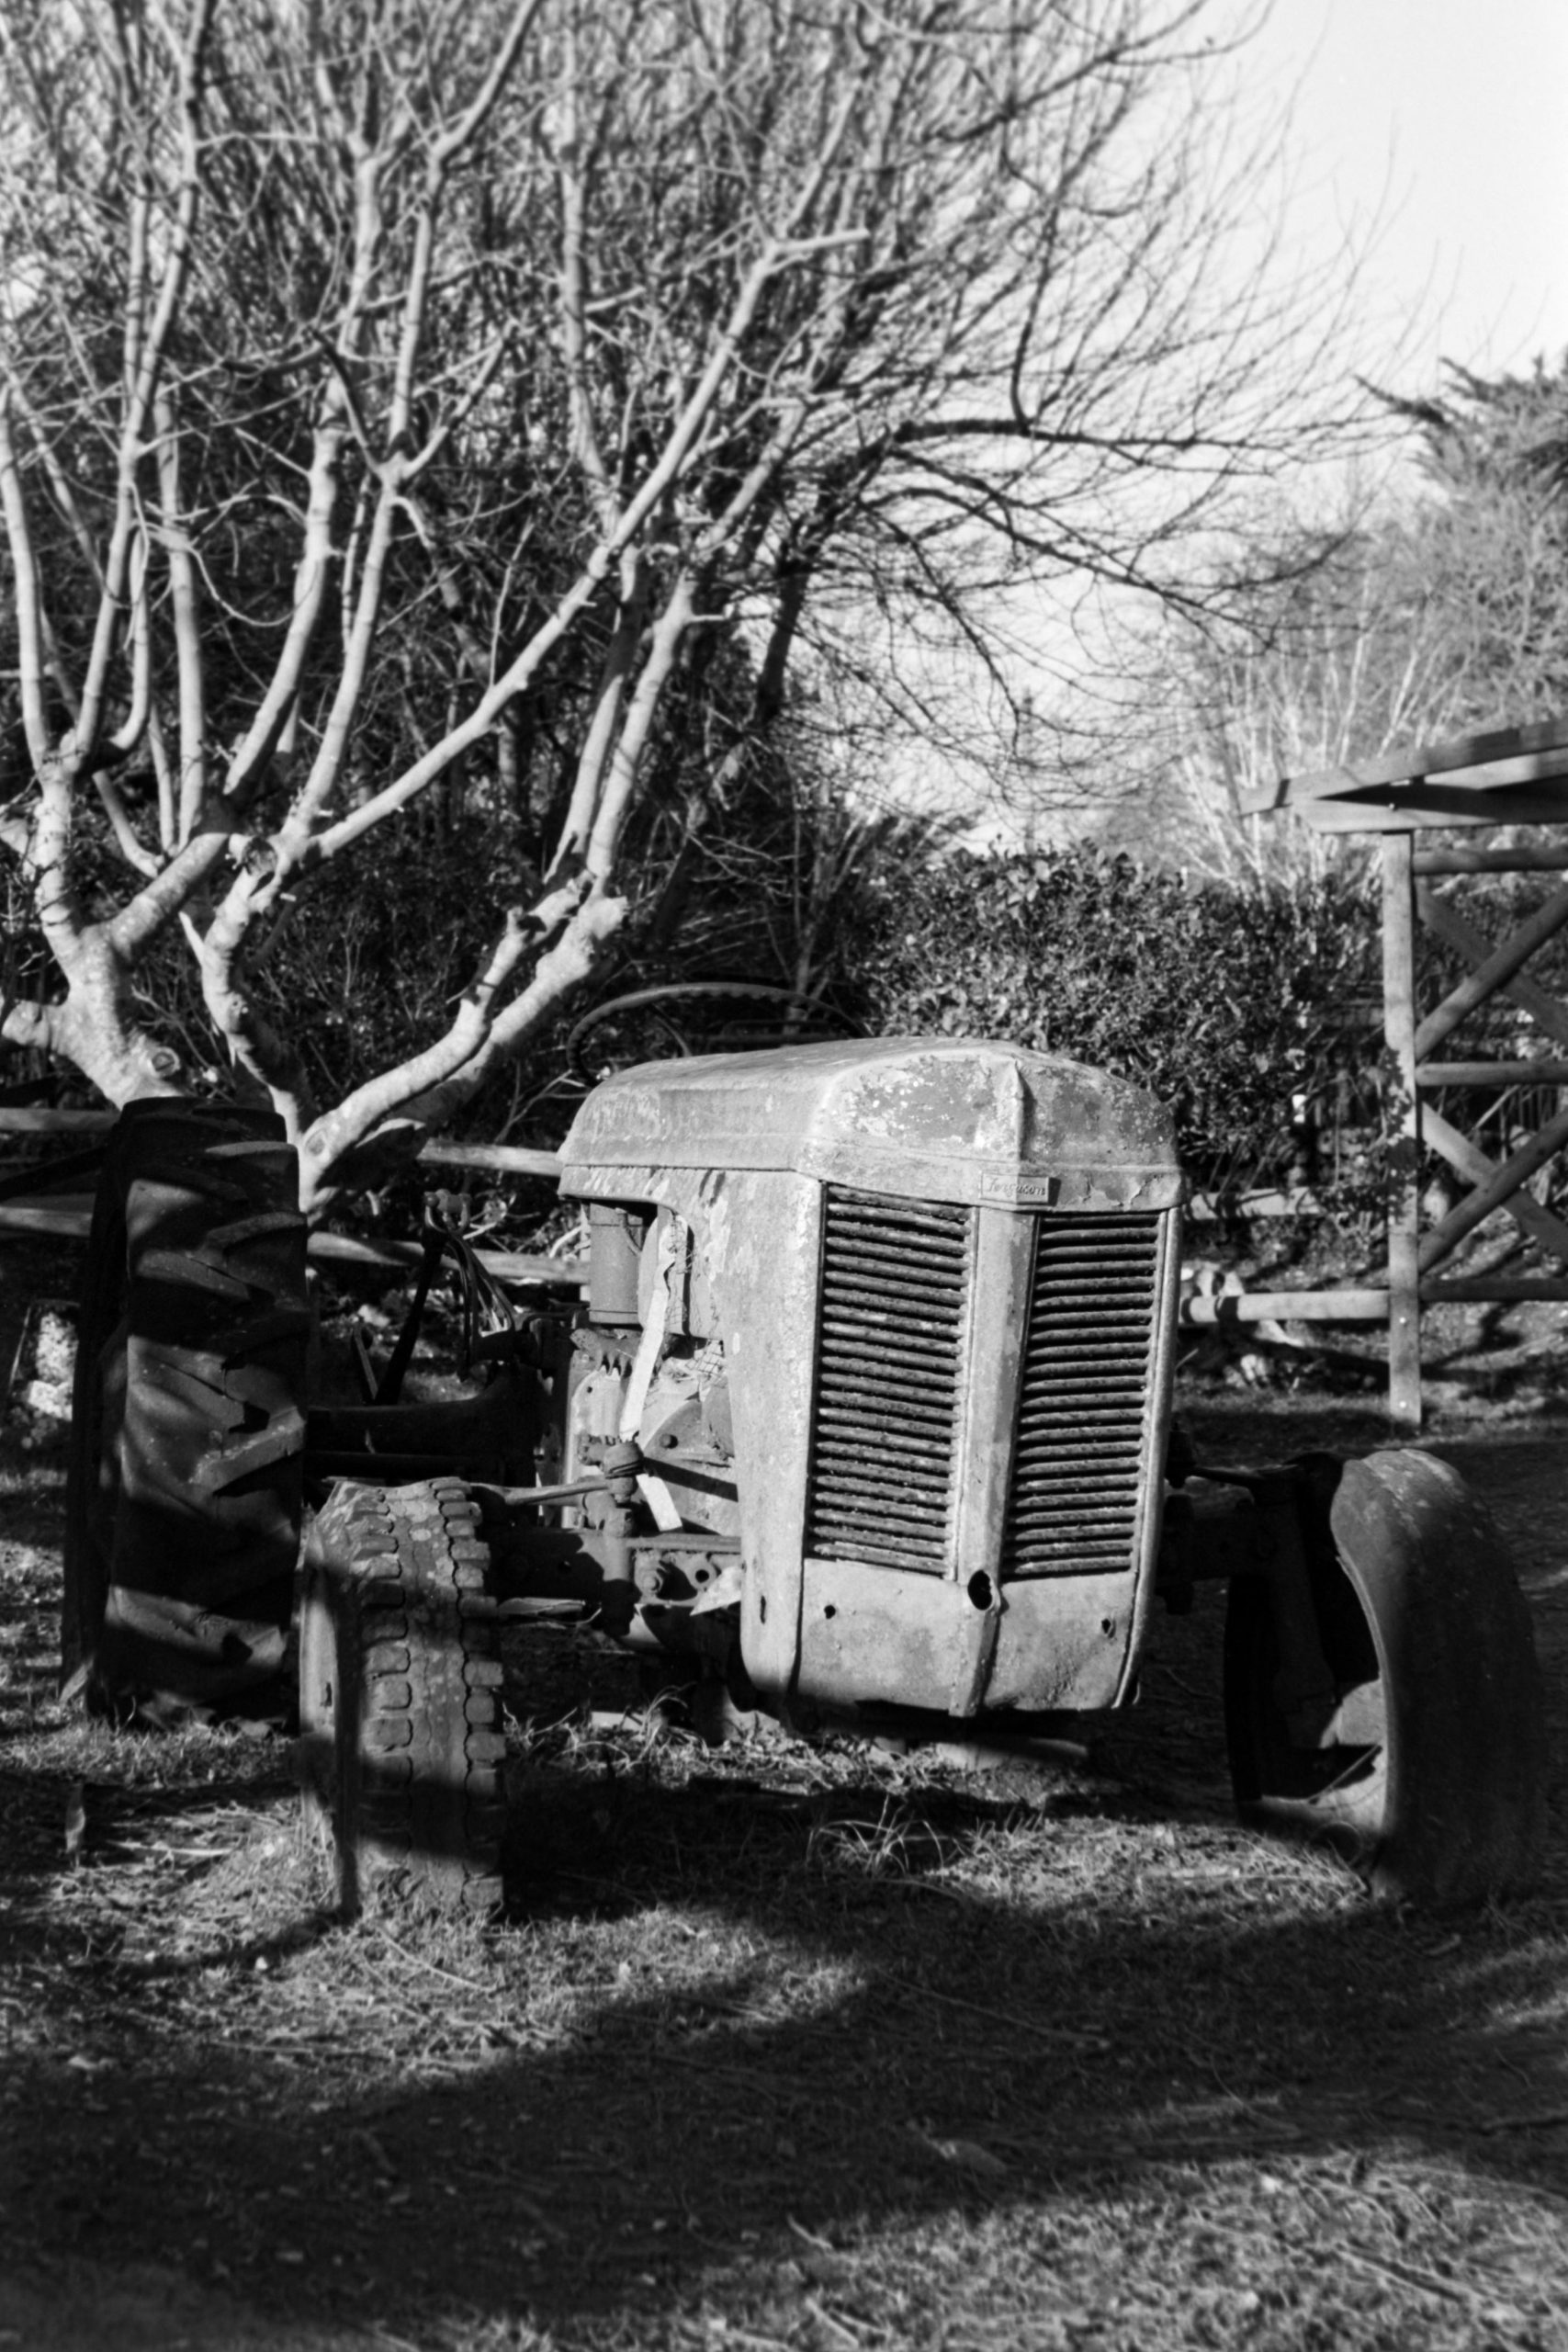
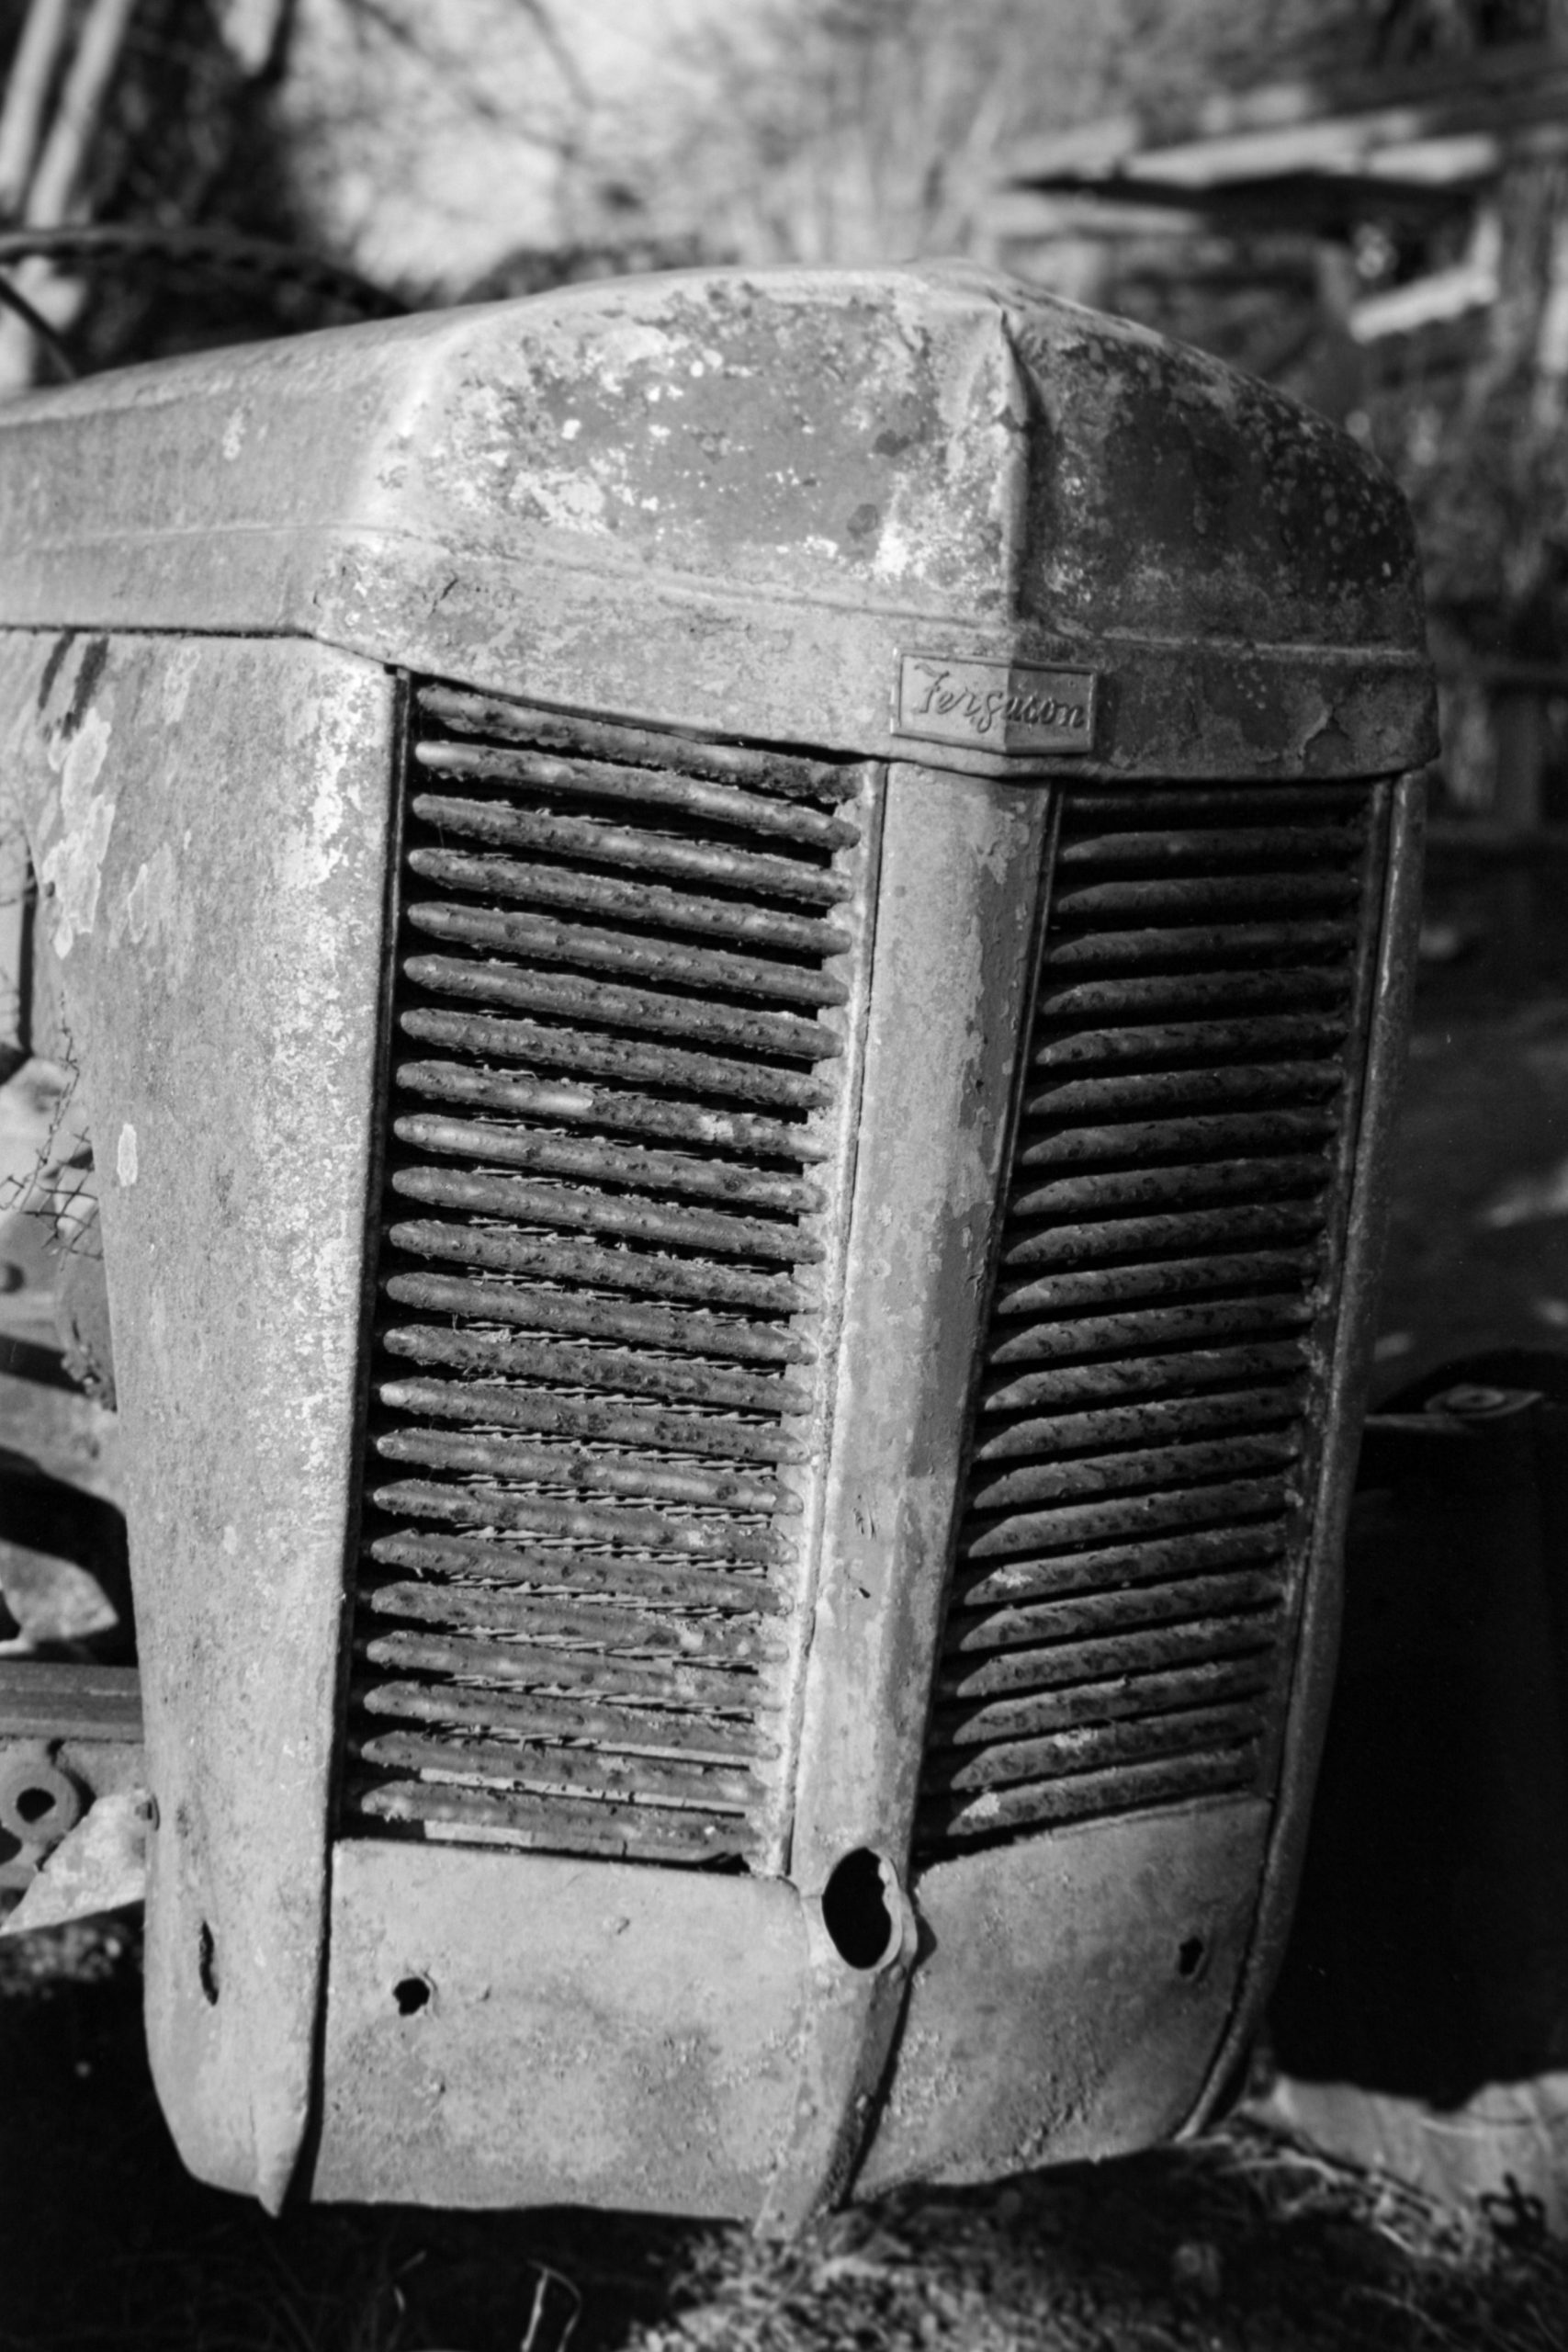
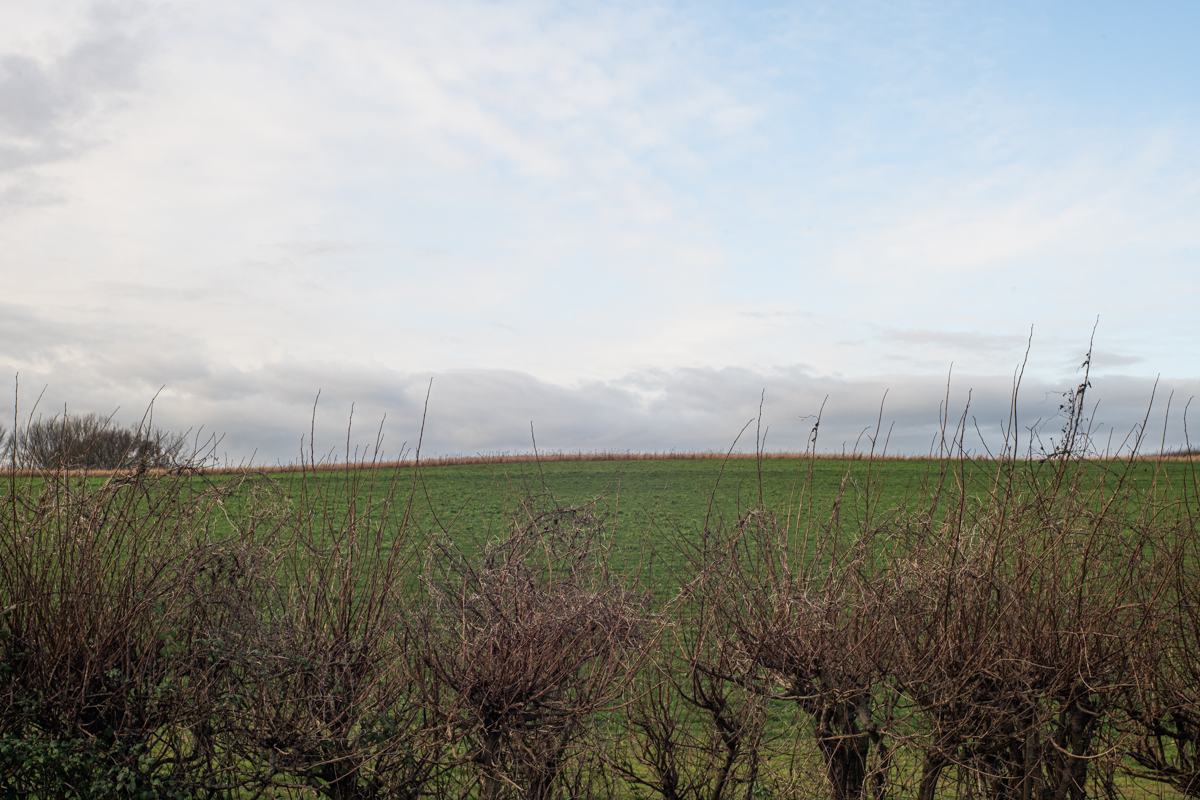
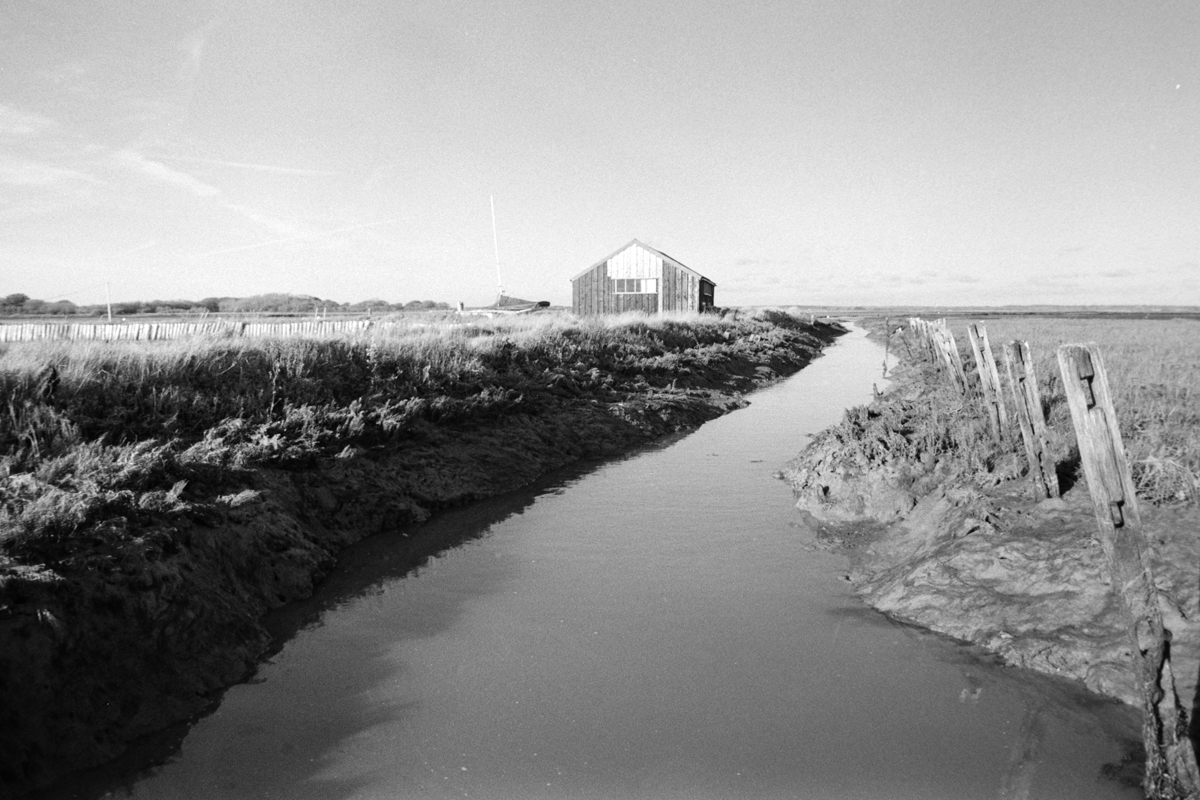
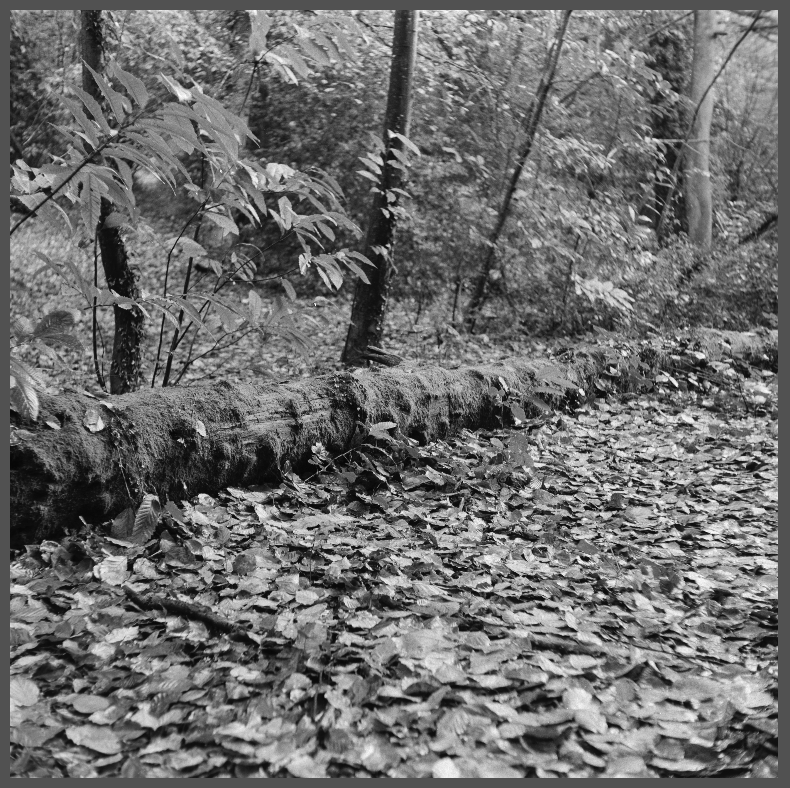
So with the rest of the film I went for a walk down the farm. I like the farm for testing new films and gear. There is so much there to study and it’s only a short walk from my home.
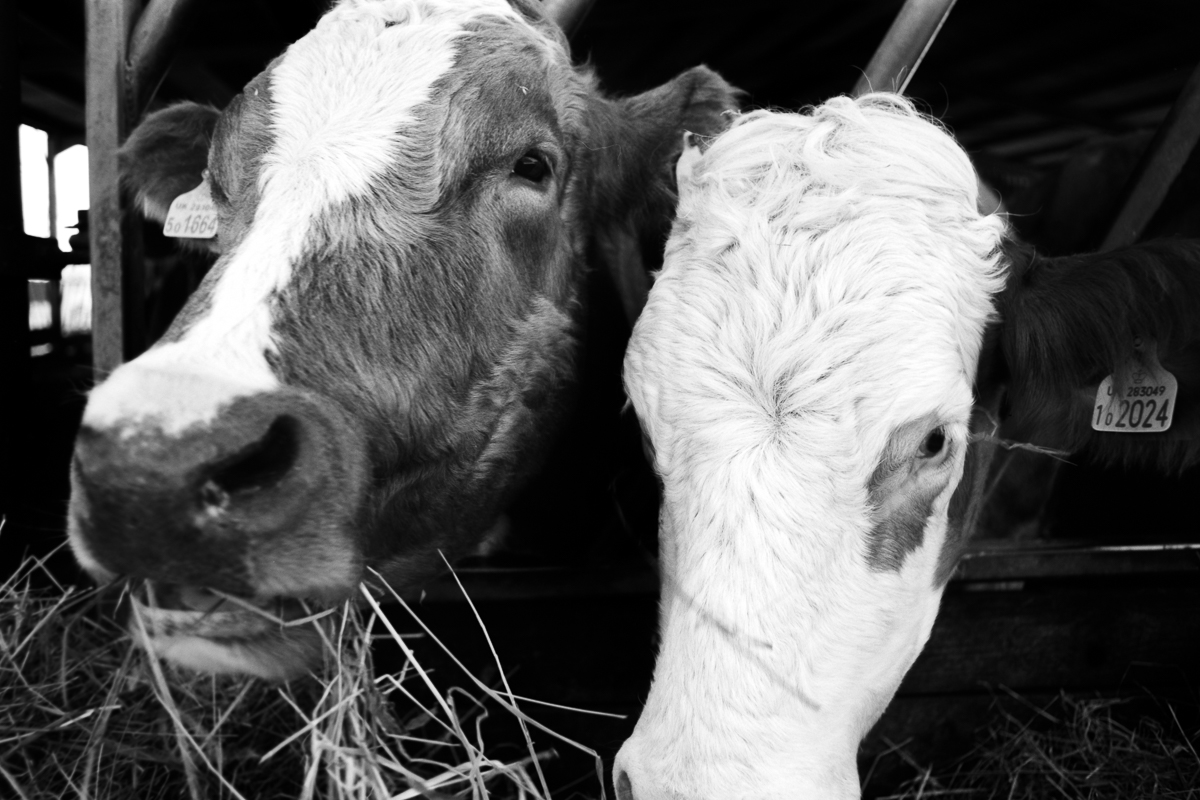
What immediately struck me about this film is its contrast, which I find very pleasing. I’ve never been drawn to the “how many tones can we capture?” approach to photography. Give me deep, rich blacks and clean, bright whites – like in this image – and I’m happy. This first roll of Svema NK2-SH definitely offers that kind of contrast.
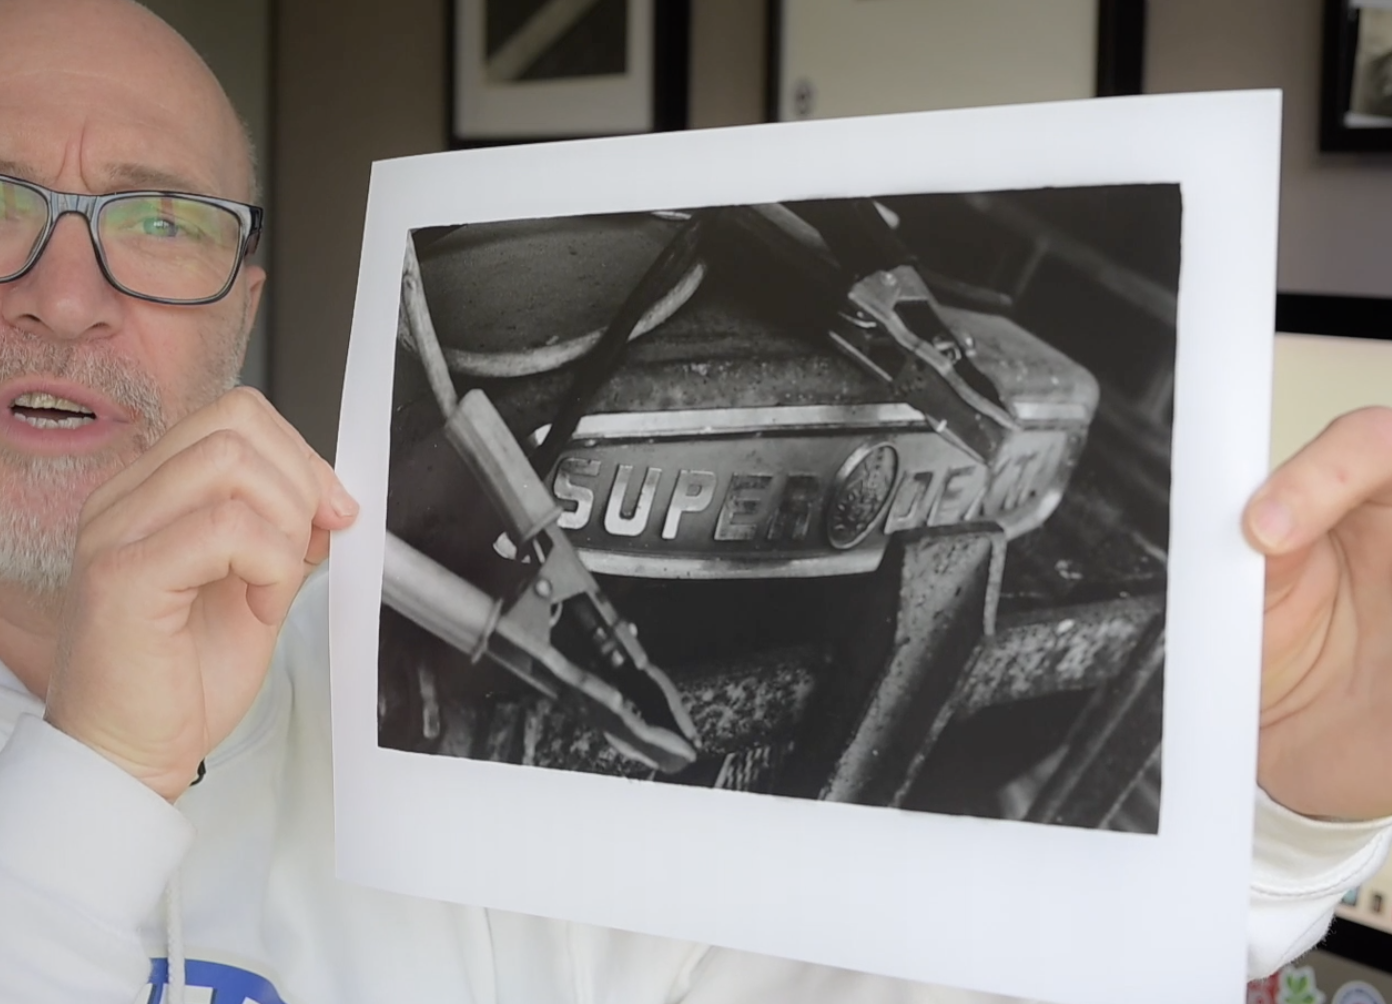
For me I need to see how a film looks on paper as I am often in the darkroom making prints. And it didn’t disappoint either. I had to split grade this print to tame the highlights a bit.
Where can you buy this film?
While Dragon is my point of introduction to Svema NK2-SH, a quick search online will show that they aren’t the only ones making it available. You’ll find a few different suppliers, often with varying price points. As for rebranding films, the work that Dragon and others like them put in deserves recognition. They’re not just reselling film. They’re going through the considerable effort of finding these unique emulsions, putting them through testing, creating appealing packaging, and then carefully hand-spooling them onto reusable cassettes. It’s a significant undertaking, and in my case, it was Dragon’s efforts that brought this film to my attention.
The downside.
This journey with Svema NK2-SH has a familiar echo of my past love affair with ORWO UN54. I fell hard for that film, buying those big 100ft rolls and feeling like I’d truly mastered the entire process from shooting to printing. But as so often happens, availability dwindled. And that’s the inherent risk with these rediscovered films. You might stumble upon a gem, a film that truly resonates with your style, only to face the possibility of it disappearing down the line. When ORWO UN54 became harder to source, I inevitably returned to my steadfast companion, Ilford FP4.
Information
- DragonFilm NO. I is a highly distinctive, fine-grained ISO 100 Black and White cinematic film producing a strong and distinctive image, manufactured in Ukraine
- As the film base is quite thin, slightly more care is needed to load the film. As the film is very sensitive and prone to light piping, so loading and changing the film should always be done in a subdued light.
- Please note that this film is not suitable for automatic camera’s and does not have a DX code on the film canister.
- The film has a PET base, and although quite thin, tends to dry flatter than many other films meaning scanning these negatives at home is a breeze!
- The film can be pulled to ISO 25 through to pushing it to ISO 320 with great results.
- 135/35mm Format
- Black and White
- ISO 100 Recommended, ISO 25 to ISO 320
- 24 Exposures
- Fine Grain
- PET Base
Black & White or Grey? Contrast.
Black and white isn’t always black and white.
As a ‘contrast chaser,’ I’m constantly hunting for scenes that deliver those striking deep blacks and brilliant whites, letting the midtones fall where they may. While subtle tonality is appreciated, a truly powerful black and white print hinges on that dramatic contrast. Of course, not every scene lends itself to such a bold approach. Ultimately, it’s the photographer’s vision that shapes the final image and there’s no right or wrong, just personal expression. And that’s precisely what makes photography so captivating and diverse.
I remember once a gallery conversation from the early 2000s has stuck with me. A debate over whether a framed print was truly black and white, or simply grey. It’s funny how those little moments linger in your mind. I just remember one saying “That’s grey! Not Black and White”.
Take this dog photograph, for example. I’ve always felt it leans too heavily towards grey. It lacks that punch, that definitive ‘black and white’ feel. I shot it on a light overcast day using Kodak XX film. Had the sun been shining, I likely would have captured much greater contrast, resulting in those desired deep blacks and whites. While Kodak XX is renowned for its contrast, the final result is always a balance of subject, shooting technique, and film processing. And juggling 36 exposures of various lighting conditions on a 35mm roll adds another layer of complexity. You can’t keep everything the same. Or can you?
You know how it is with a 36-exposure roll of 35mm? You’re kind of stuck with whatever lighting you get, right? Either you chase the same light for every shot, or you just go with the flow with whatever the weather is doing. If you’re out on a day where the sun’s popping in and out of clouds, you’re going to get a mix of contrast levels, and you’re probably just going to have to develop it normally. But, if I’m on a mission, hunting for that contrast in every single shot, then I’ve already got a plan. I know exactly how I’m going to shoot and develop that film to get the results I want. Sunny day with no clouds? Let’s get metering and embrace the contrast!
Metering matters
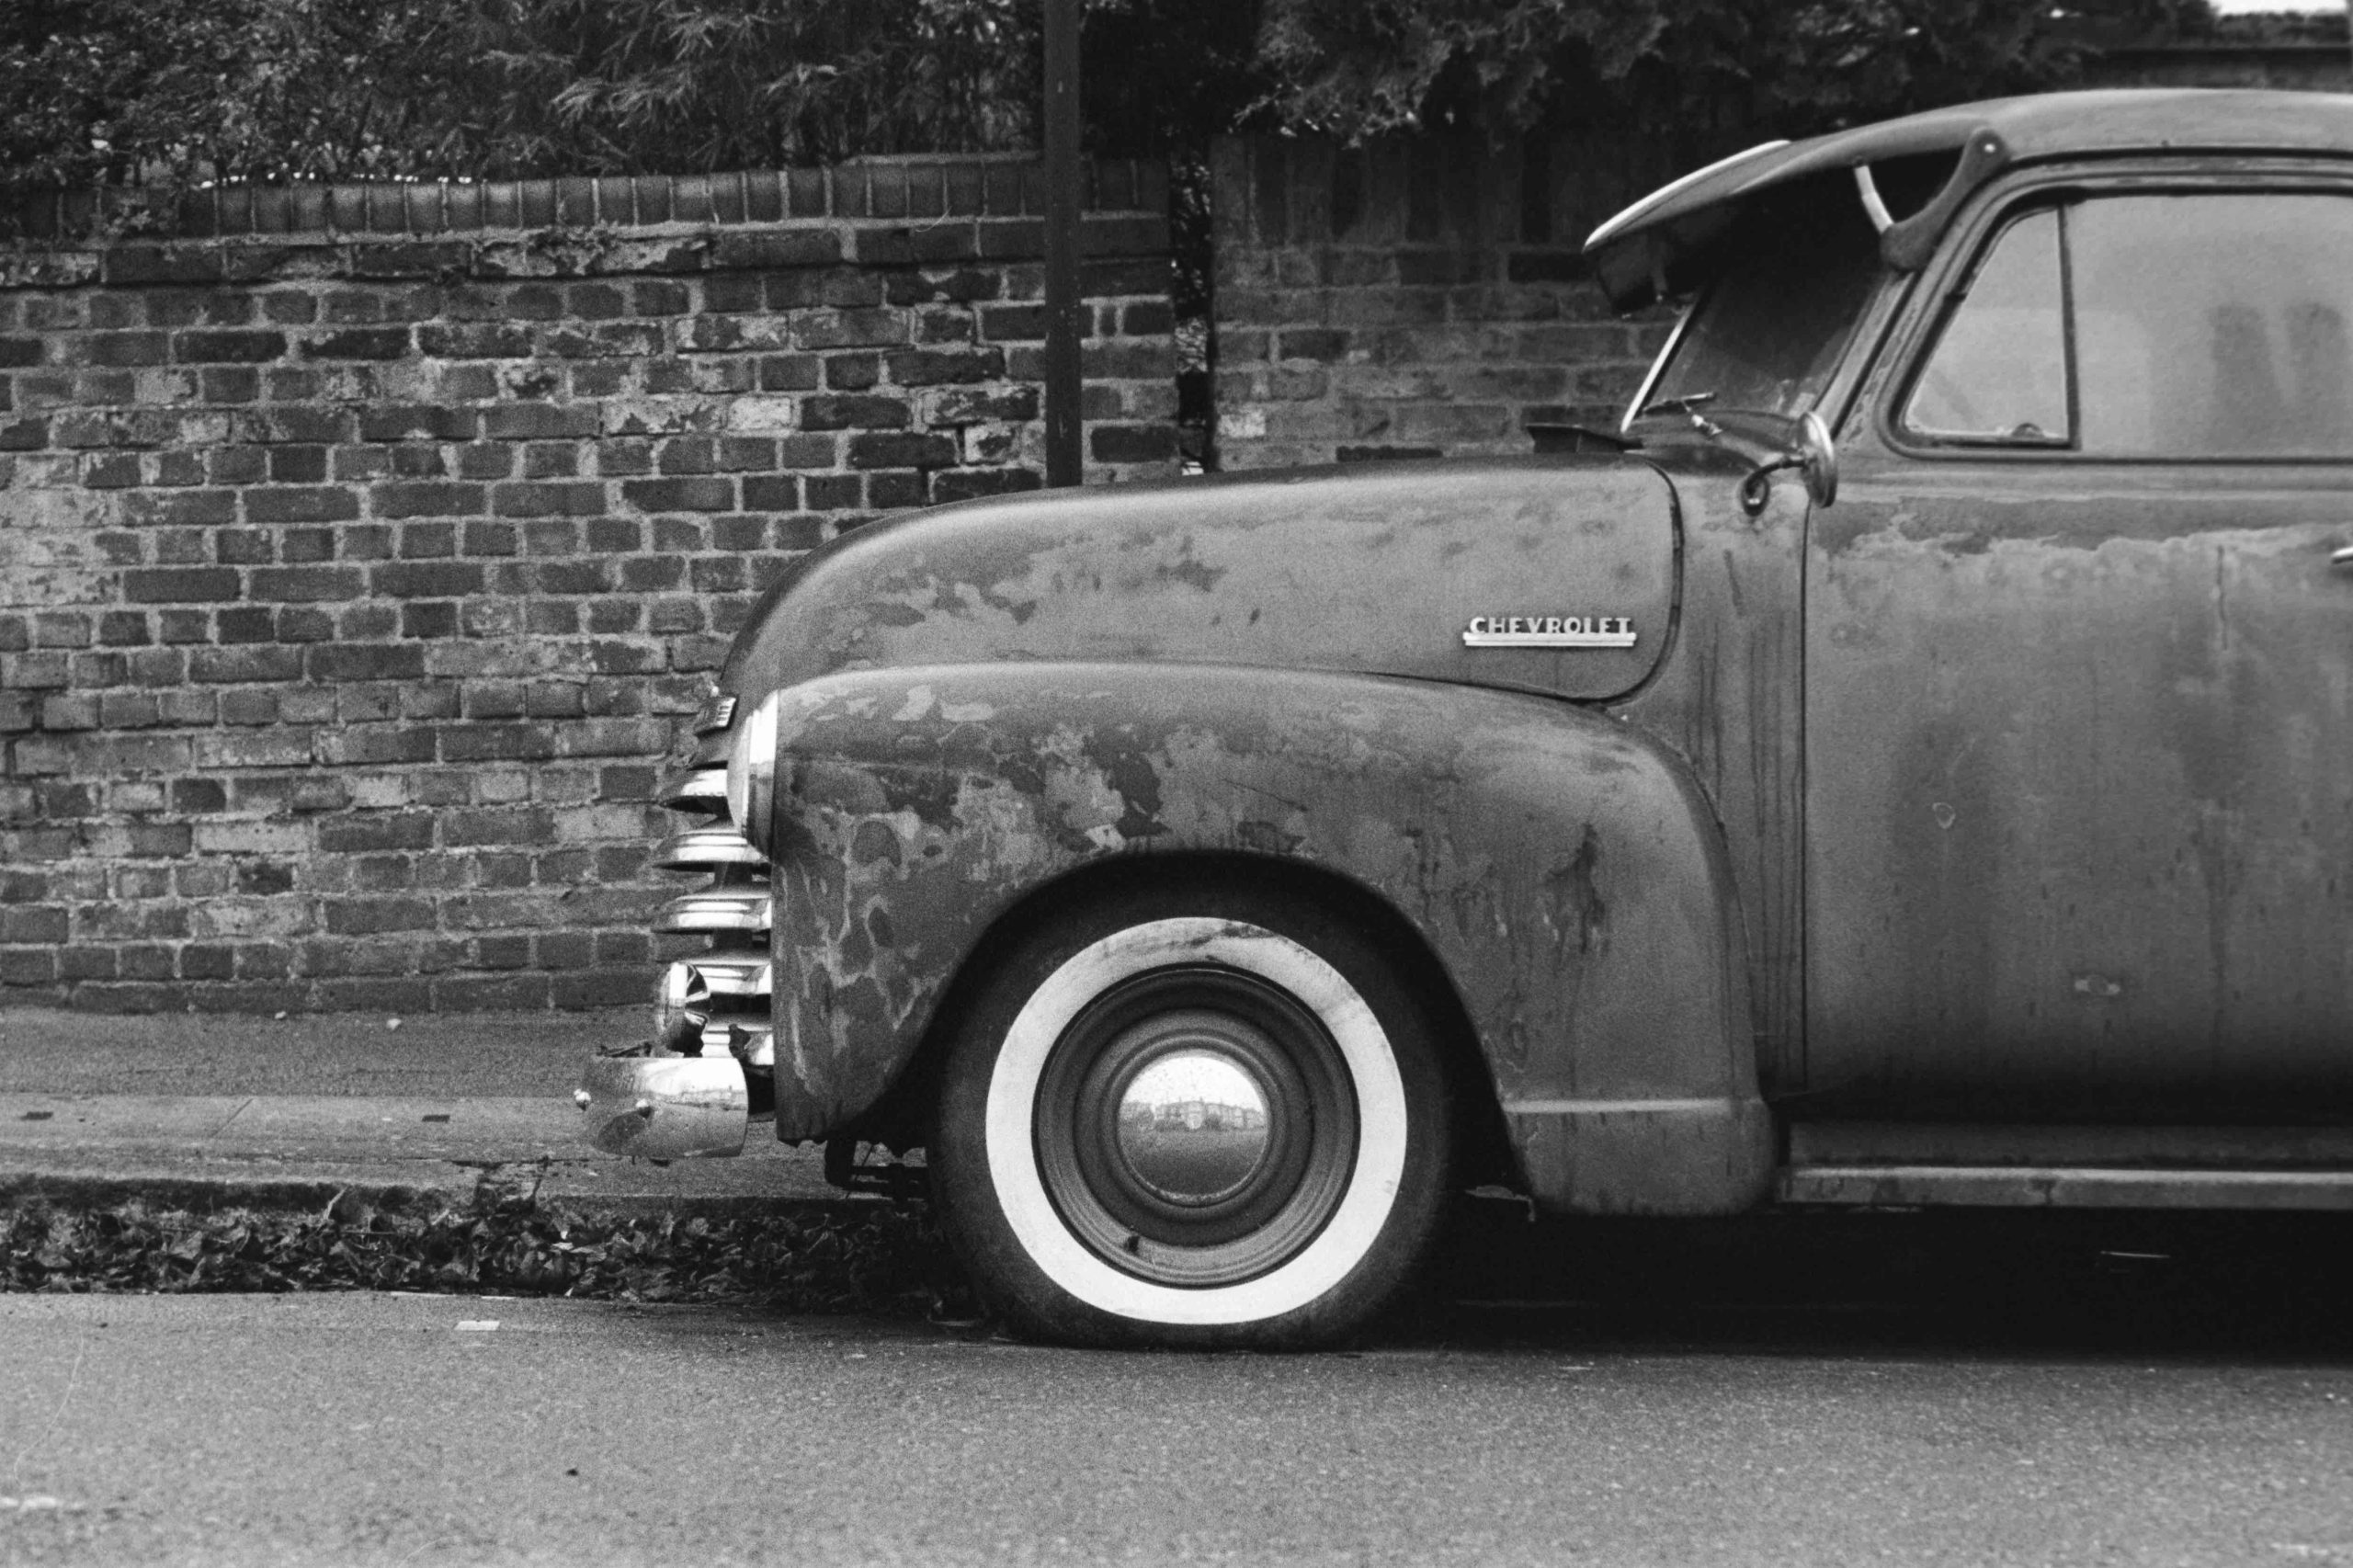
The two photographs below were taken on two different days using Kodak BW400 CN film. Which is a C41 process film. I was shooting aperture priority.
The lighting on the Chevrolet scene is light overcast and the whole scene is balanced almost equally. The cameras meter wasn’t overwhelmed with bright highlights and so I got an average contrast.
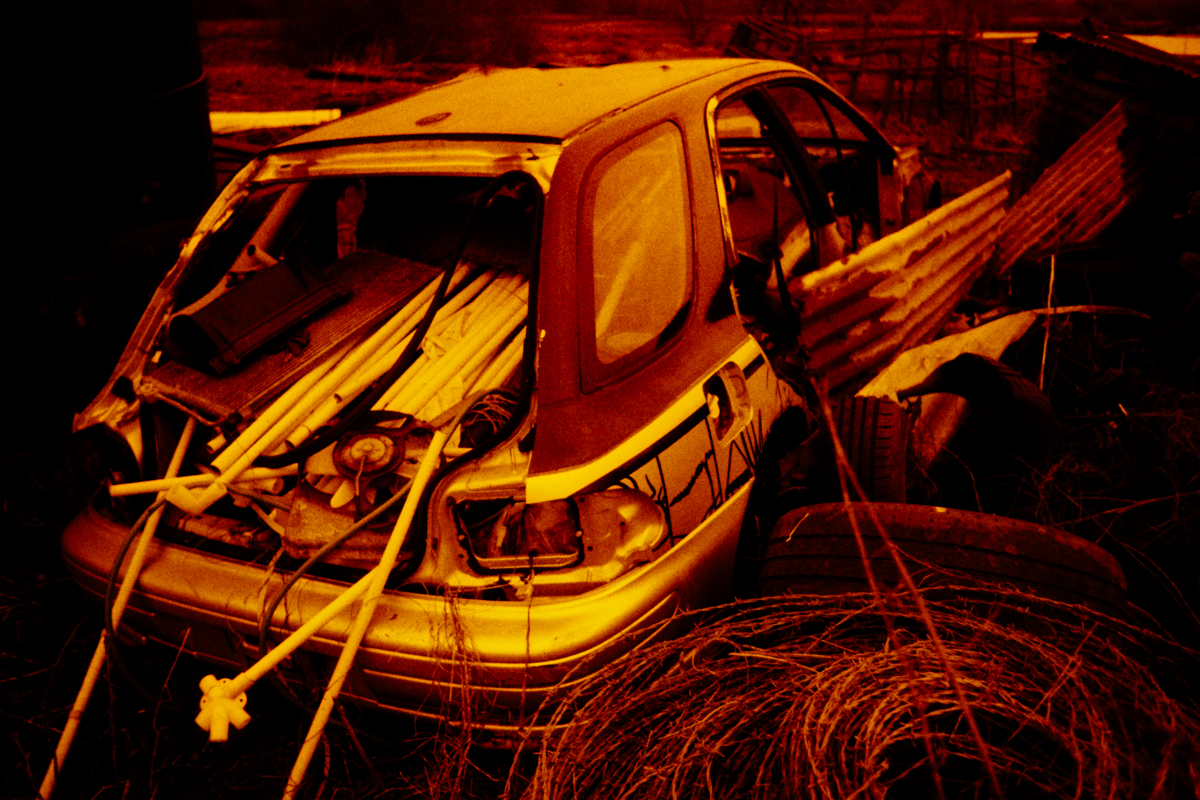
The XR3i scene, although similar lighting, shows a deeper contrast. The background is black and the car is more reflective from the white buildings opposite with highlights bouncing off the bodywork. The camera doesn’t want to over expose my highlights and so it meters for them first. It selects a faster shutter speed (aperture priority) so as not to blow my highlights out which in turn renders other areas darker giving a more contrasty look.
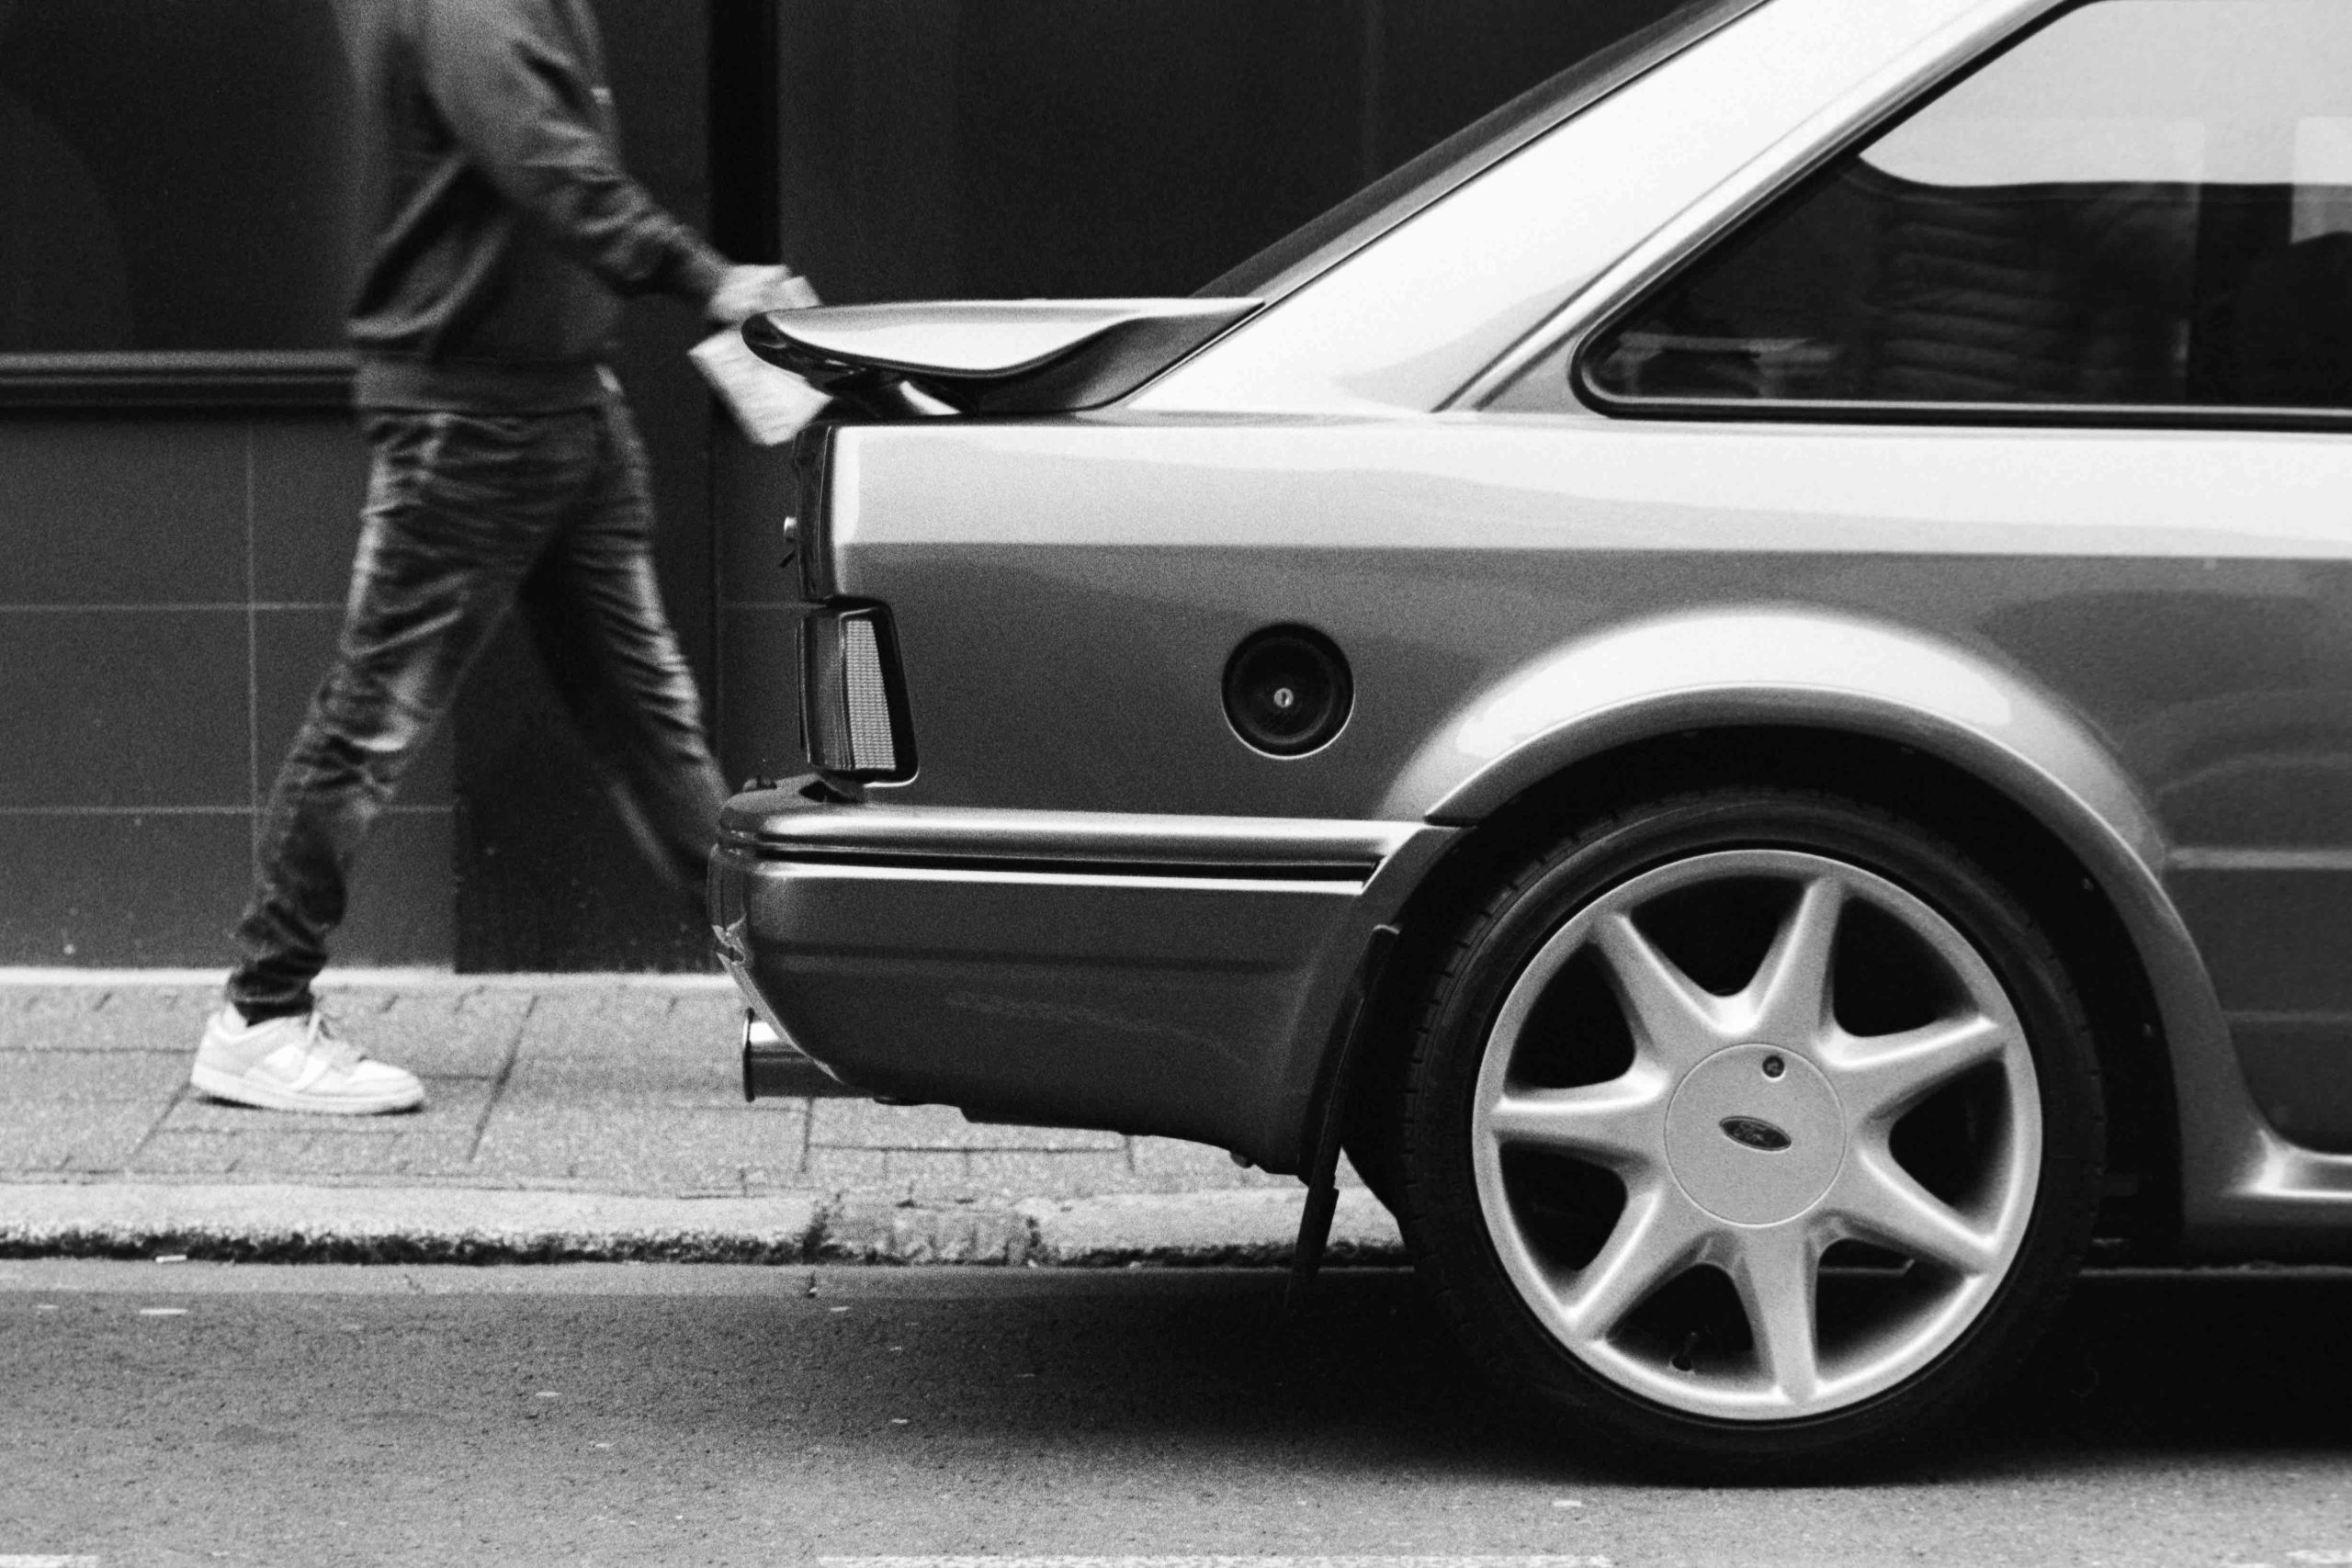
The moment I saw the XR3i, I knew it was destined for good black and white. The background provided the perfect backdrop, and the car’s highlights, bright but not overexposed, were ideal. The strong shadows cast by the sunny day further enhanced the scene’s potential for a striking black and white print.
This brings me to a crucial point. Metering. Accurate metering is important to achieve high contrast, seek out scenes with brilliant highlights and deep, dark backgrounds, especially on sunny days. A well functioning camera’s metering system will preserving those highlights, closing down the exposure. This naturally pushes the darker areas towards near-black, creating that high contrast effect. But what about the mid tones? They’ll only appear if they’re inherently strong within the scene. This is a critical assessment you must make before pressing the shutter.
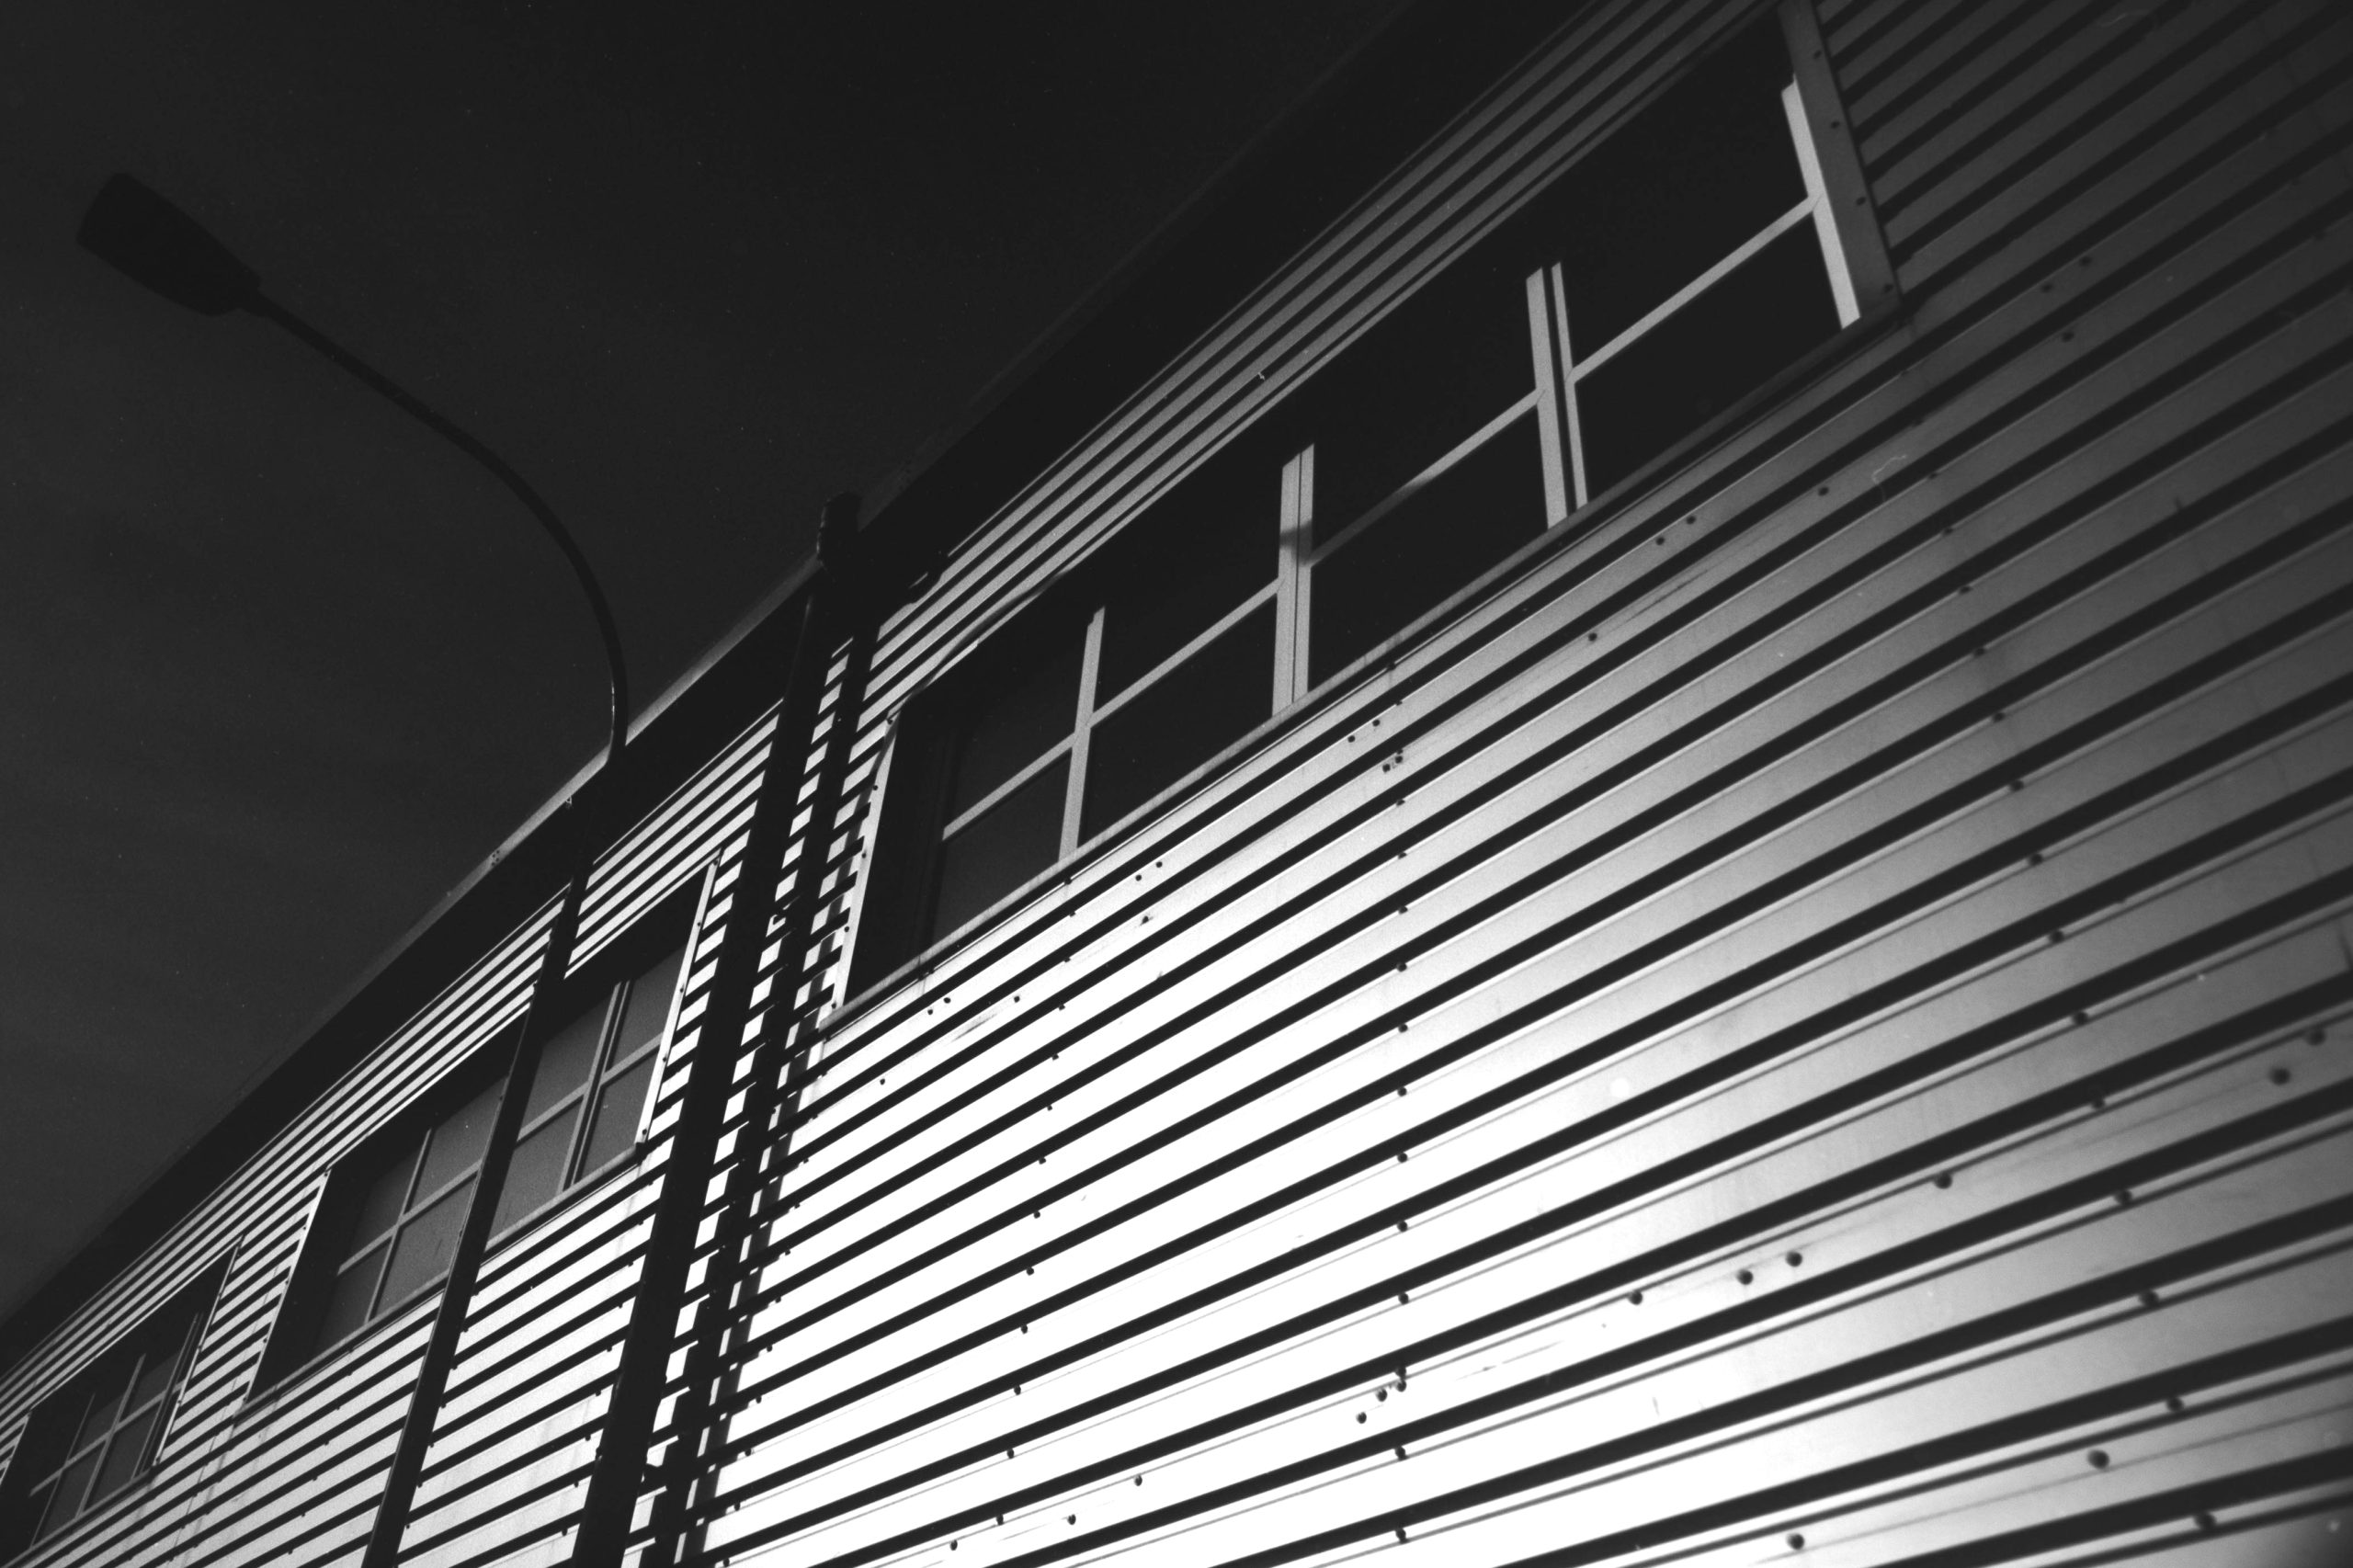
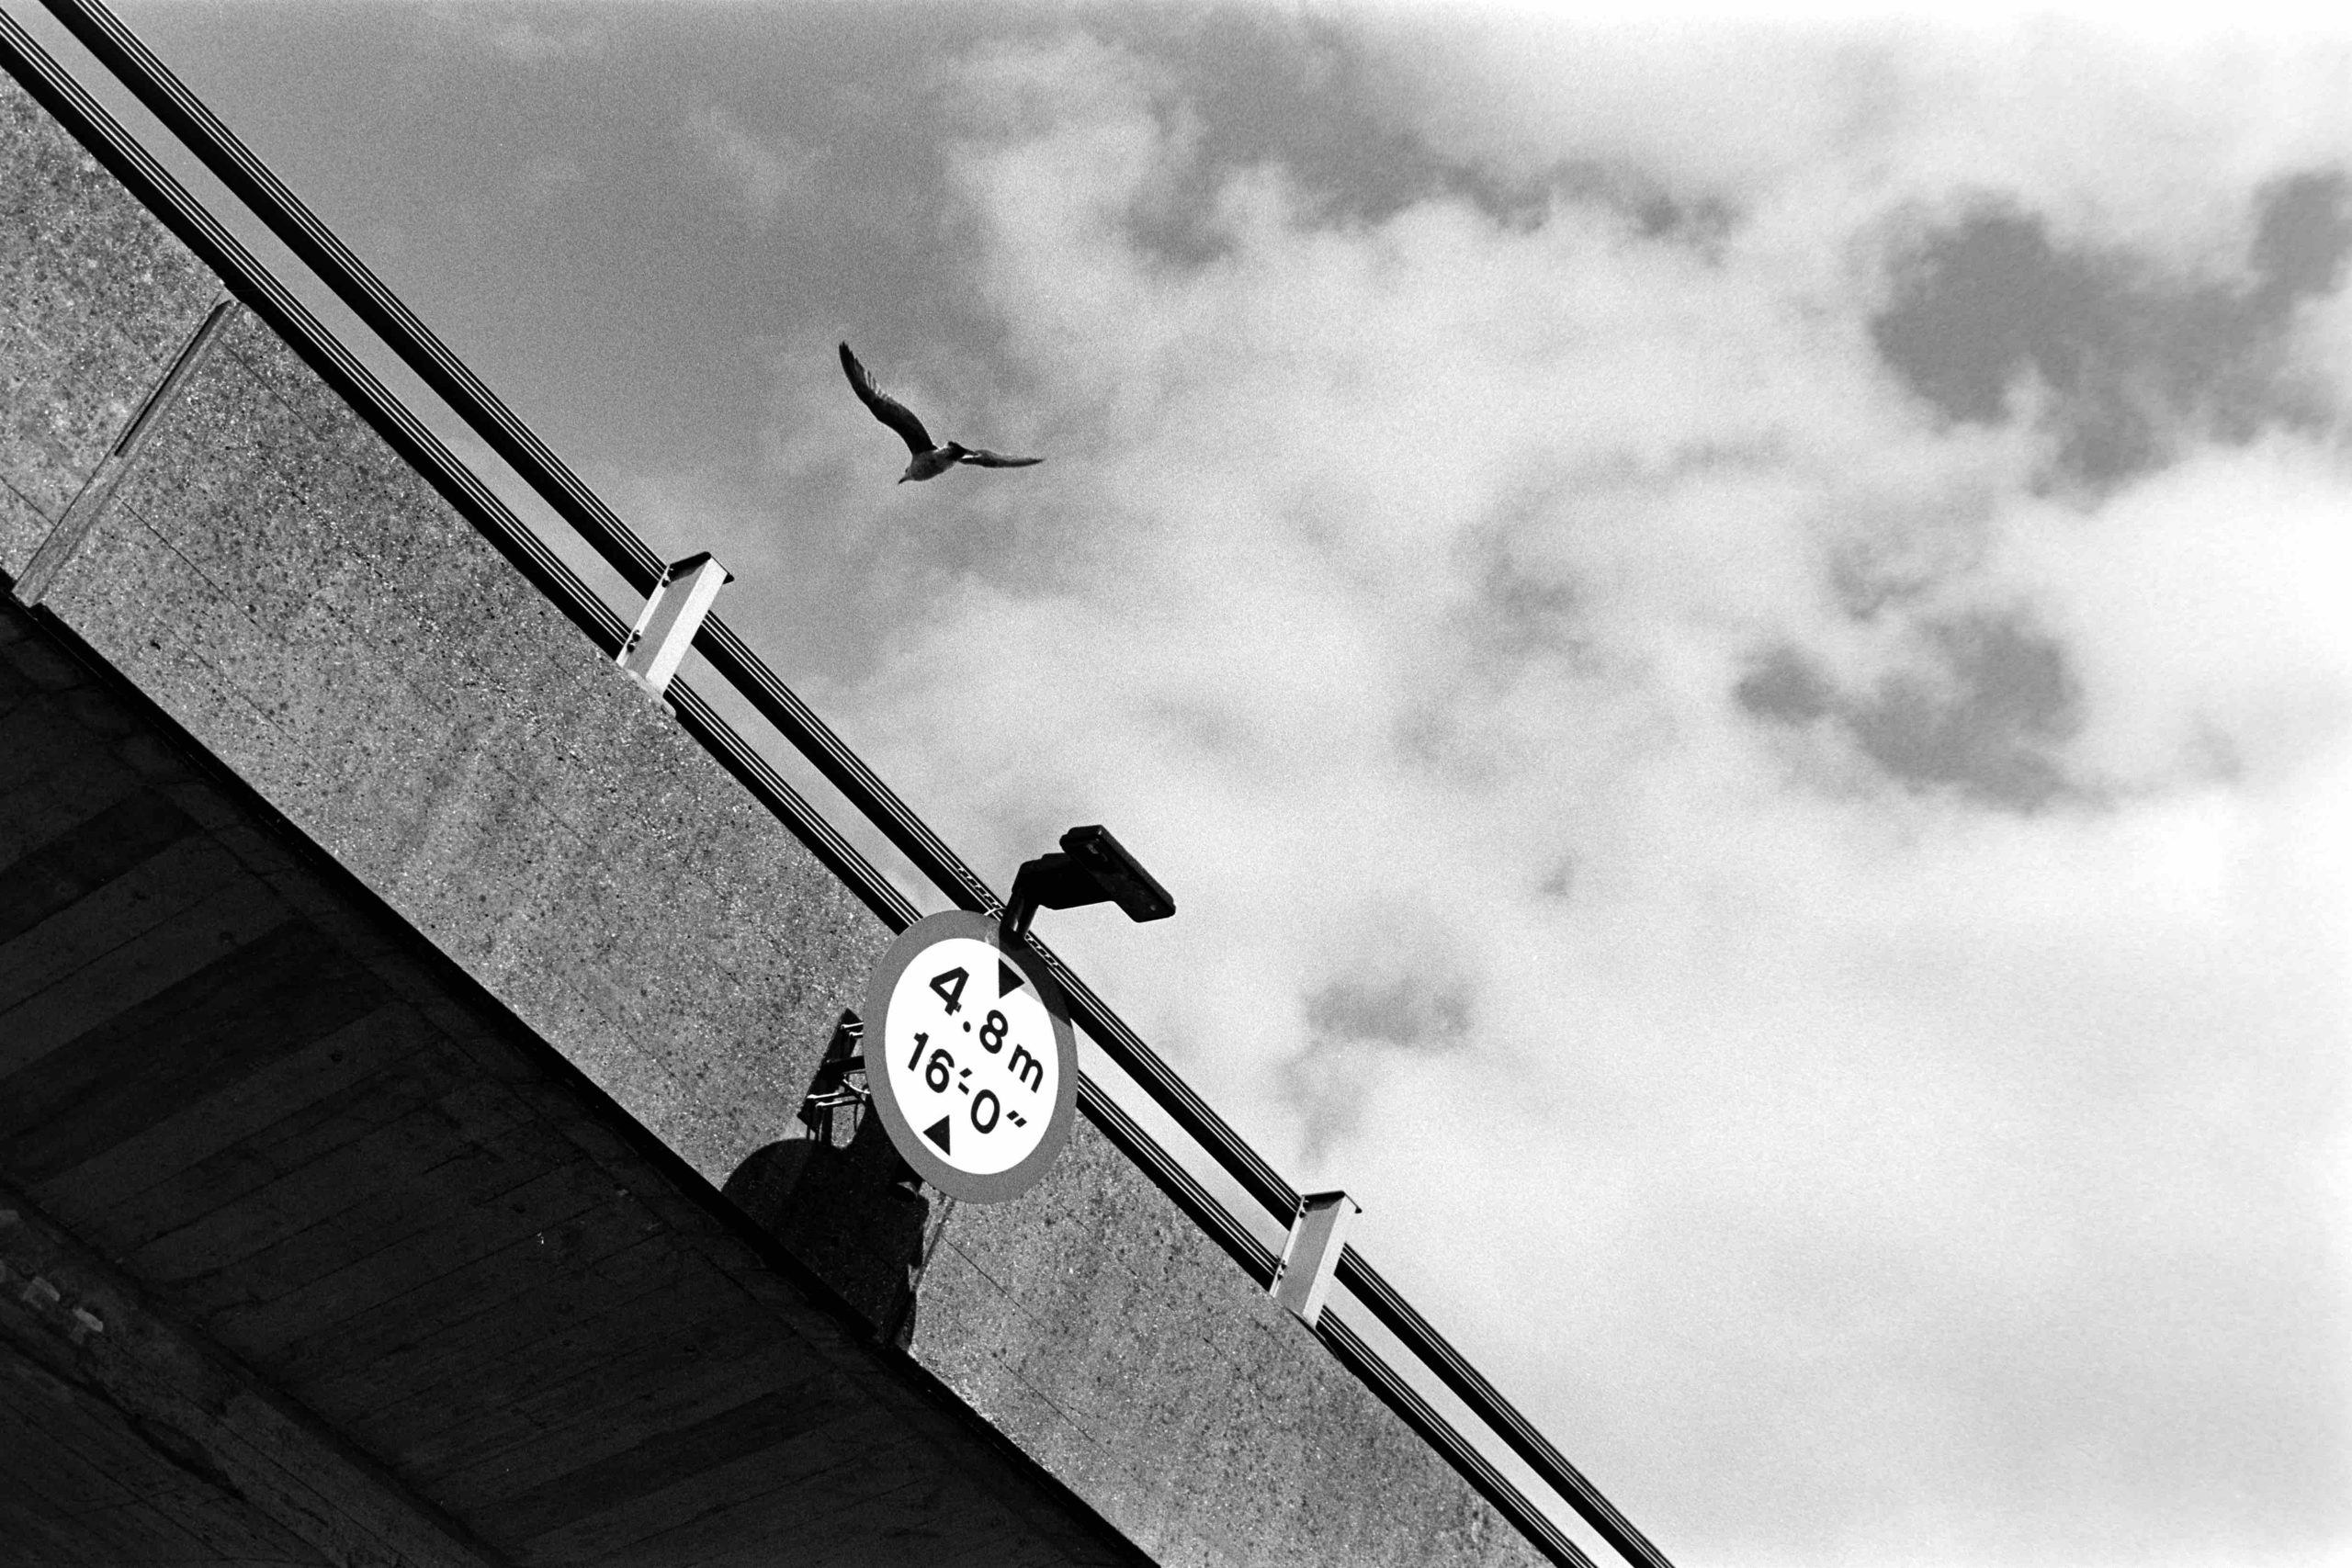
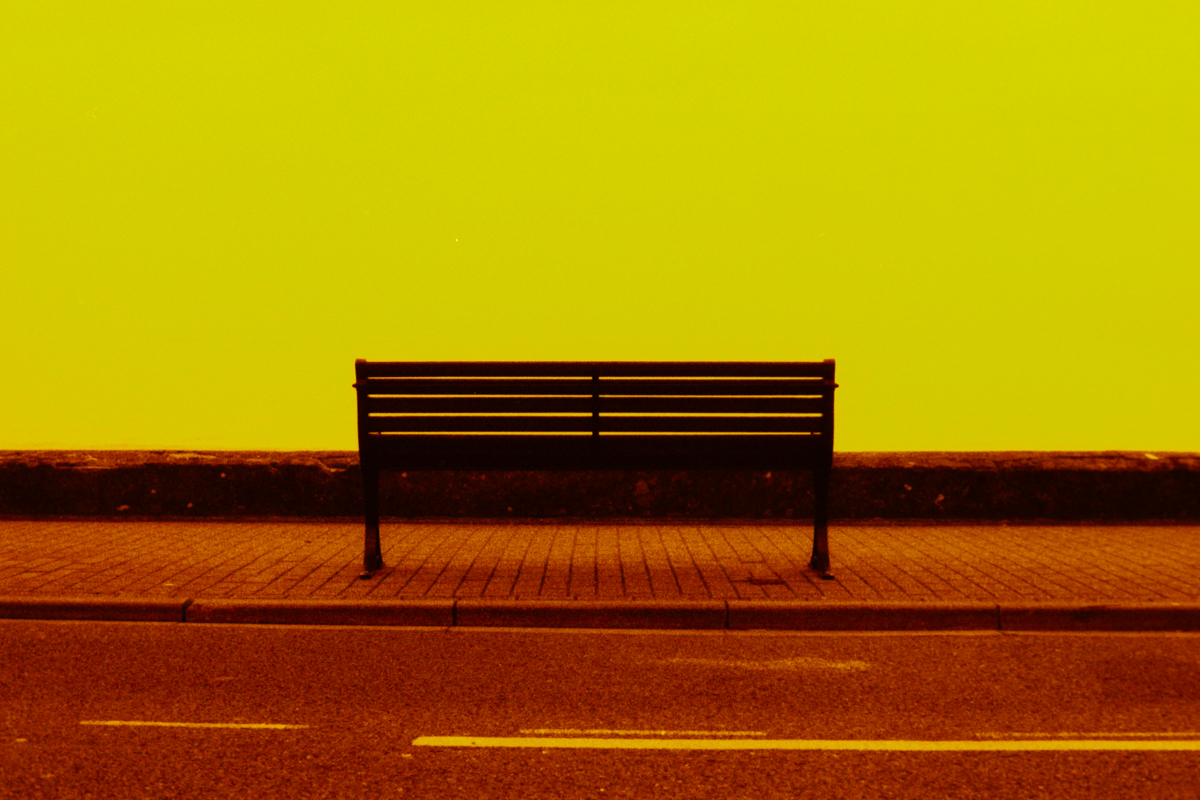
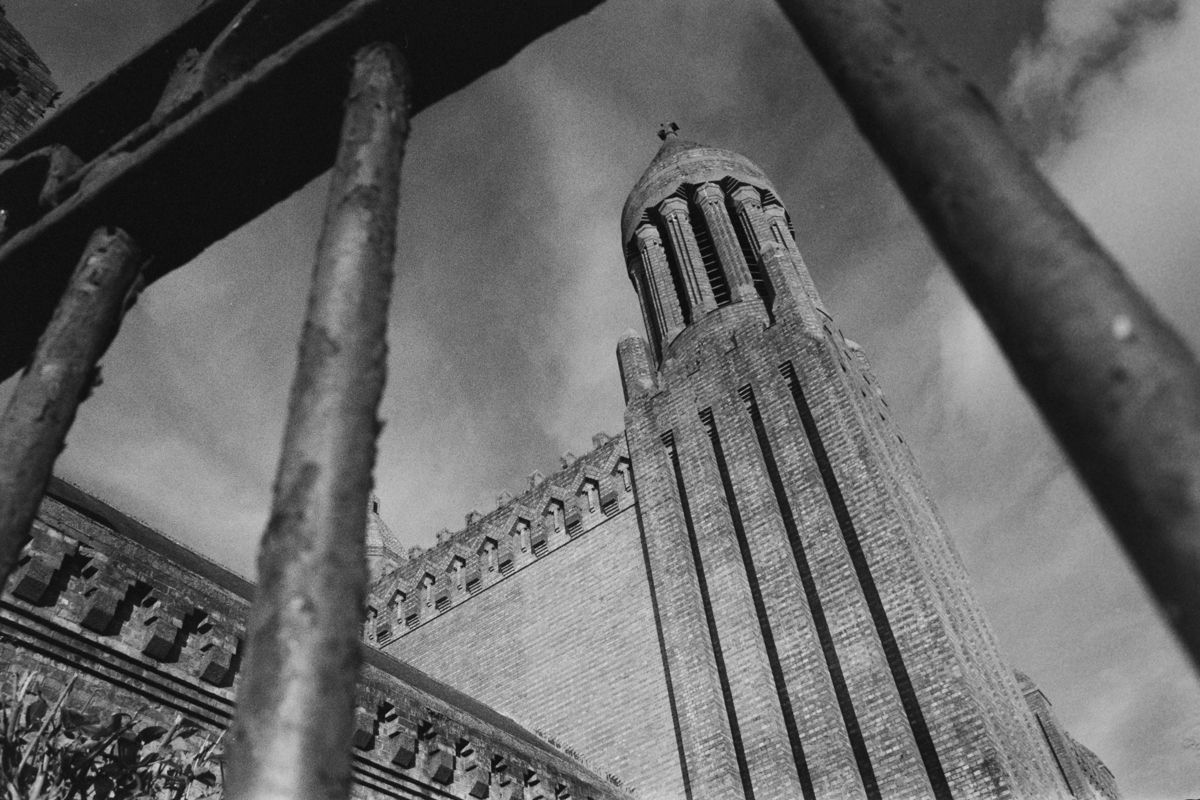
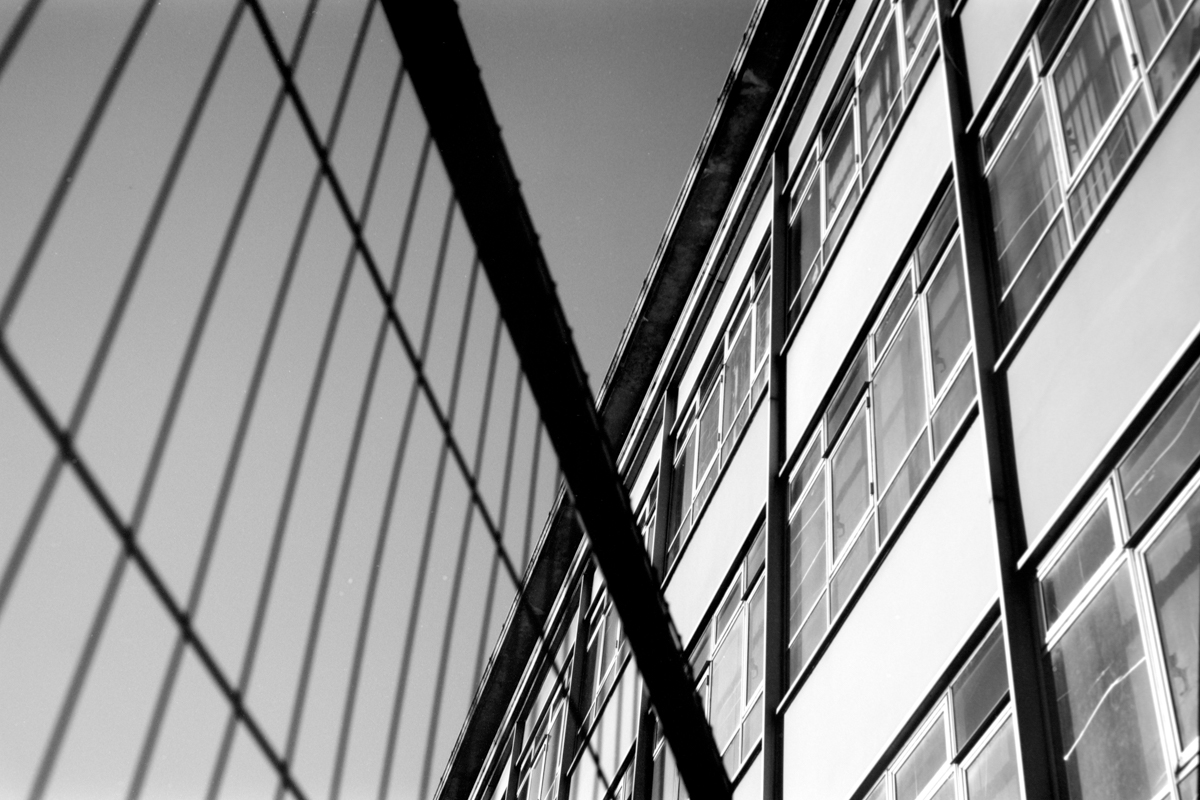
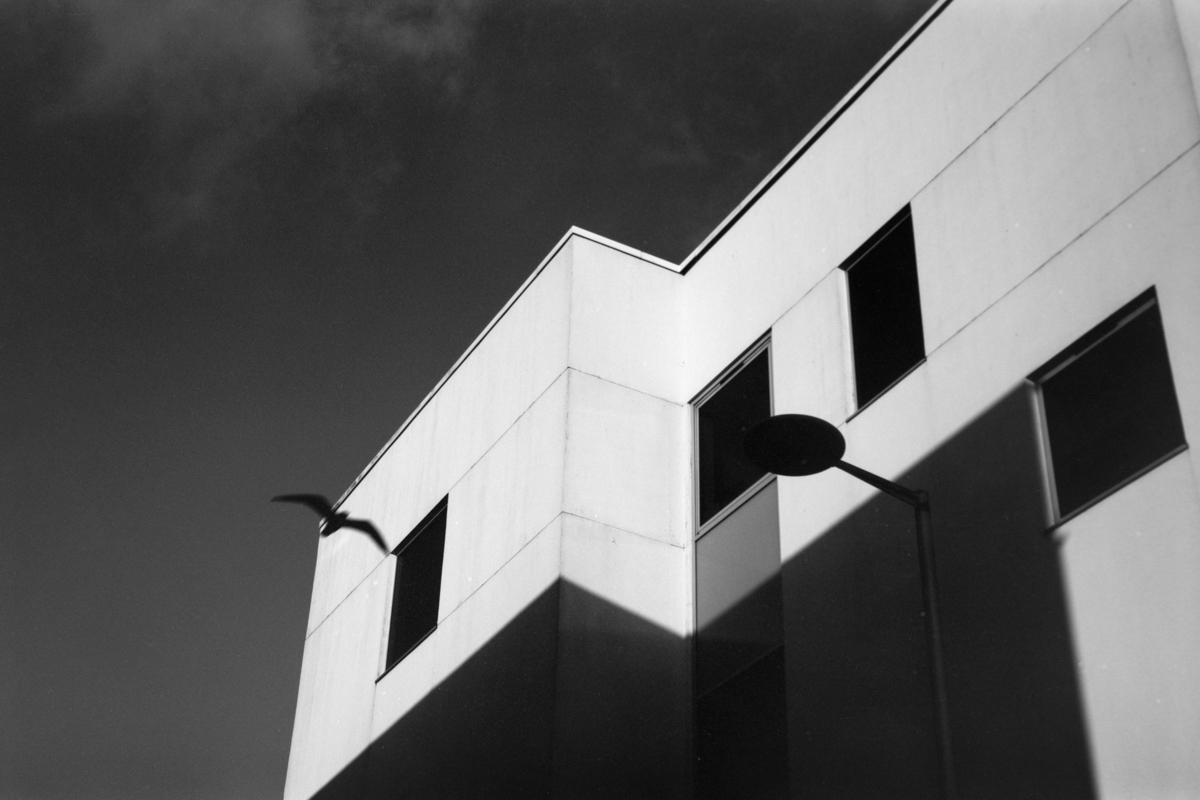
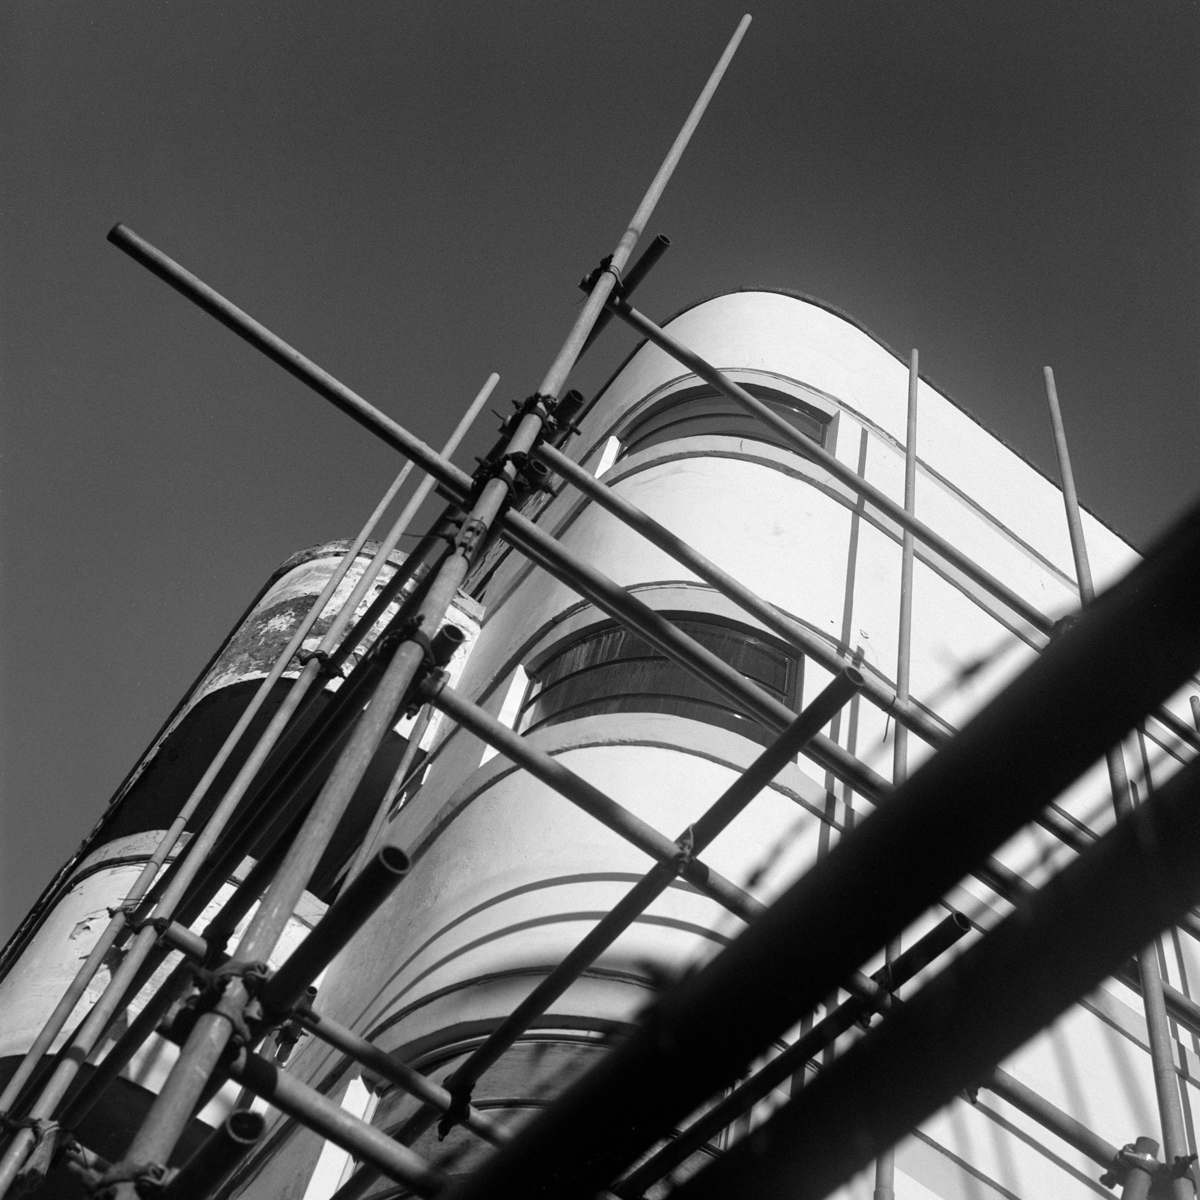
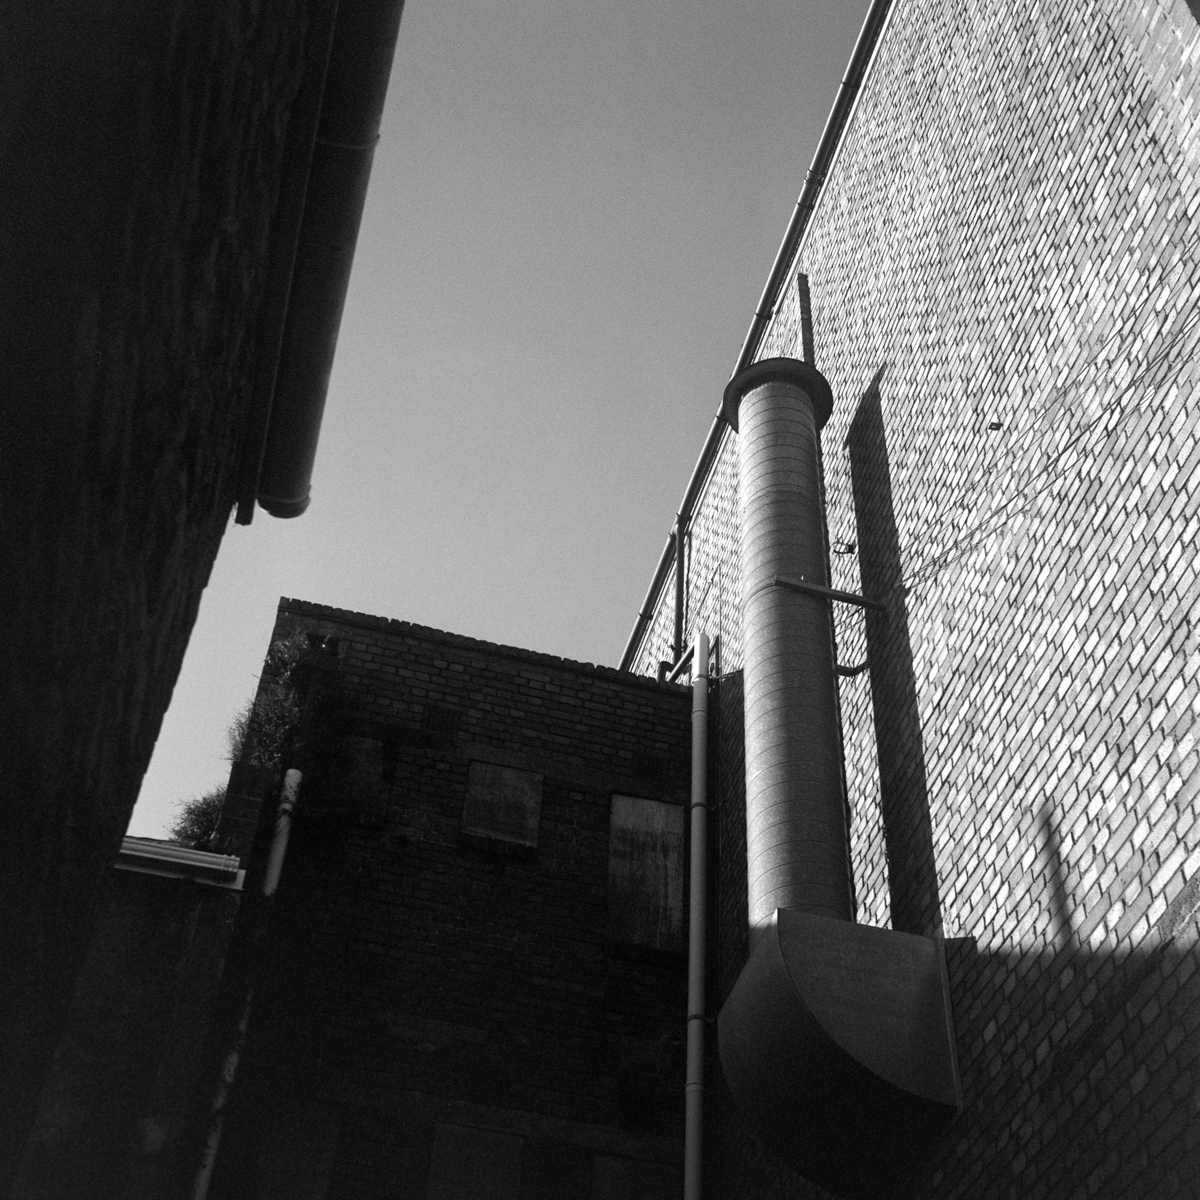
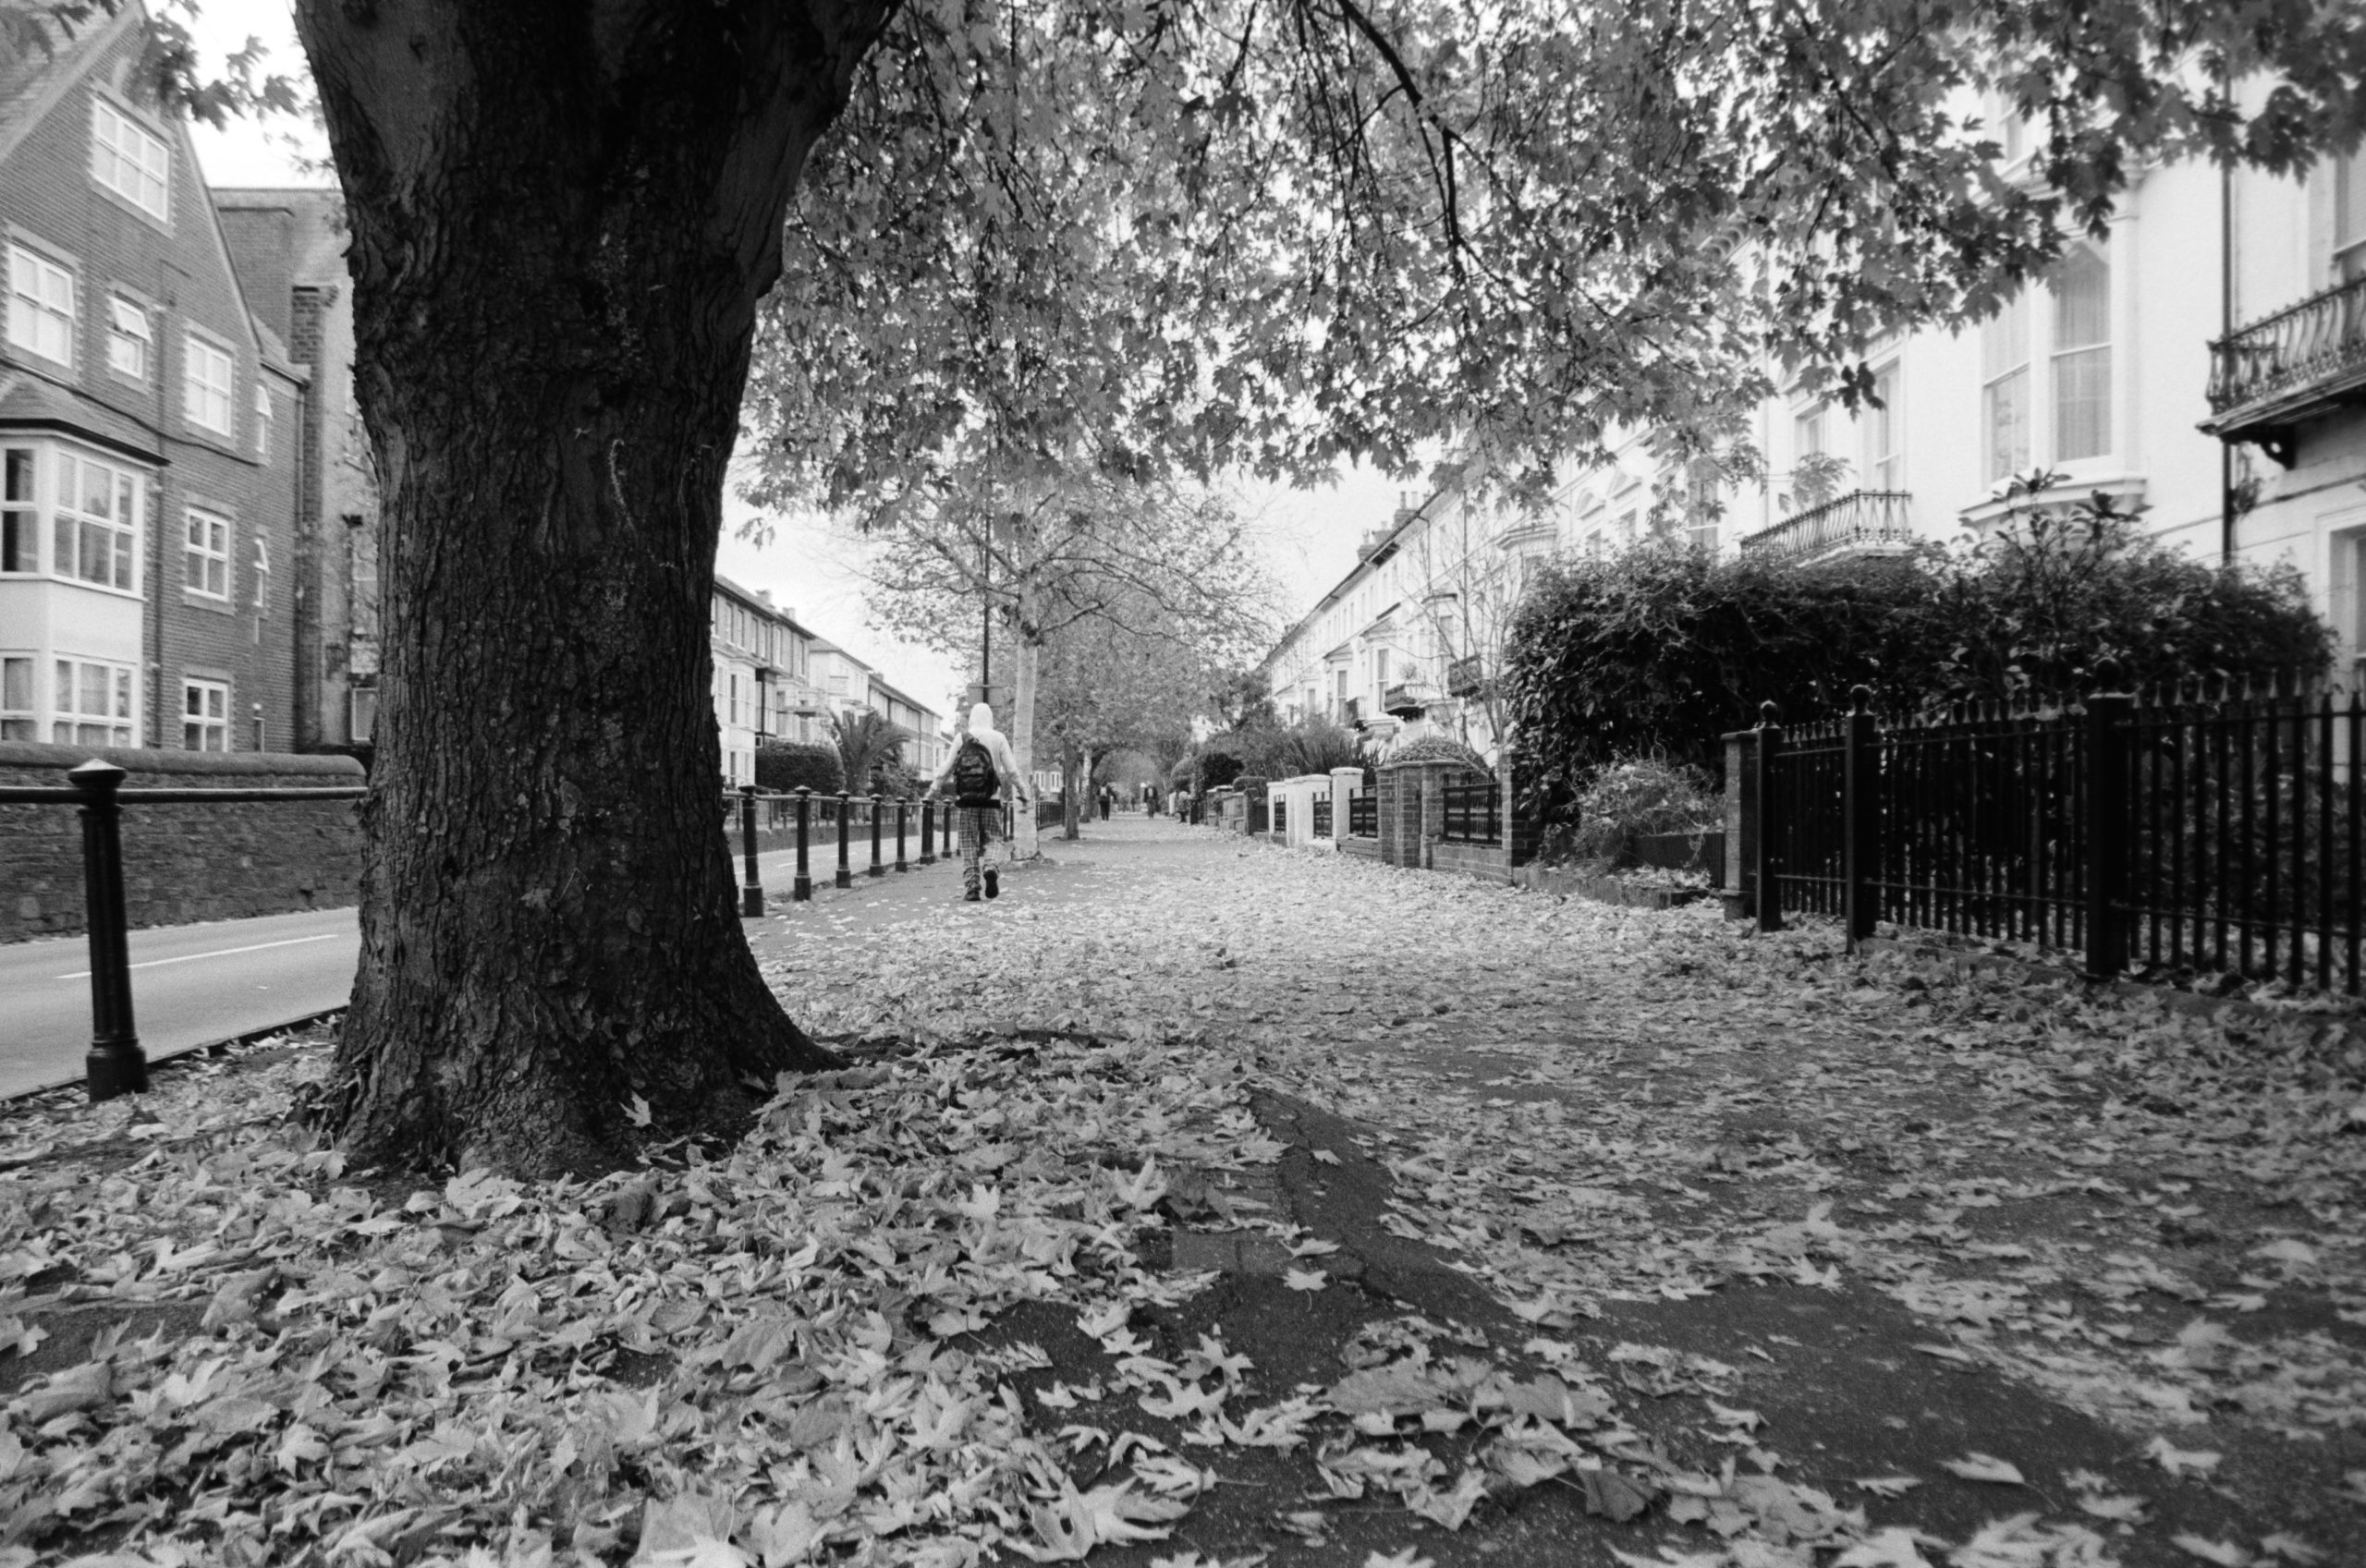
Take this shot of the building, for example. The bright sunlight reflecting off its surface forced the camera to reduce exposure to prevent blown-out highlights. Consequently, the sky and lamp post were rendered dark. Notice the absence of prominent mid tones to bridge the gap between highlights and shadows.
I was pushing my film on this day for seeking hard contrast in scenes. And this worked well. The camera was in aperture priority, which means I choose my aperture and the camera will select the appropriate shutter speed. The bright sunlight reflecting off this building caused the shutter speed to increase thus giving me a good exposure on the highlights and rendering anything else in the scene dark.
The Scene
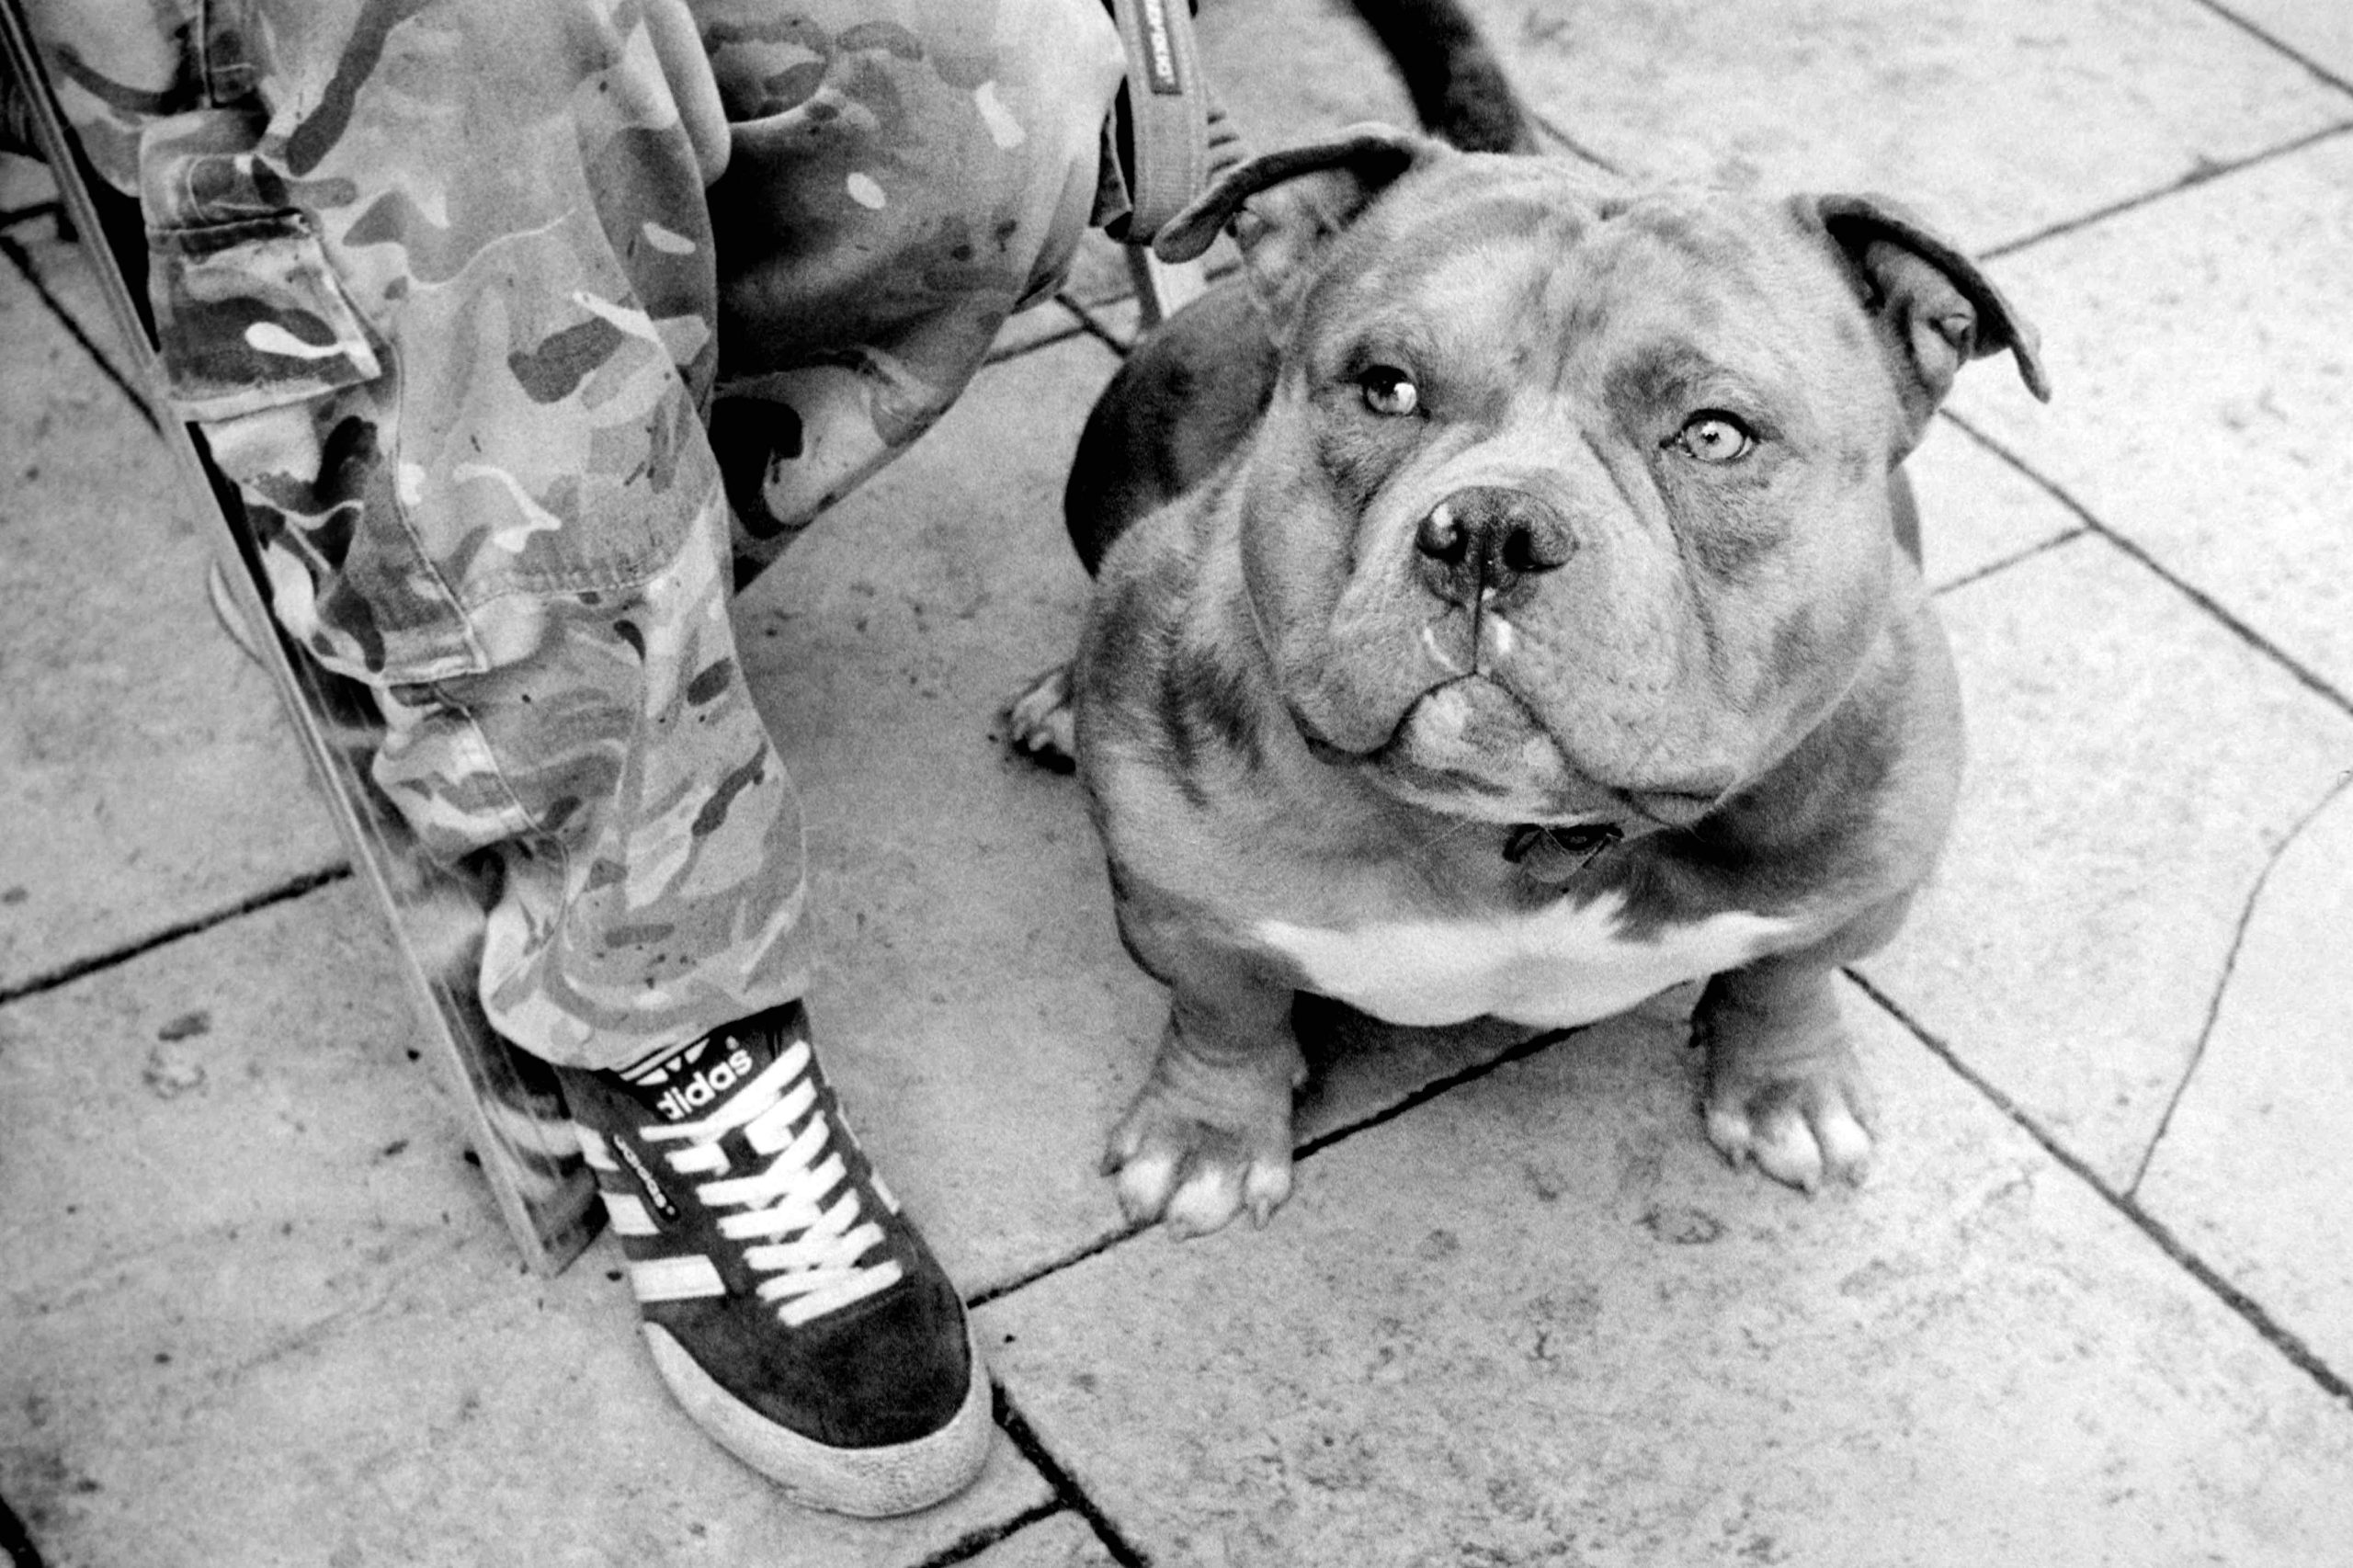
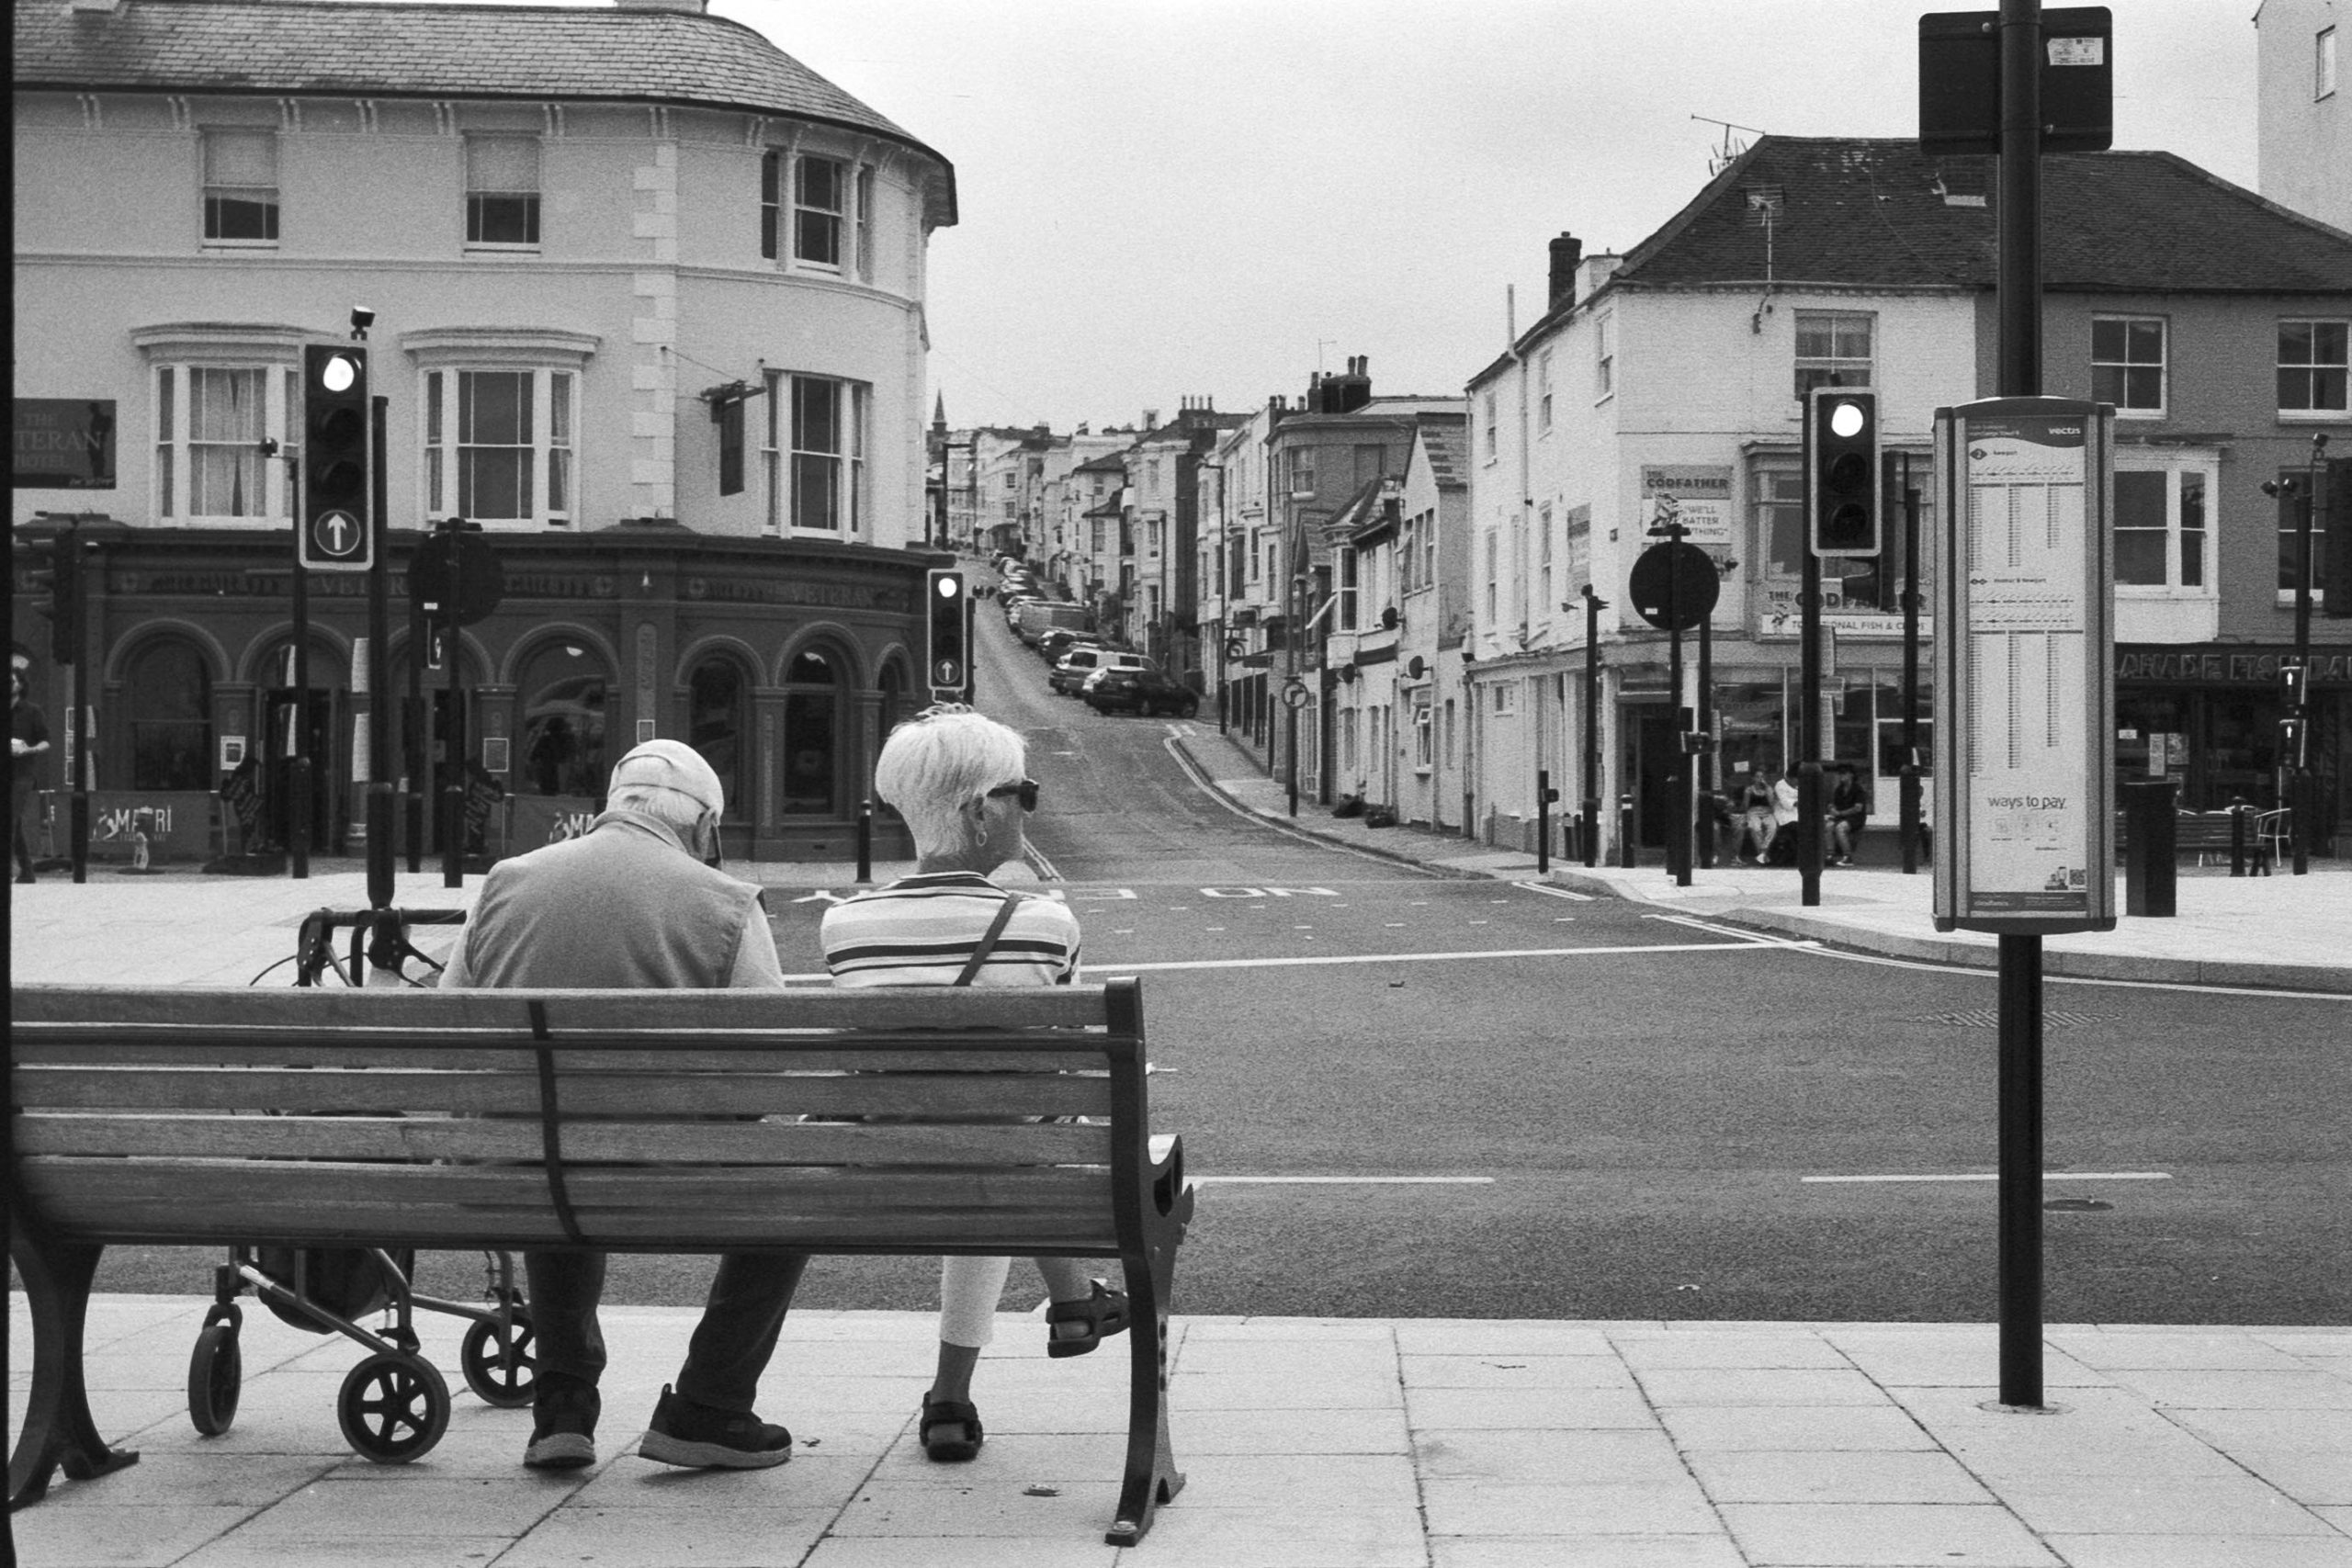
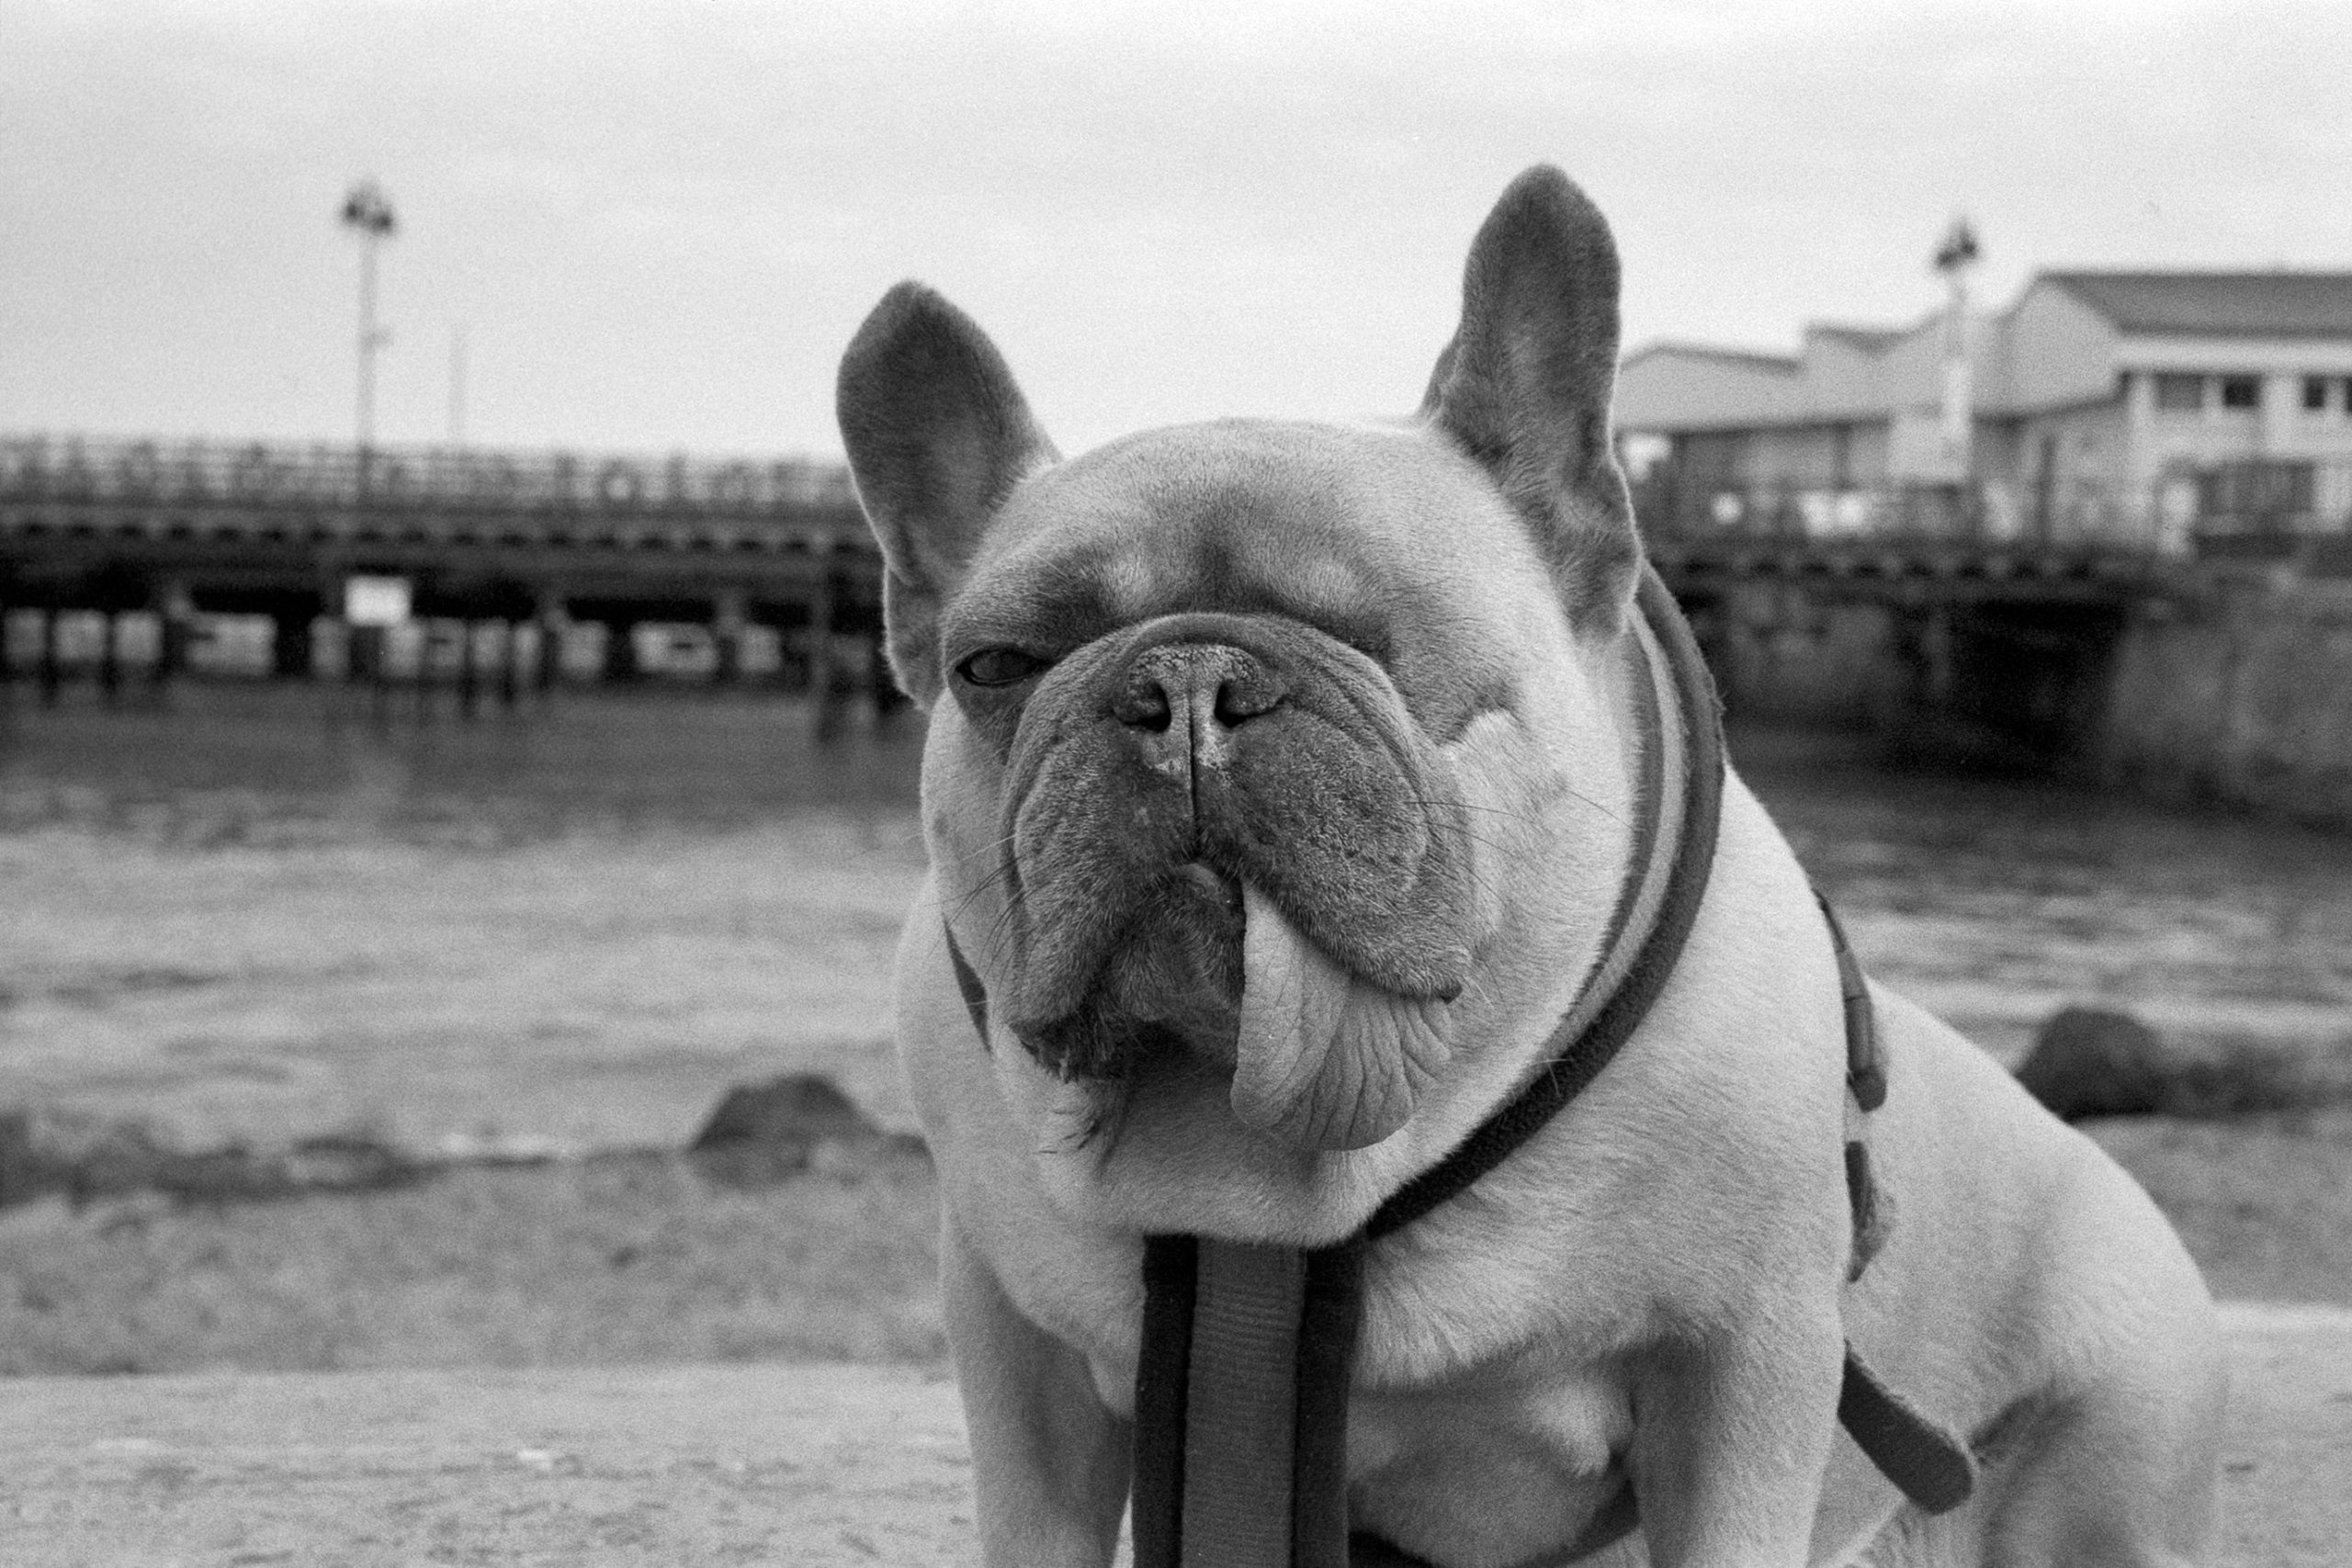
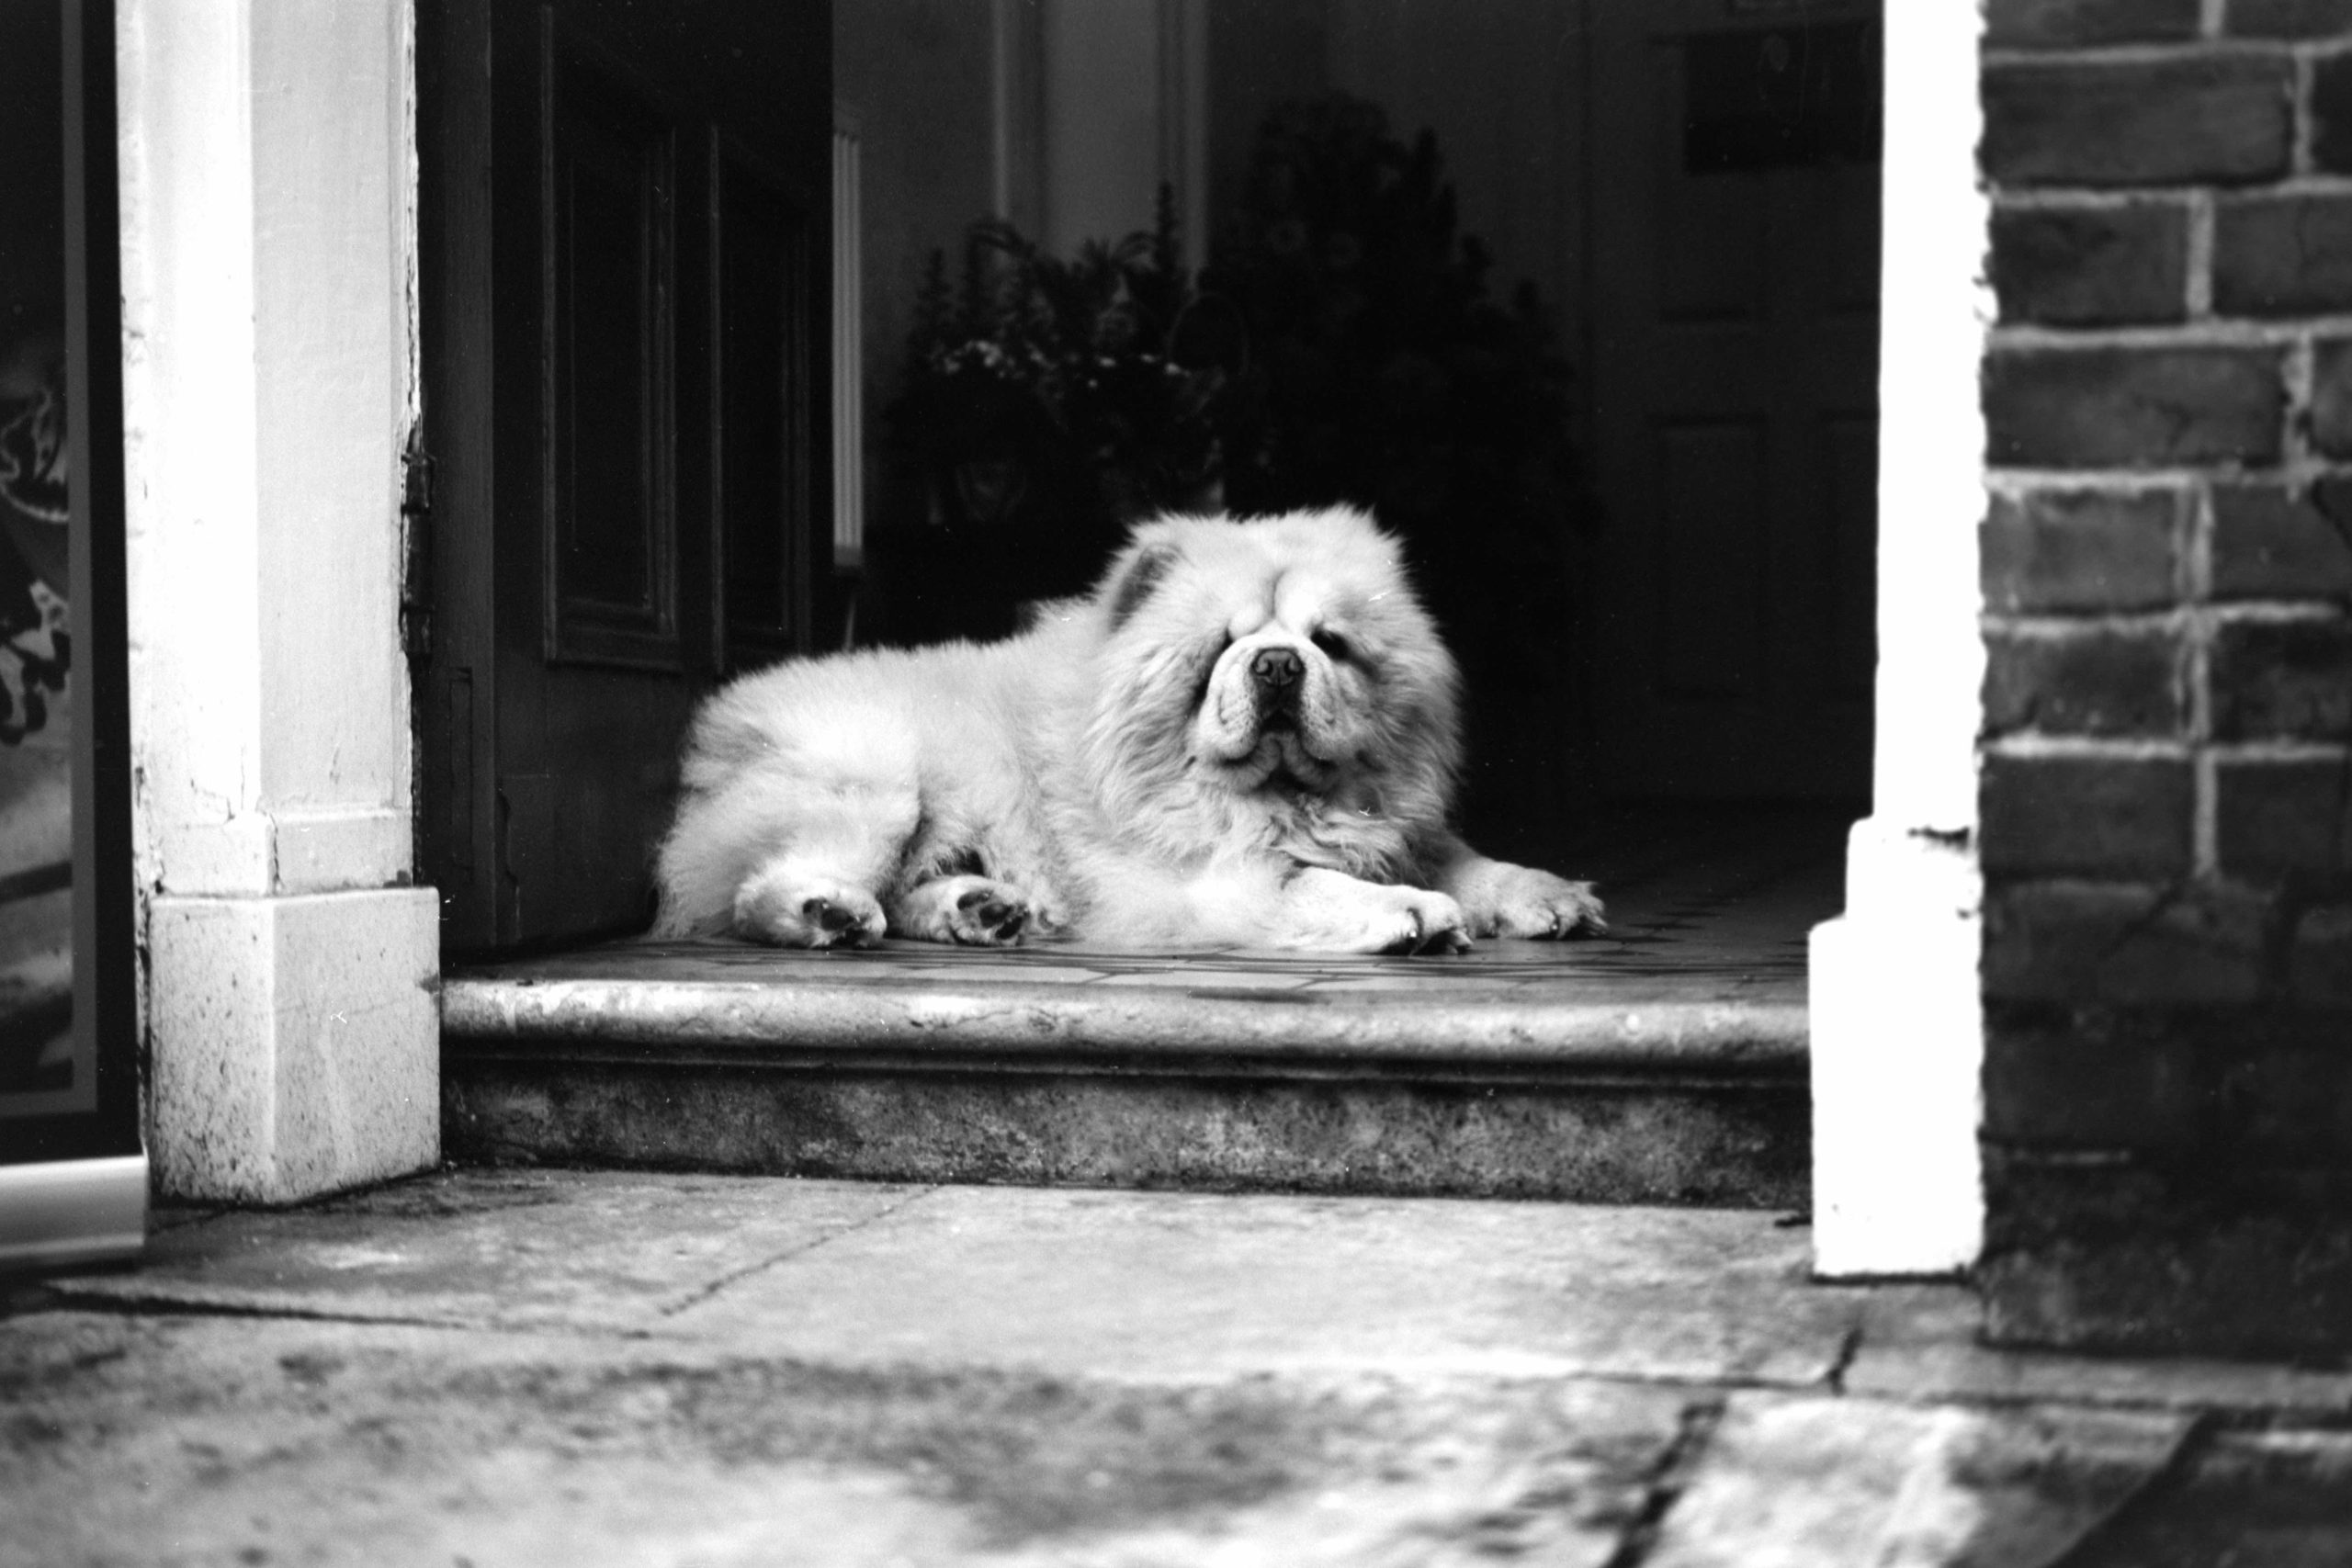
Let’s face it, not every scene or condition ,makes for a contrast goldmine. Take this photo of the town. The light overcast day simply didn’t produce the kind of shadows that would create dramatic contrast. Everything is evenly lit, much like the dog photo below it, which was the same day. While the exposure is spot-on, the contrast is, well, average.
Street photography is all about capturing what catches your eye in the moment. You shoot what you find and move on. In hindsight, this dog photo could have been something truly special if I’d had the chance to take him for a walk, searching for the perfect background and lighting. But that’s not how street photography works. You seize the opportunities as they appear. And what a great-looking dog he was!
But when I’m craving contrast, I head out on sunny days, camera in hand, with a roll of film dedicated solely to the pursuit. This focused approach allows me to tailor my development for maximum impact. I often push Ilford FP4 to 400, even under bright sunlight, to boost both film speed and contrast—a technique that consistently delivers results I love. However, the moment I venture into a shaded alley or the sun hides behind a cloud, any frames captured there will lack the intended contrast. But the push certainly helps it.
This photograph, taken on FP4 pushed to 400, demonstrates the power of this technique. It’s a prime example of FP4’s potential, showcasing those rich, deep blacks and brilliant highlights that define true black and white photography. I chose this scene specifically for its stark contrast and clear separation of tones. It wasn’t in bright sunlight, but the push compressed the tones.

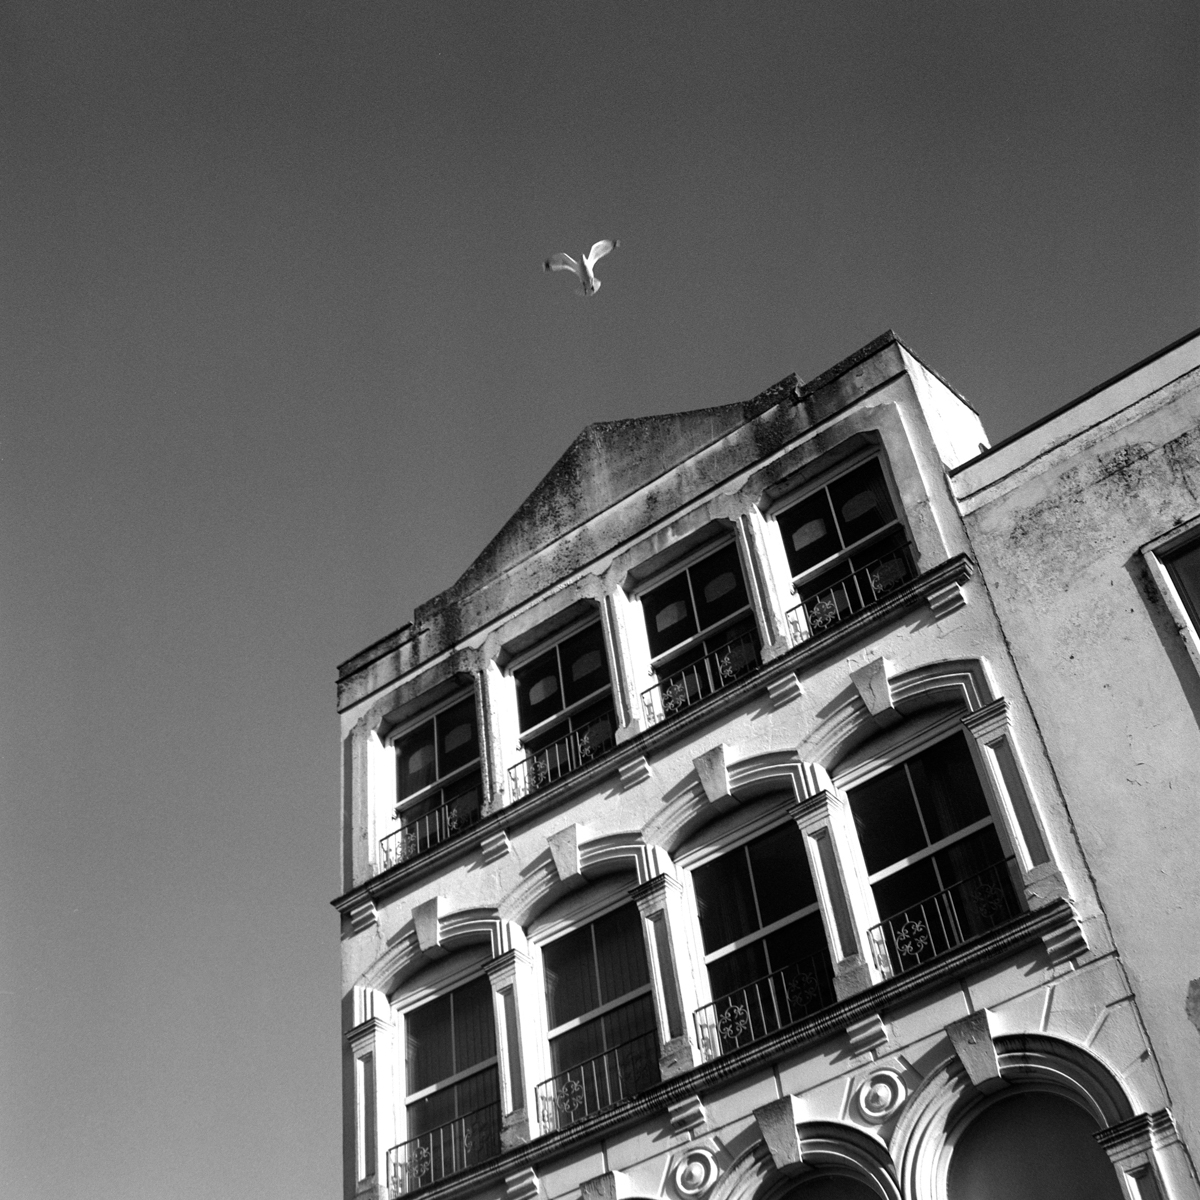
And this photograph I took on the same roll. It lacks the same feel because there are hardly any highlights for a separation.

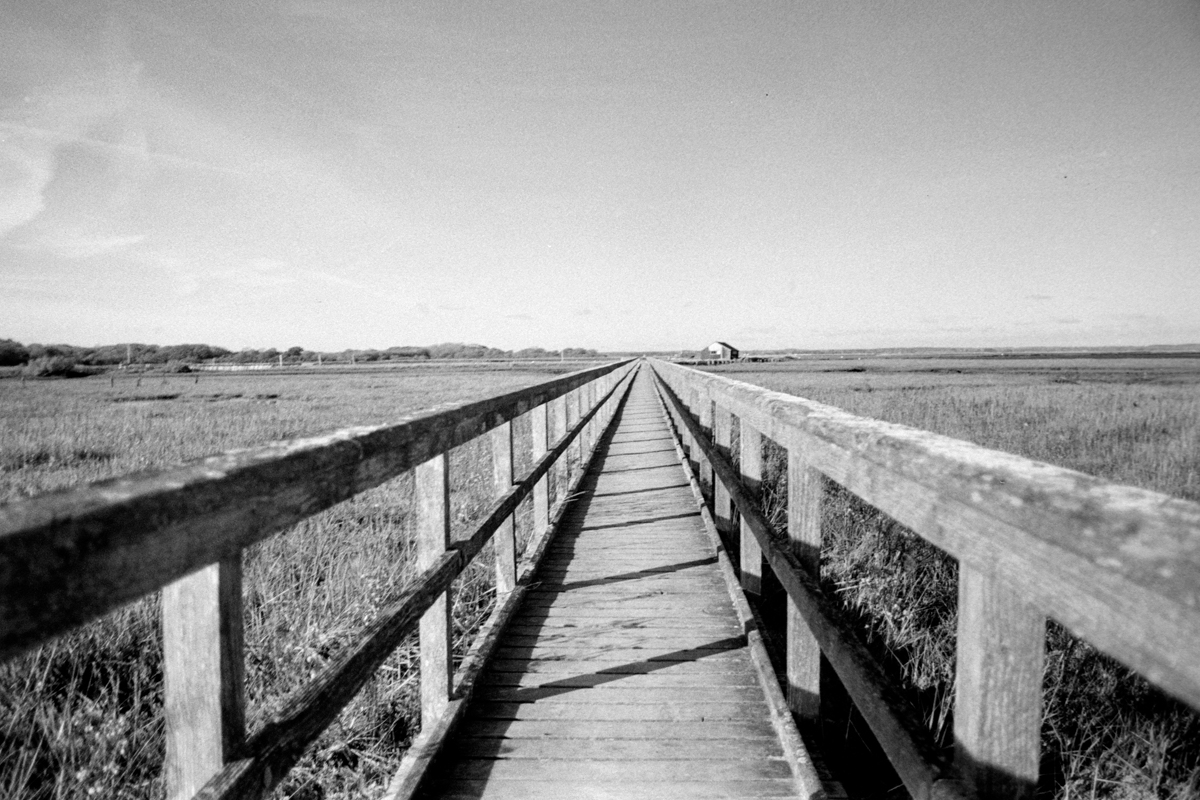
And this photograph of the bridge you can see I am back on track with sunlight and contrast. Deep blacks and bright whites.
So if you are looking for contrast and deep black and white prints it’s important to be mindful of the scene in front of you.
- Is the lighting strong?
- Is there a significant difference between the bright parts of the scene and the shadow ares?
- Where are the shadows falling?
- Are there any shadows?
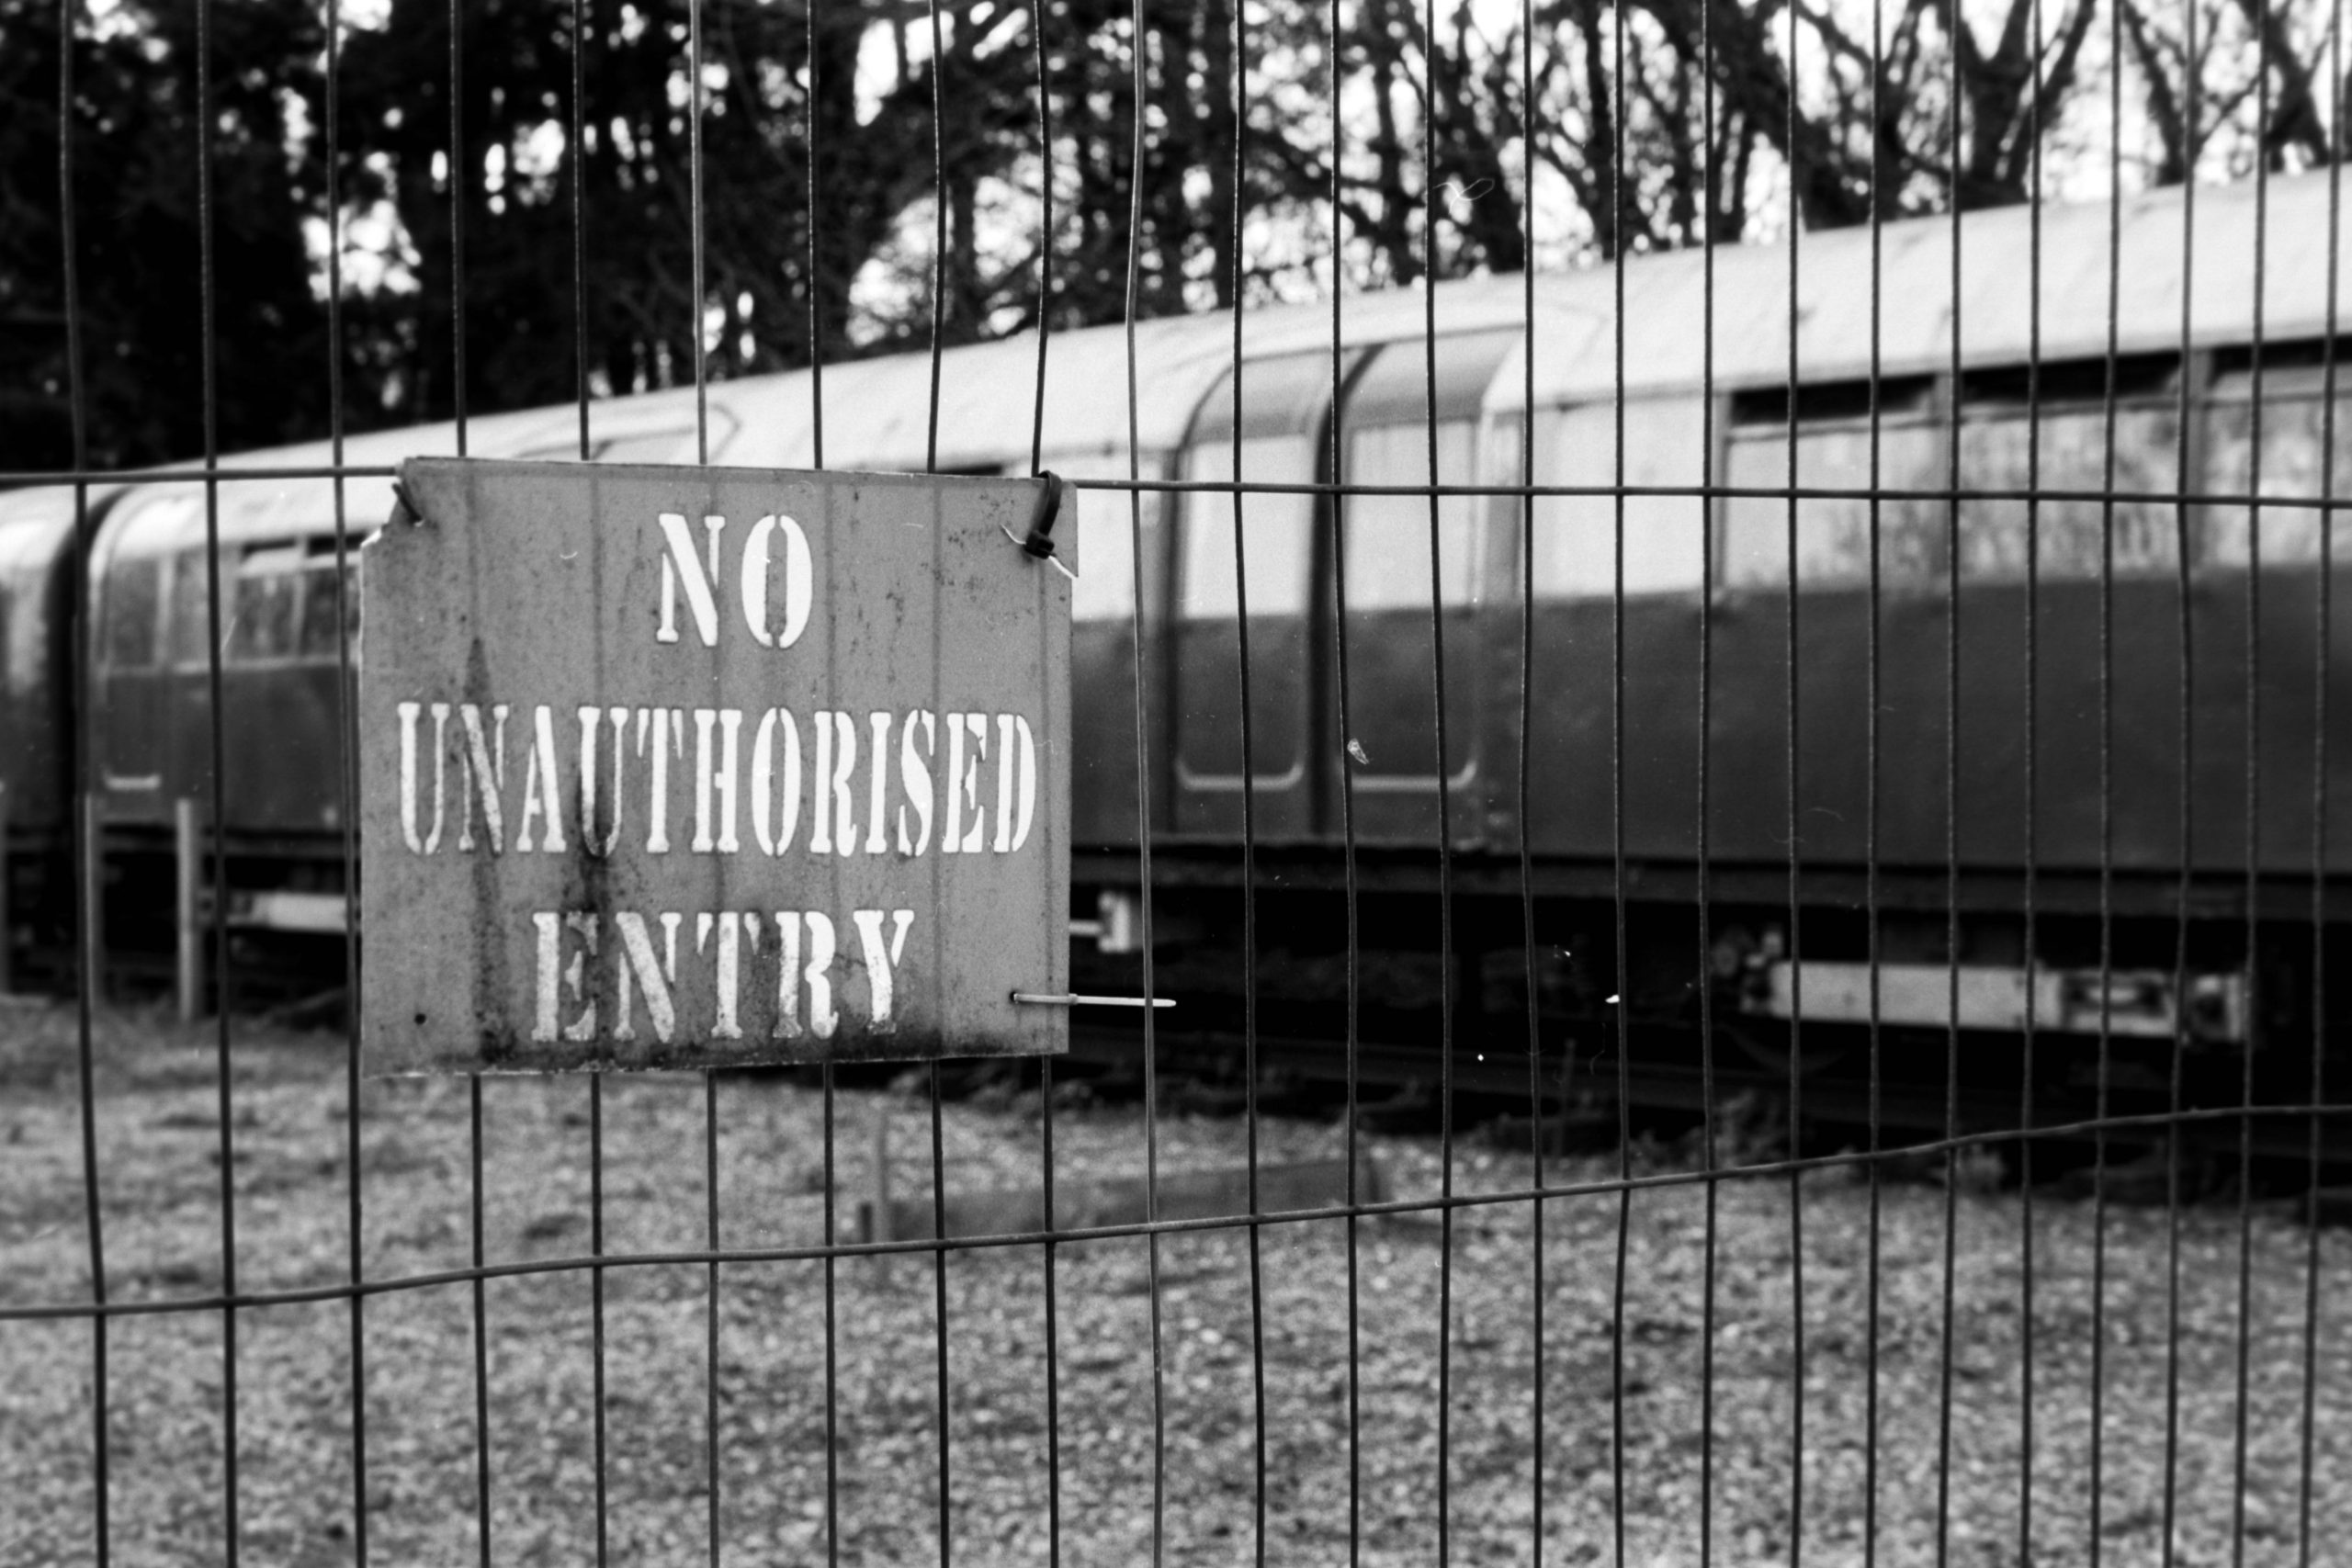
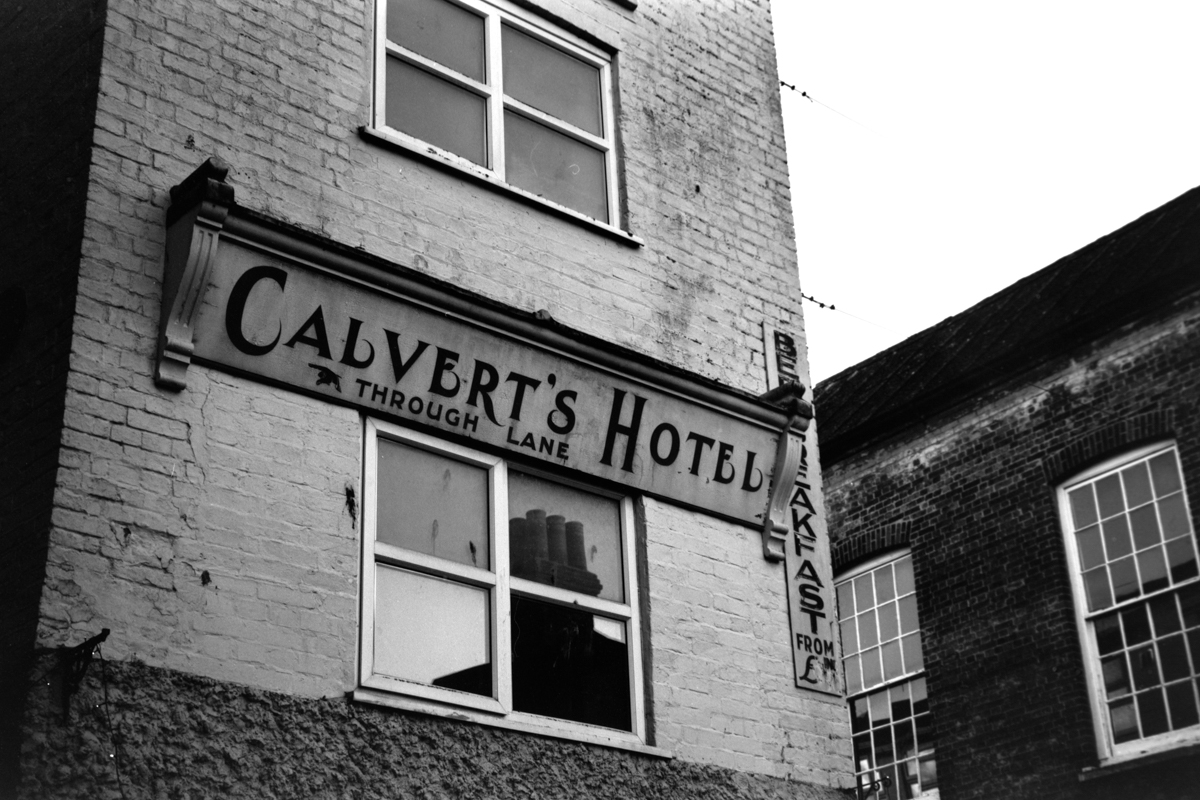
- Is the main subject well lit? (such as the sign above)
- Do I need to make any adjustments to the film or development?
Any film or development adjustments should be thought of before you shoot your first frame or those adjustments may not work for certain photographs you took on the same roll.
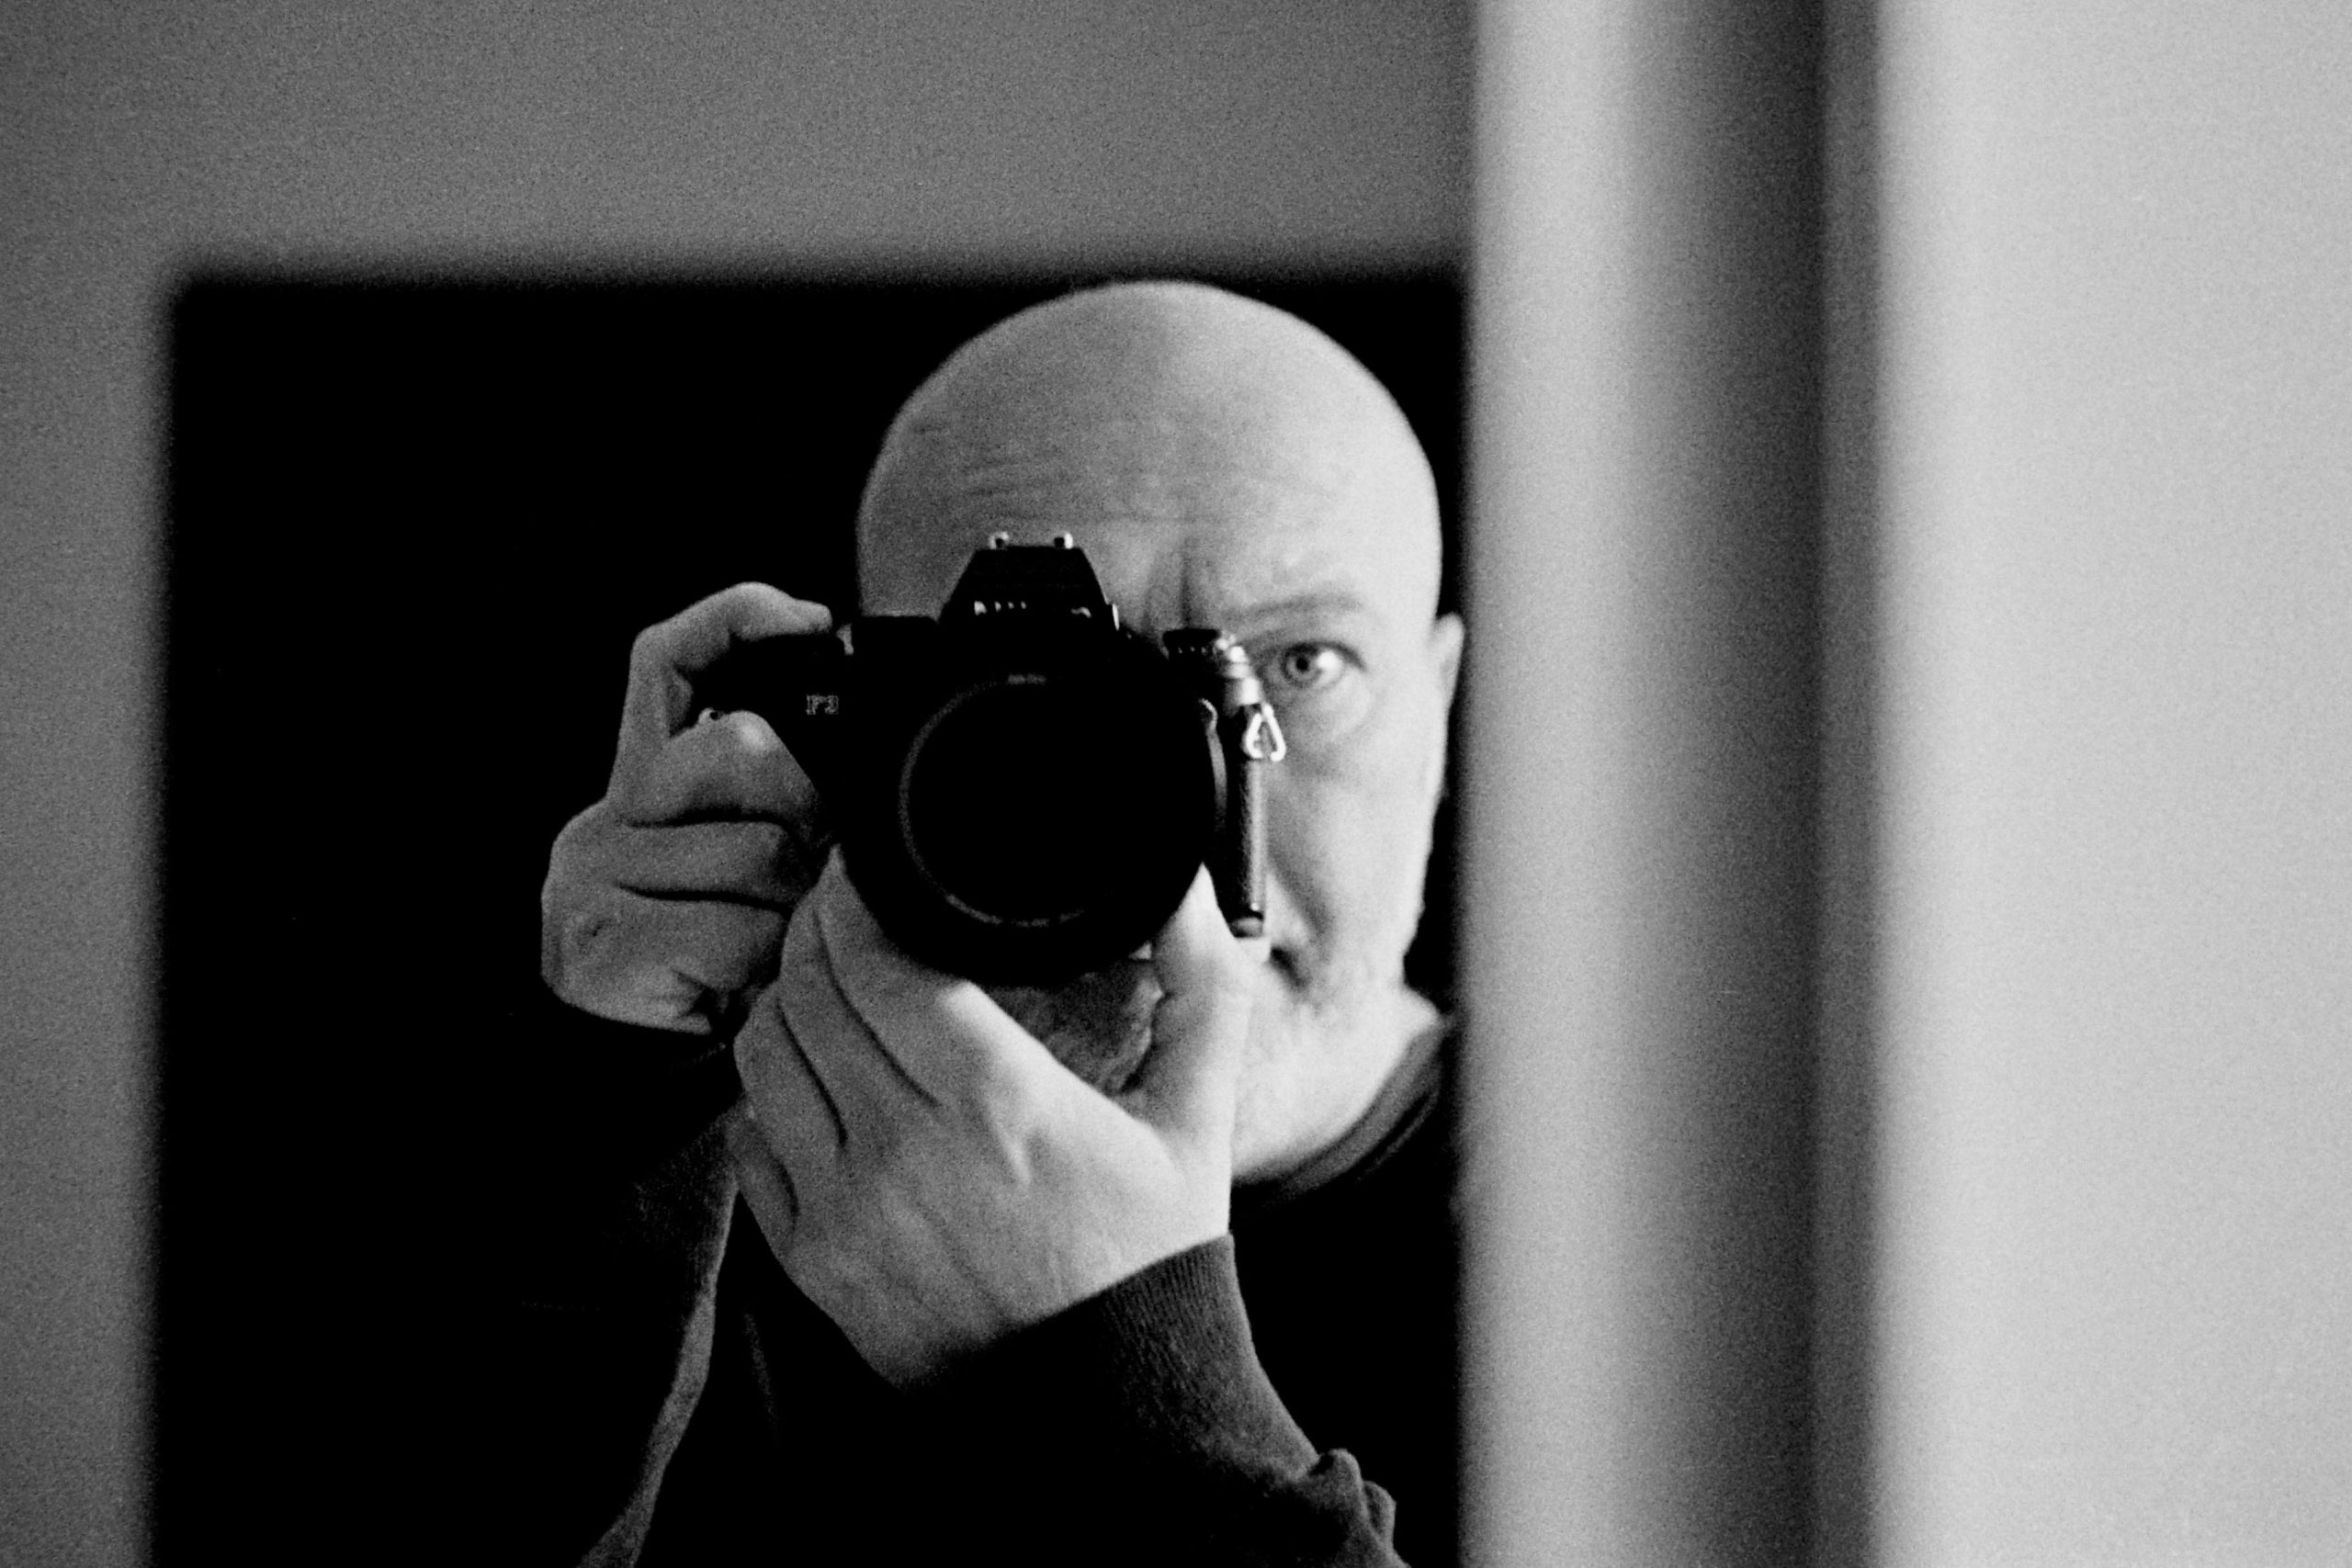
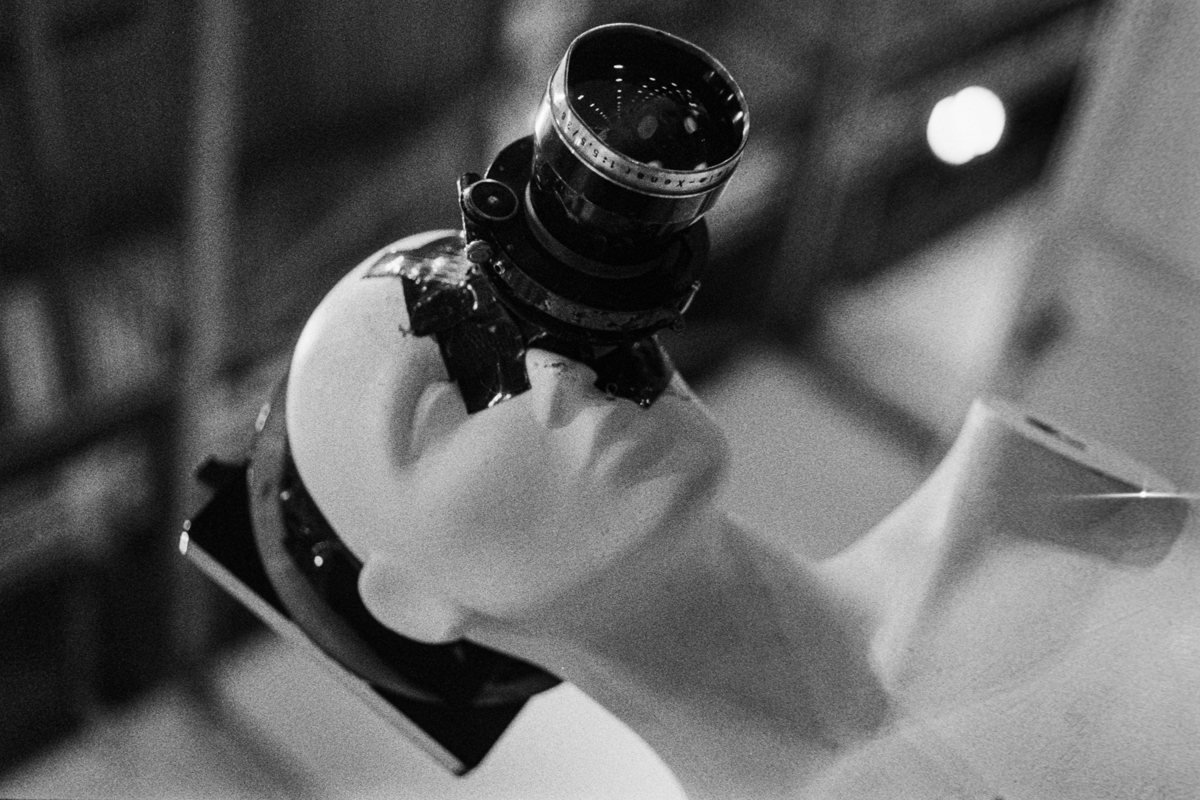
This self portrait (usually I take these when I have a frame or two left in the camera), I shot this purposely for the contrast mix. The dark door in the background and the white frame on the right hand side. Black jumper, camera and well lit face from the window light. This is a nice example of good black and whites. Does it matter the camera is dark and you can’t see a catch-light in the lens. Of course not. Although it would have been an added bonus! But the light isn’t pointing there.
Pushing for contrast
So, as mentioned, a technique I often use when I am shooting street on a flat day is to push my film. I just said about pushing FP4 because I like the look. But sometimes I will push the film to compress my negatives, lose mid tones and generate a contrasted look. This is done through underexposing the film and then overdeveloping! Sounds strange to underexpose an already flat scene! Surely the shadows would be dark and the highlights would be grey or muddy? Well, they would. Thats when we develop accordingly.
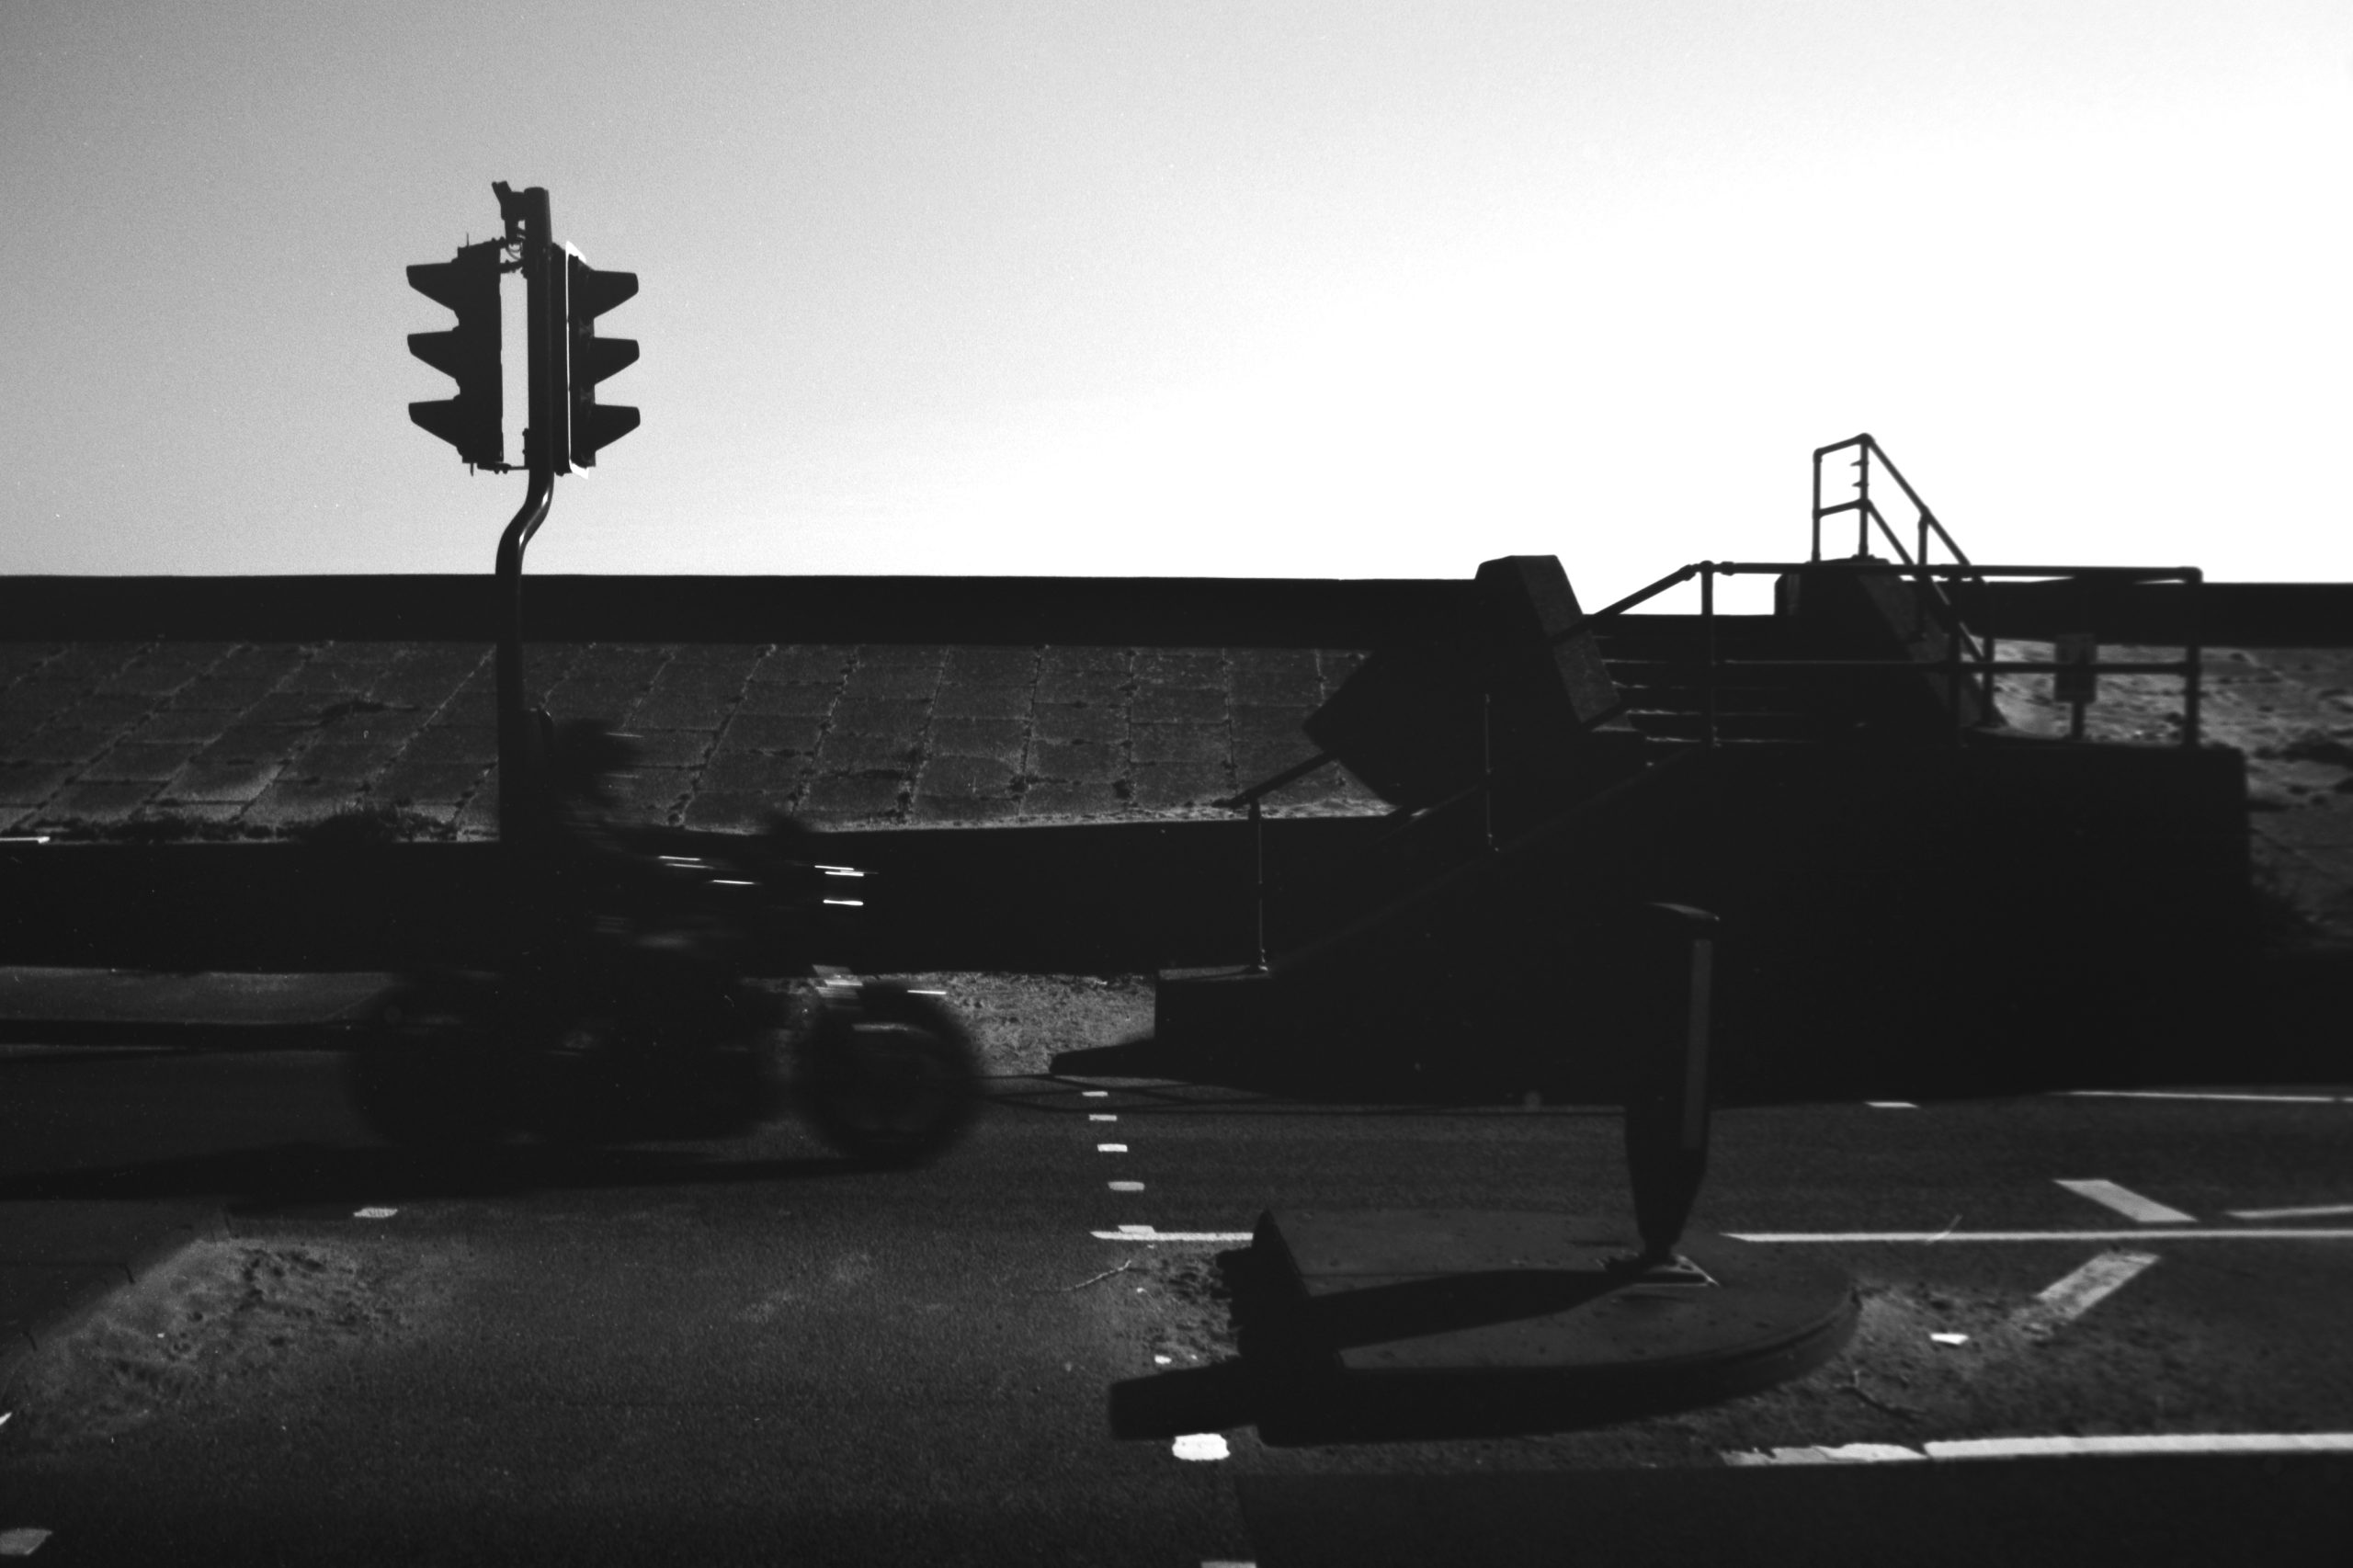
You can see how flat this scene was. There is no shadow anywhere! So to make the scene look more punched with contrast I pushed the film. Again, this is FP4 at 400.
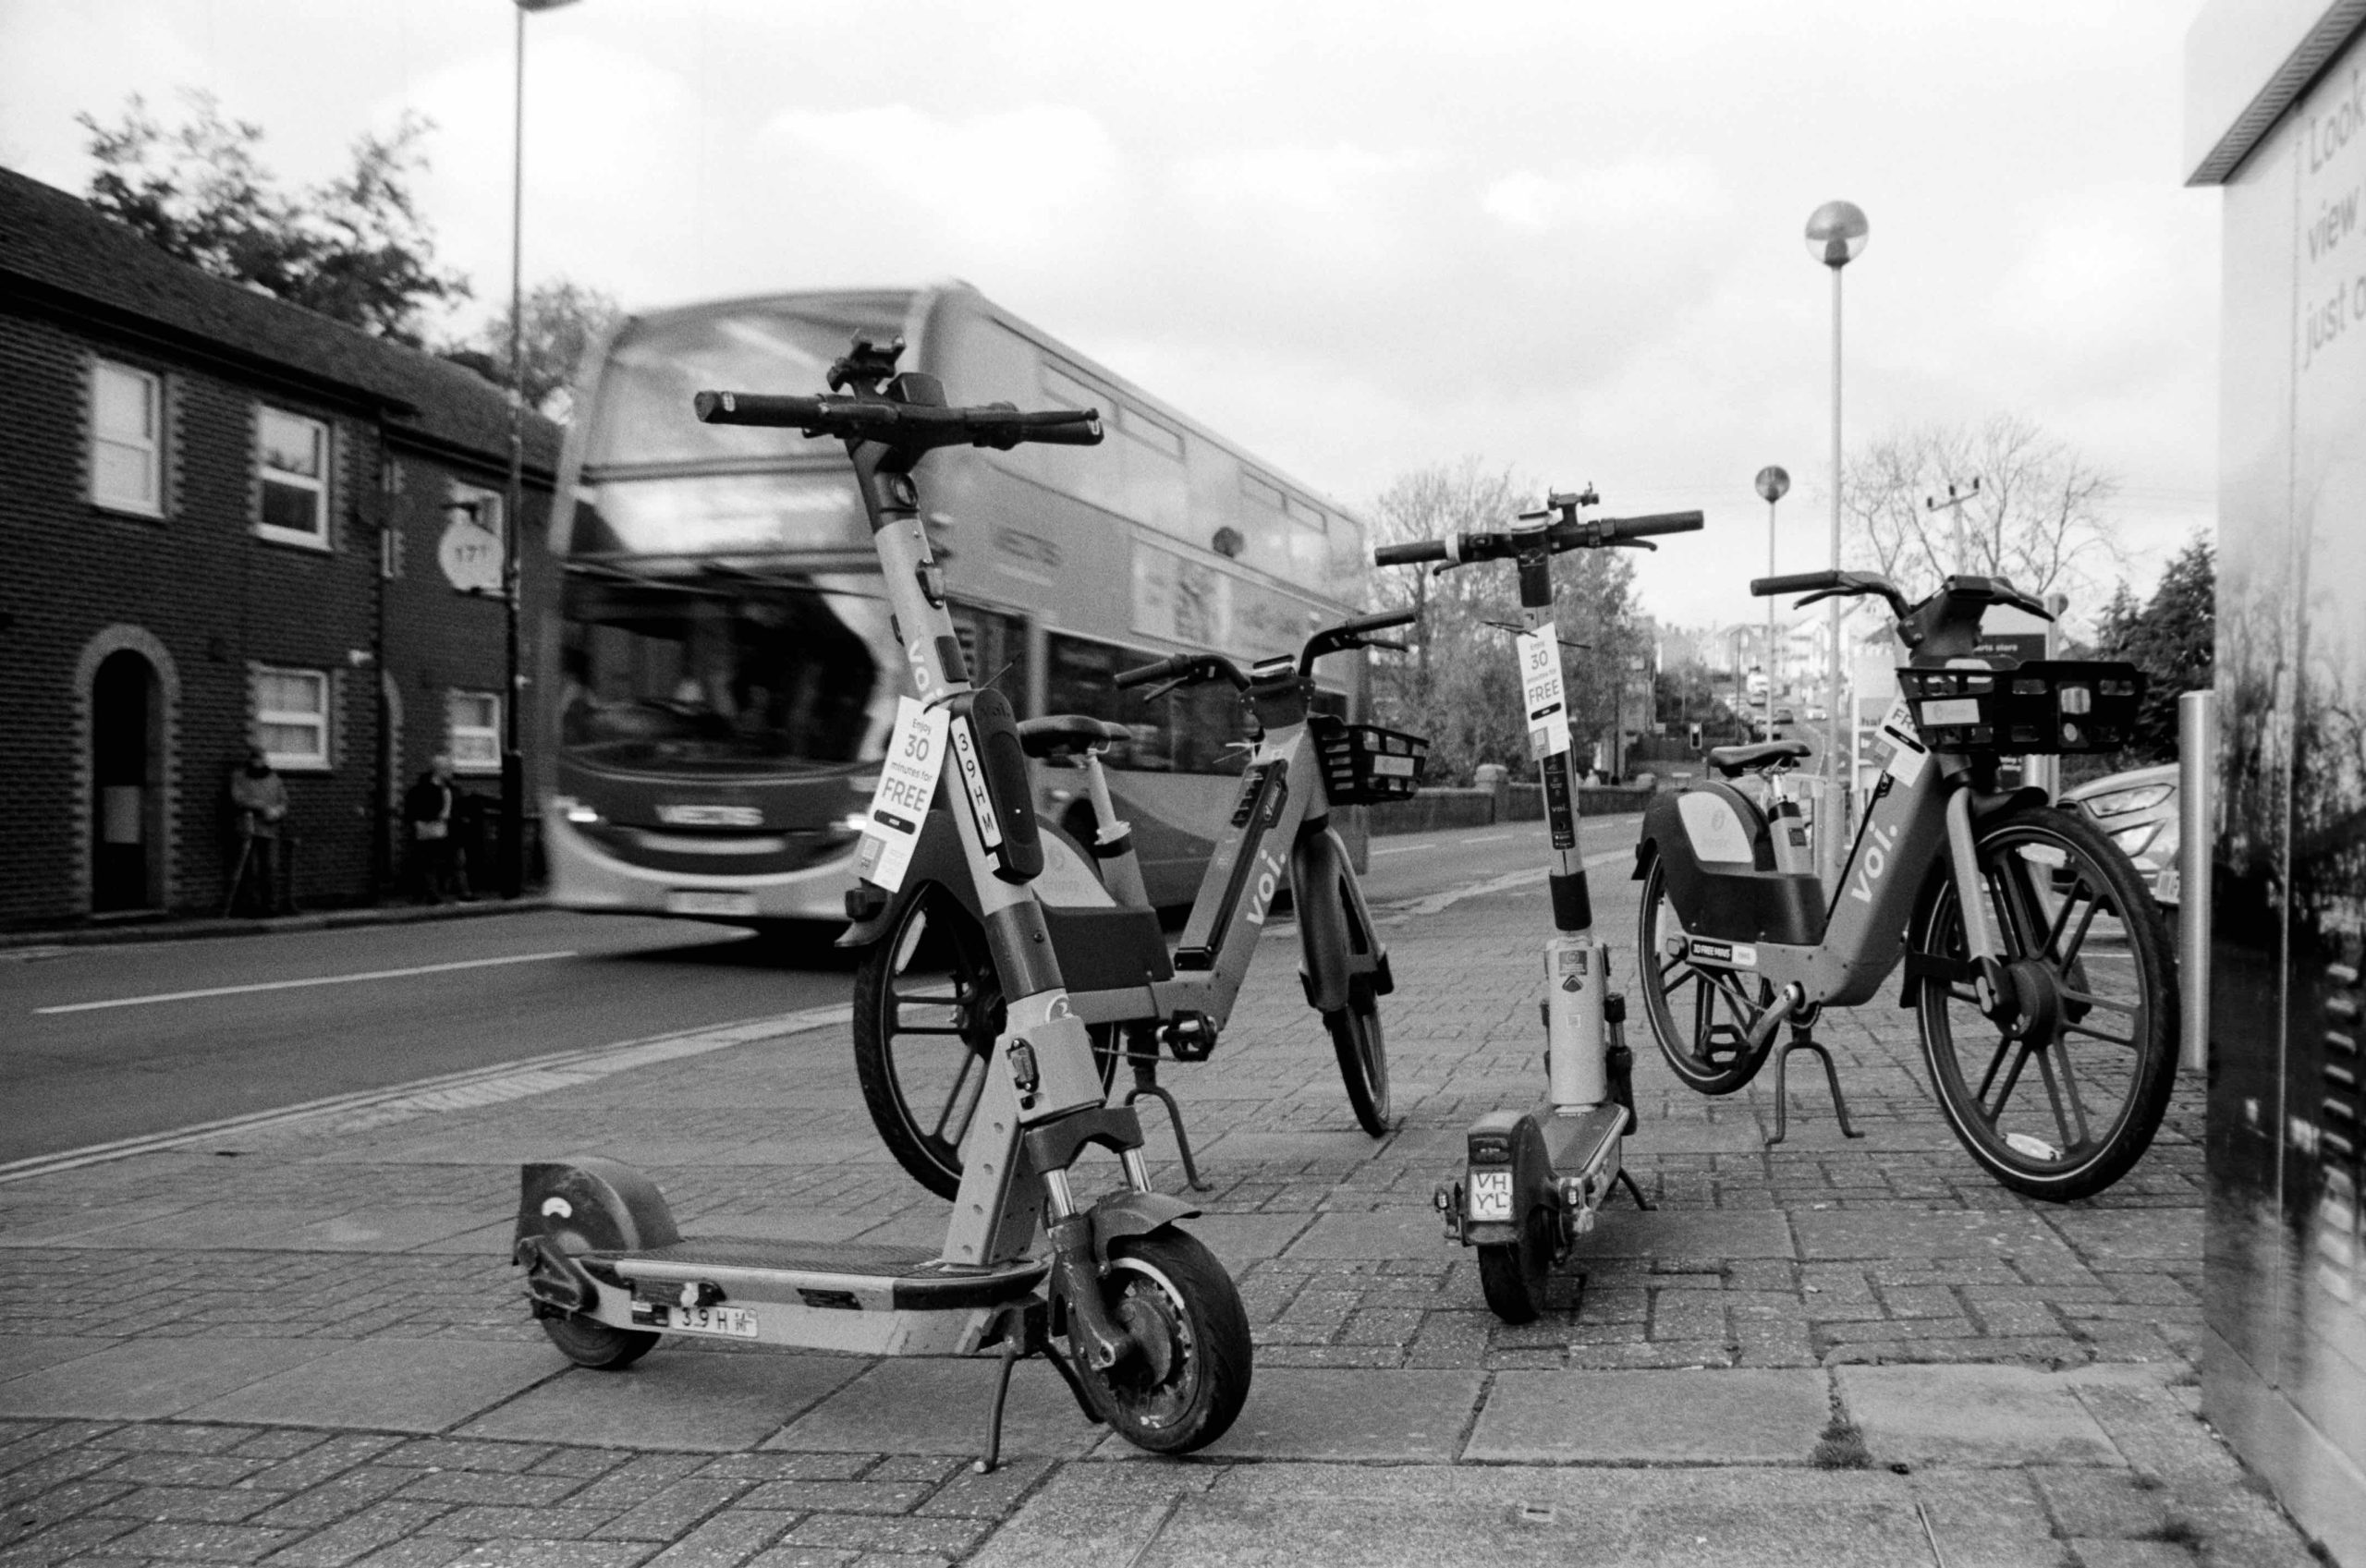
The ‘pushing’ effect we’re talking about comes from the development process itself. Essentially, the longer you develop your film, the more the highlights will build up. In this particular case, an 11-minute development yielded perfect results. Had I extended the development to, say, 20 minutes, the highlights would have continued to intensify, potentially leading to blown-out areas, particularly in the sky, which would have become a featureless white. The scooters would also have appeared significantly brighter, while the darker areas would have remained relatively unchanged. So, you can see how extending development time increases the overall contrast, though often at the cost of highlight detail, like the sky.
Now, what about underexposure? If I hadn’t intentionally underexposed and still developed for 20 minutes, the entire scene would have appeared flatter, with the darker areas, such as the houses, becoming much lighter. This illustrates how pushing film creates a more contrasty image: you underexpose to deepen the shadows and overdevelop to boost the highlights, effectively compressing the tonal range. Just remember that contrast and grain are heavily influenced by the specific film and development combination. And especially with pushing, grain can become quite noticeable.
Low Key
Another form of contrast is Low Key photography. Not to be confused with hard contrast. This is a good example of a Low Key photograph. The image is predominantly dark, with a black background and the subject appearing in shades of grey and white.
And this image is still Low Key but not as strong. It almost appears flatter with not very strong highlights and a more grey background than dark.
Low key photography can create a striking effect, whether you’re shooting still life, portraits, or even street scenes. It’s all about mastering the lighting. You can further refine the look during development by underdeveloping your film, but it’s crucial that the scene itself is already lit appropriately. An under-developed shot of an evenly lit street scene, like the Chevrolet, will simply look flat and washed out, with grey highlights.
The photograph below is from a roll of 36 where I intentionally under-developed the film, aiming for a low key aesthetic across most of the shots. When I captured this particular frame, I wasn’t specifically going for a low key image. I knew the sky would be too bright. However, the under-development yielded an interesting result. The camera’s metering, which considered the bright sky, played a significant role. The white road markings provide crucial detail in the shadow areas. The under-development prevented the sky from becoming overly bright, while darkening the road. But those road markings add a layer of depth and visual interest. You could almost call it a ‘split low key’ effect, if that’s even a thing. I’ve just invented it maybe?
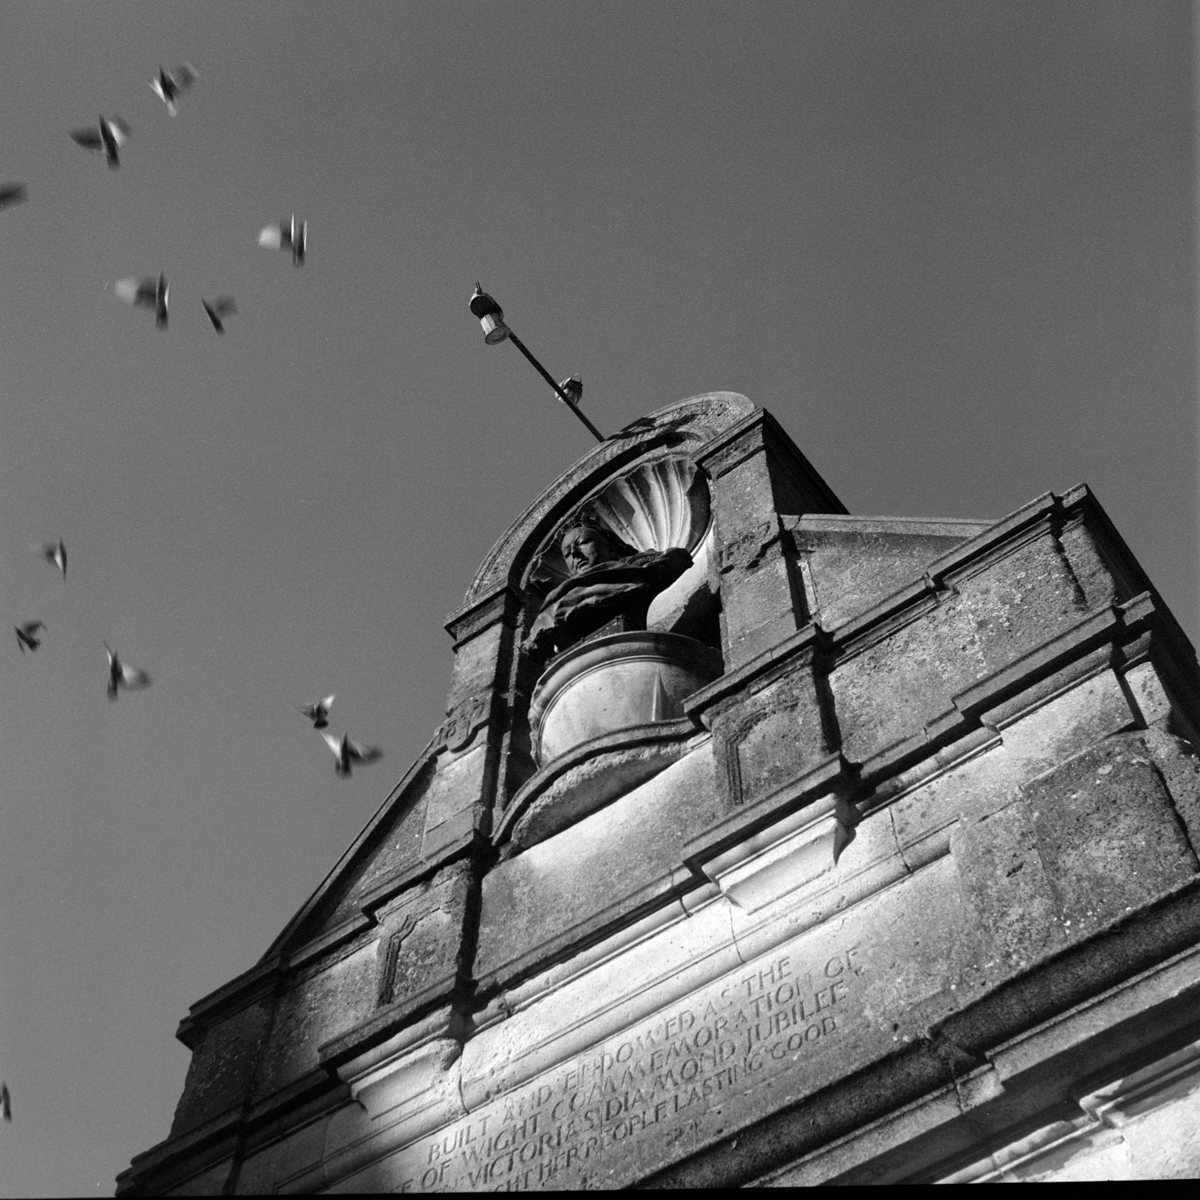
Another similar “Split Low Key” Photograph.
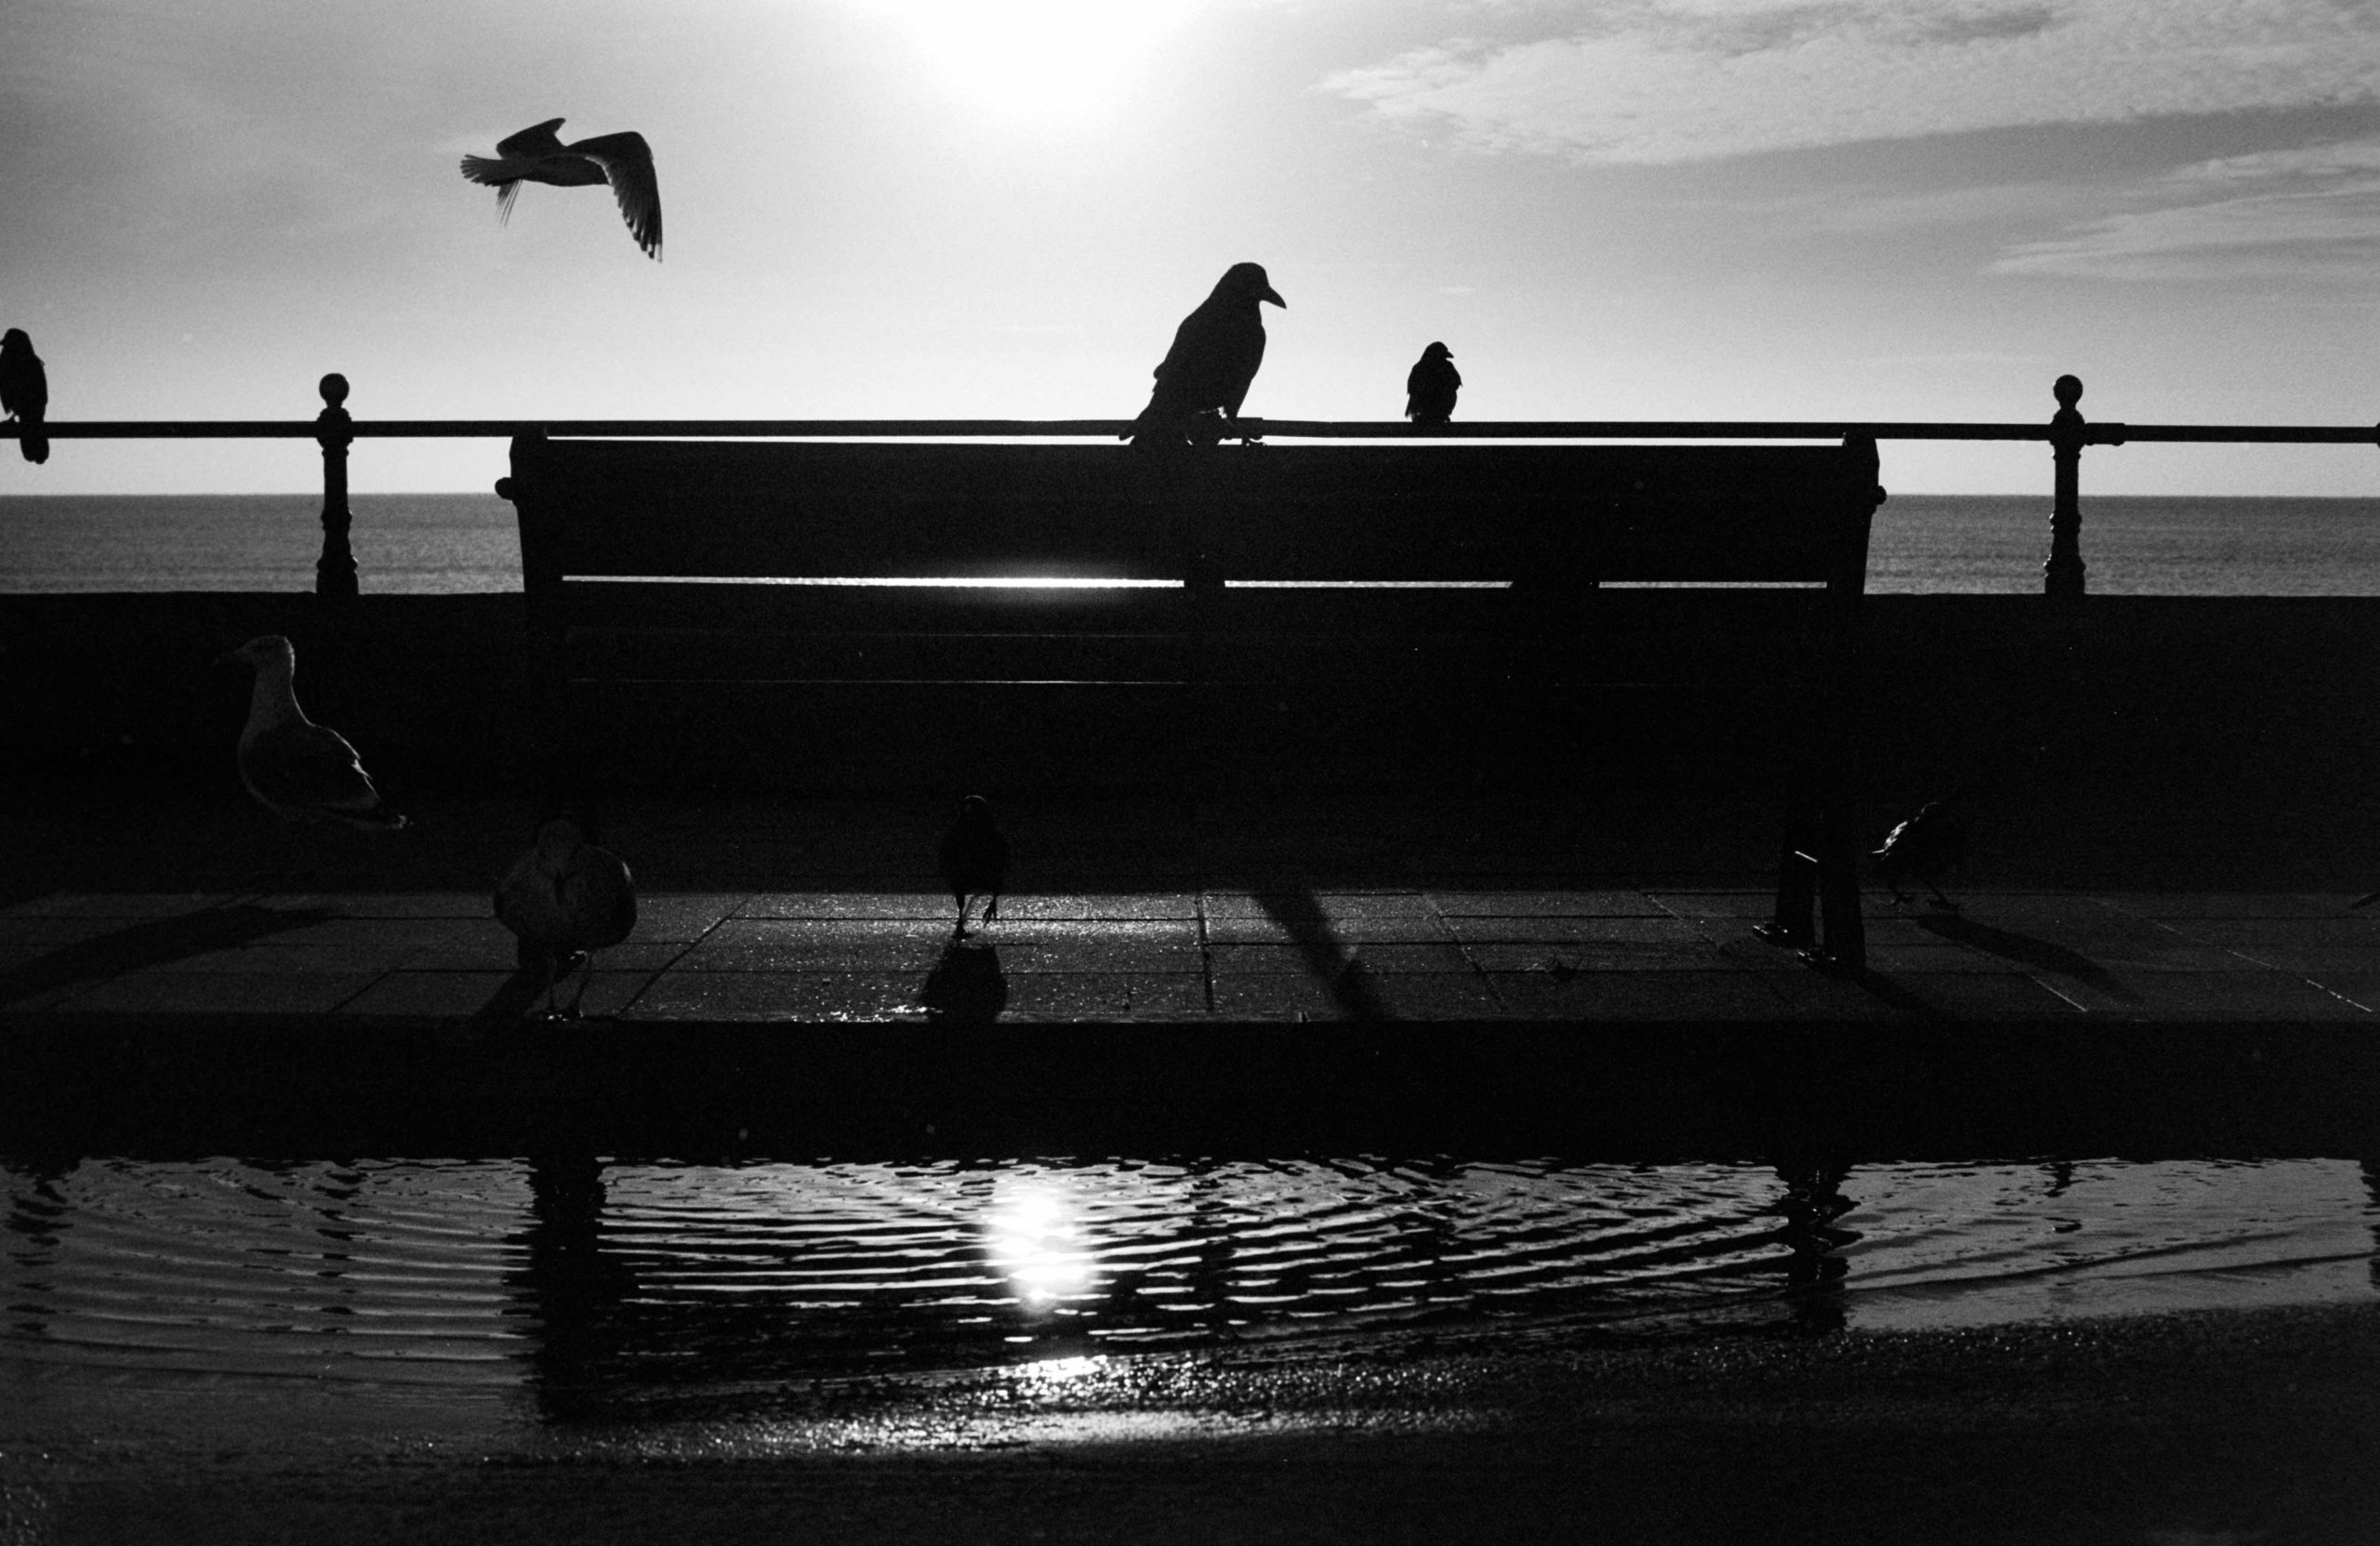
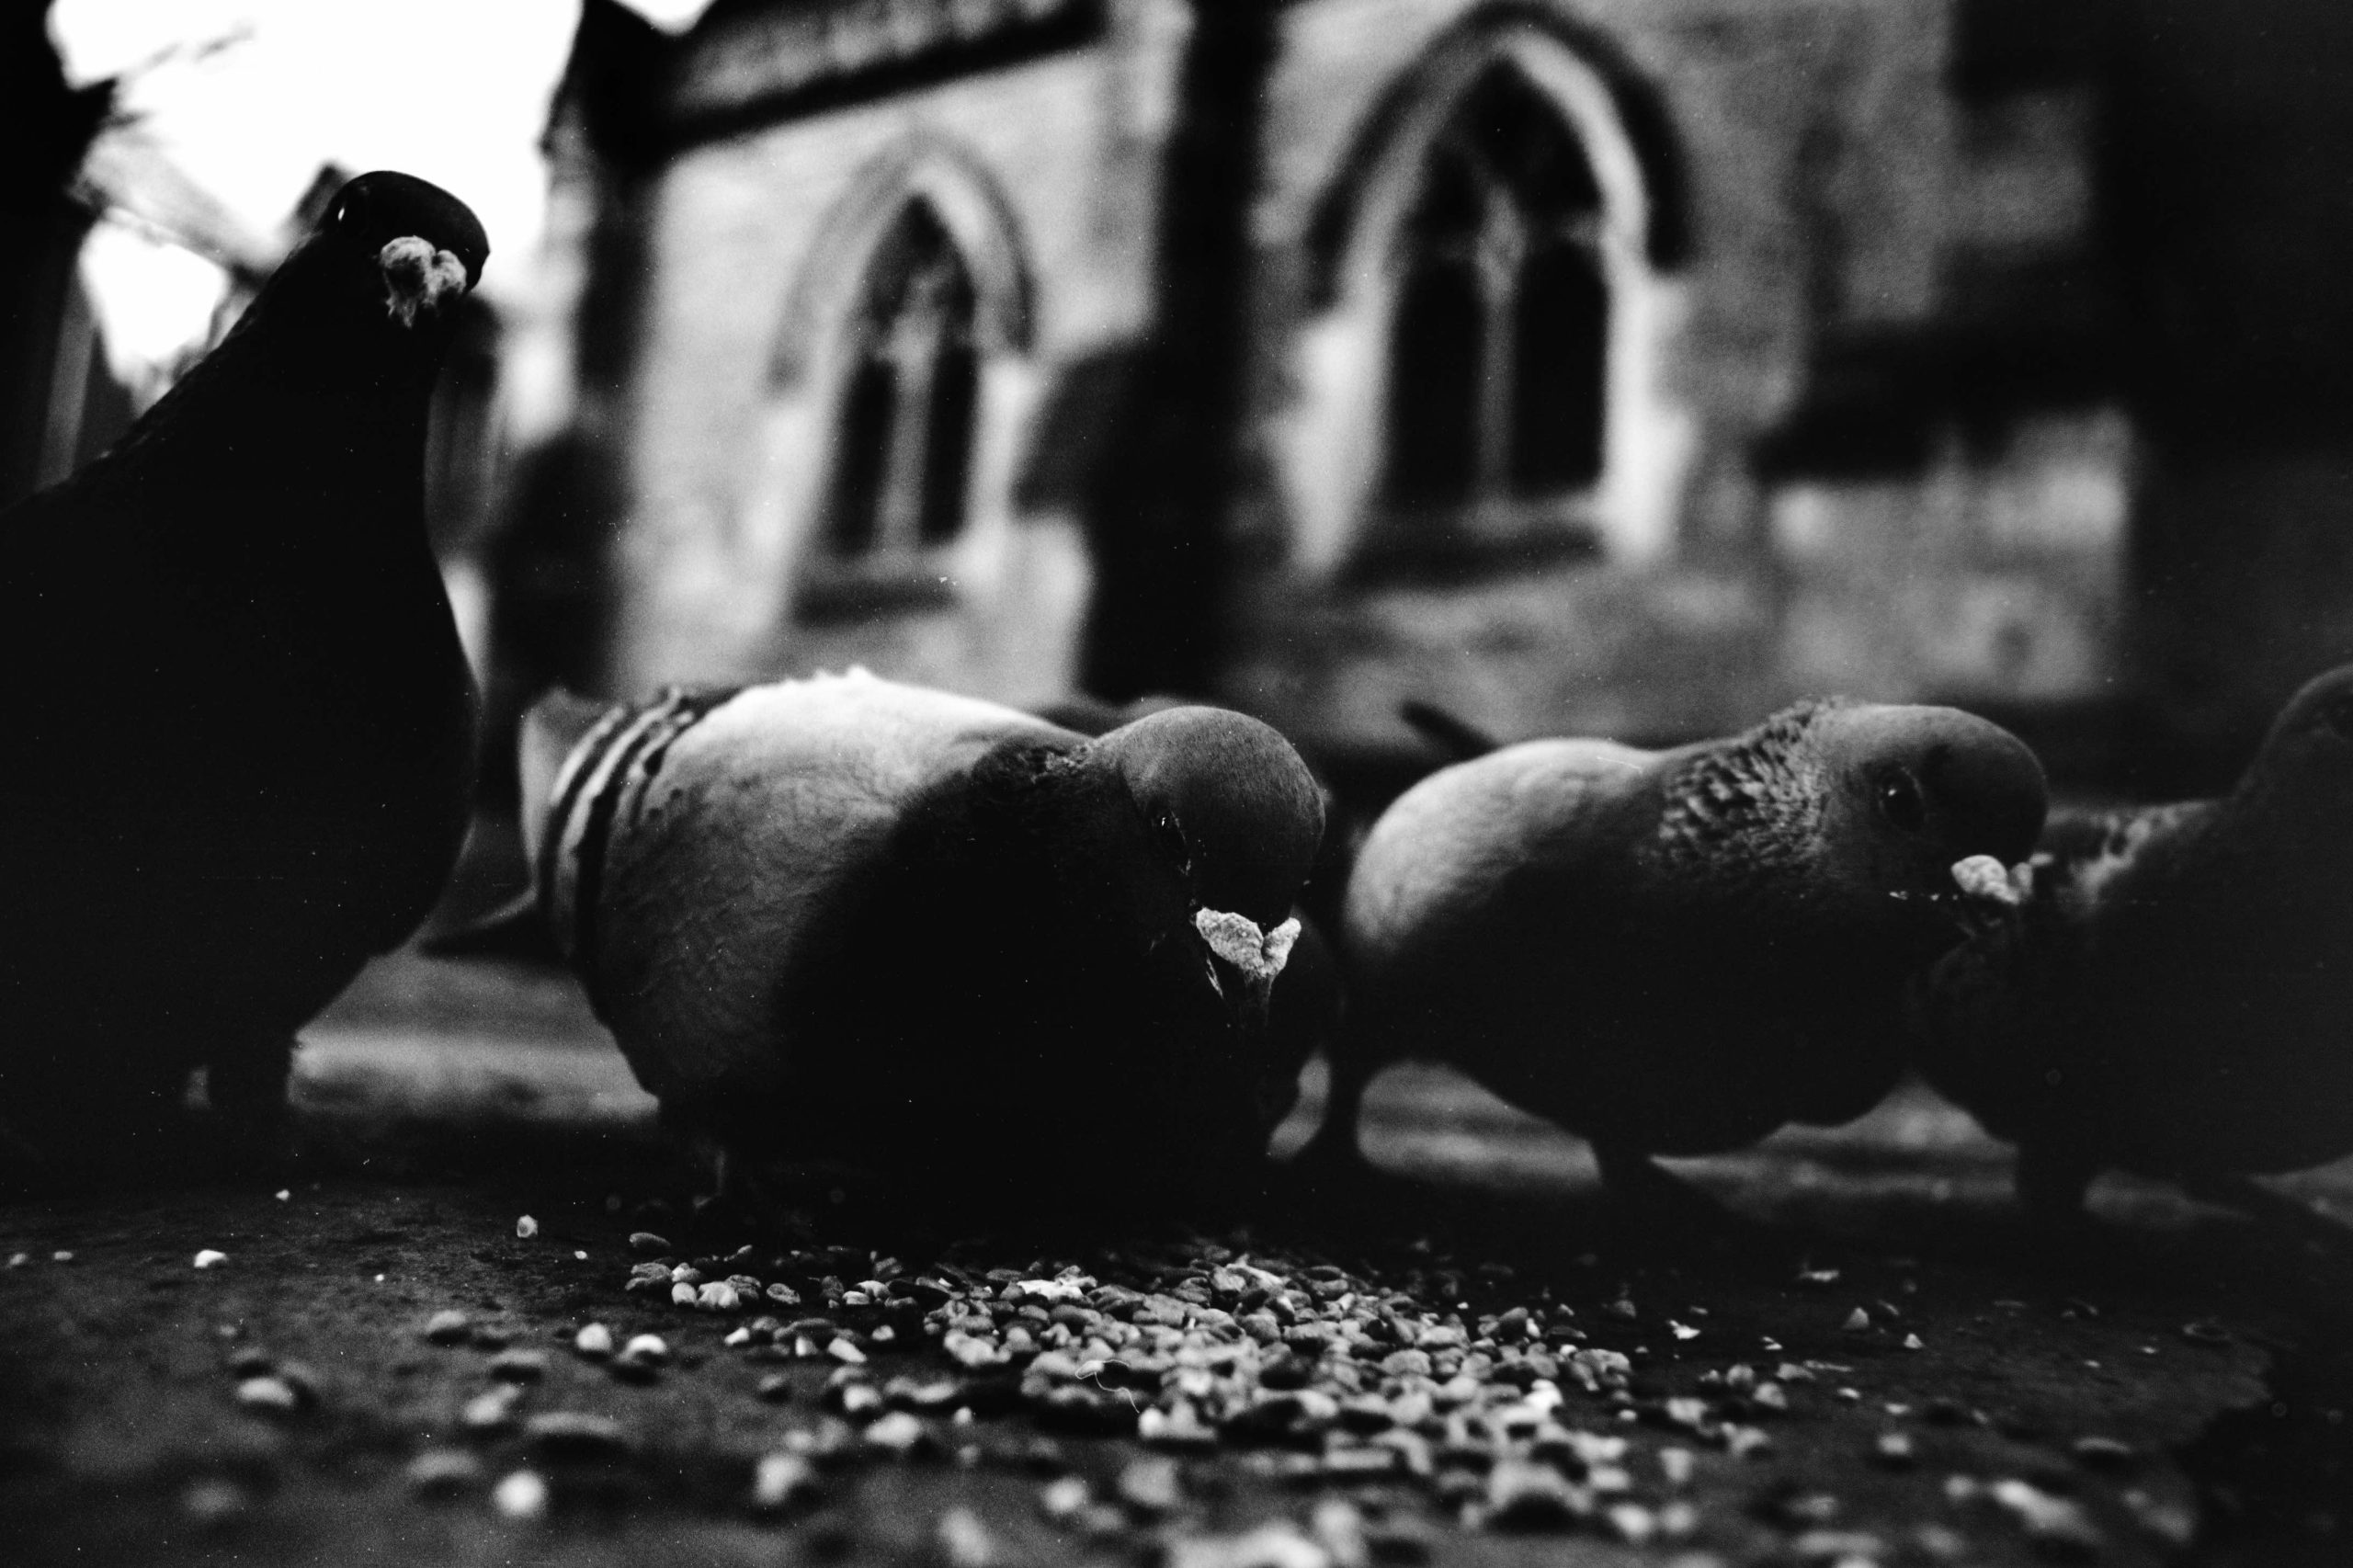
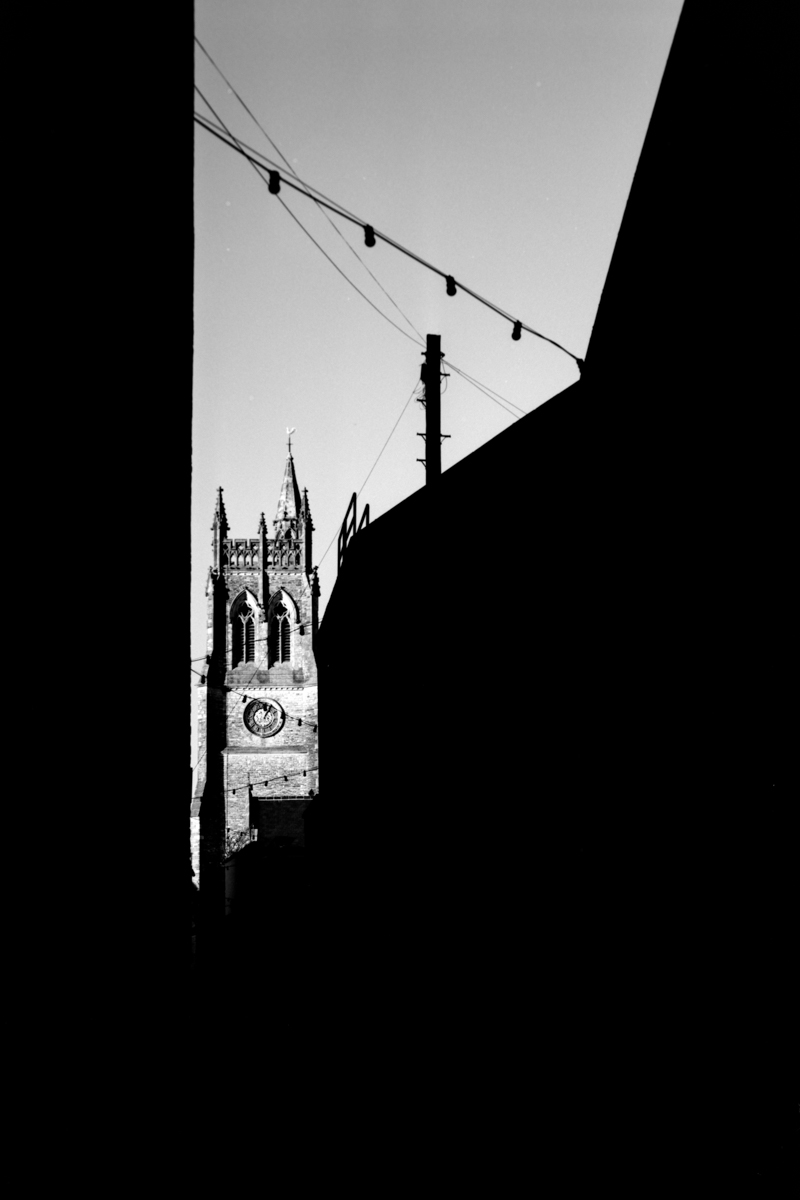
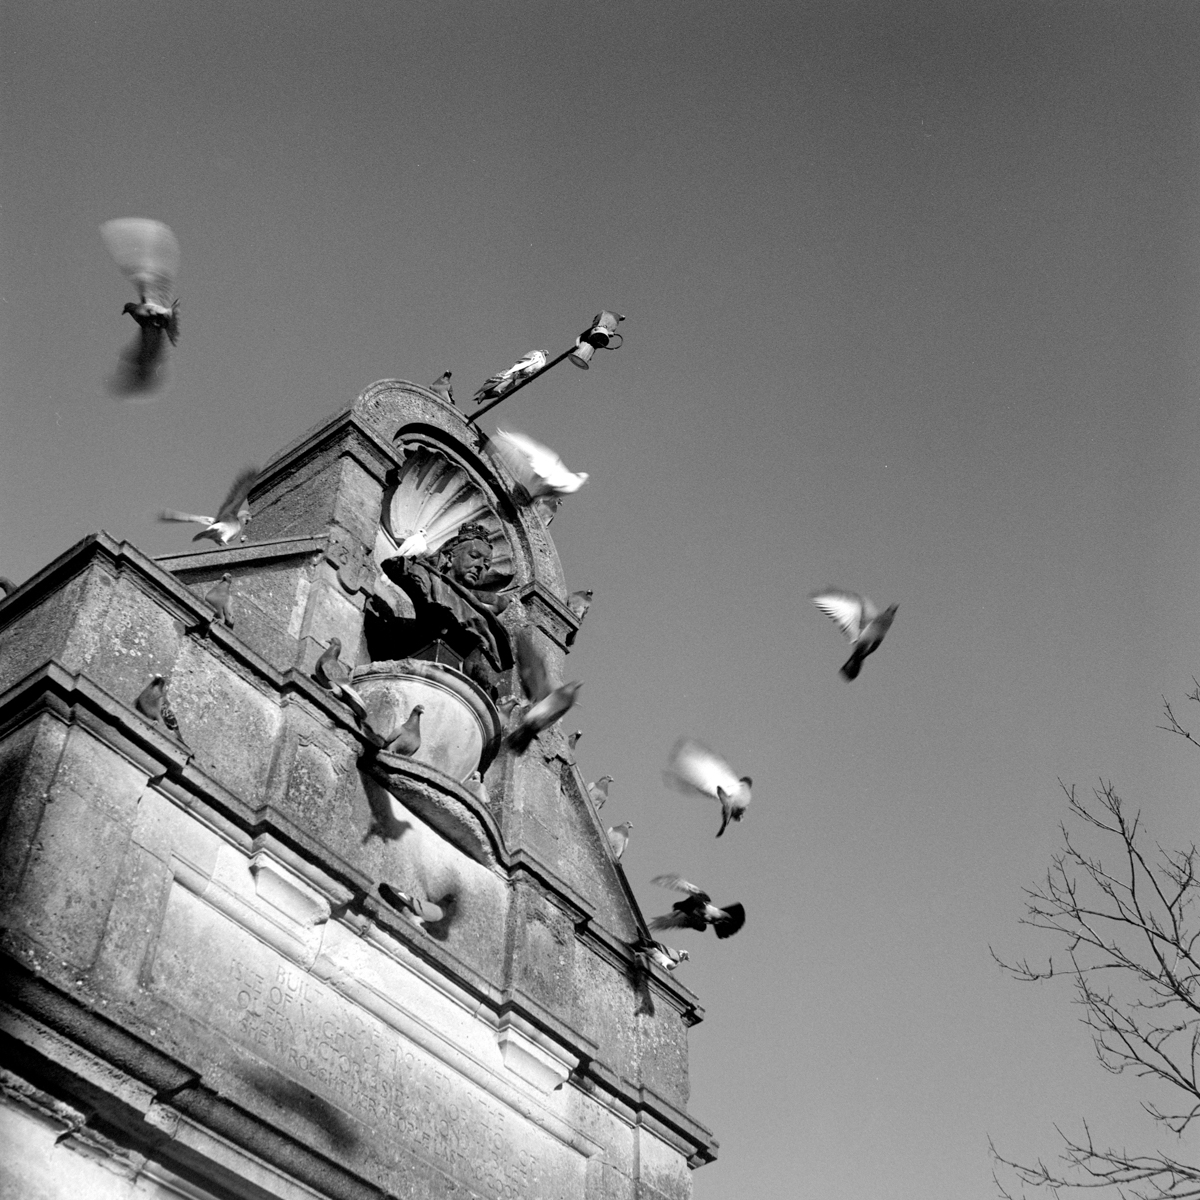
Continuing with that same roll, where I was consciously seeking out low key opportunities, we have this shot of pigeons in a shaded area, with sunlight dramatically illuminating the church in the background. Note that this isn’t simply underexposed—the highlights clearly demonstrate that. Instead, the camera’s metering has accurately captured the bright background, while the under-development has deepened the shadows, creating a striking contrast.
This wouldn’t have worked with crows, which are uniformly black. The pigeons, however, possess subtle tonality that allows them to stand out against the darker surroundings. You could argue it’s more of a deep contrast image than a pure low key shot, but it certainly leans in that direction. And it’s undeniably effective, resulting in a powerful black and white print.
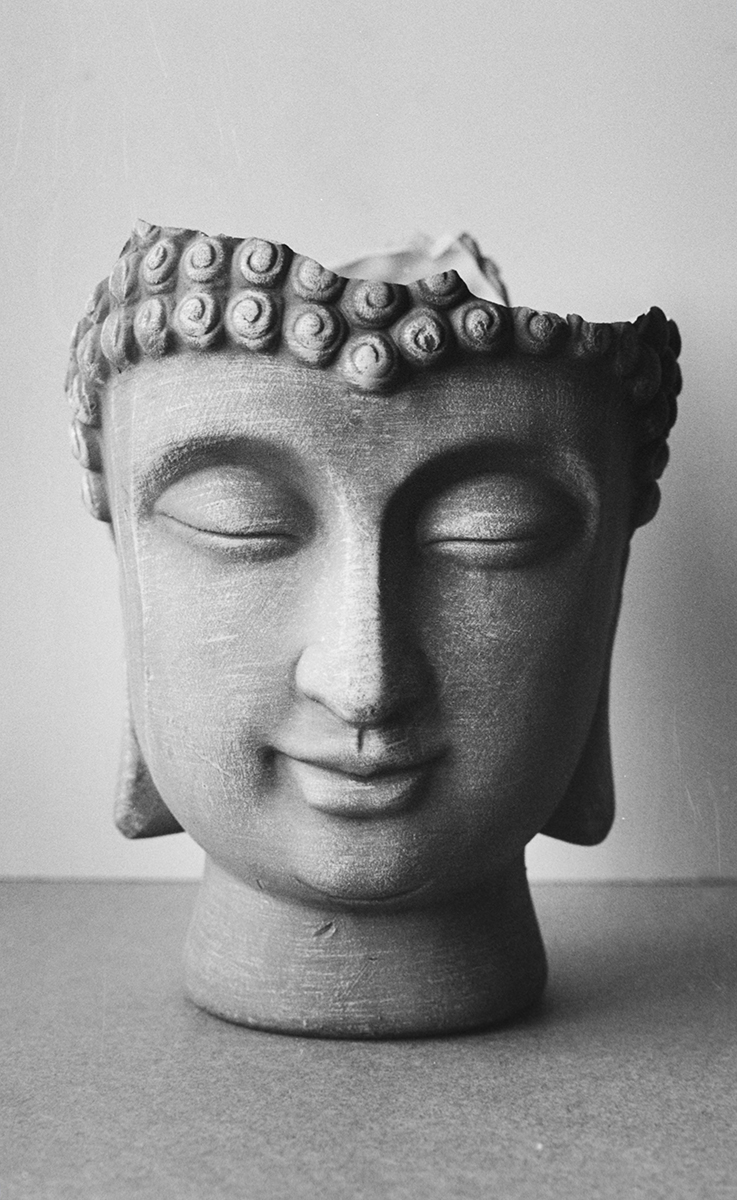
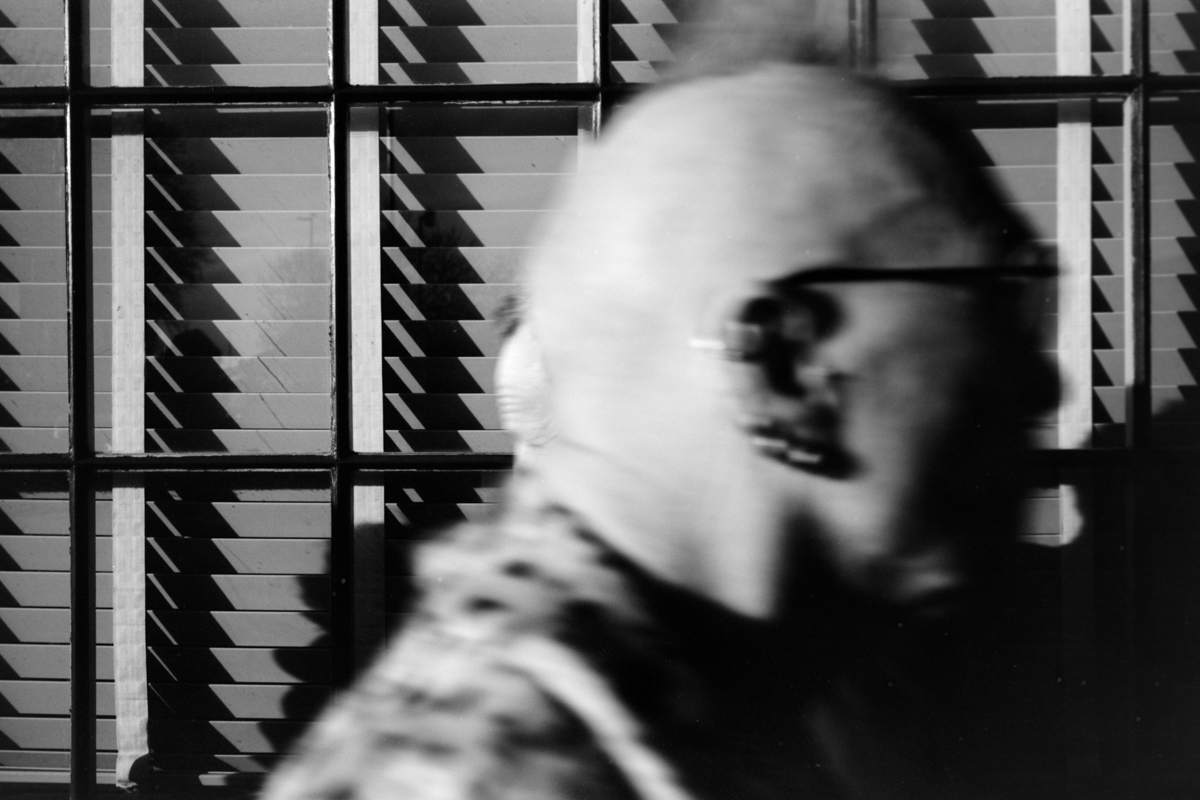
And now we are back to Low Key photography again. A character portrait. We have a black background, well, actually it’s grey but no light has hit it! And we have a strong light on the mans face. His face is well lit and blends off into the background making the whole scene low key. An example of how metering for strong highlights can yield other tones much darker.
In essence, low-key photography is about using a predominantly dark palette to create a mood of mystery, drama, or introspection

And with this window light portrait. Now we can see good contrast. It’s not low key. But it could be if the background was black! The subject would have blended into the background. But it’s not high contrast. If it was then the mans face would be brighter and the white frame in the background would be more white. I’d say this is well lit but a mid to medium contrast.

Compare this to the photograph below we can now see a high contrast.
And another example of contrast. I wouldn’t say this is hard contrast. We have deep blacks but the whites are not bright enough for strong separation. Or at least not enough white in the scene.
Black & White not Grey
Having been in the darkroom for many years I have got to know, in my mind, what makes a good Black & White print, especially when it is framed on a wall. I found the most impressionable prints of mine are those that are deep Black & White catching some tonality within. And it comes from
- The scene
- The lighting
- The film and Development
- Metering
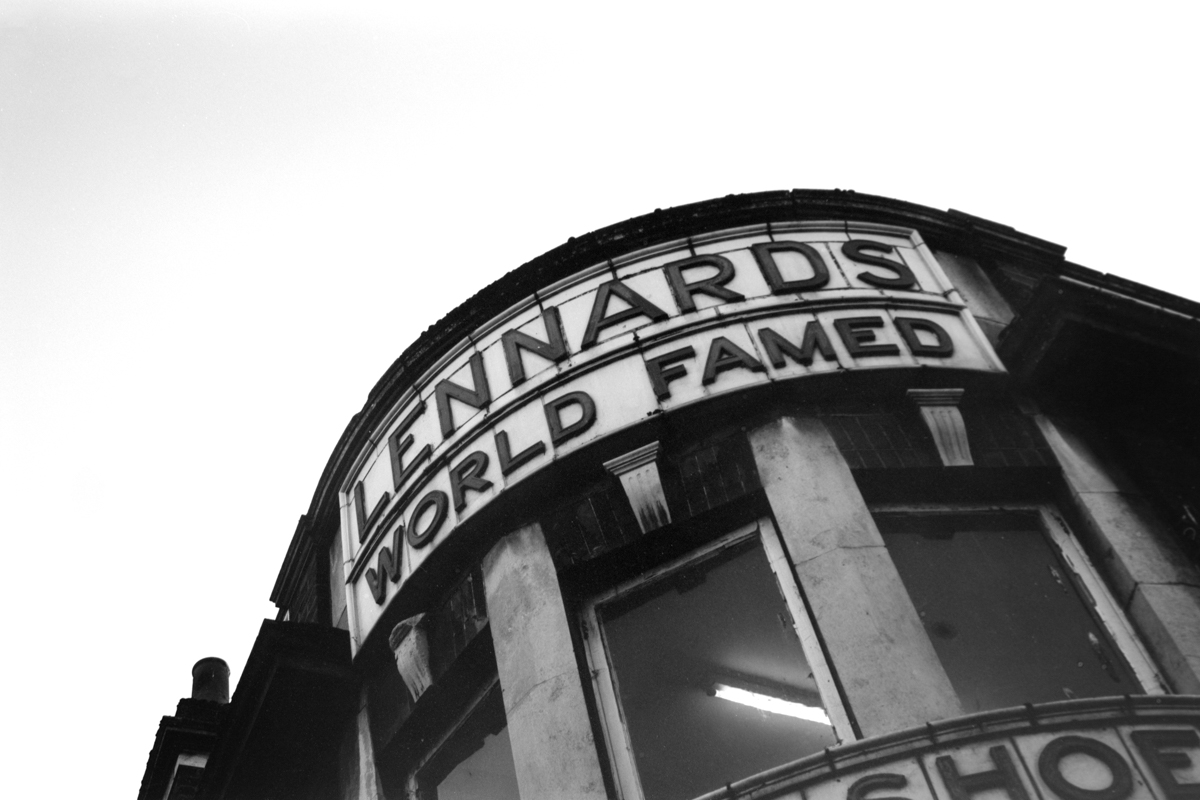
When all of these elements come together it works perfectly for my style. Such as this photograph. I saw the scene and knew it would be a perfect moment for Black & White. It’s all there.
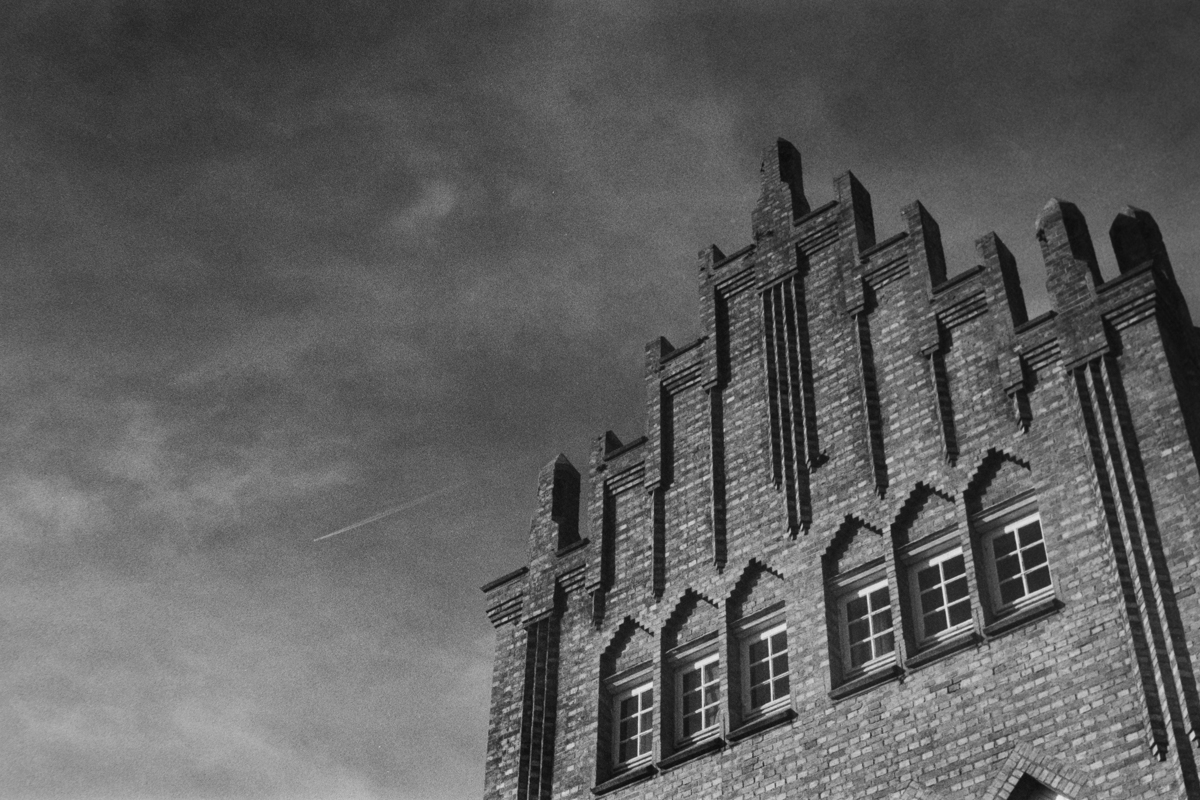
And another below. The sun bouncing off a textured white building. As long as I meter right for the highlights then the rest of the tonality follows. It’s all deep black and bright whites with a bit of shadow tonality thrown in. It makes for strong contrast.
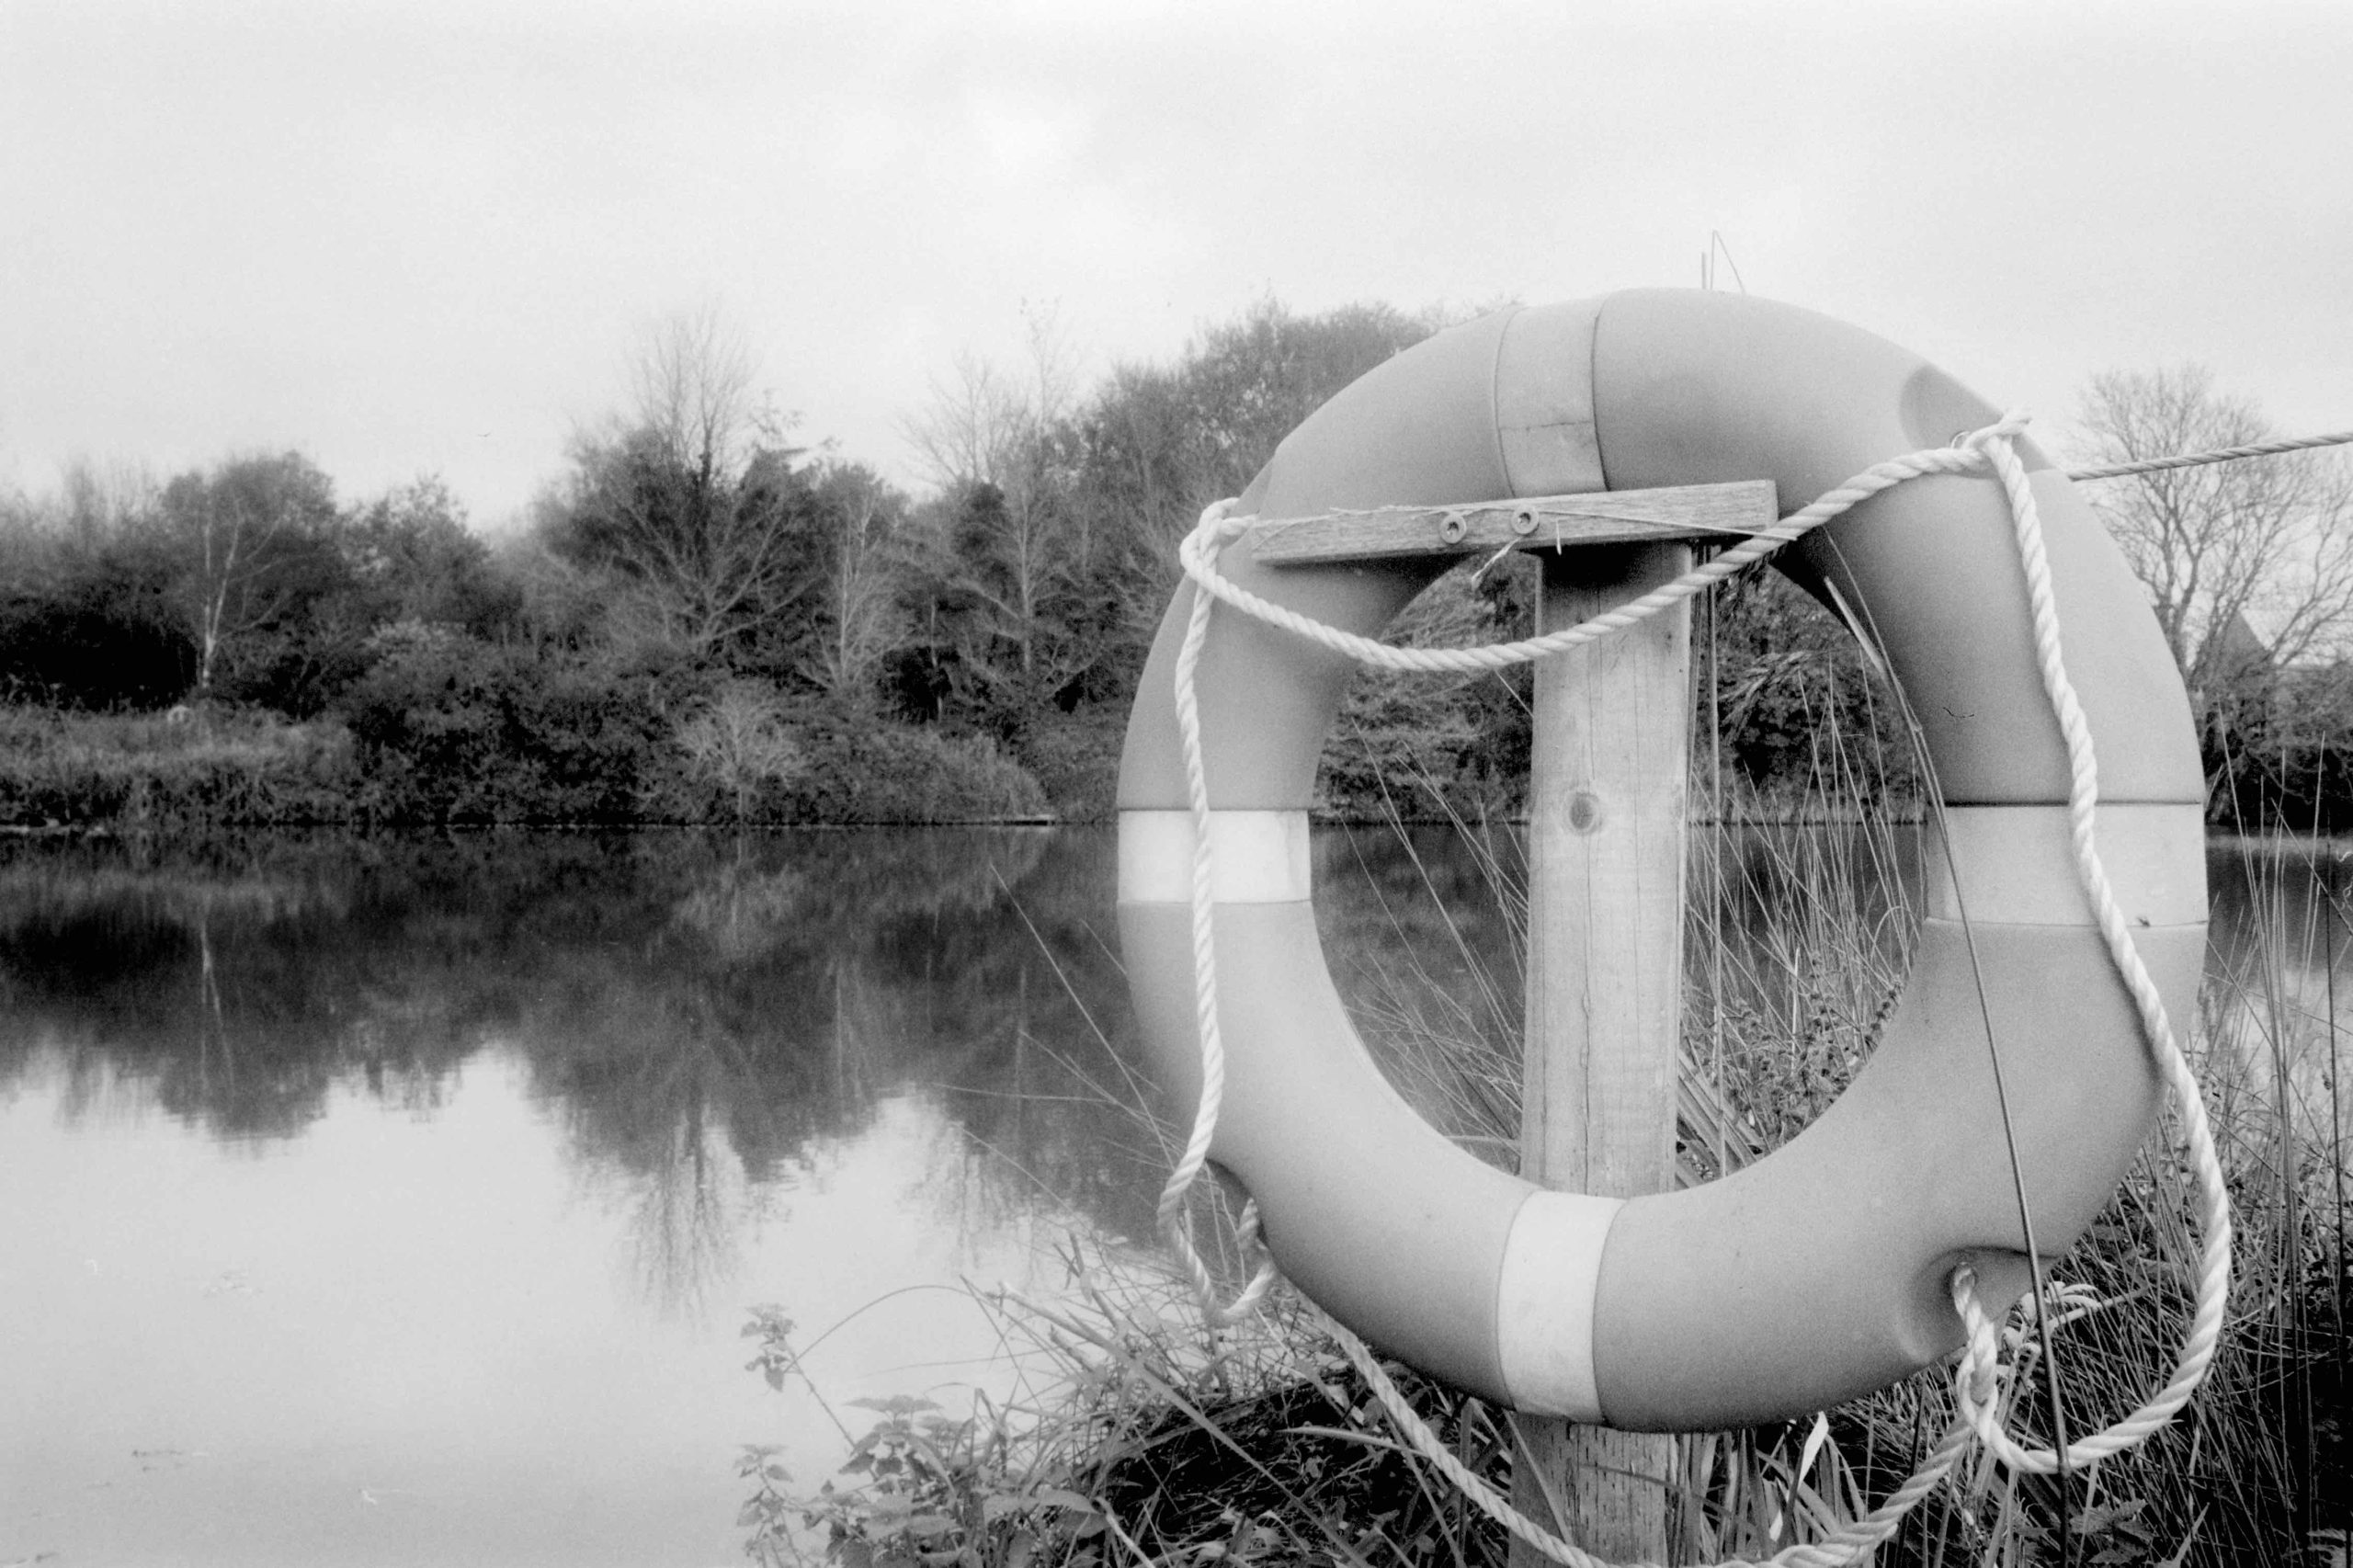
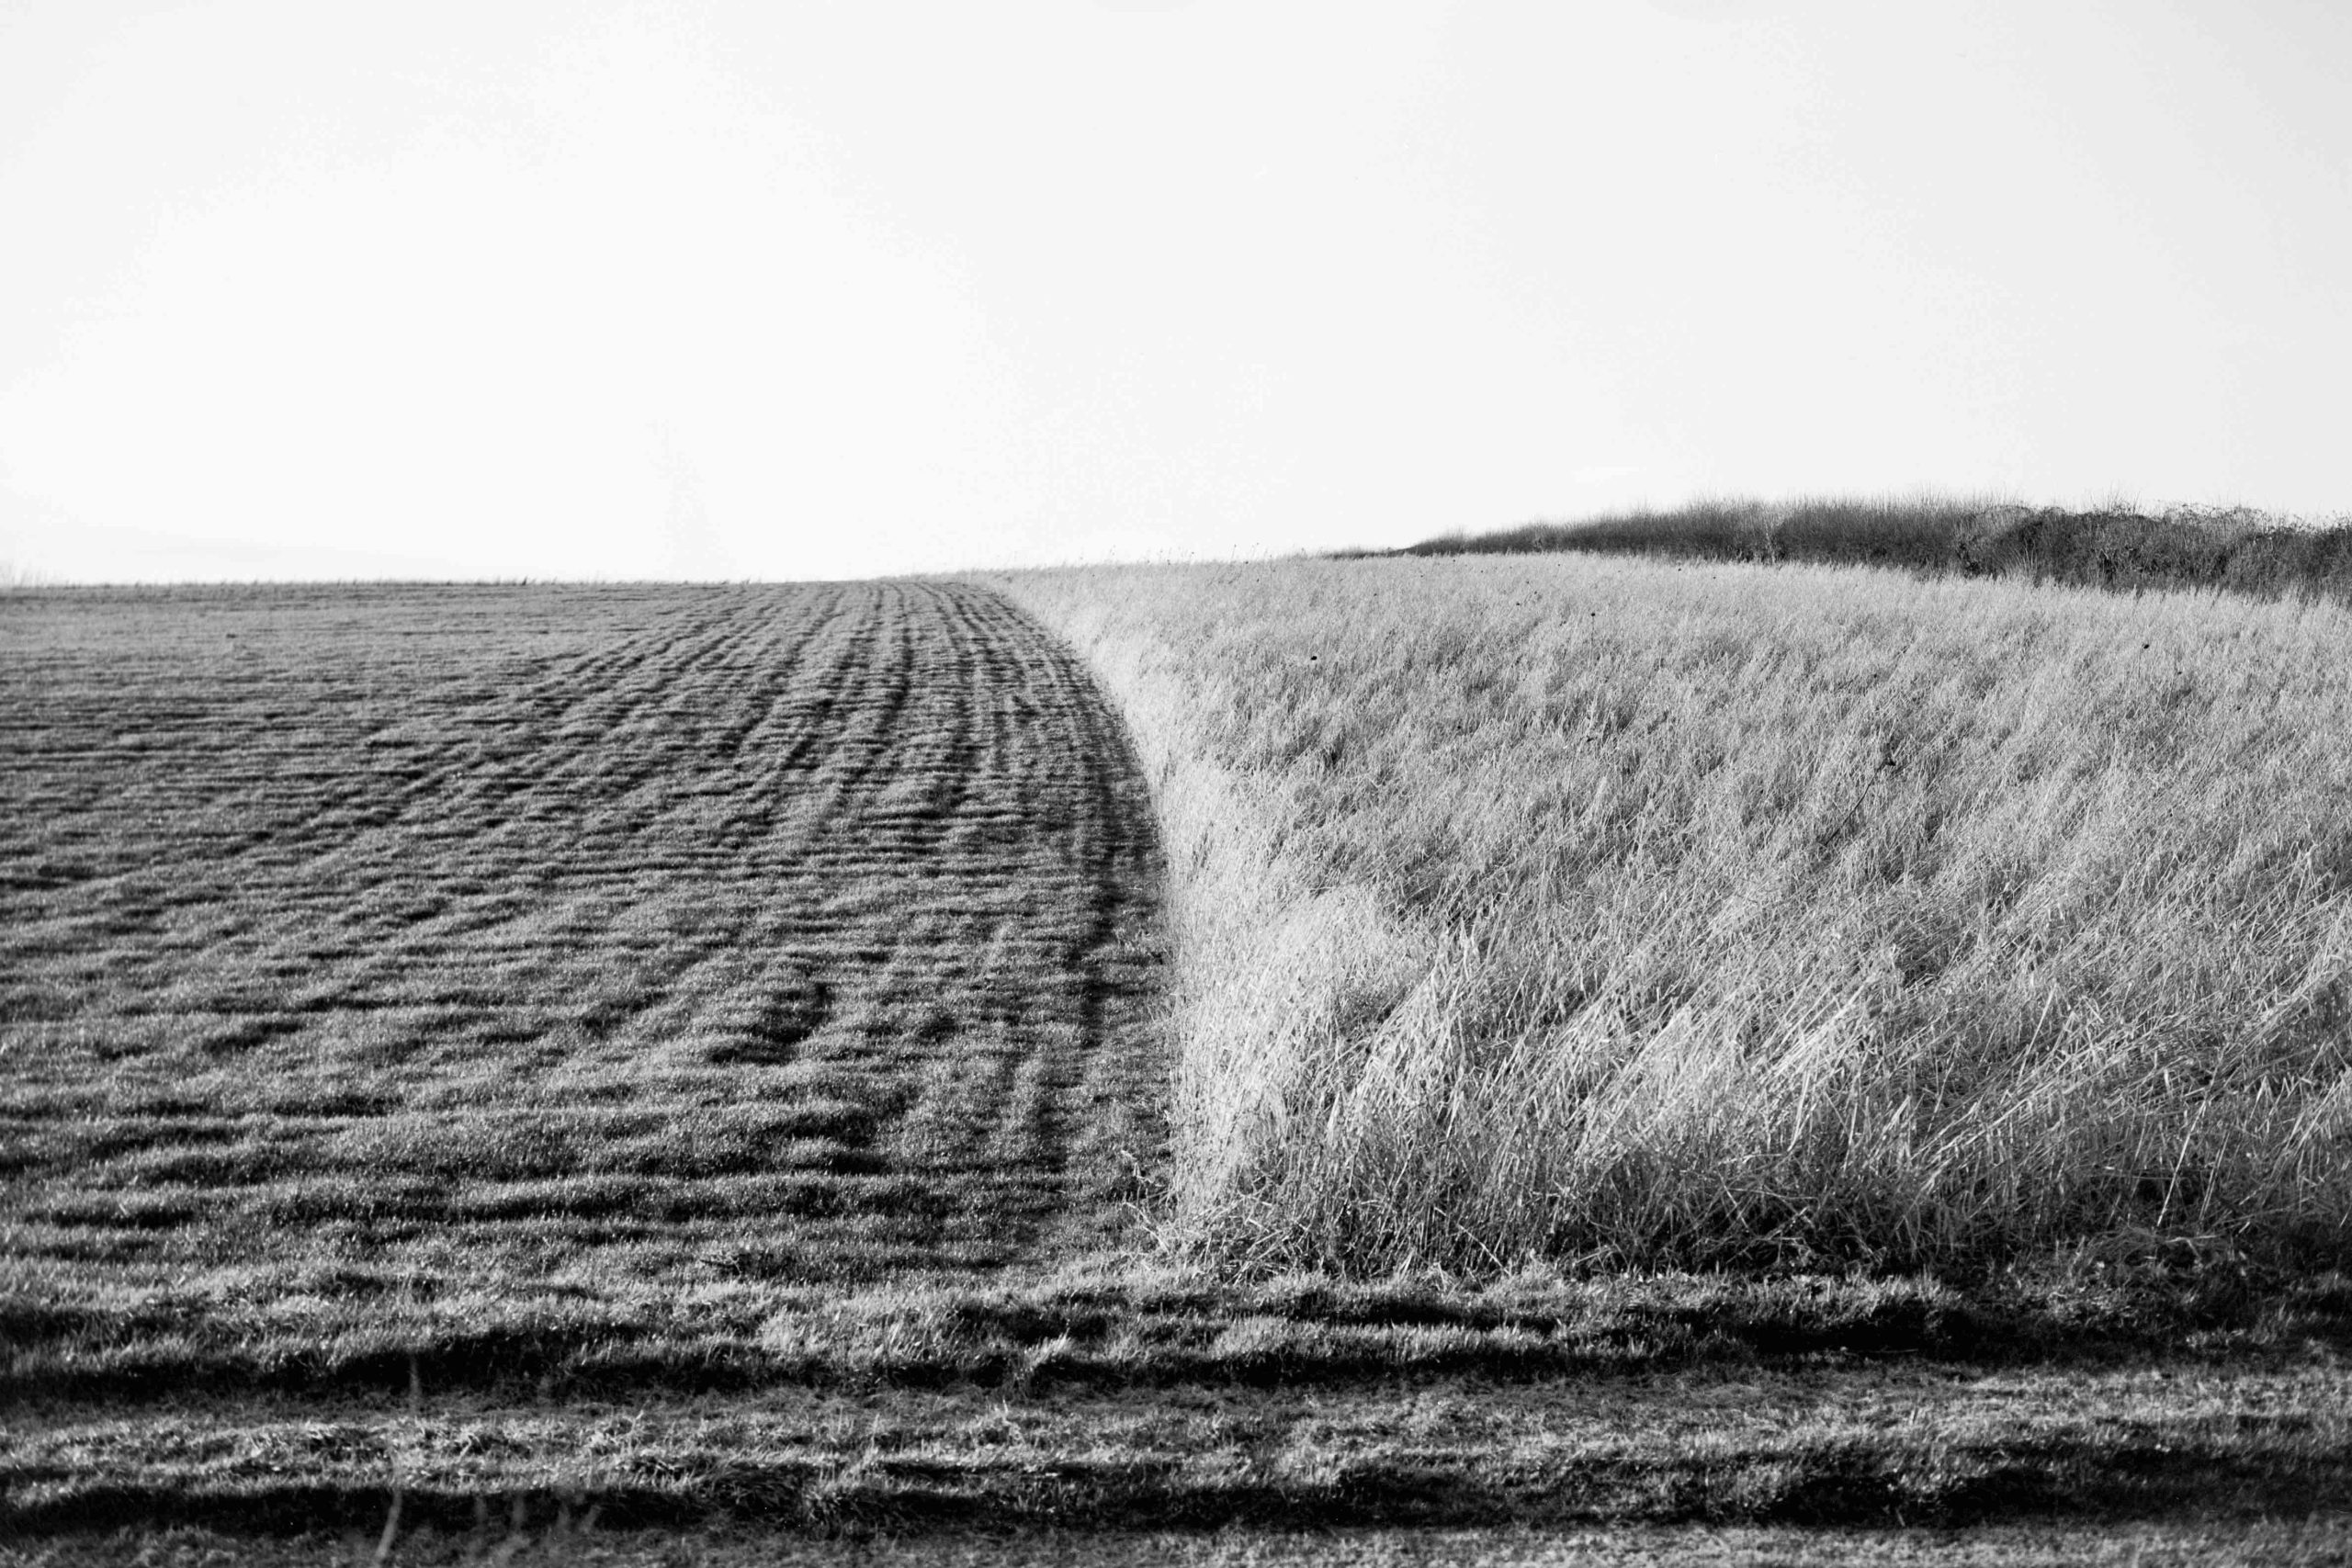
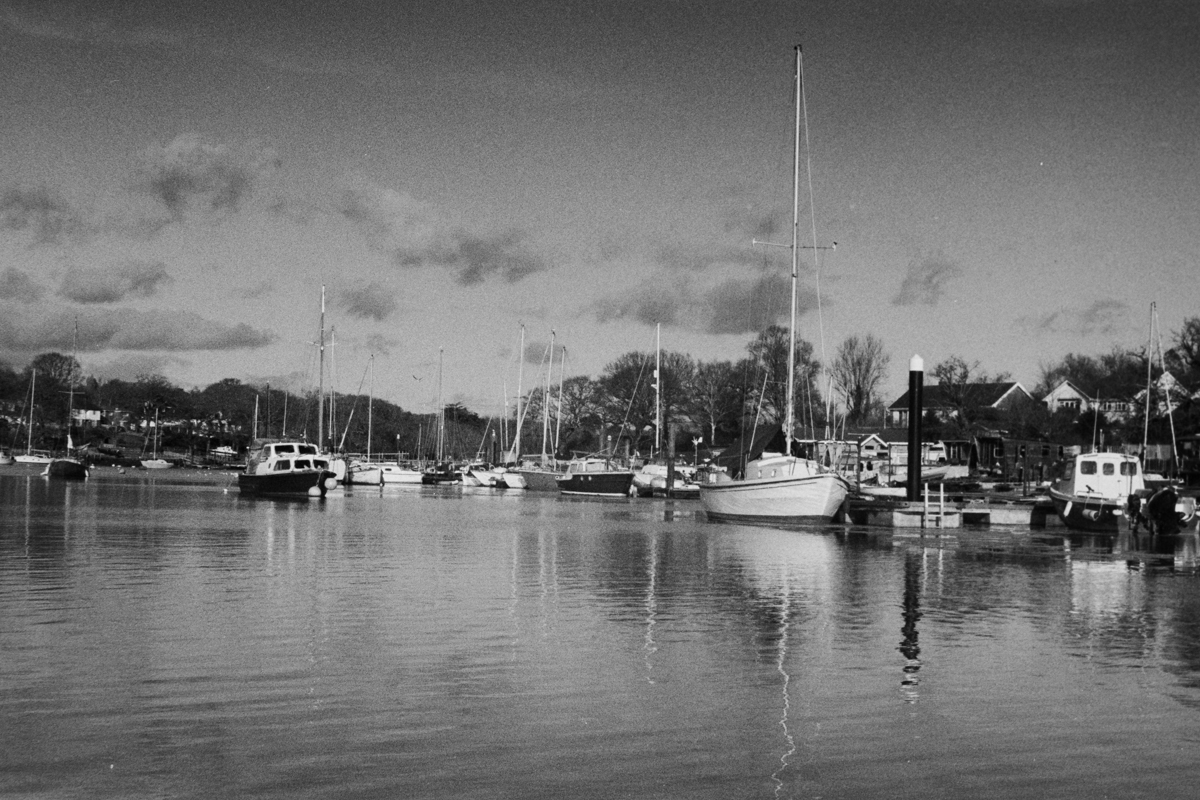
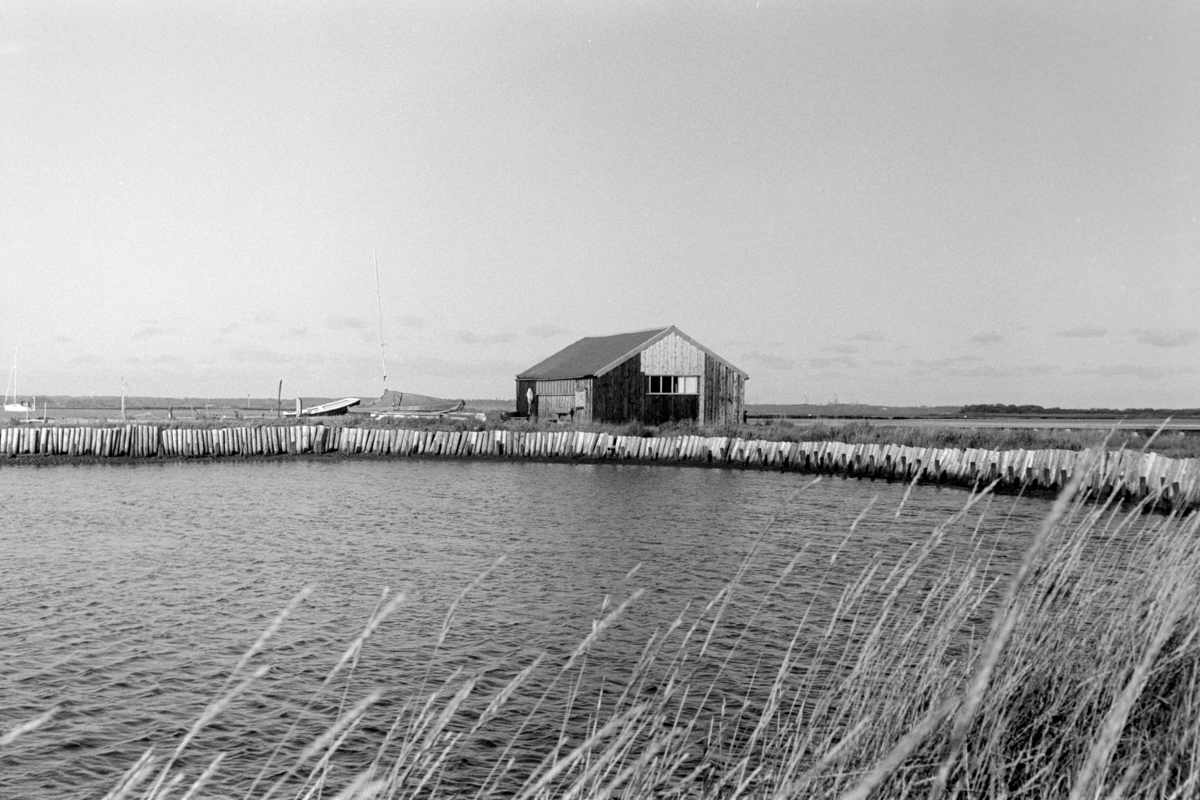
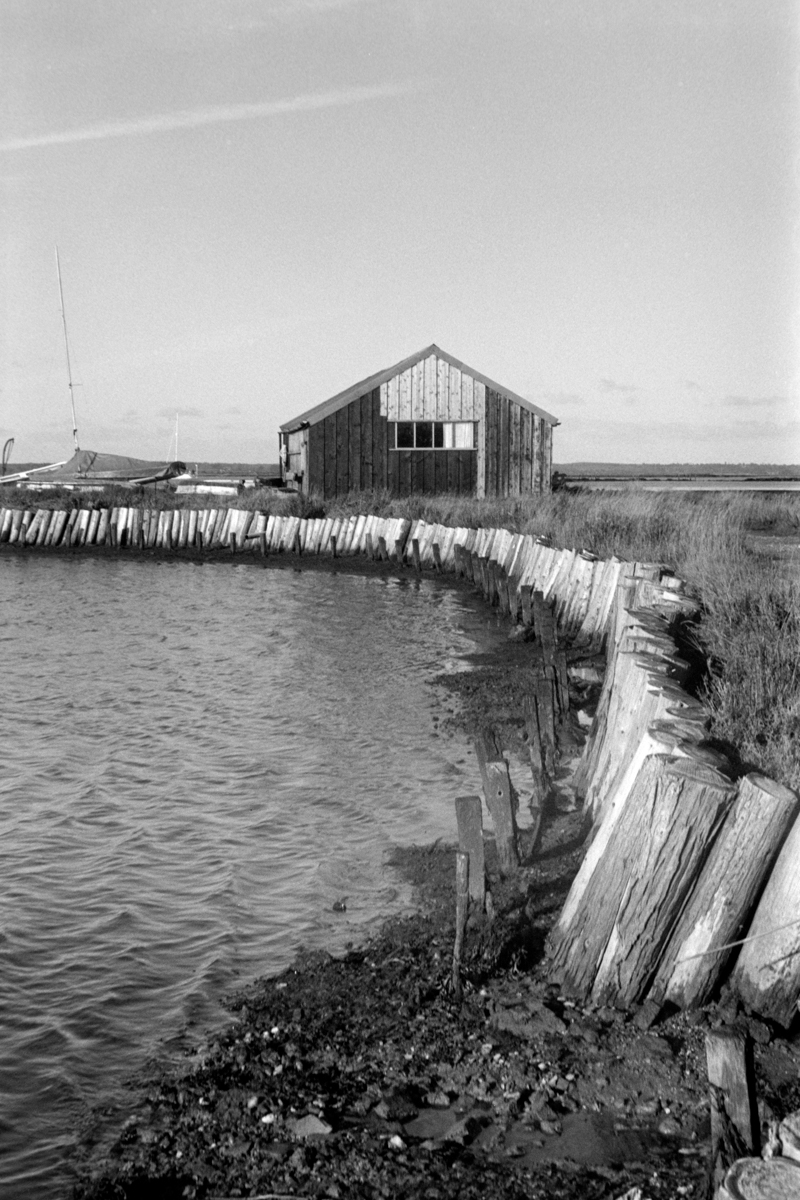
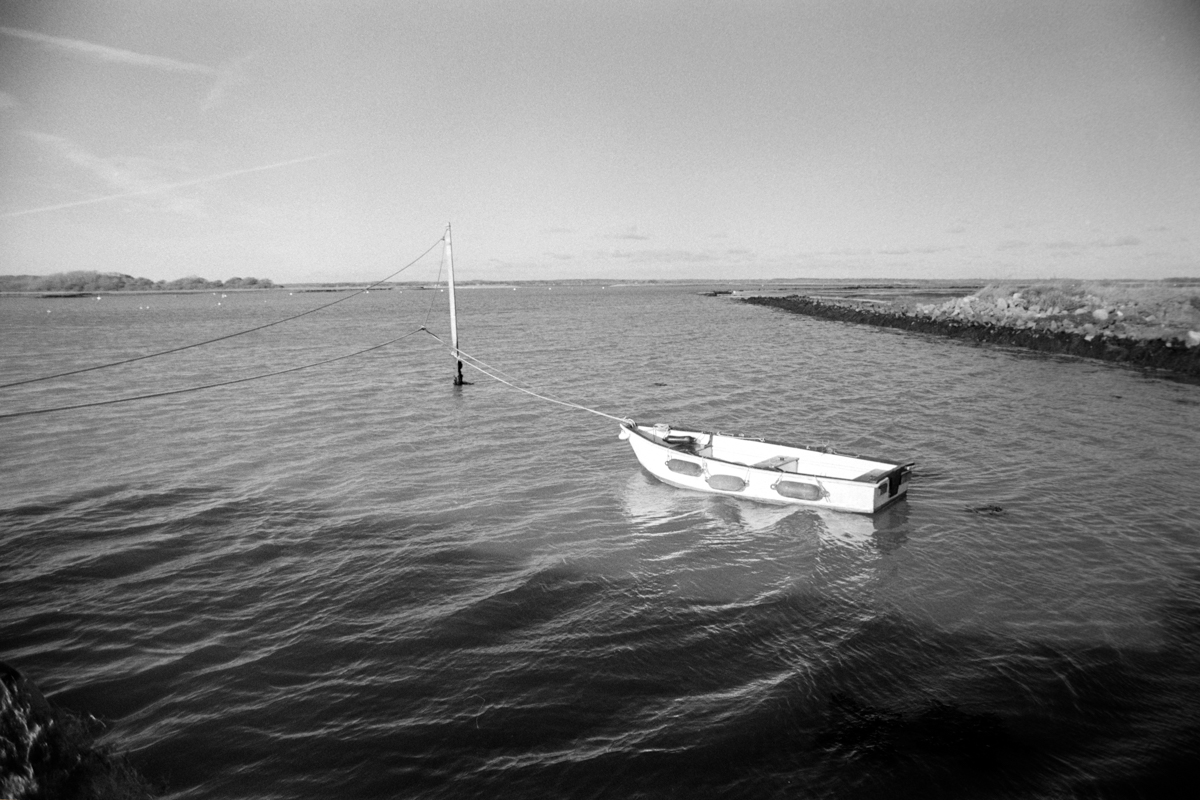
And then we come to the total opposite end of the contrast topic. This scene here of a lake and another of a field. They wouldn’t have worked so well with hard contrast. Sometimes not everything suits. It was a light overcast day which suited this scene well. Shooting the film at box speed and developing normally. There is detail in most areas and it works. A harder contrast would have made the shadows far too dark for this scene. And thats what I said at the start of this post. Not all scenes suit contrast. And it’s up to us as photographers to decide how to make a particular scene look. But it’s wonderful we have this creative choice for our own work.
And as it is going to be sunny this week I am planning to go shooting the streets looking for more high contrast scenes.
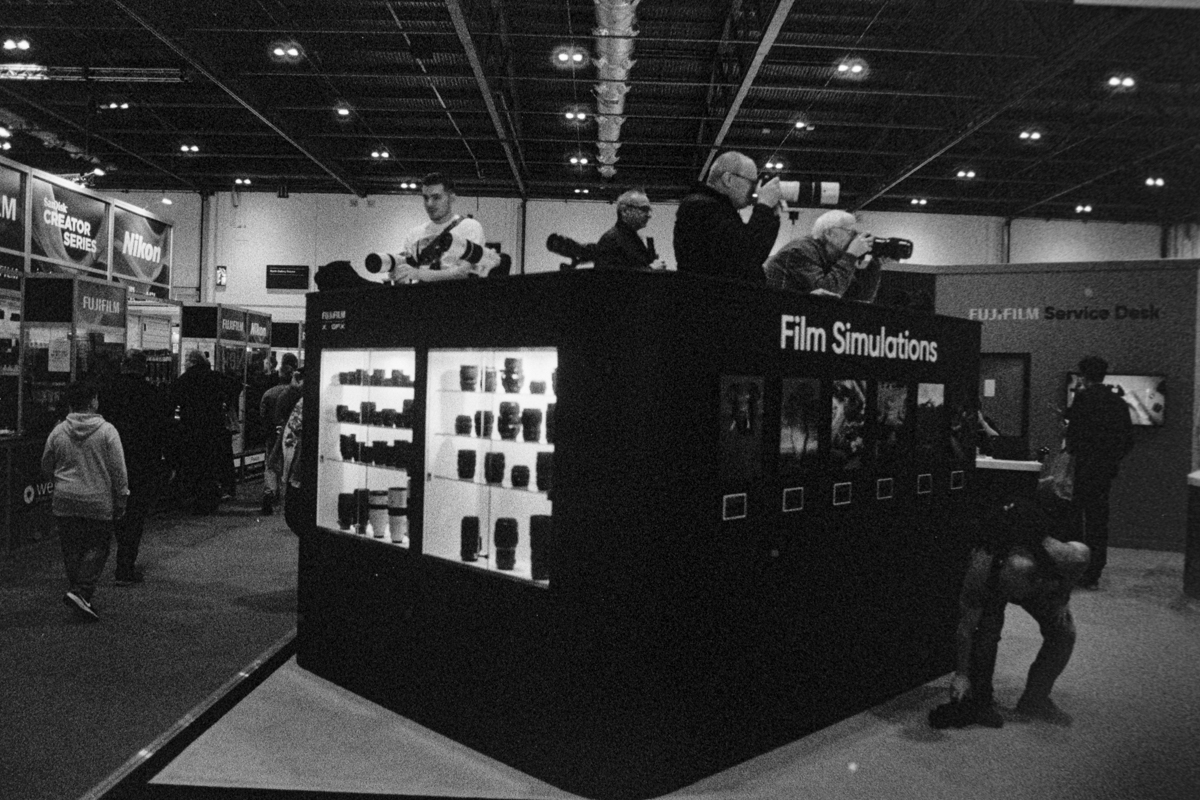
Delta 3200 at the London Photography & Video Show 2025
Each year in the UK there is the Photography & Video Show which is usually held at the NEC in Birmingham. And I’ve never attended. Mostly because of the distance from where I live. But this year, 2025, it was held in East London, so much closer for me! So. My first time at the show, what did I think?
As well as film photography I have interests in video production, especially with the YouTube Channel. So I wasn’t short of attention when it came to mooching around looking at all the new tech on the stands. There was everything there if you’re a digital shooter for photography or video, but when it came to film us film photographers had to contend with walking past the same stands over and over again pondering on weather to try that Harman Red film, or maybe Harman Phoenix. Or in my case Delta 3200! More on that soon.

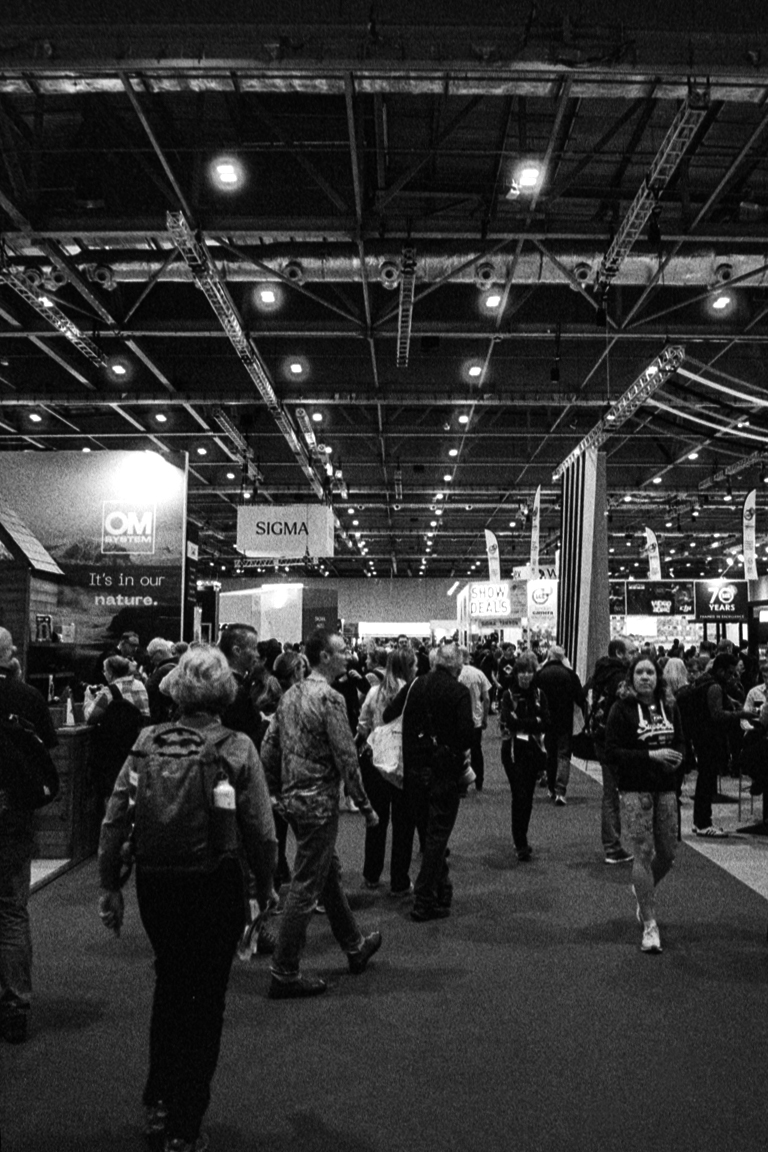
Some said it wasn’t as big as the previous shows at the NEC in Birmingham, but I thought it was HUGE! I certainly got my steps in.
I was only there for one day and I found myself walking around a lot looking at gear that was either way too much for my pocket or gear I didn’t really need or gear that I already have. Possibly the most intriguing part for me was looking at the used camera stands but unfortunately I couldn’t spend any money at the show as my pocket money had been swallowed up with car repairs that same week! But who needs to buy stuff. I was happy walking around taking pictures and chatting to other film shooters and meeting the companies on the stands.
What to do?
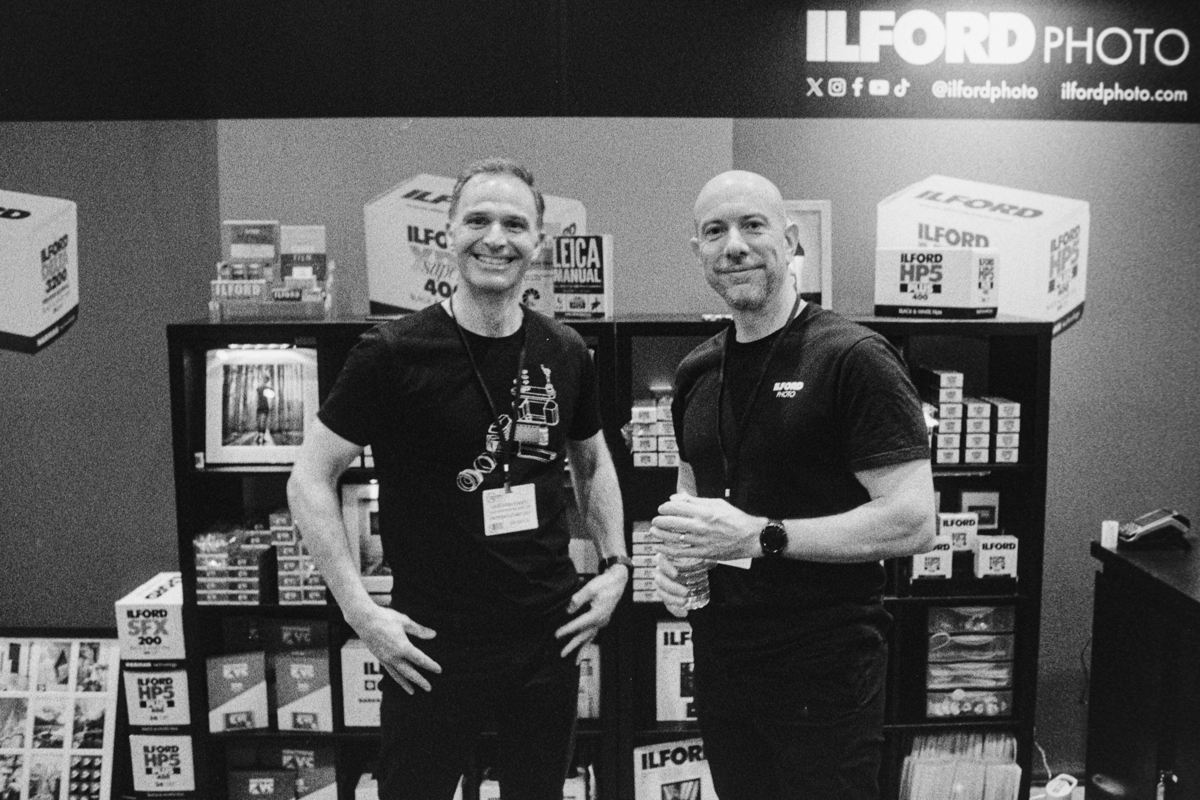
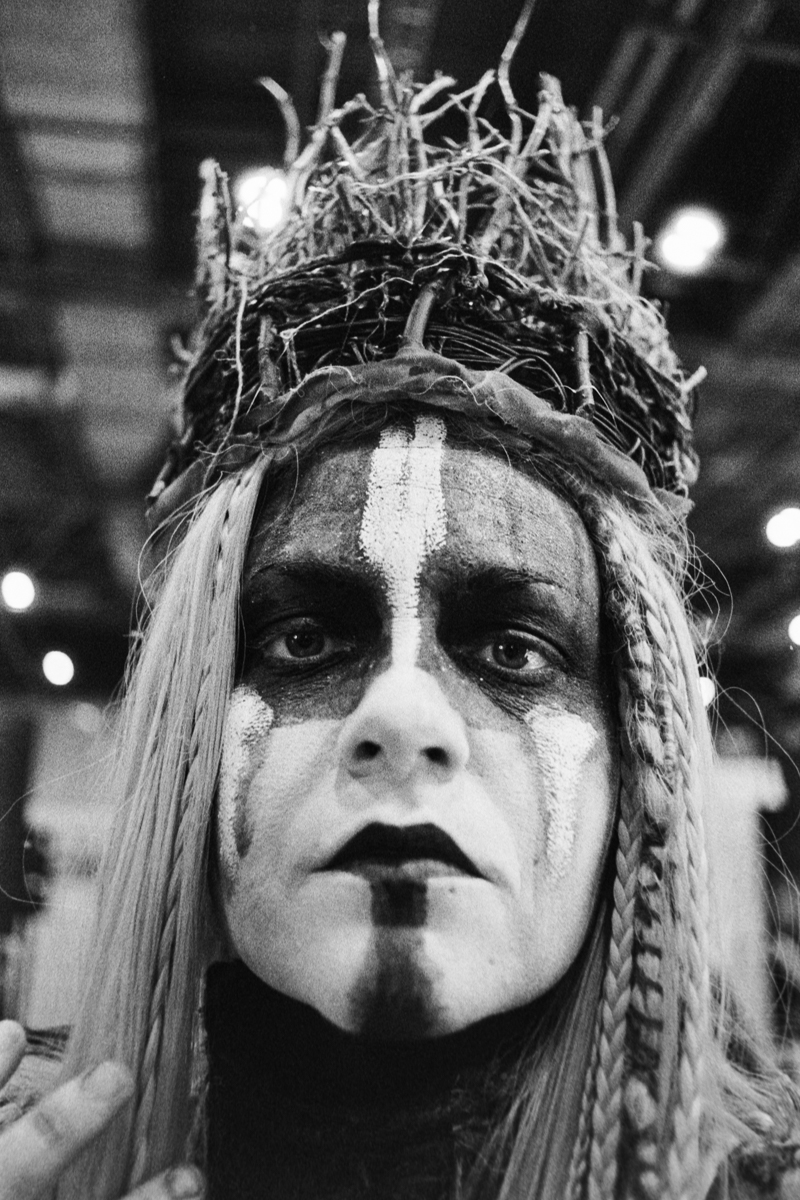
When I arrived (after traveling for 4 hours) with my Nikon F3 and a couple of rolls of 100 film I was shocked at how dimly lit the show was! I needed a faster film and so I headed straight to my friends on the Ilford stand and grabbed a couple of rolls of Ilford Delta 3200! I didn’t really have any questions about anything and neither did I wish to play with all the cameras and gear on display so I went off in search for photos. It was nice to see Ilford busy all day!
I would say the show was about 95% digital. I didn’t have a program but these were the stands I stopped at. Ilford, Zone Imaging, TT Artisan, Analogue Wonderland, ORWO, and various used camera stands. There were also some good talks on film.
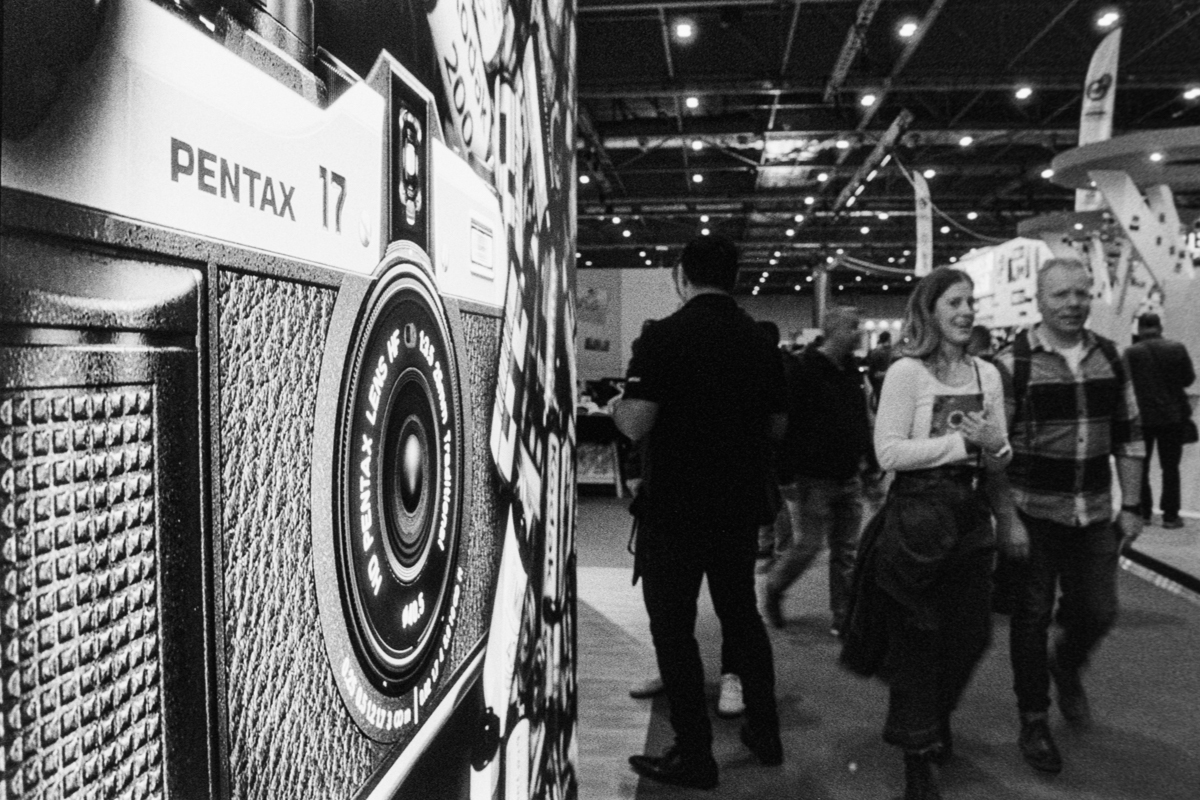
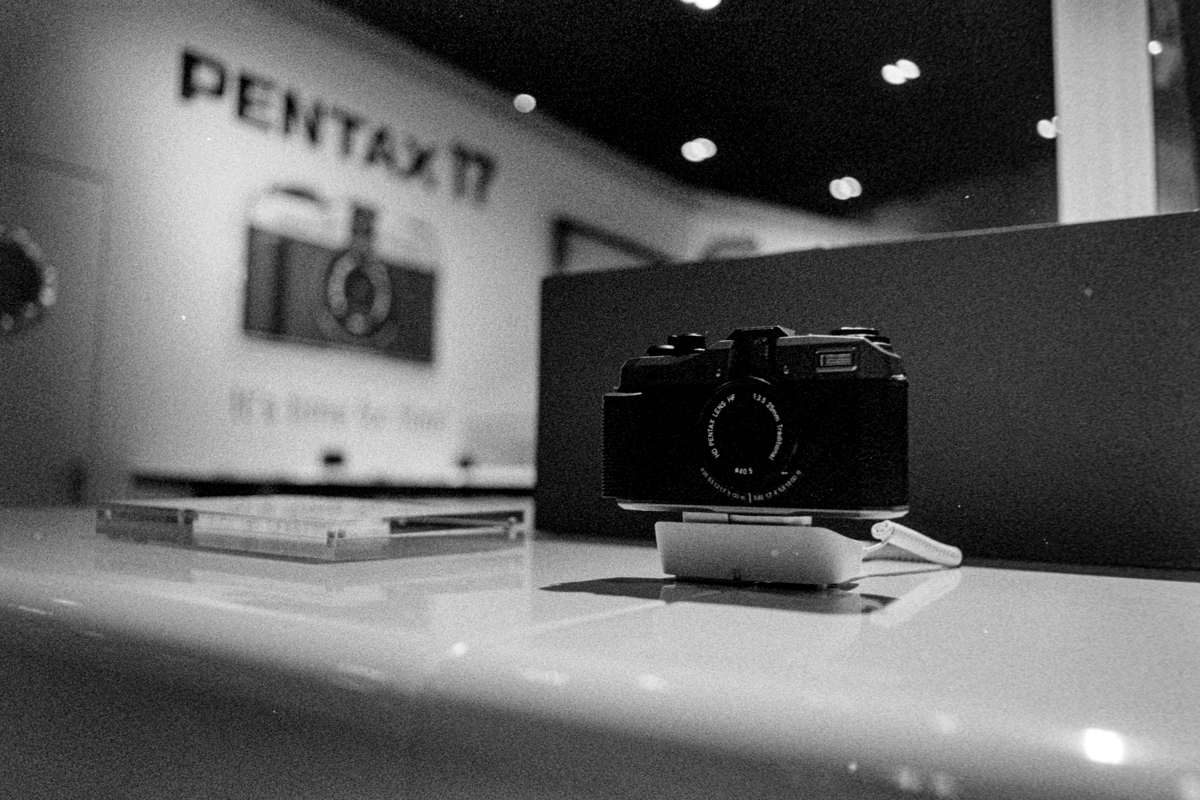
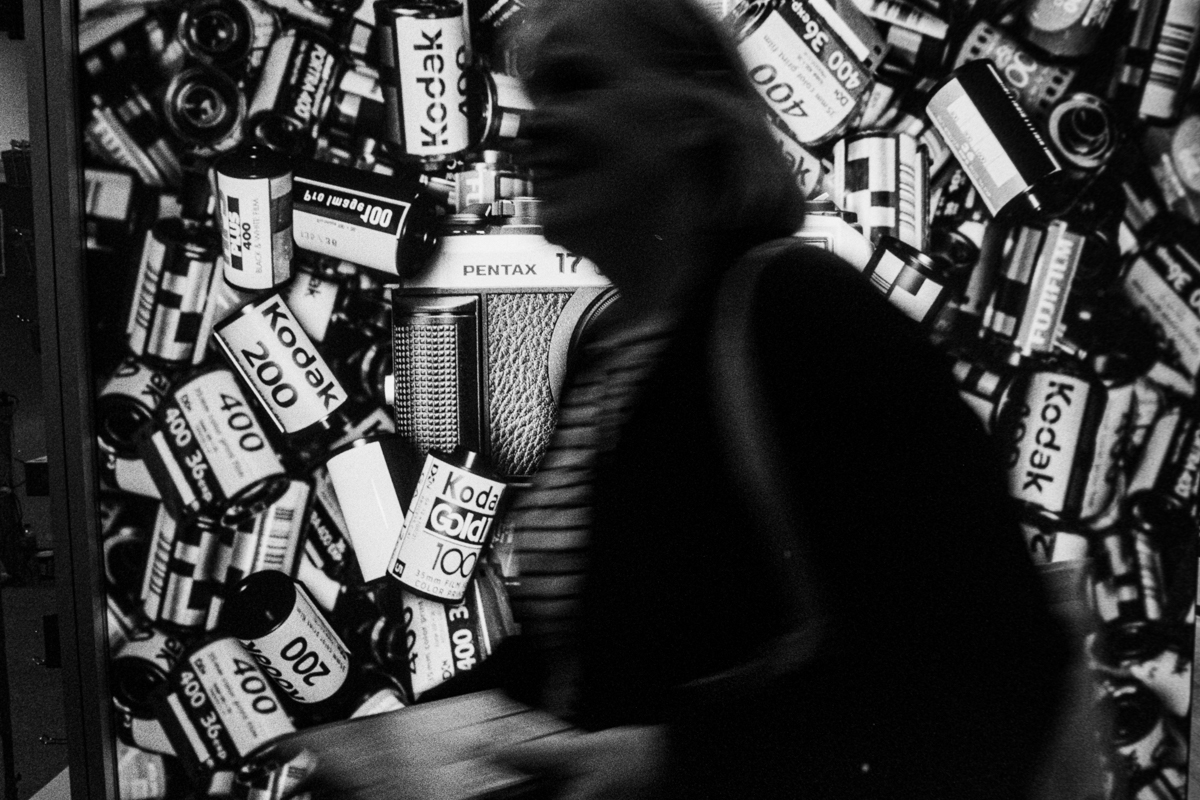
Pentax were also there celebrating their new camera, the Pentax 17, a camera I have and enjoy. The feedback I could hear was the price of the camera. Retailing at around £450 it isn’t cheap for a point and shoot. You can certainly get more for your money on the used market BUT this is a BRAND NEW Film camera. With all the design, manufacturing, staff, marketing etc how can they make it cheap? I believe they sold out in Japan!
Being Shy
So after an hour of meeting the film stands I headed off to take pictures. I’ve got about four hours before I have to head back home. To catch a ferry!
Even if you are a shy photographer there were people taking pictures all over the show. And let’s face it, no one is going to question why you took their photograph. You’re at a photography show! And because of the dimly lit arena I was looking for photographs which were brightly lit, or at least with lots of white.
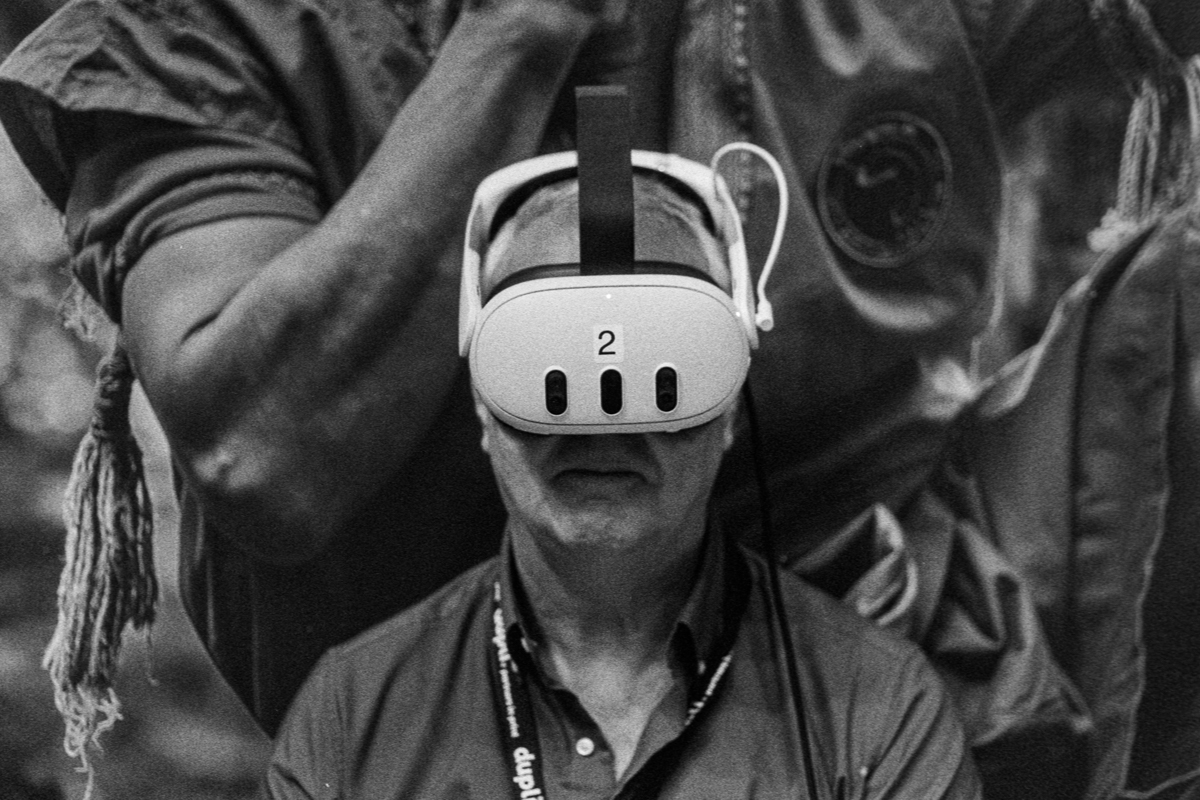
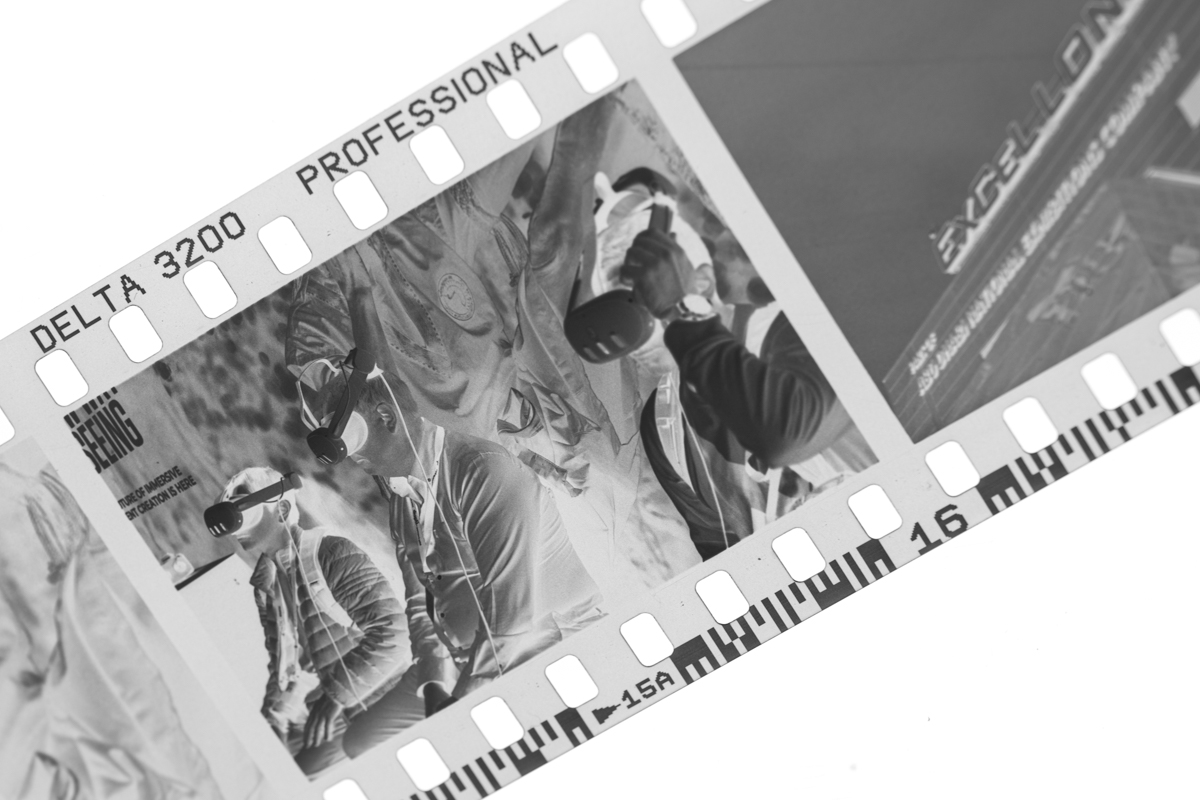
This VR stand did make me chuckle. I couldn’t resist getting a few photographs of these people trying out these headsets. They wouldn’t have had a clue.
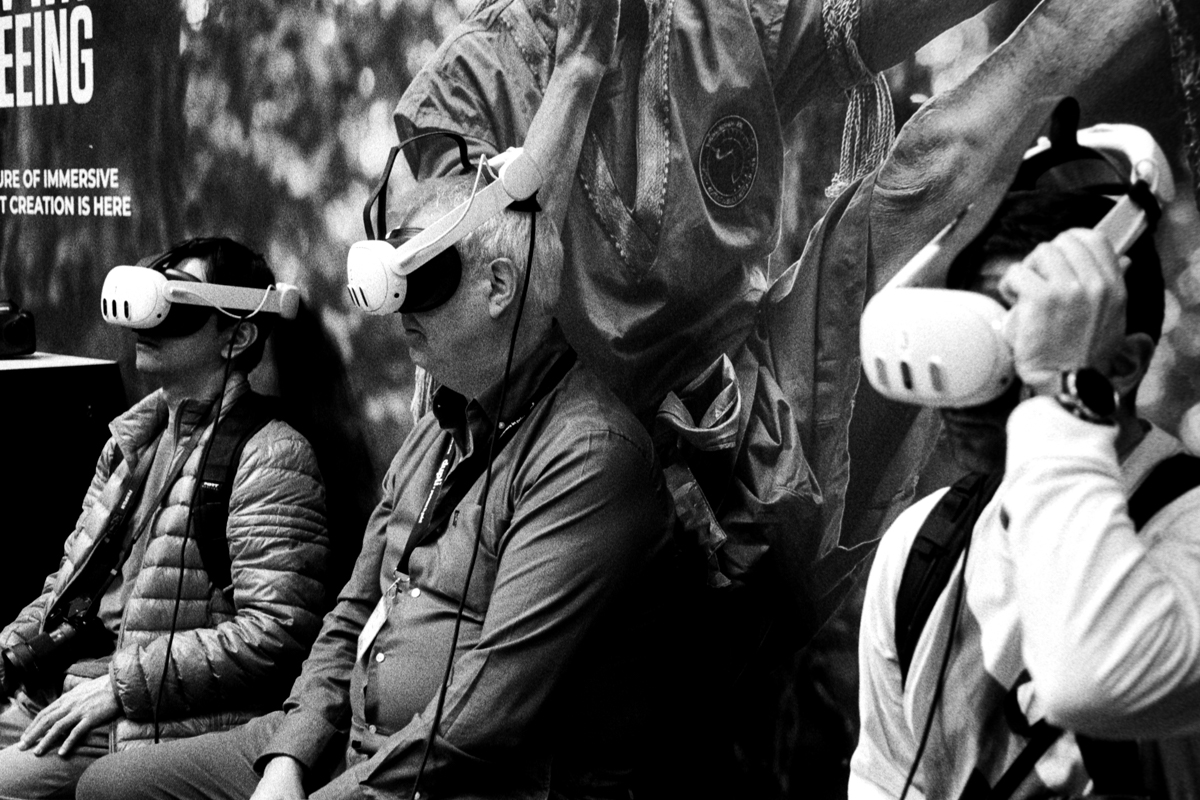

One day these maybe as popular as your smart phone. So getting these photographs I thought would be interesting to look back on in 50 years! And you can see why I needed the 3200 film. I was shooting mostly at f2.8 giving me a speed of around 1/125th.
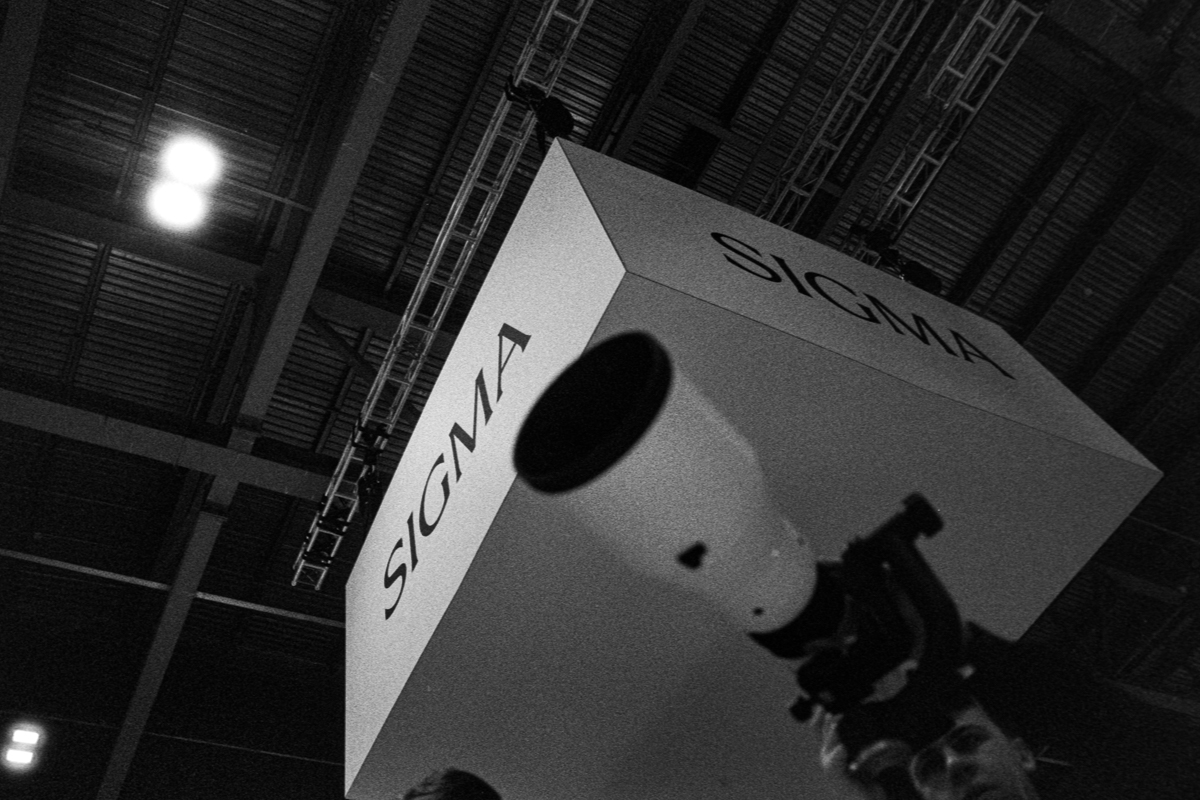
I was shooting Aperture Priority. So if you can imagine most of the stands were brightly lit with white walls my meter is going to reflect off this and adjust accordingly without a care for the overall scene. So I nudged the exposure compensation up by a stop. And even the camera itself on this stand wasn’t under a spotlight. I found that bizarre.
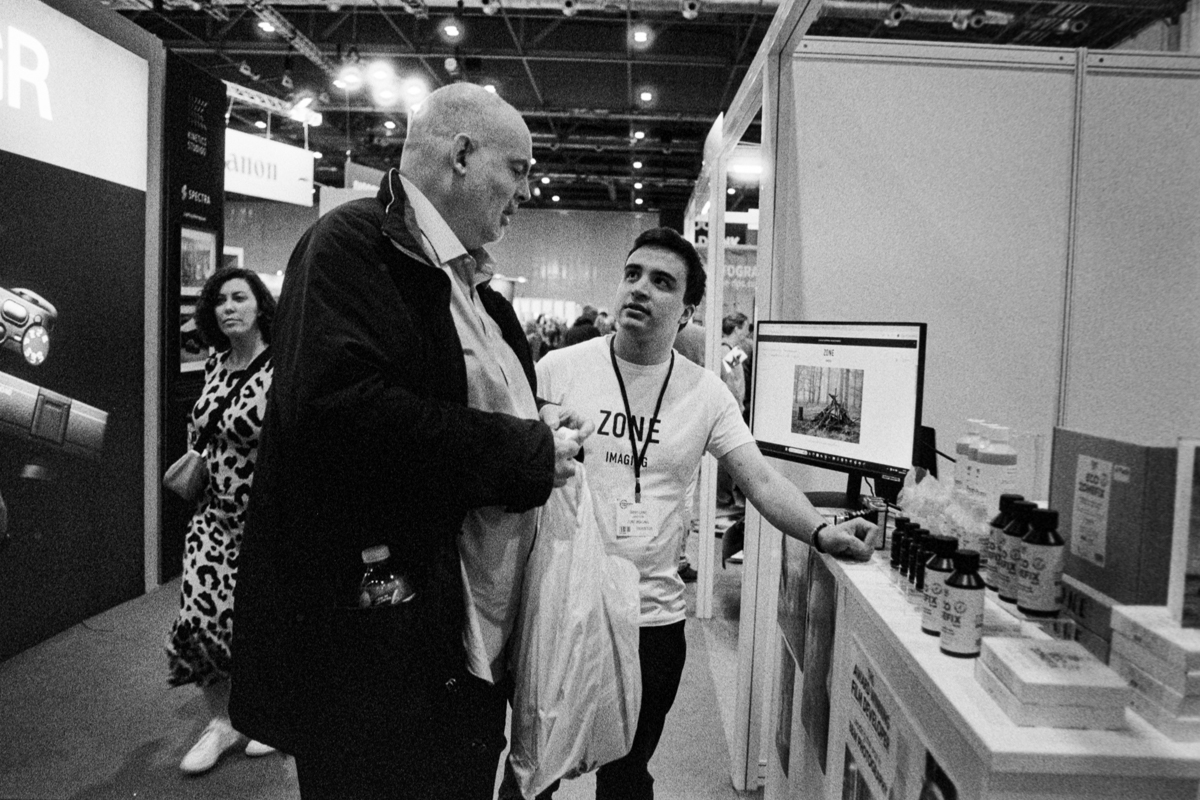
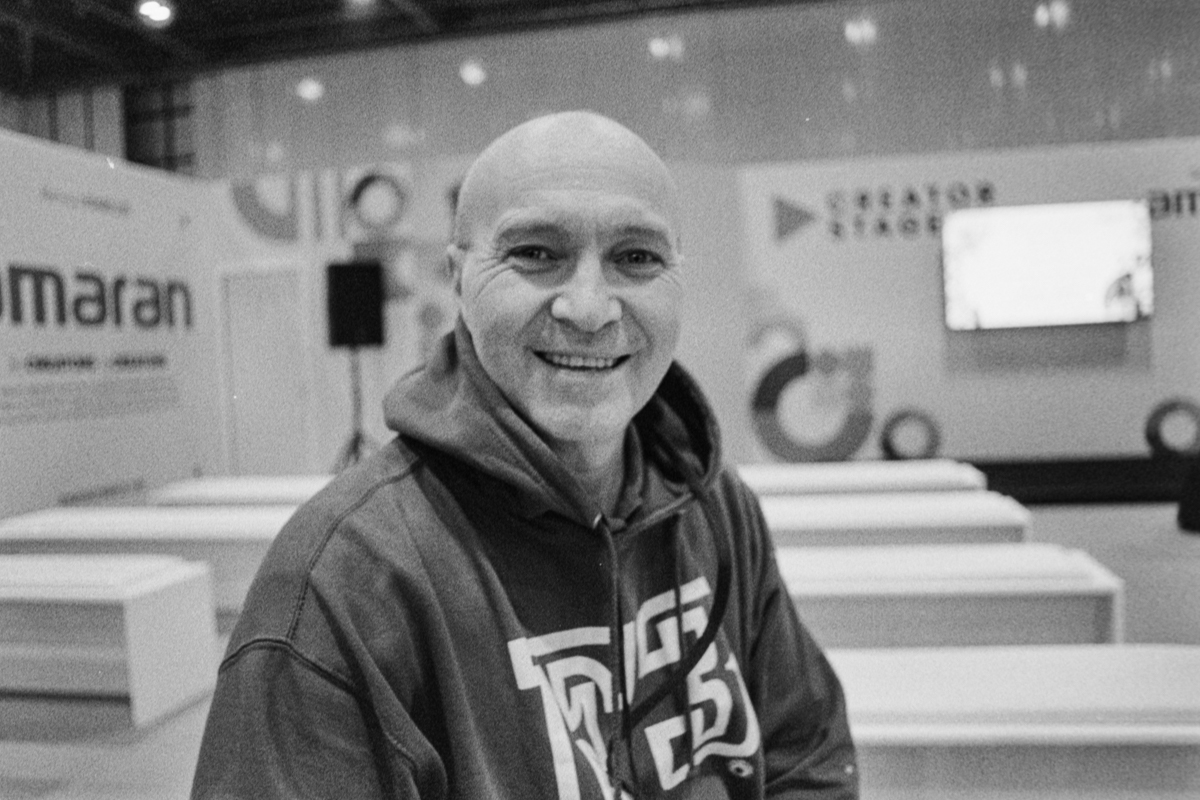
And this is James Lane. The man behind 510 PYRO. I have to admire this lad. He is persistent with his developer and eco fixer and attends the show each year. It was nice to see James busy on his stand. Every time I walked past he was engrossed in conversation about his developer. A top chap!
Ilford Delta 3200
So far the film has really saved my bacon! There was no way I would have been able to shoot with the film I had, even if I pushed it. I shot this Ilford Delta 3200 at 1600. So I told my camera I had a 1600 film inside and it metered for such. I did this because I wanted to hold the grain back! And in 510 PYRO they came out looking good. You could say with my +1 stop exposure compensation I was shooting it at 800! And I was happy with the negatives.
Getting Bored
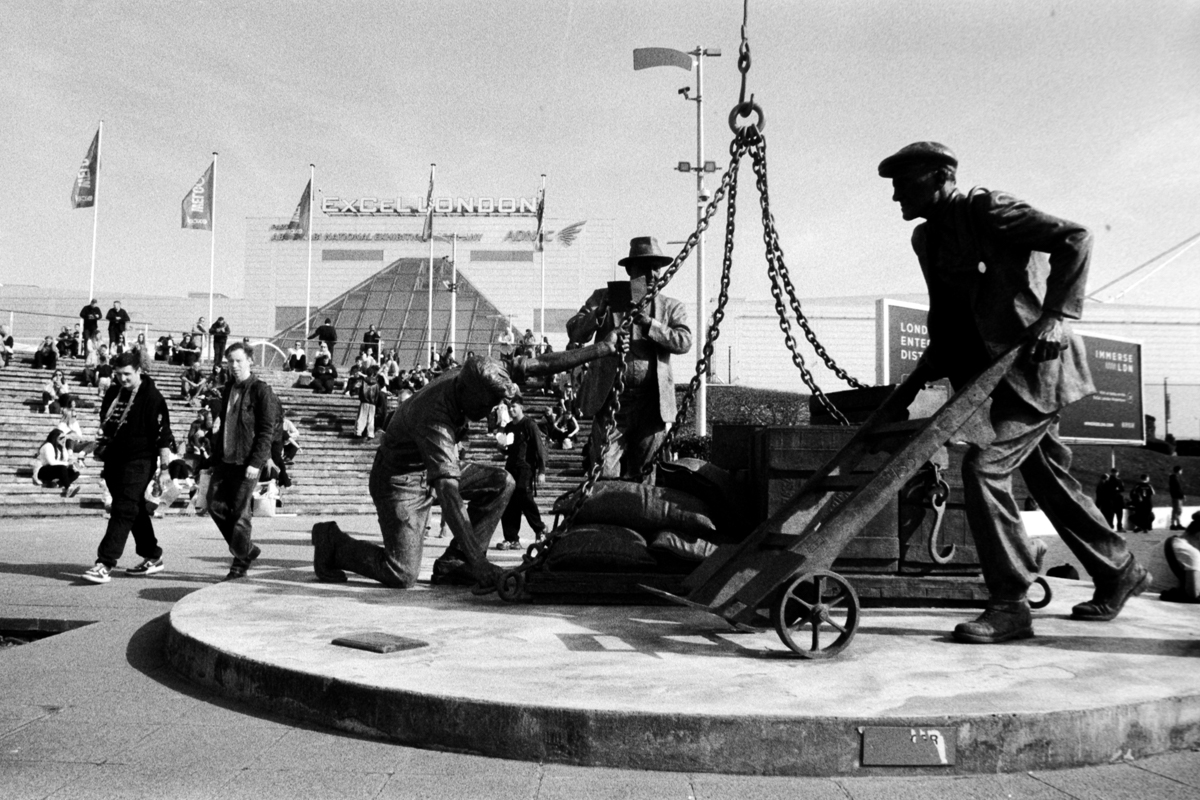
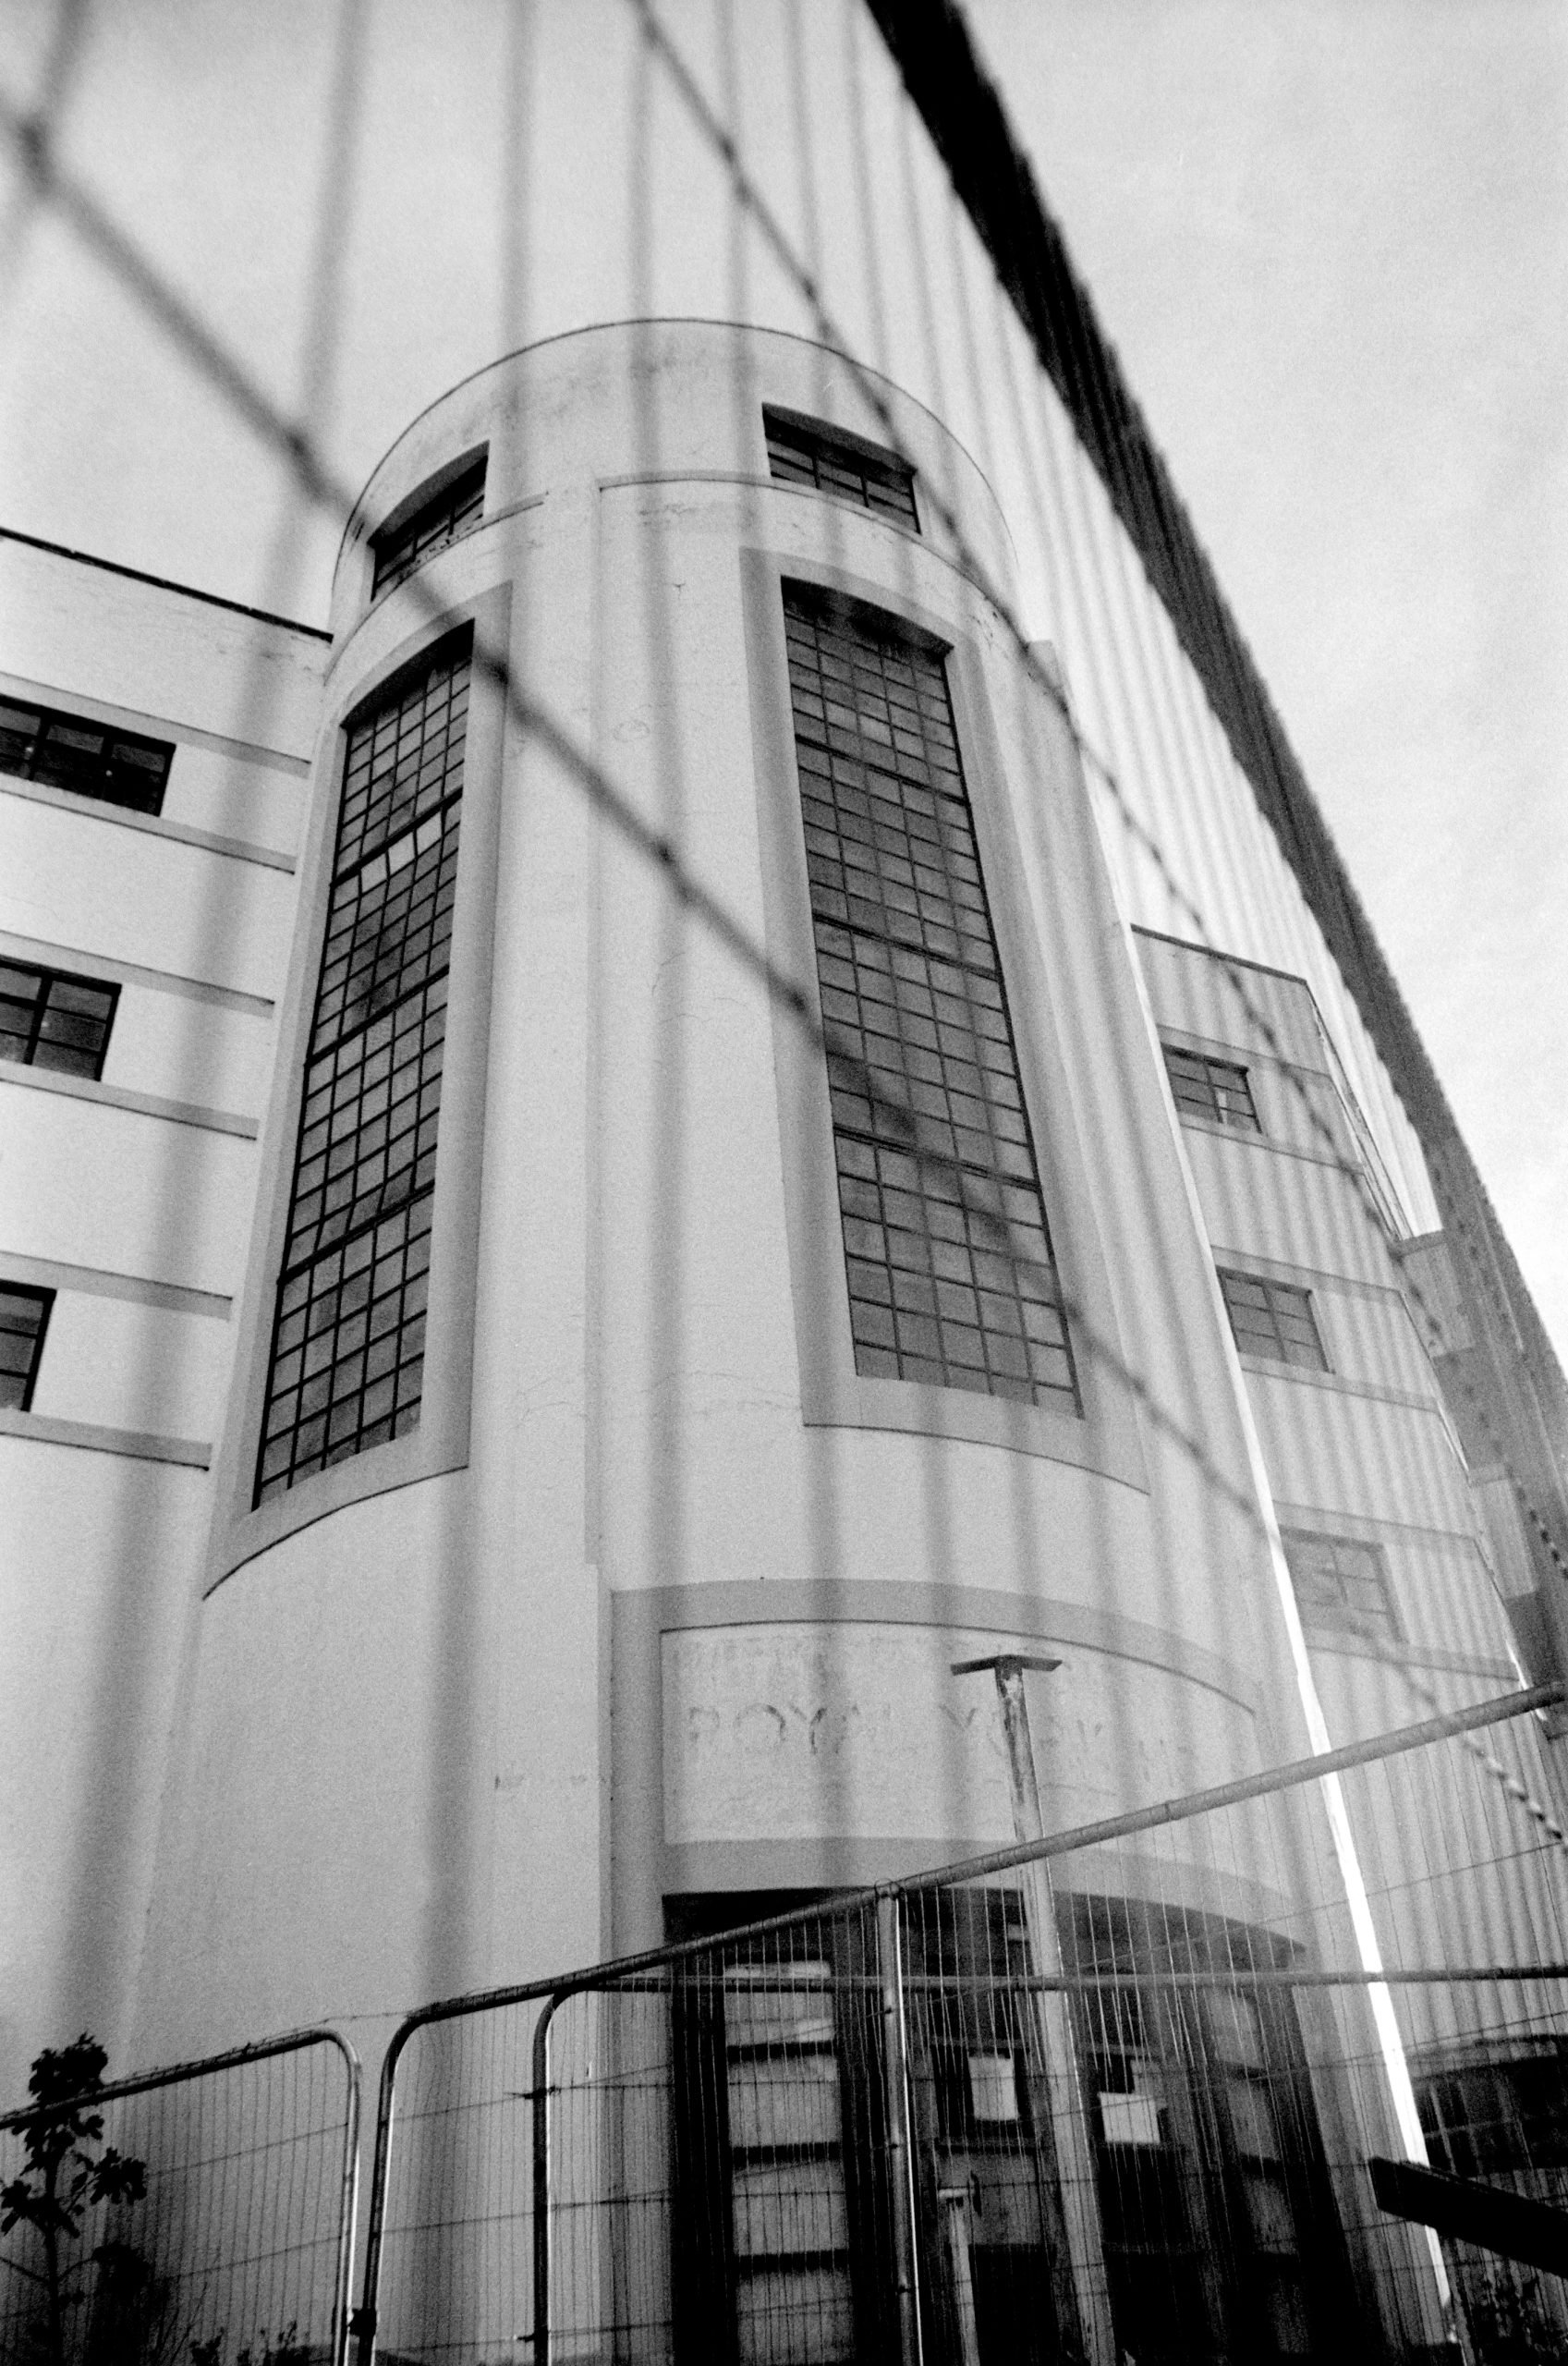
Dare I say I was getting bored at the show? There is only so many times you can walk around in circles before you go on the straight. And thats what I did, straight out the doors and into the streets.
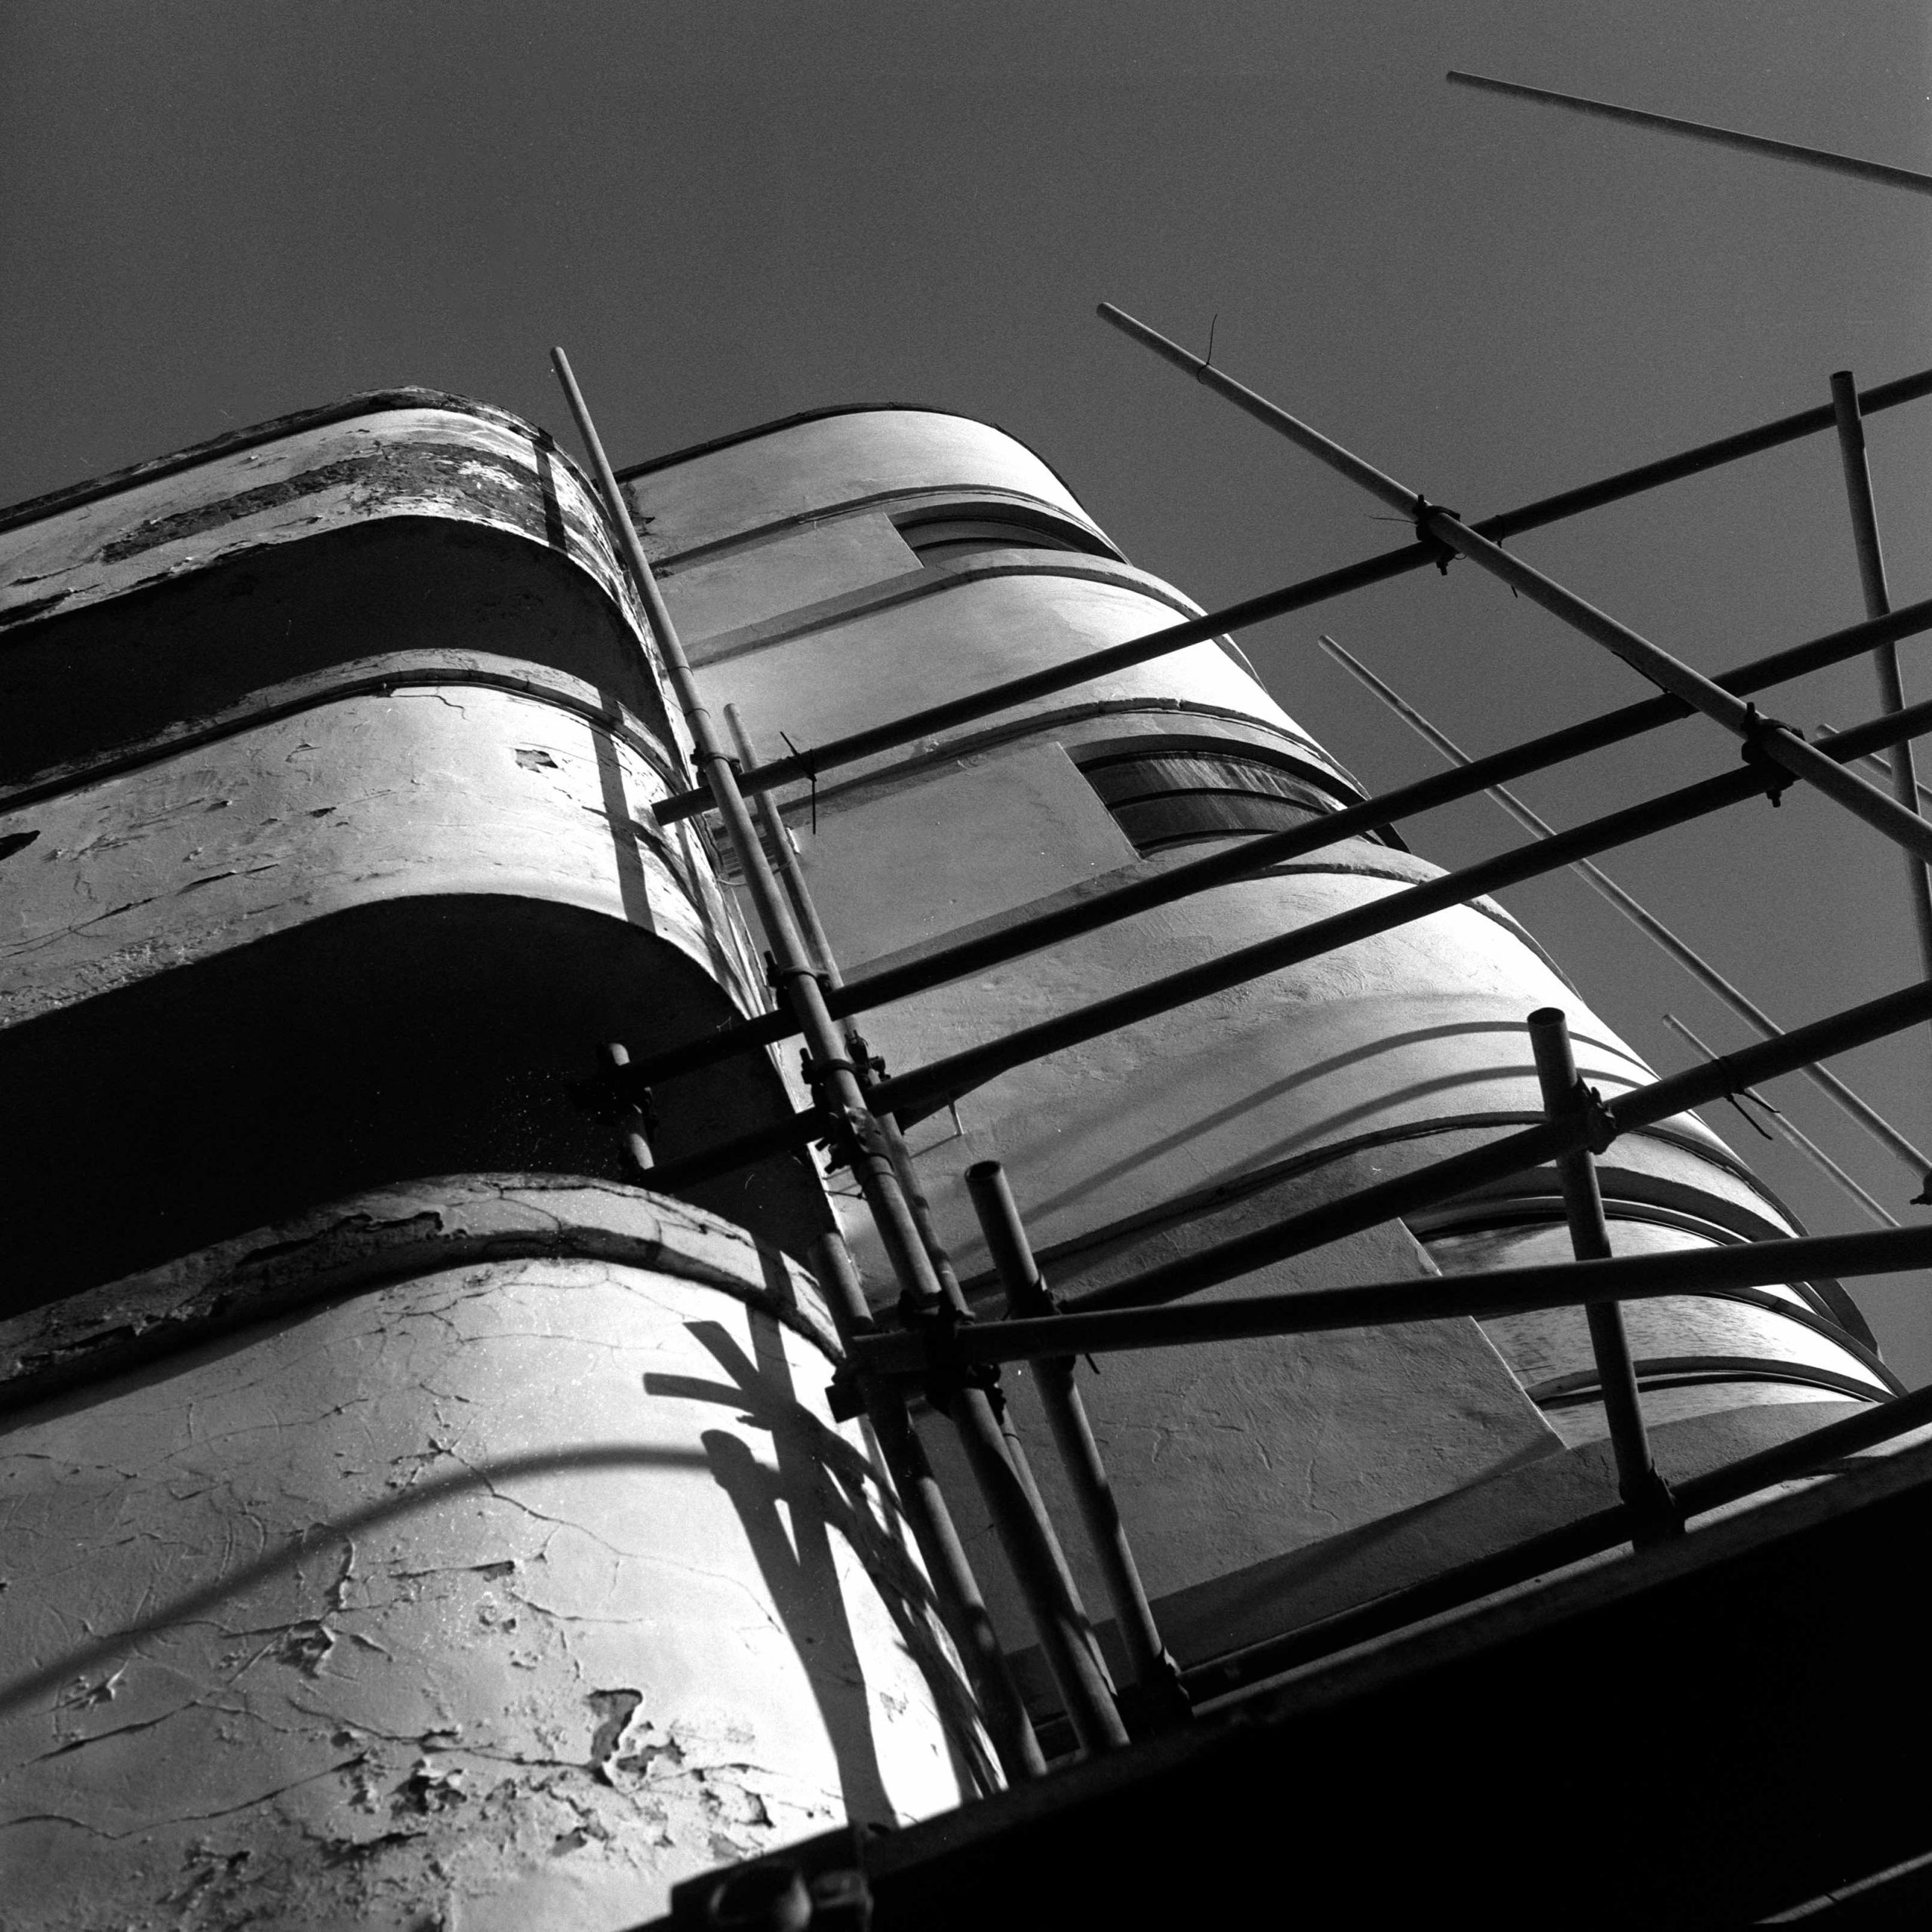
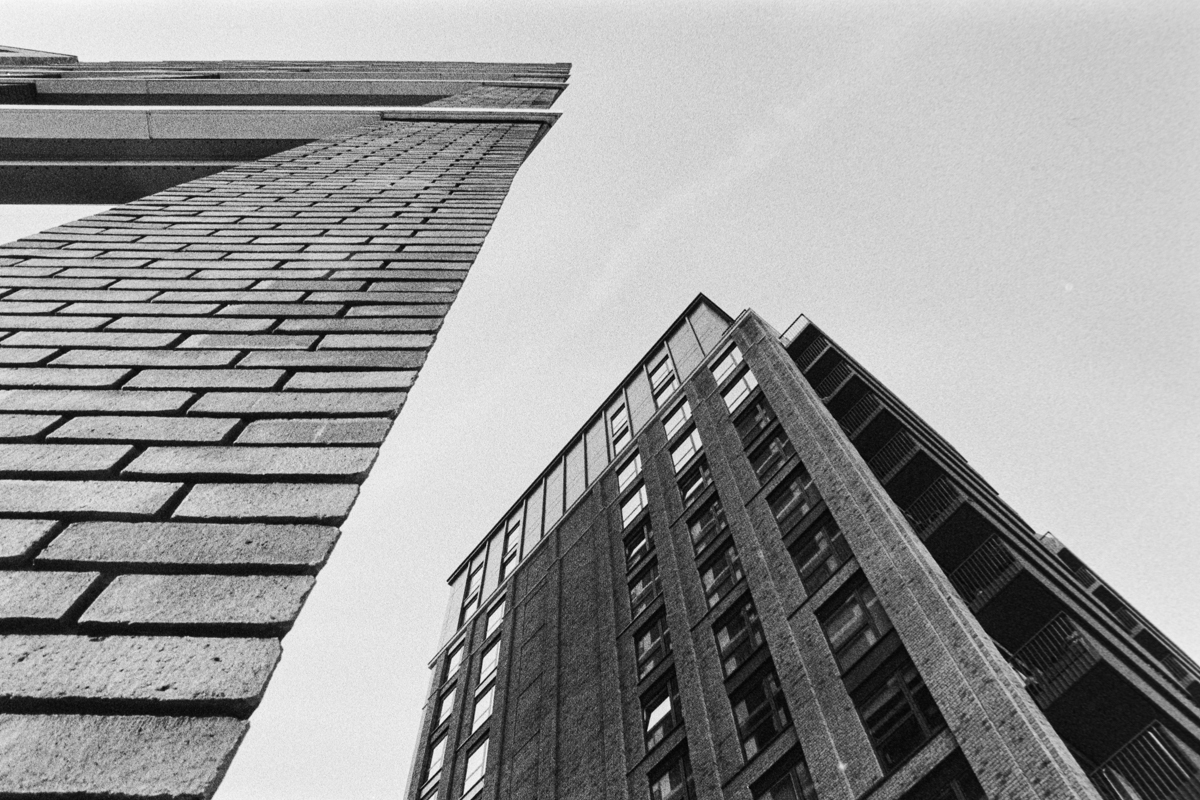
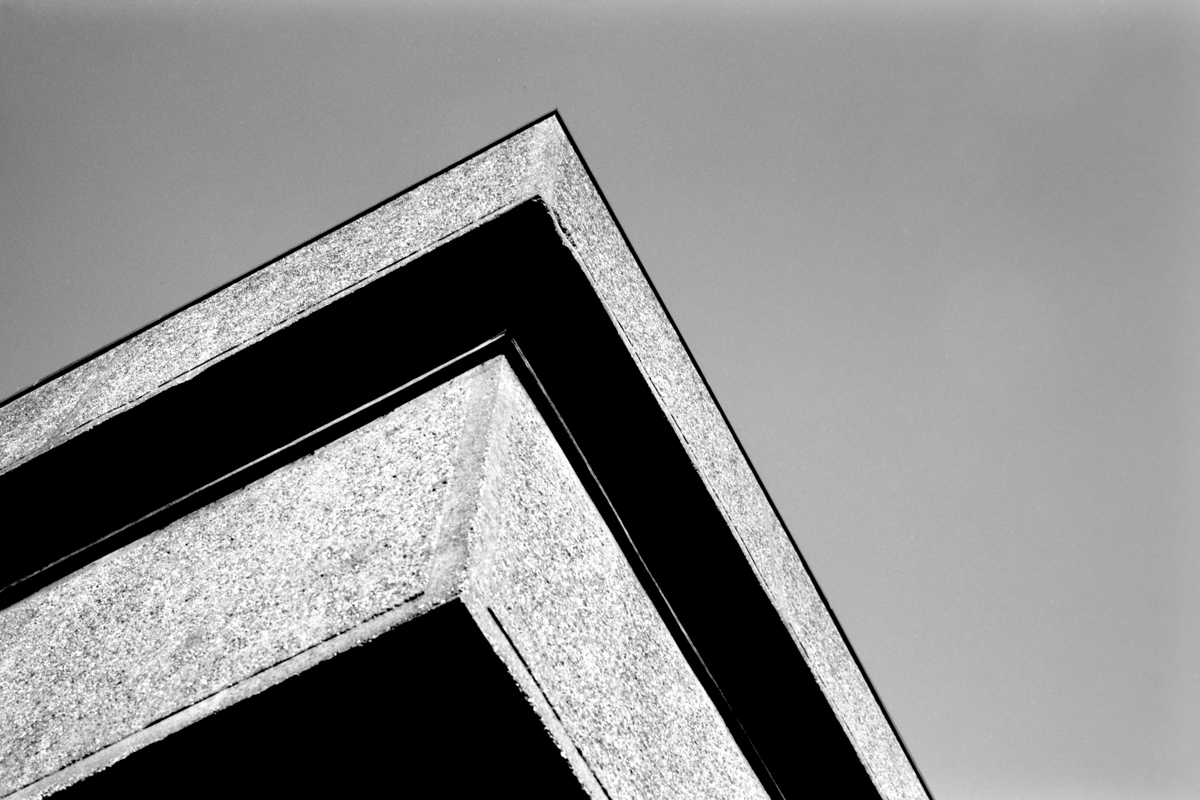
I fancied some fresh air and I found myself around the dock areas looking for photographs for my “Looking Up” project. Still at 1600 ISO (I took the compensation off by now) I had plenty of aperture and speed to play with! It took me a while to compose the photograph below. I decided on this composition of the two buildings giving the illusion that on is wafer thin! Not bad eh! And it looks fantastically dramatic with that Delta 3200 and 510 PYRO.

Heading Home
I spent another hour or so walking around the show, chatting to people and taking a few more photographs before heading off back home. Even though a few asked if I was hanging around for a beer afterwards.

And I only shot a third of the Ilford Delta 3200 which means I have another roll spare. I do actually have some in the fridge but it’s a bit airport scanner damaged! Foggy.
Above all it was a really good day out and shows like this are fantastic for networking, trying out all the latest tech and being social with like minded people. I felt it was a shame there wasn’t more film photography stands but I guess we are in a smaller bubble than the digital world. And there is only so many camera straps, bags, cable releases and lens filters you can have.
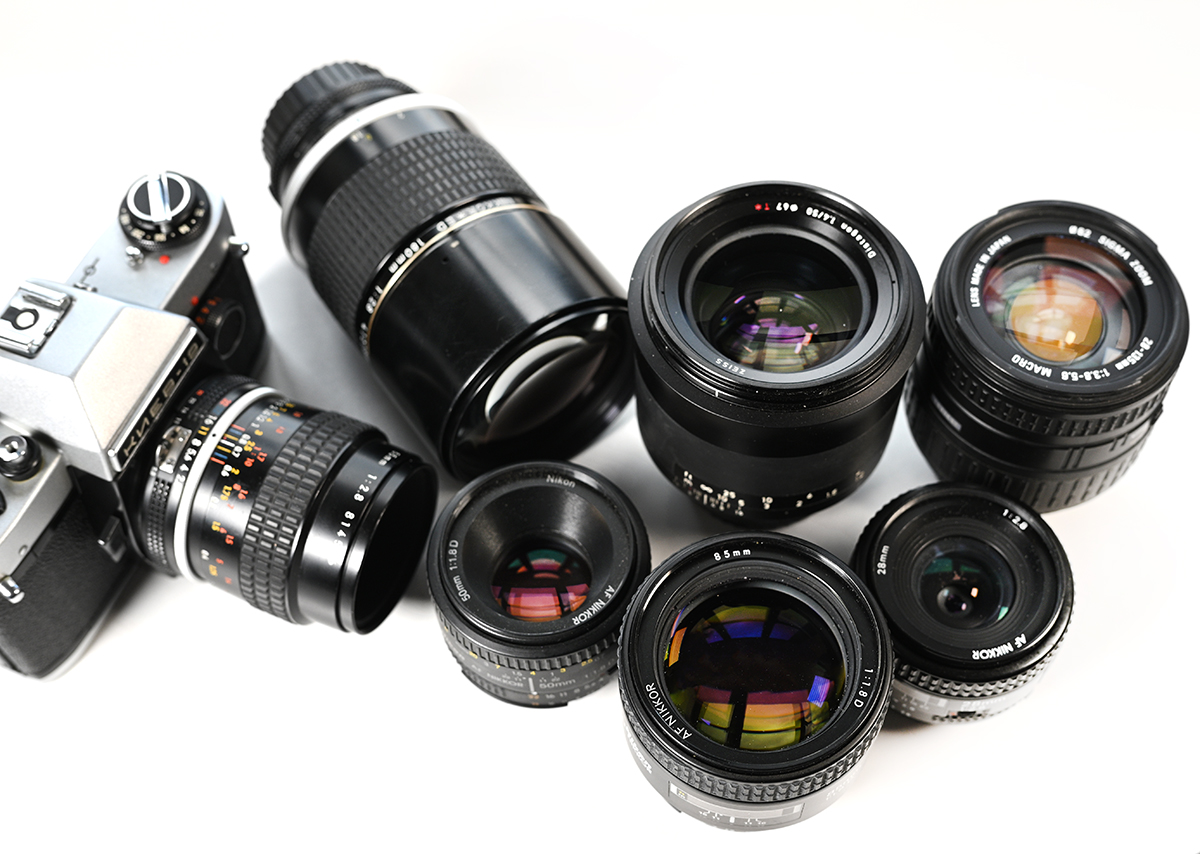
What if I had deep pockets that day? Would I have made a purchase? Maybe a couple of nice lenses from the Nikon stand for my digital camera. As for film, I guess I’m lucky to have more than enough to enjoy the hobby. There were some really nice used cameras and lenses on show though. Maybe next time!
And finally my friend took my Nikon F3 and snapped me at the show where I was sitting down packing way before I left for home.
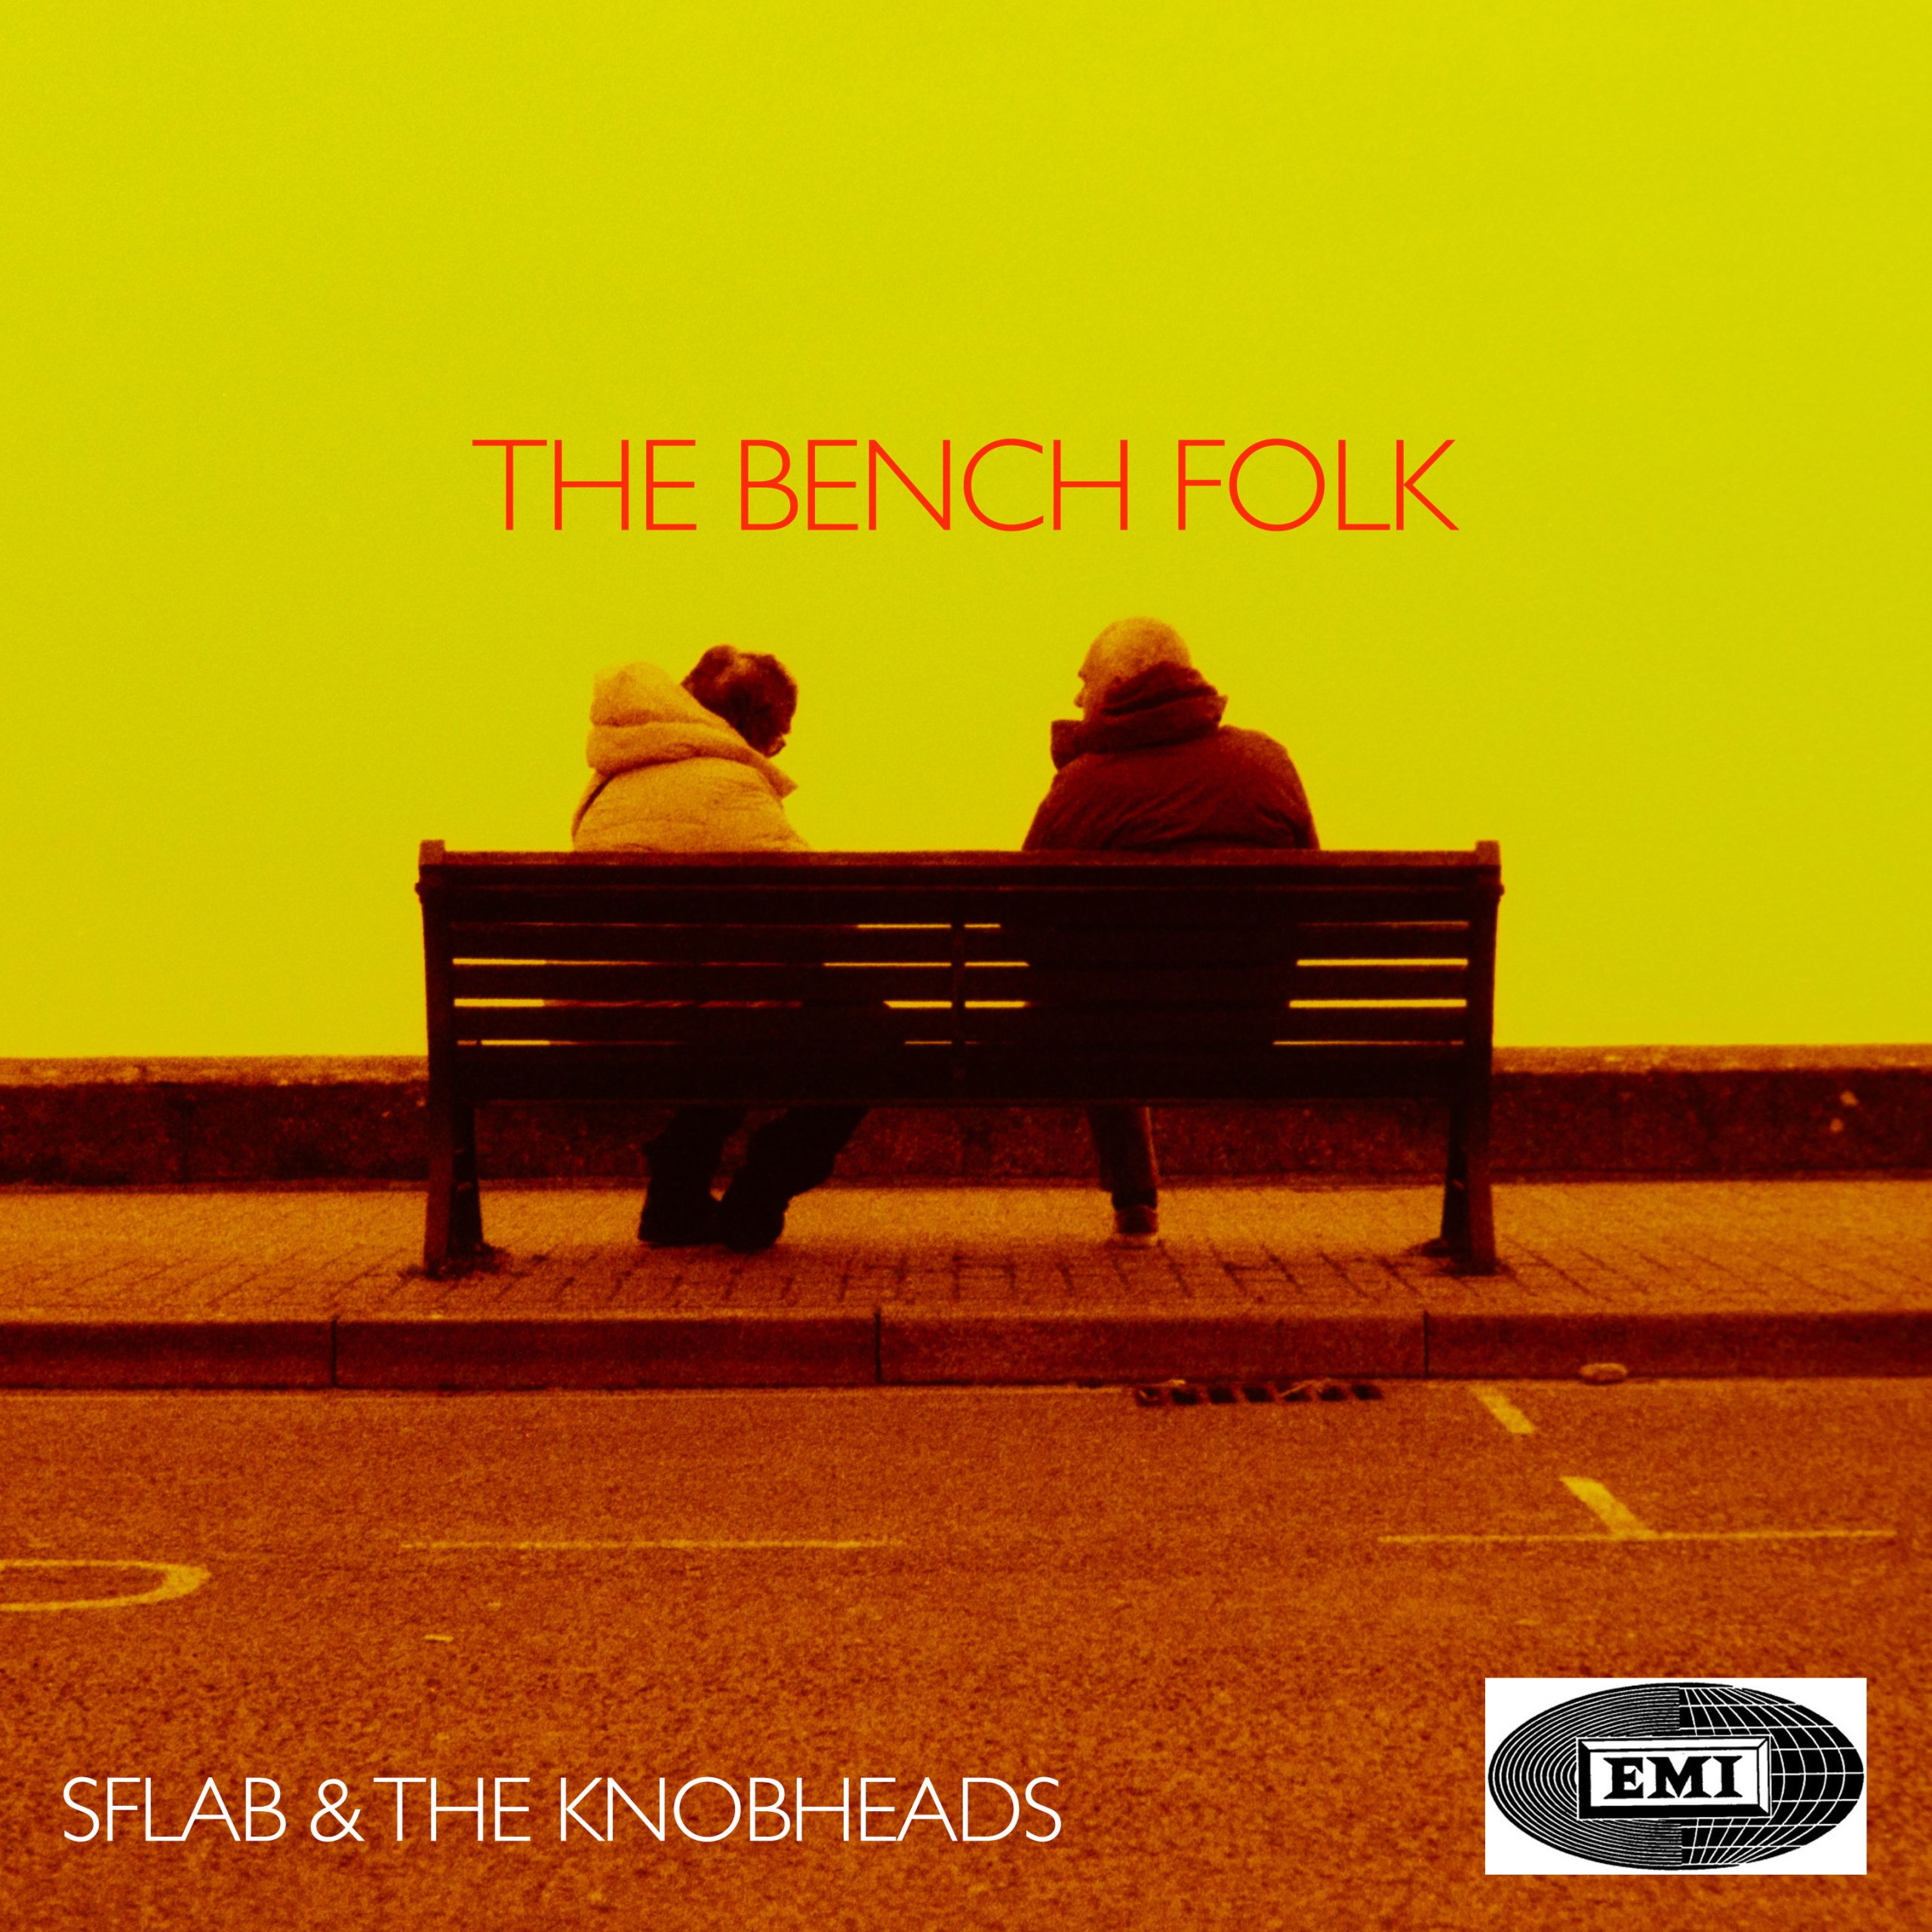
HARMAN RED (REDSCALE)
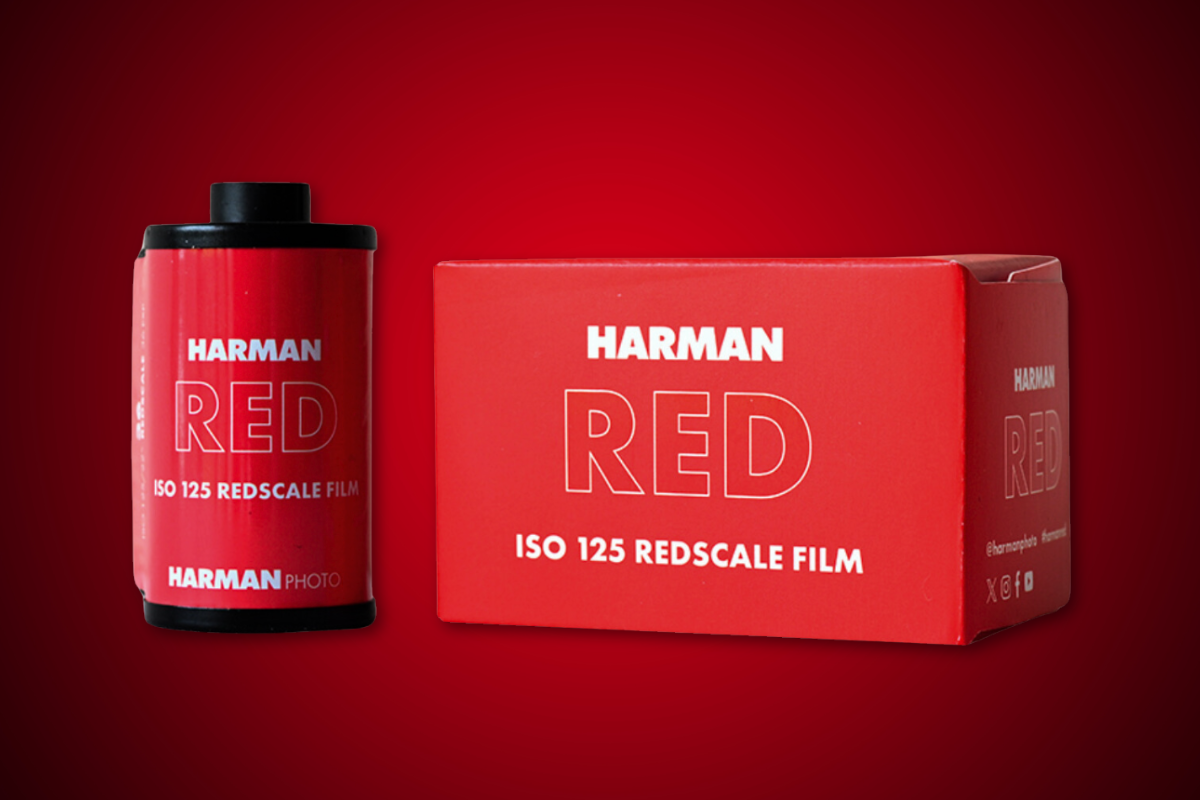
Harman release a brand new film and they call it “RED”. Well, sort of new anyway.
It’s a “Redscale” Film. And if you don’t know what Redscale is, it’s colour film that has been flipped the other way round in the cassette. Yup! The gloss side of the film is facing the lens. And when you shoot and develop the film in C41 the red layer of the film gets exposed first and it creates this Red, Orange, Yellow look. I read it was discovered by mistake back in the day. Probably by a large format photographer putting his colour sheet film in the wrong way round.
Harman sent me some to try out so I wasted no time and was looking forward to seeing what I could get from it. So I went to the beach. It was a light overcast day. I wasn’t sure if Redscale needed strong light but after reading online that it hold up perfect on light overcast days I felt rest assured I was going to get some nice Redscale negatives.
Here is the vlog I made for the channel.
I used my Nikon F6 with a 50mm Zeiss Milvus f1.4 lens and developed the film in Cinestill C41 chemistry. Rotary processed.
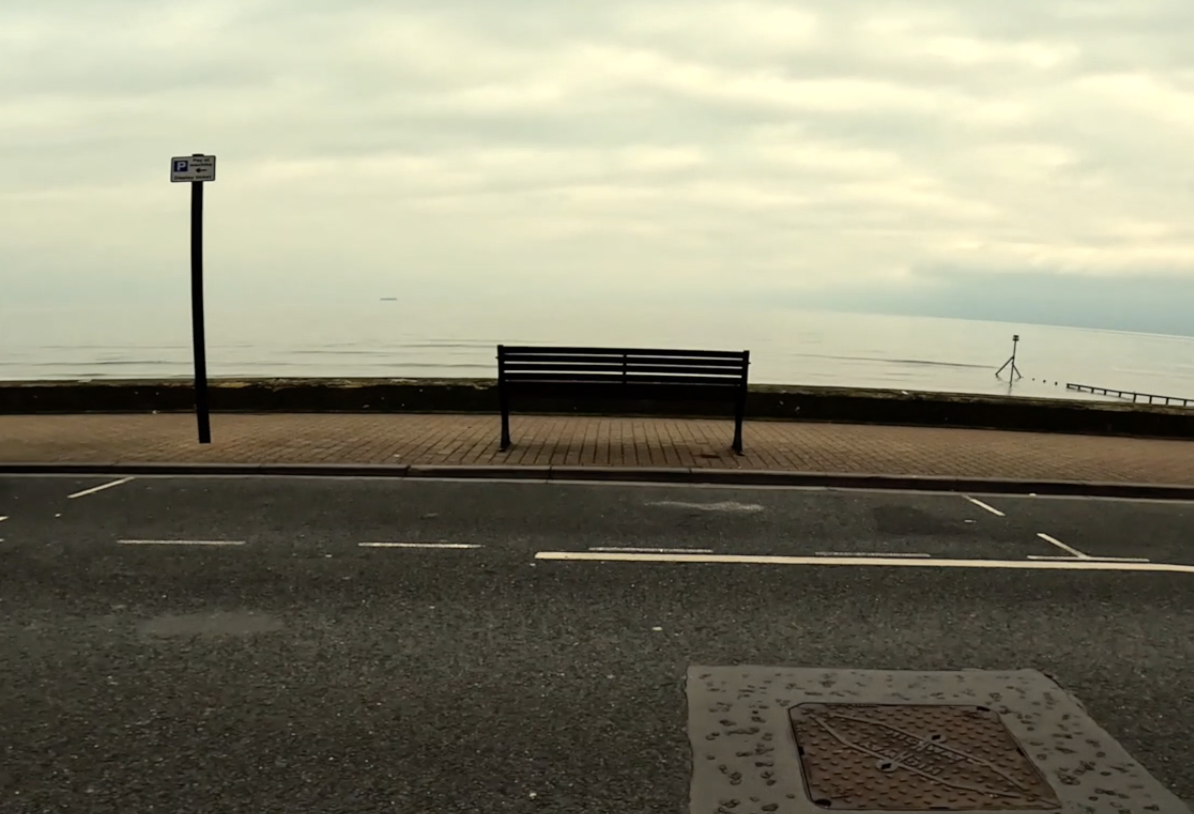
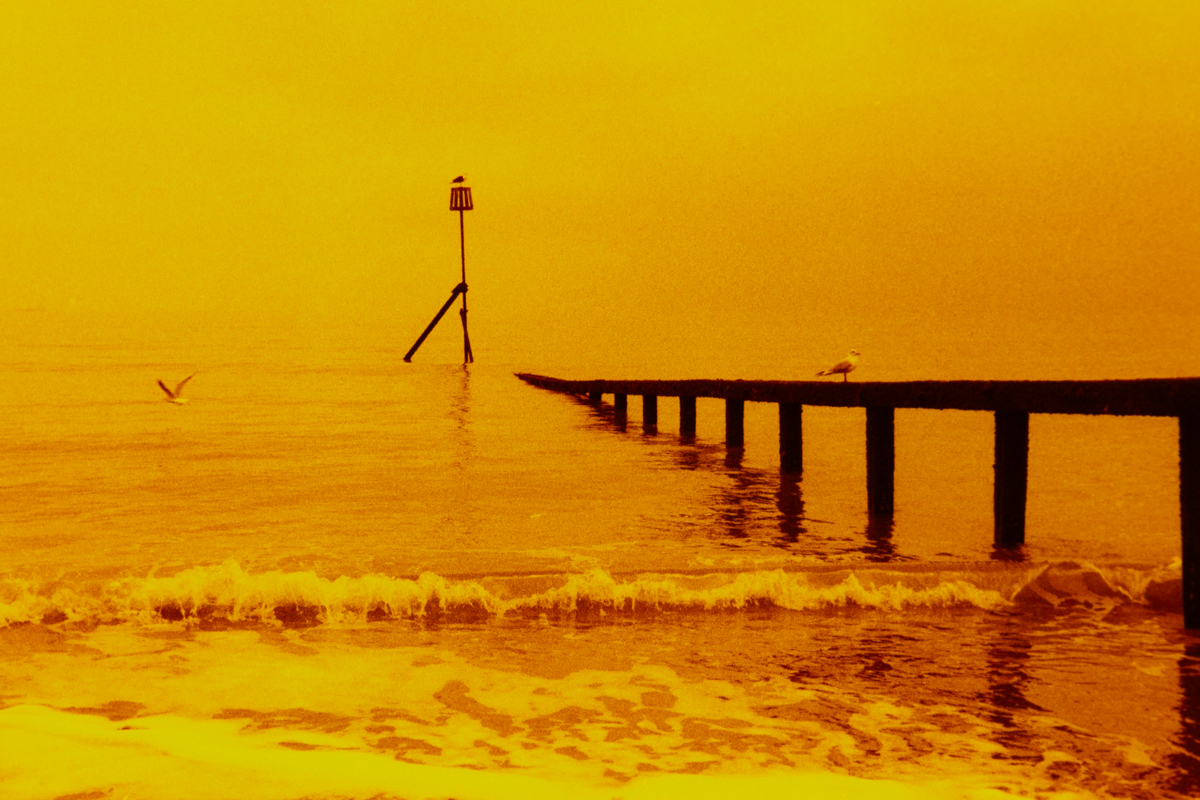
When I saw my scans inverted I was pleasantly surprised that I didn’t get a totally red looking overlayed image. As you can see my sky is Yellow! Leading into an Orange Red towards the bottom.
Here are some more images from the beach. The light hardly changed.
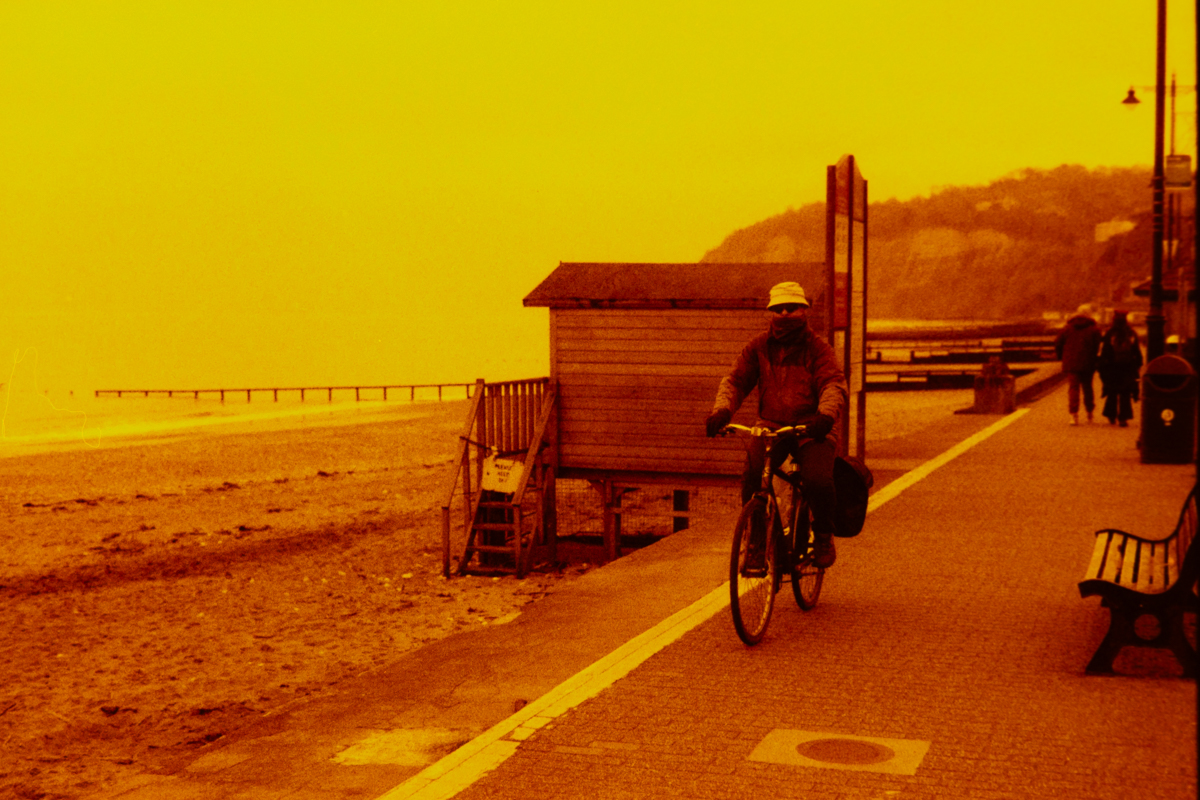
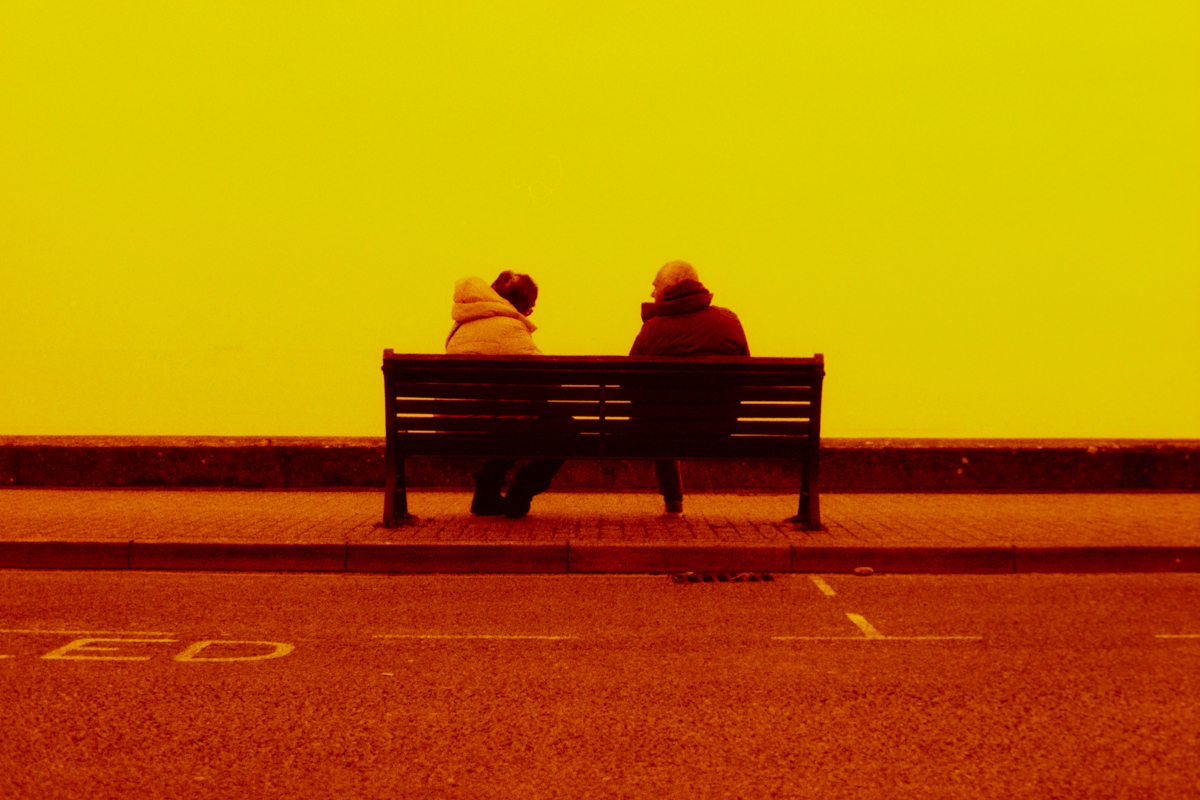
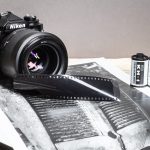
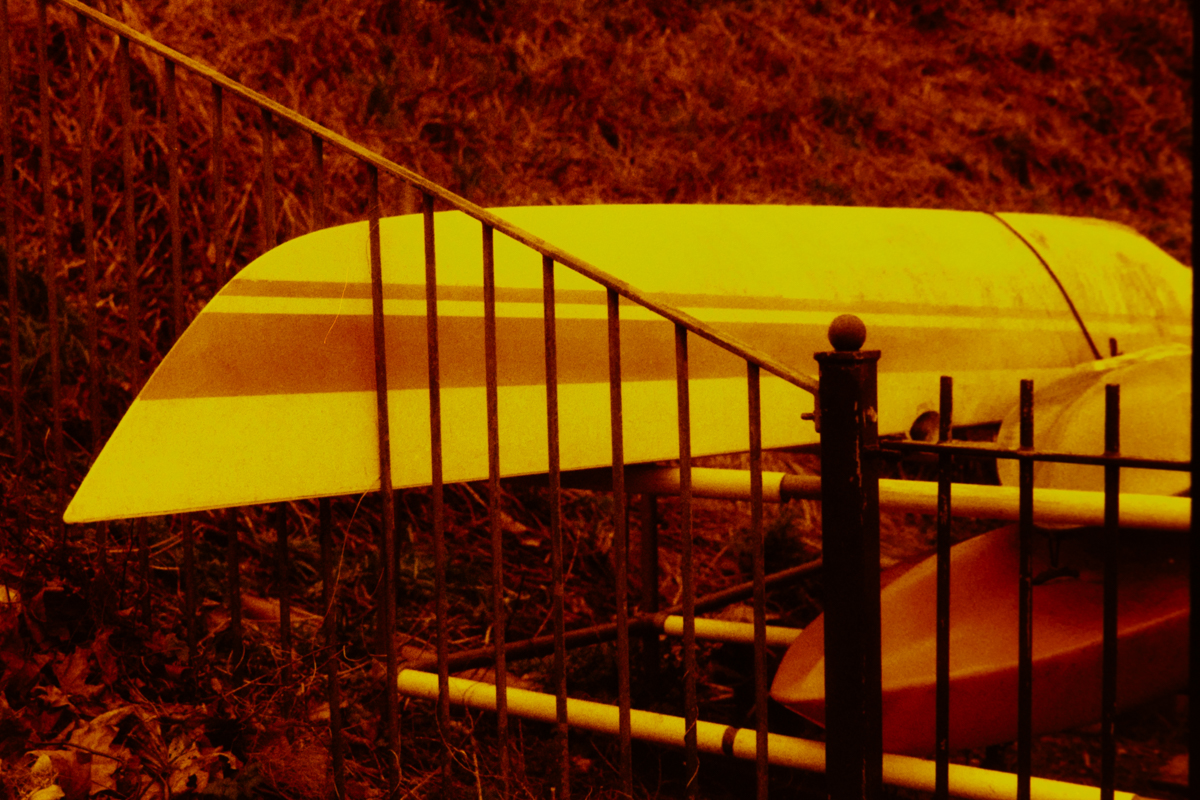
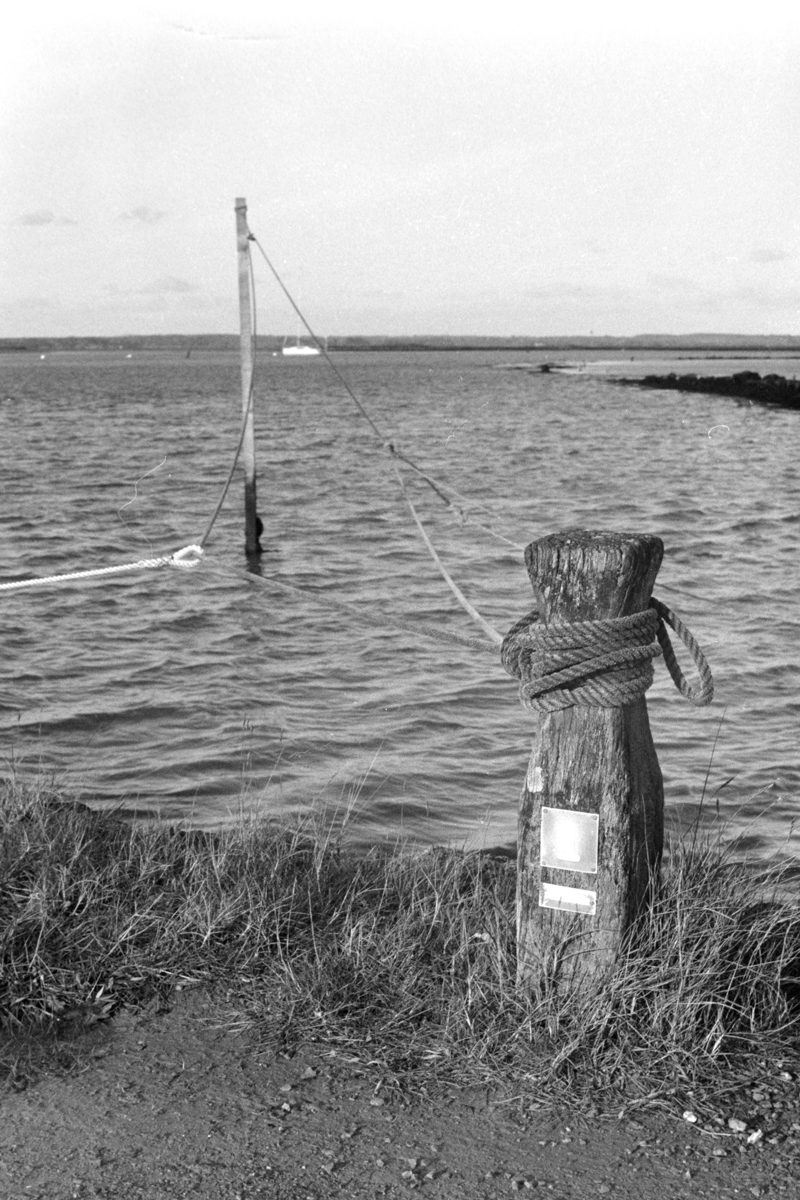
I wasn’t so convinced at first. I’m not sure seascapes does Redscale much justice, so I took another roll and went off to the local farm. The lighting was similar to the beach. Same camera, lens and process.
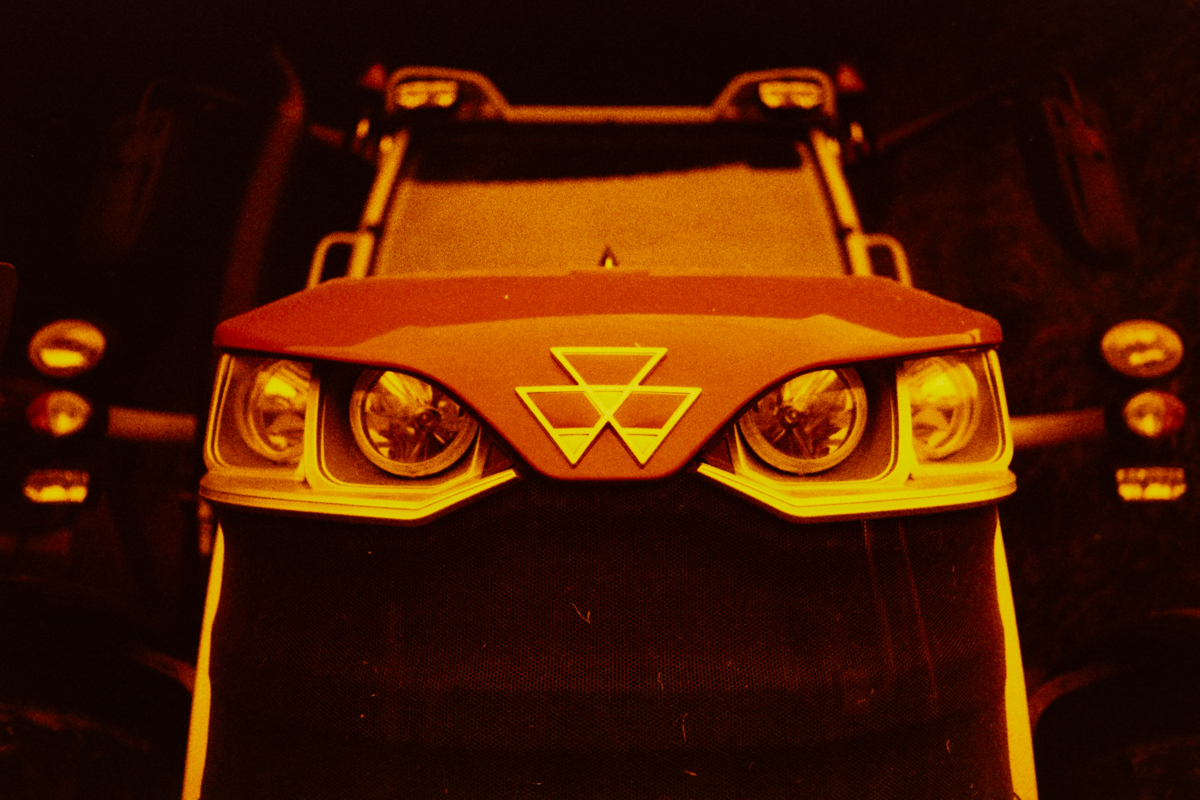
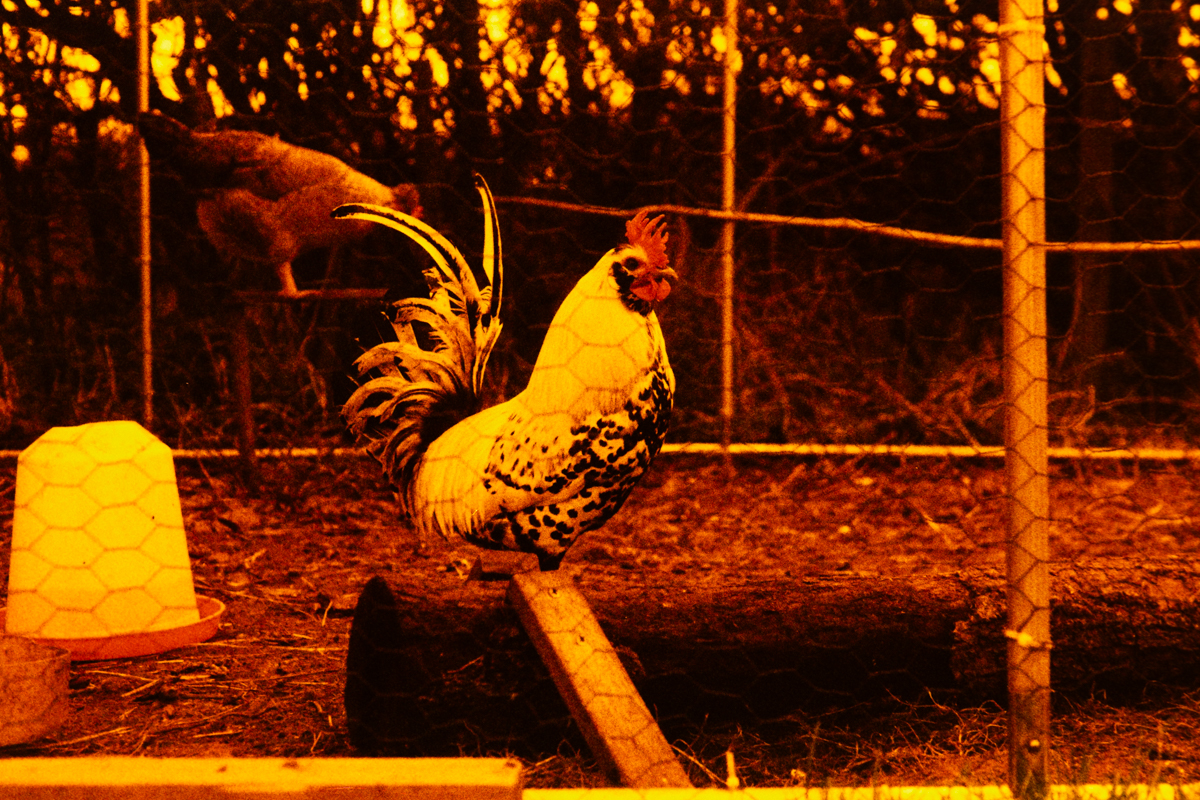
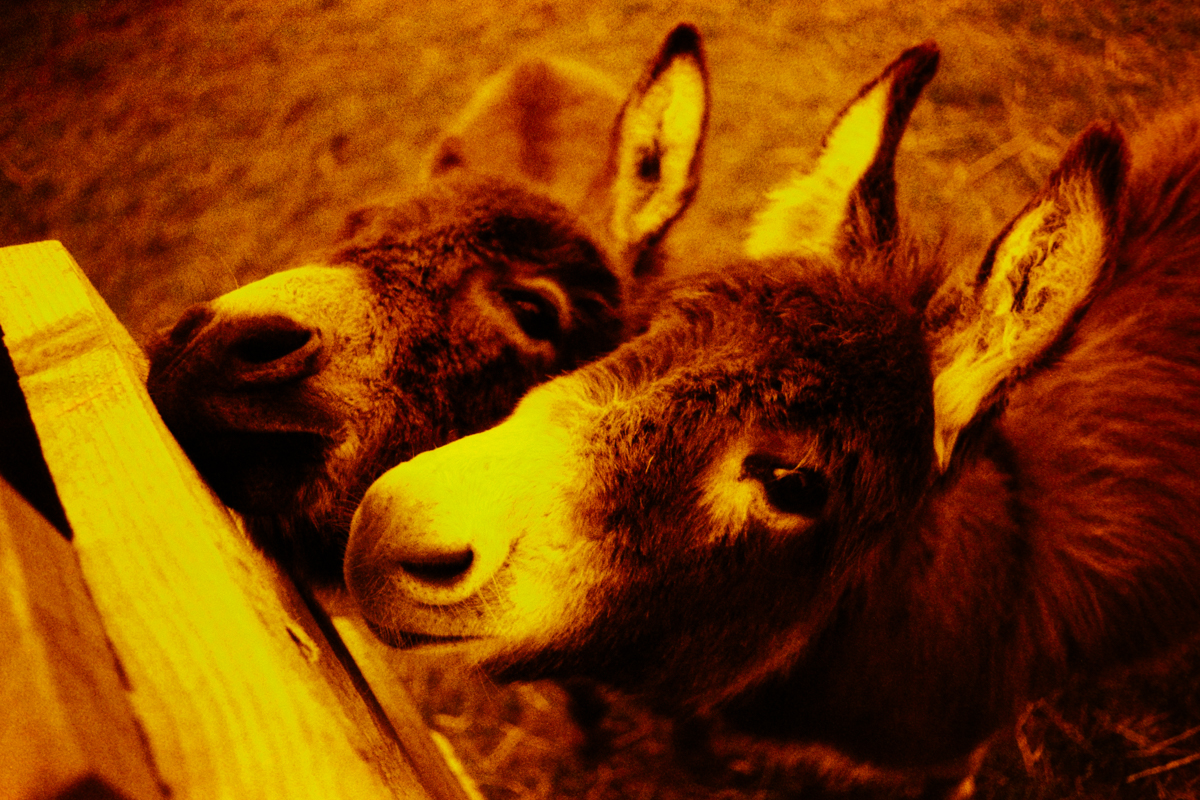
These were much different as this time I hardly had any sky in my photographs and I started to get a more deep red.
I didn’t really know what to expect when I was shooting these films. And I wasn’t sure if I liked the idea, but the more I looked at my photographs the more it got me wondering about other scenes of photography. Street, Woodland, Urban, Buildings, Portraits. And the more variety I photographed the more I began to enjoy the look. Unfortunately I can’t print colour in my darkroom. But there is nothing stopping me scanning and making an inkjet print, framing and putting on the wall at home for something different in-between my Black & White and Colour prints. Redscale could look pretty quirky in the right home.
Phoenix 200.
So we know Harman already has a colour film. Phoenix 200. It’s their only colour film. And you’ve guessed it. They have taken Phoenix 200, flipped it in the rolling machine and relabelled it RED. And because of the “Flip” they have rated it at 125 ISO. But I still got good results more or less.
It’s no secret. You can clearly see the Phoenix etched on the RED negatives.

And although Phoenix 200 is a very good film, in it’s own unique way, you don’t have to buy Redscale Film if you have a darkroom, closet or anywhere else that is pitch black to shoot Redscale. Just take a roll of colour film you have into the dark, pull it all out of the cassette, cut the end away, turn it over, tape it back to the cut end of the film that is hanging out of the cassette and rewind it back into the cassette. You now have Redscale film to shoot. It is a bit of a faff and can be quite tricky to do in the dark, that’s why Harman have done all the hard work for us.

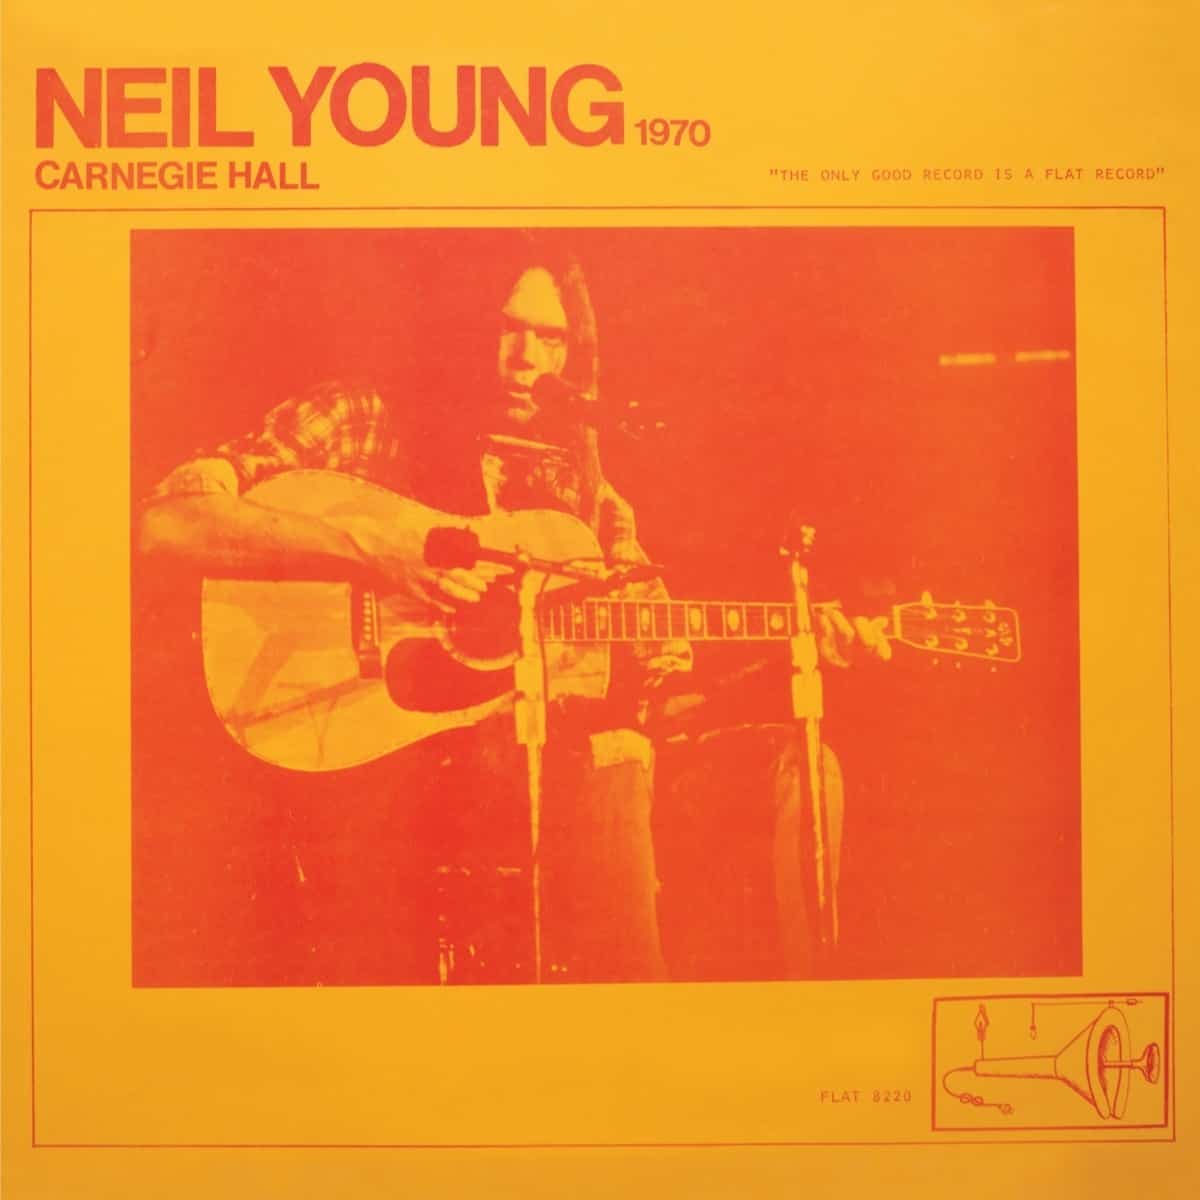
I even tried a selfie of myself with a static light indoors. Manual lens. Always a bit hit and miss to focus but it’s not that bad! Different anyway. Or is it different. You’ve more than likely come across this look in magazines and record covers in the pre digital days. Unless it was an orange filter on the lens. Who knows.

Was Redscale used for Record Labels pre digital era?
Back at the Farm.
Of course it’s not going to be to everyone’s taste. And if you are pretty good with photoshop you can create the same look without buying or sabotaging a roll of colour film, but where is the fun in that? I’d rather shoot a roll of Redscale.
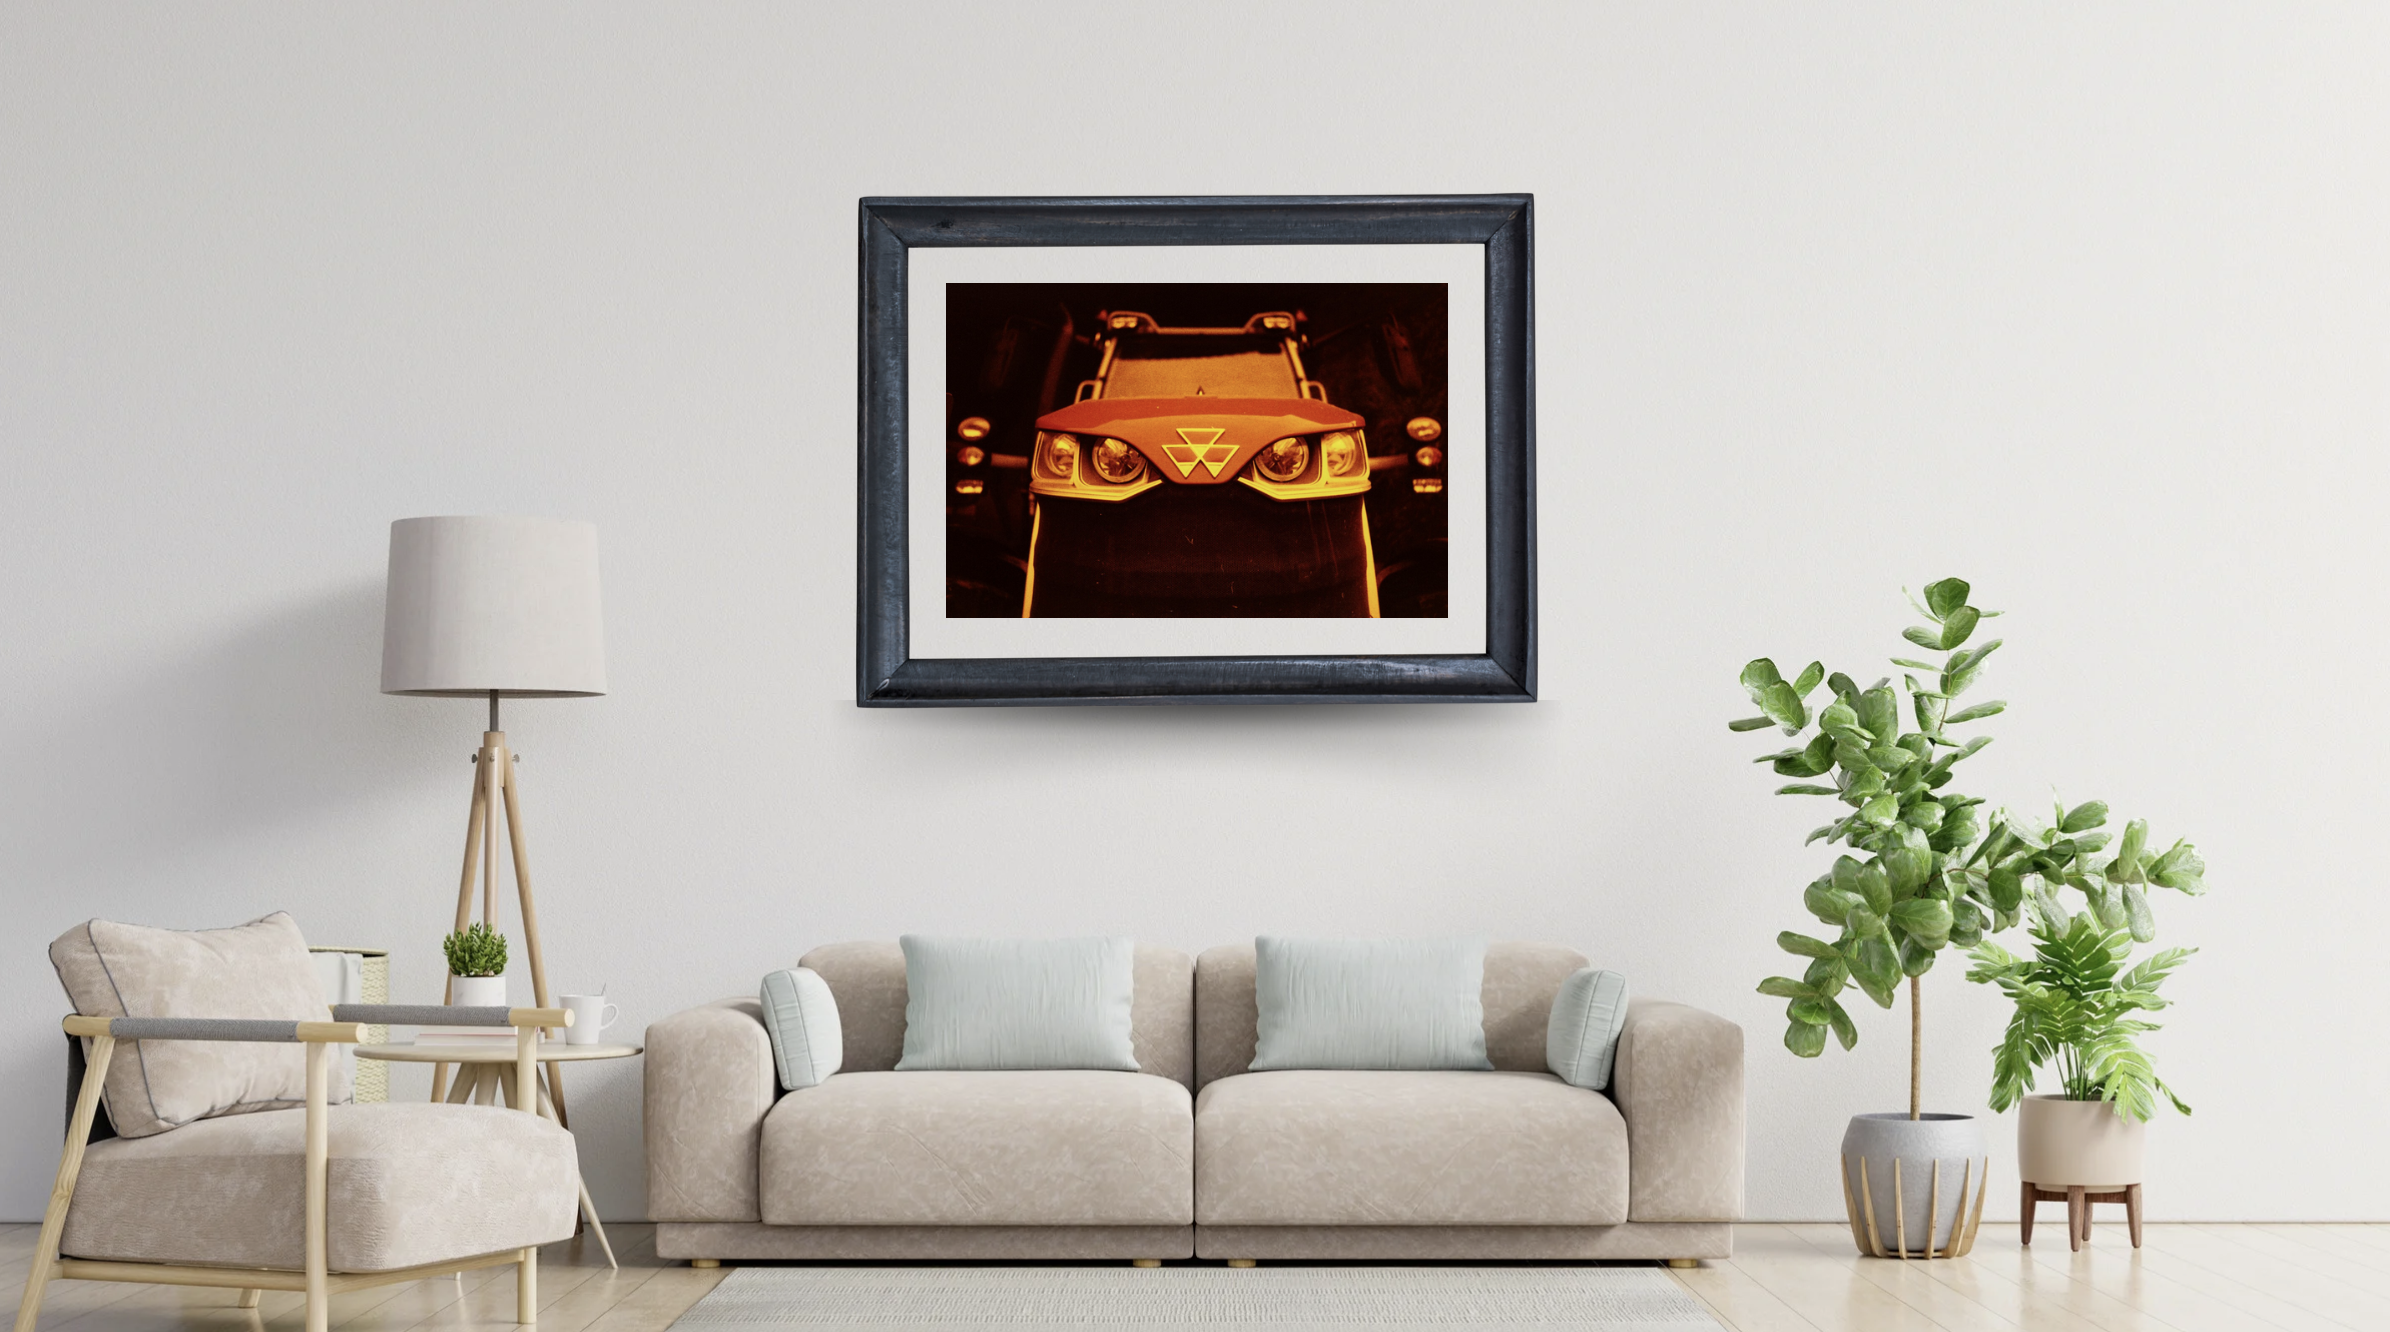
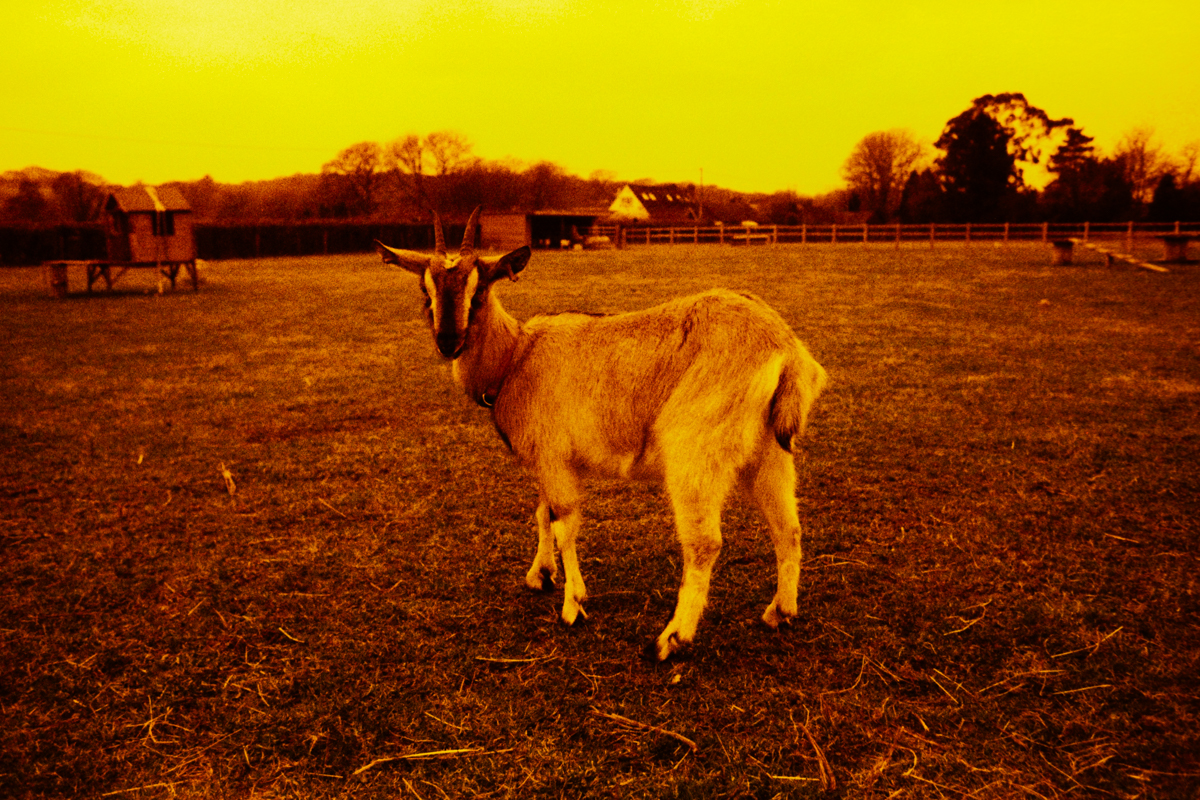
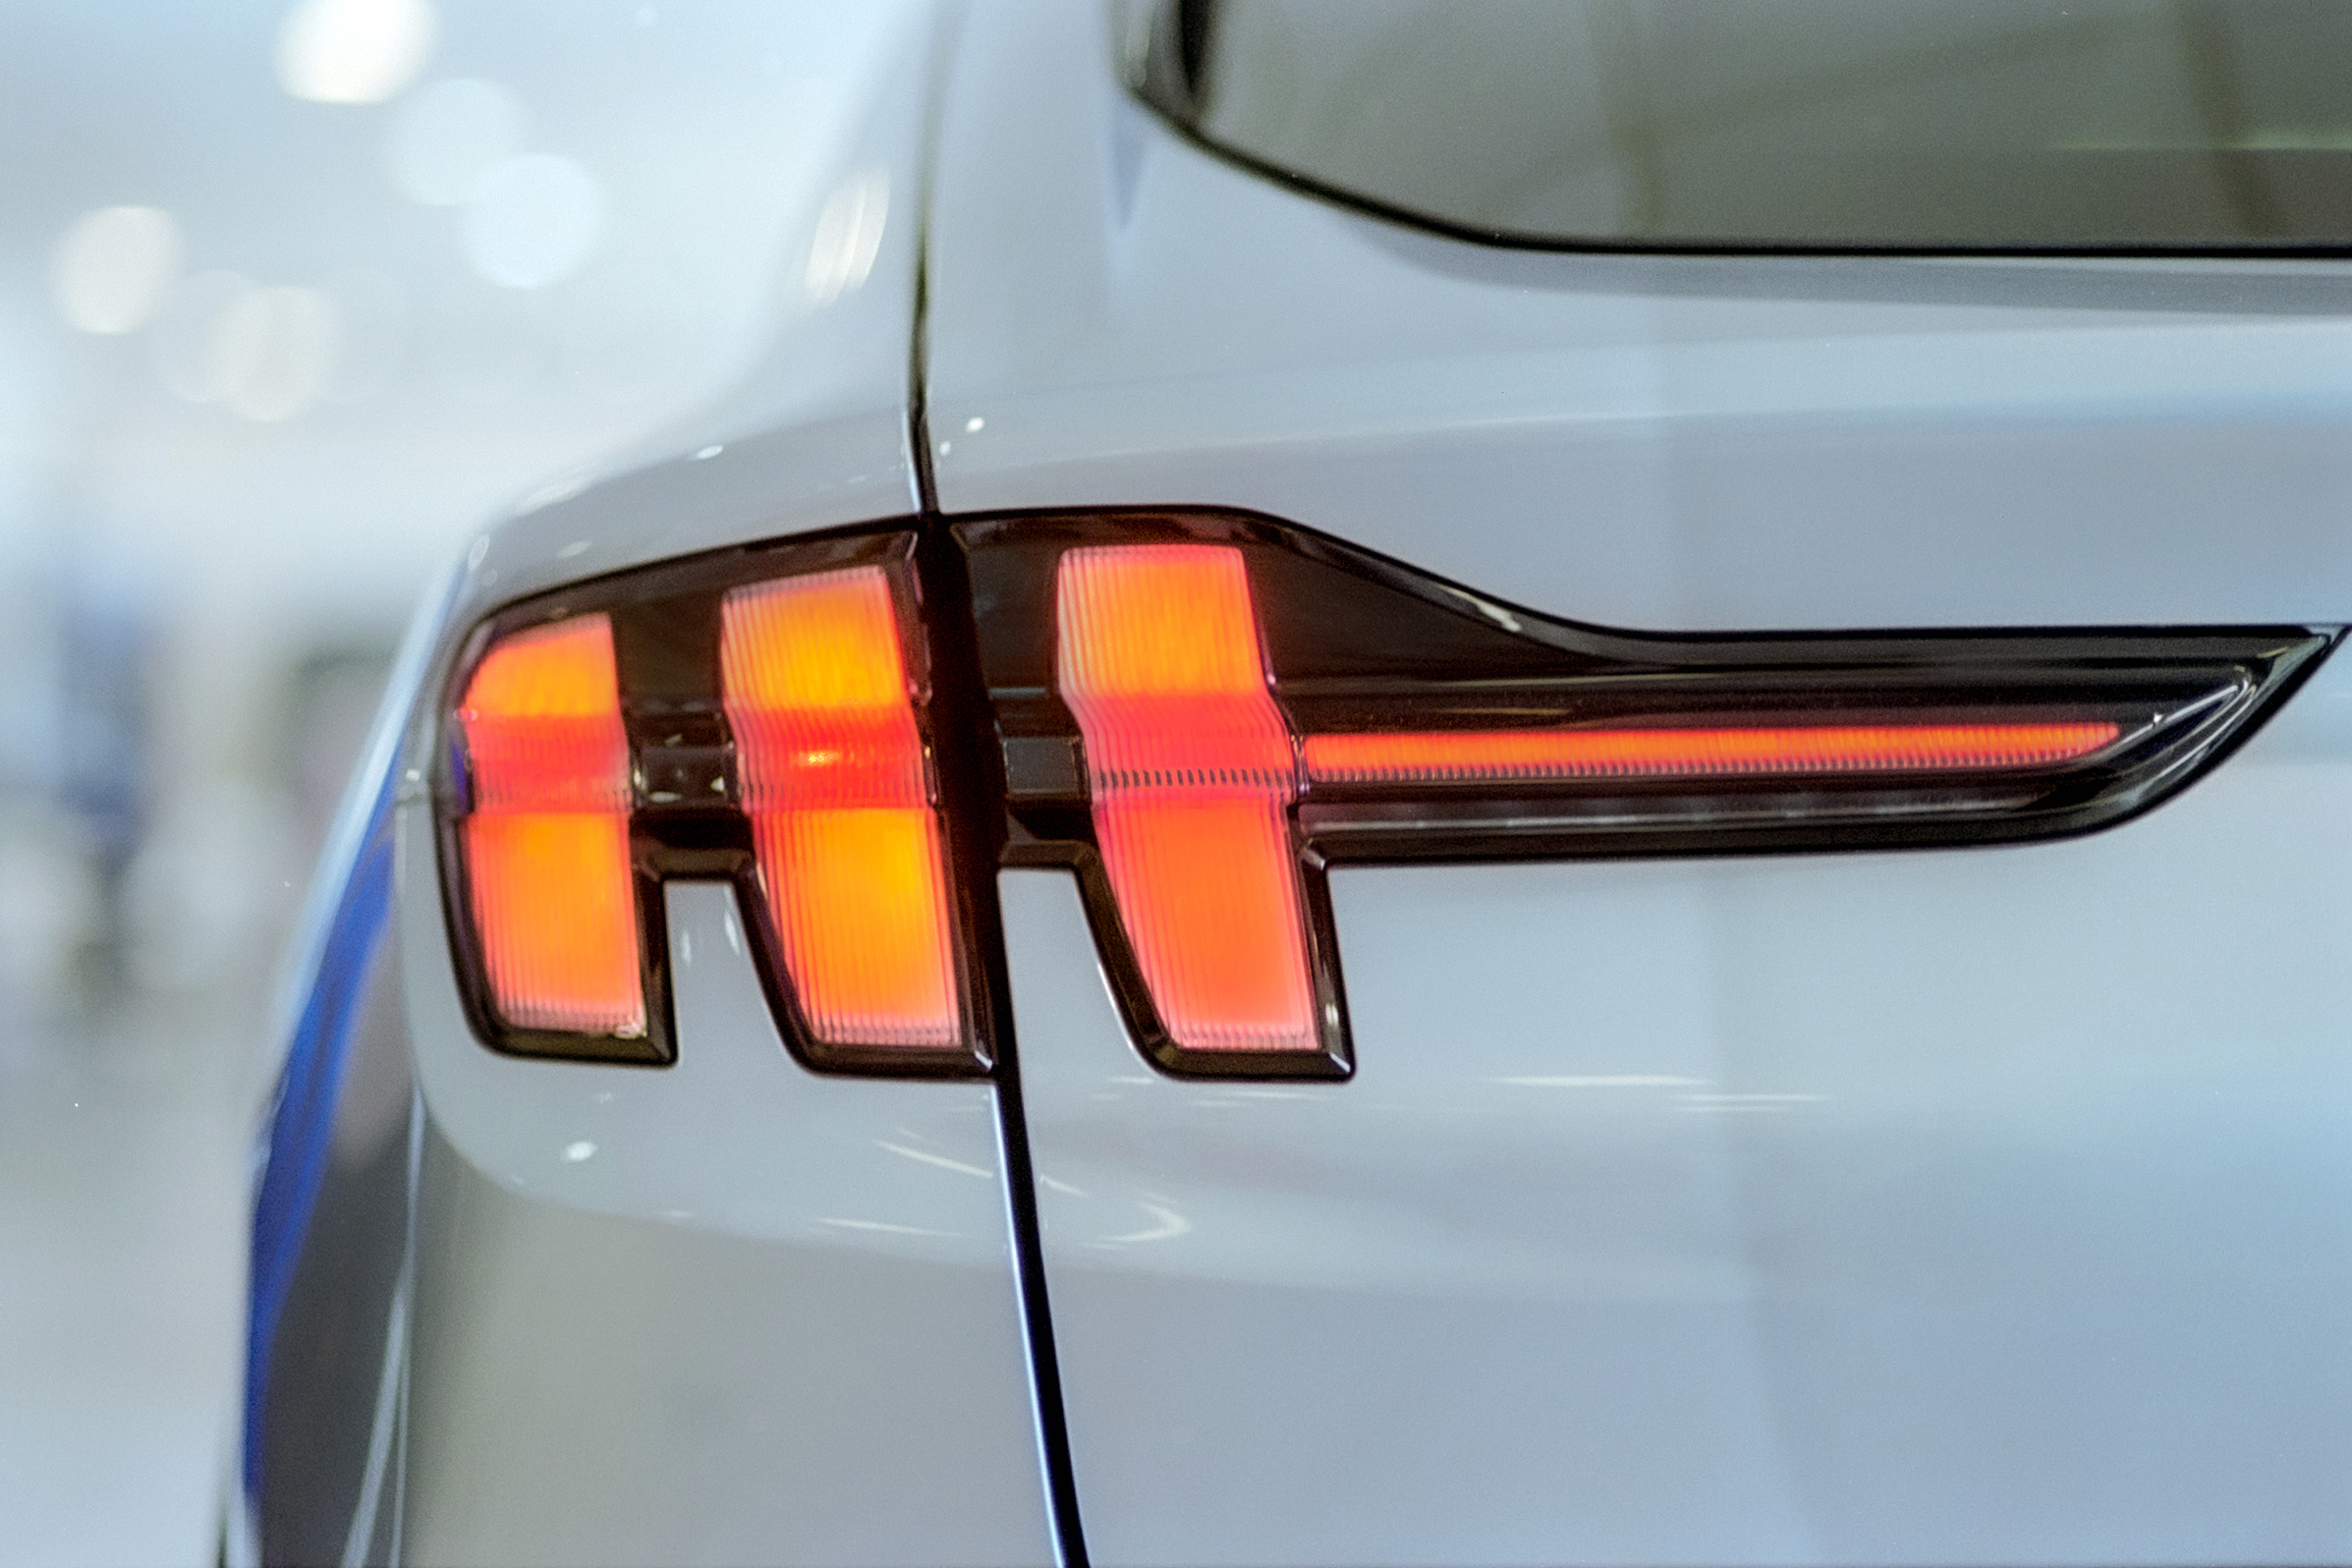
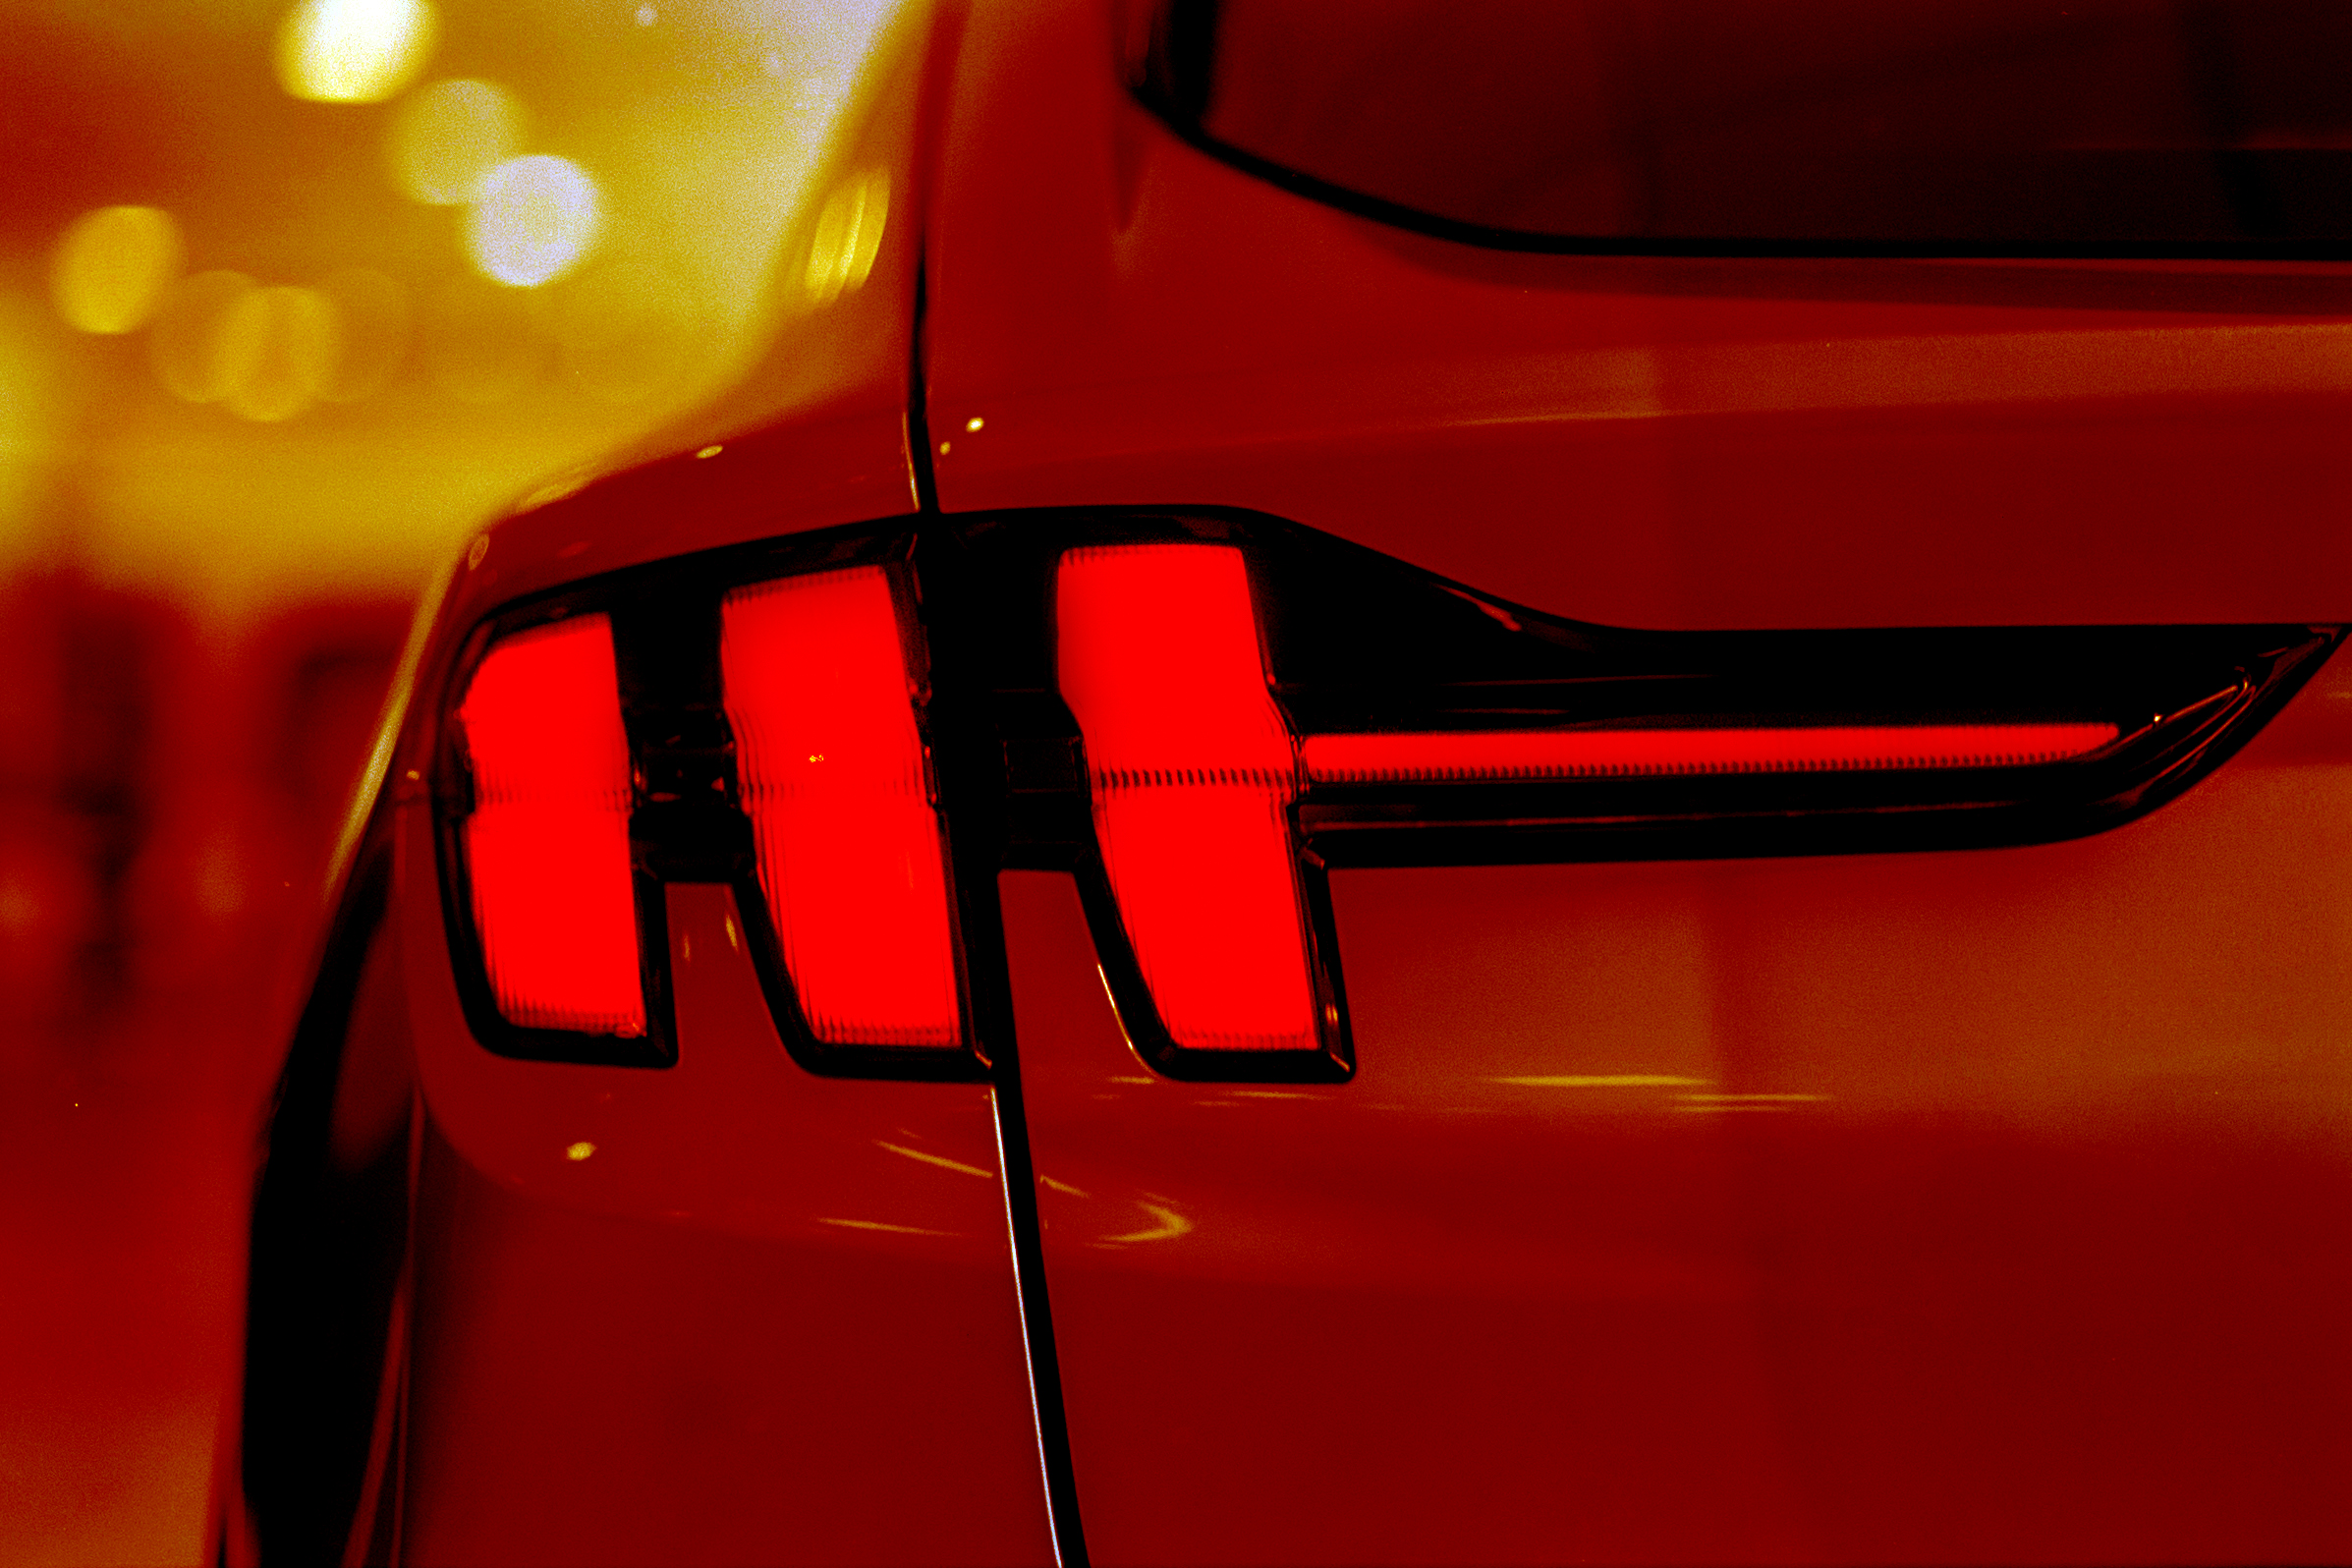
Here is a Car that I photographed for a showroom. And you can see I turned it into Redscale using a dark orange layer in Photoshop.
I don’t think you’d ever want to shoot someone’s Wedding or Commercial Event on Redcsale. Of course you wouldn’t. But loading a roll with intent for experimentation is fun. As I found out.
We haven’t had much sun here lately so I am looking forward to getting out on a sunny day, or maybe in the golden hour, around town for some Street/Urban Photography. I think that is where this film would suit me best.
Above all, well done to Harman for making this film possible for us to try. Can you imagine a Film Photography Community with no new products?
I’m definitely going to try more with Redscale. I may even try other colour films and flip them in the darkroom and see what results they give.
New Film Merch!

Svema KN-1 Expired Film
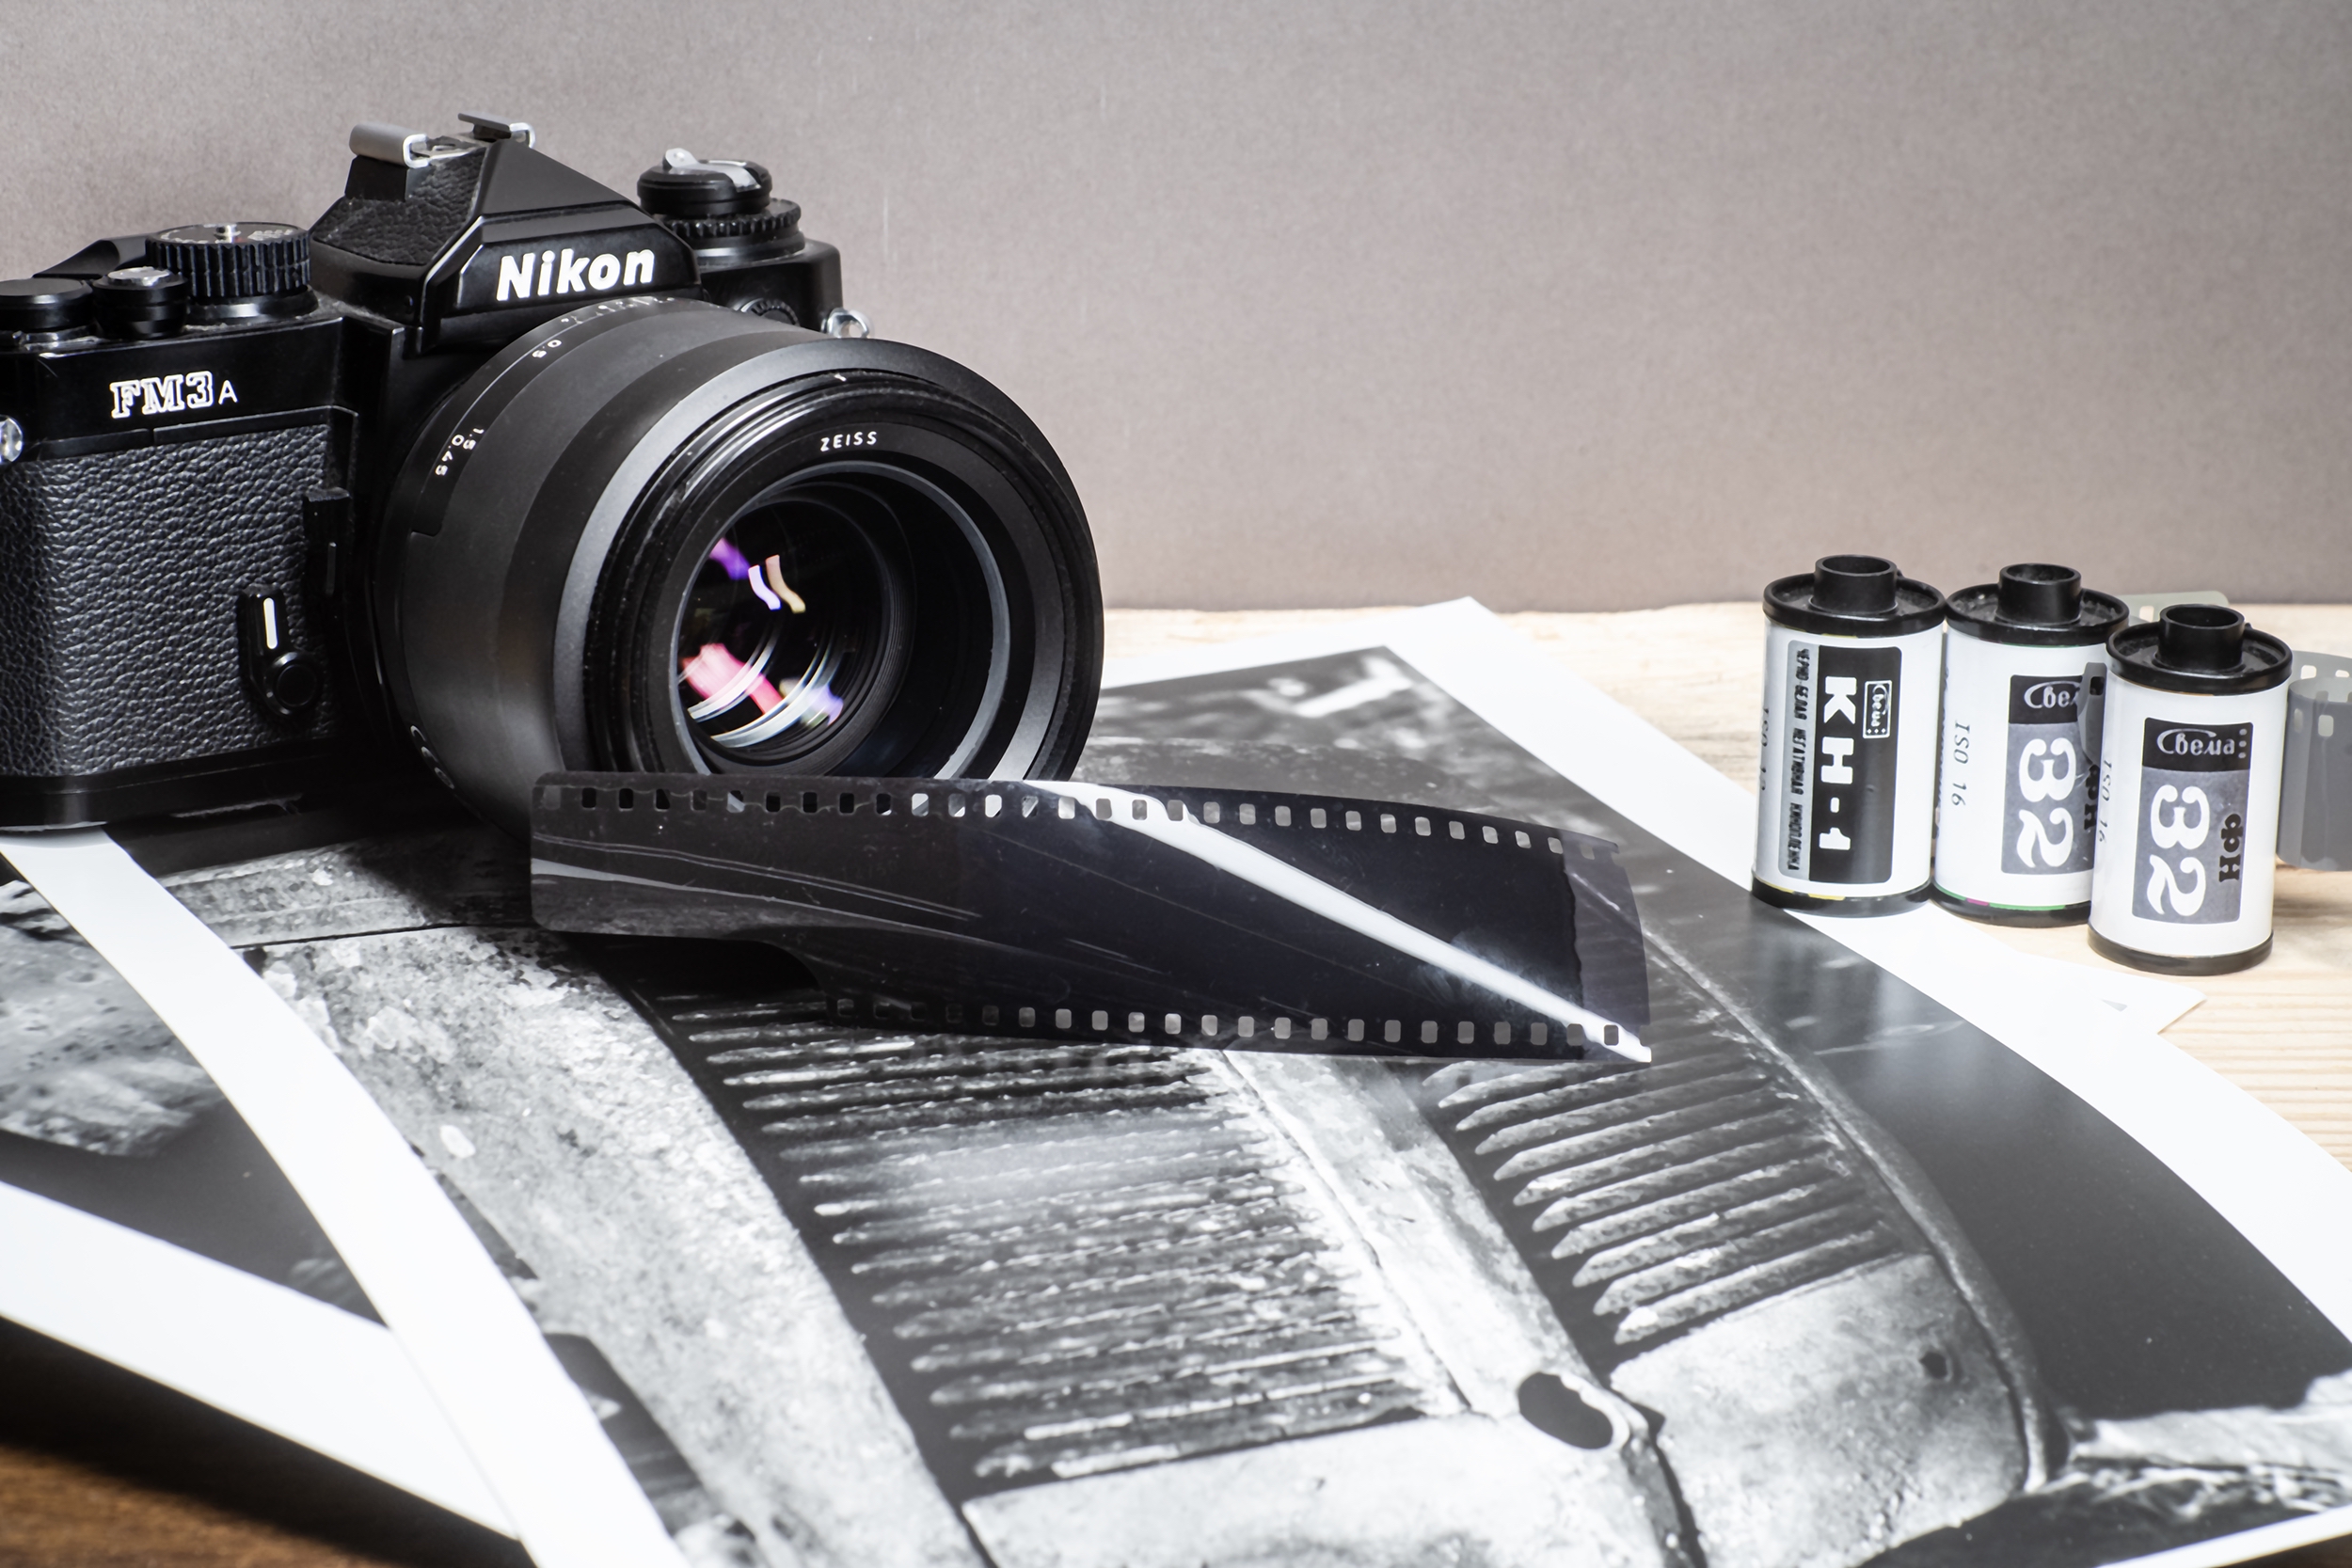
Expired Film! We either hate or love it! Hate it because we just spent hours shooting and developing just to find an emulsion full of mess or love it because we just managed to successfully shoot, expose, develop and print a film that was made 30 years ago.
See the Video…
This Soviet film was produced around the late 80’s and was kindly sent to me by the Ukrainian Film Photography Group, in Ukraine. And this film is being re-spooled and sold by an online store in Ukraine.
It is one of those low ISO films. 12 ISO. Your first thought is that pain in the arse word – TRIPOD. I love tripods. Where would we be without them. But at the same time they are a pain to lug around the streets. And most of the time public areas such as shopping centres and complexes won’t let you use one. Try taking a tripod on the South Bank in London. You get told to put it away! But. With ISO 12 you have no choice.
I don’t know the history of this film. I couldn’t find much concrete answers online. Maybe it was originally a 100 speed and because of the age the people spooling and labelling it have stamped ISO 12 on the box to count for sensitivity. Whatever it is, it is really nice!
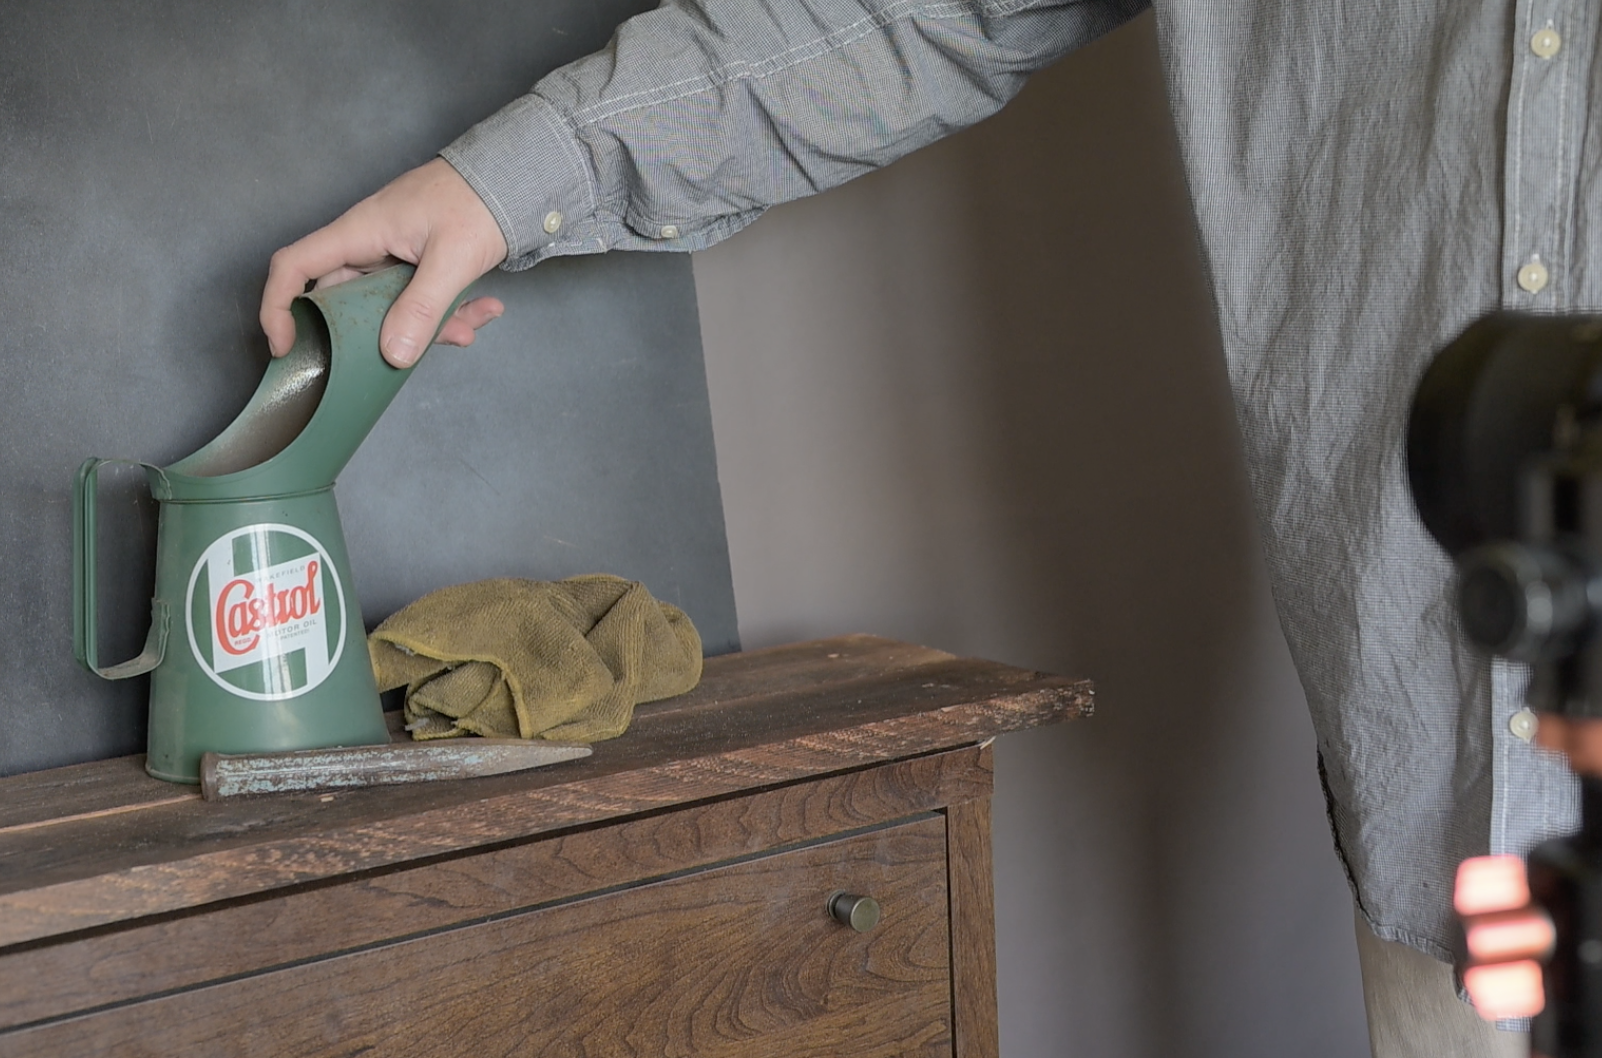
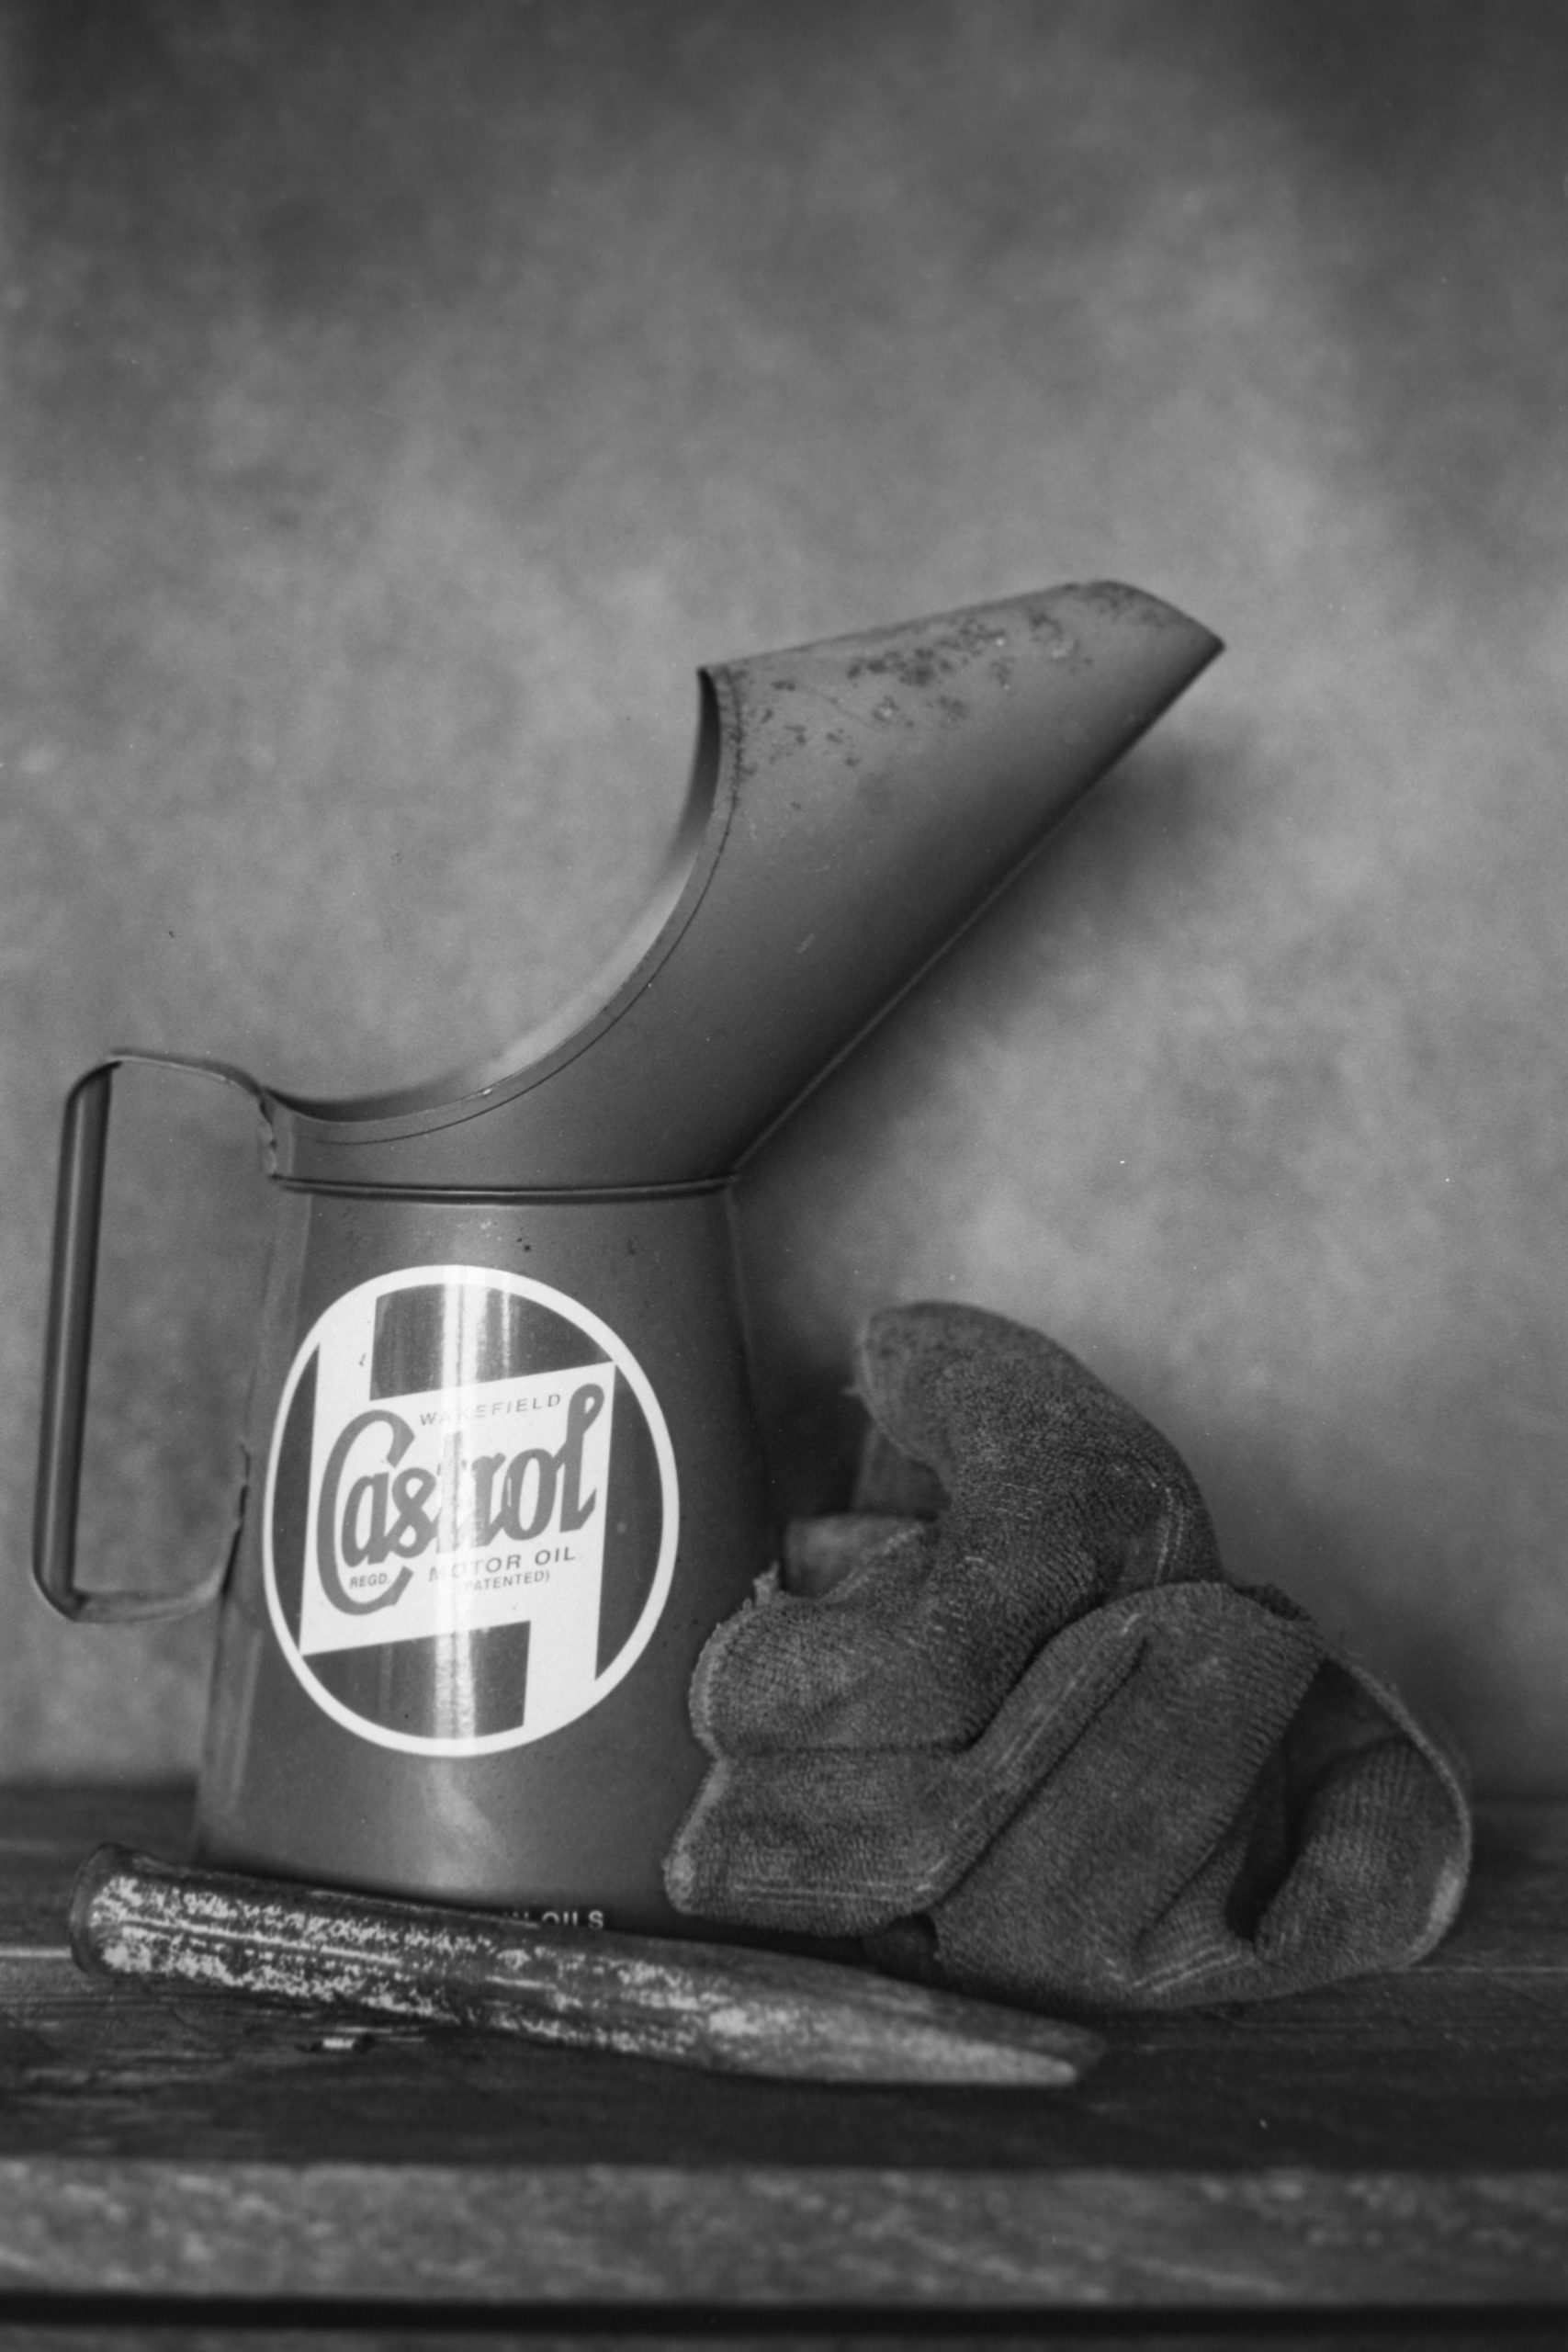
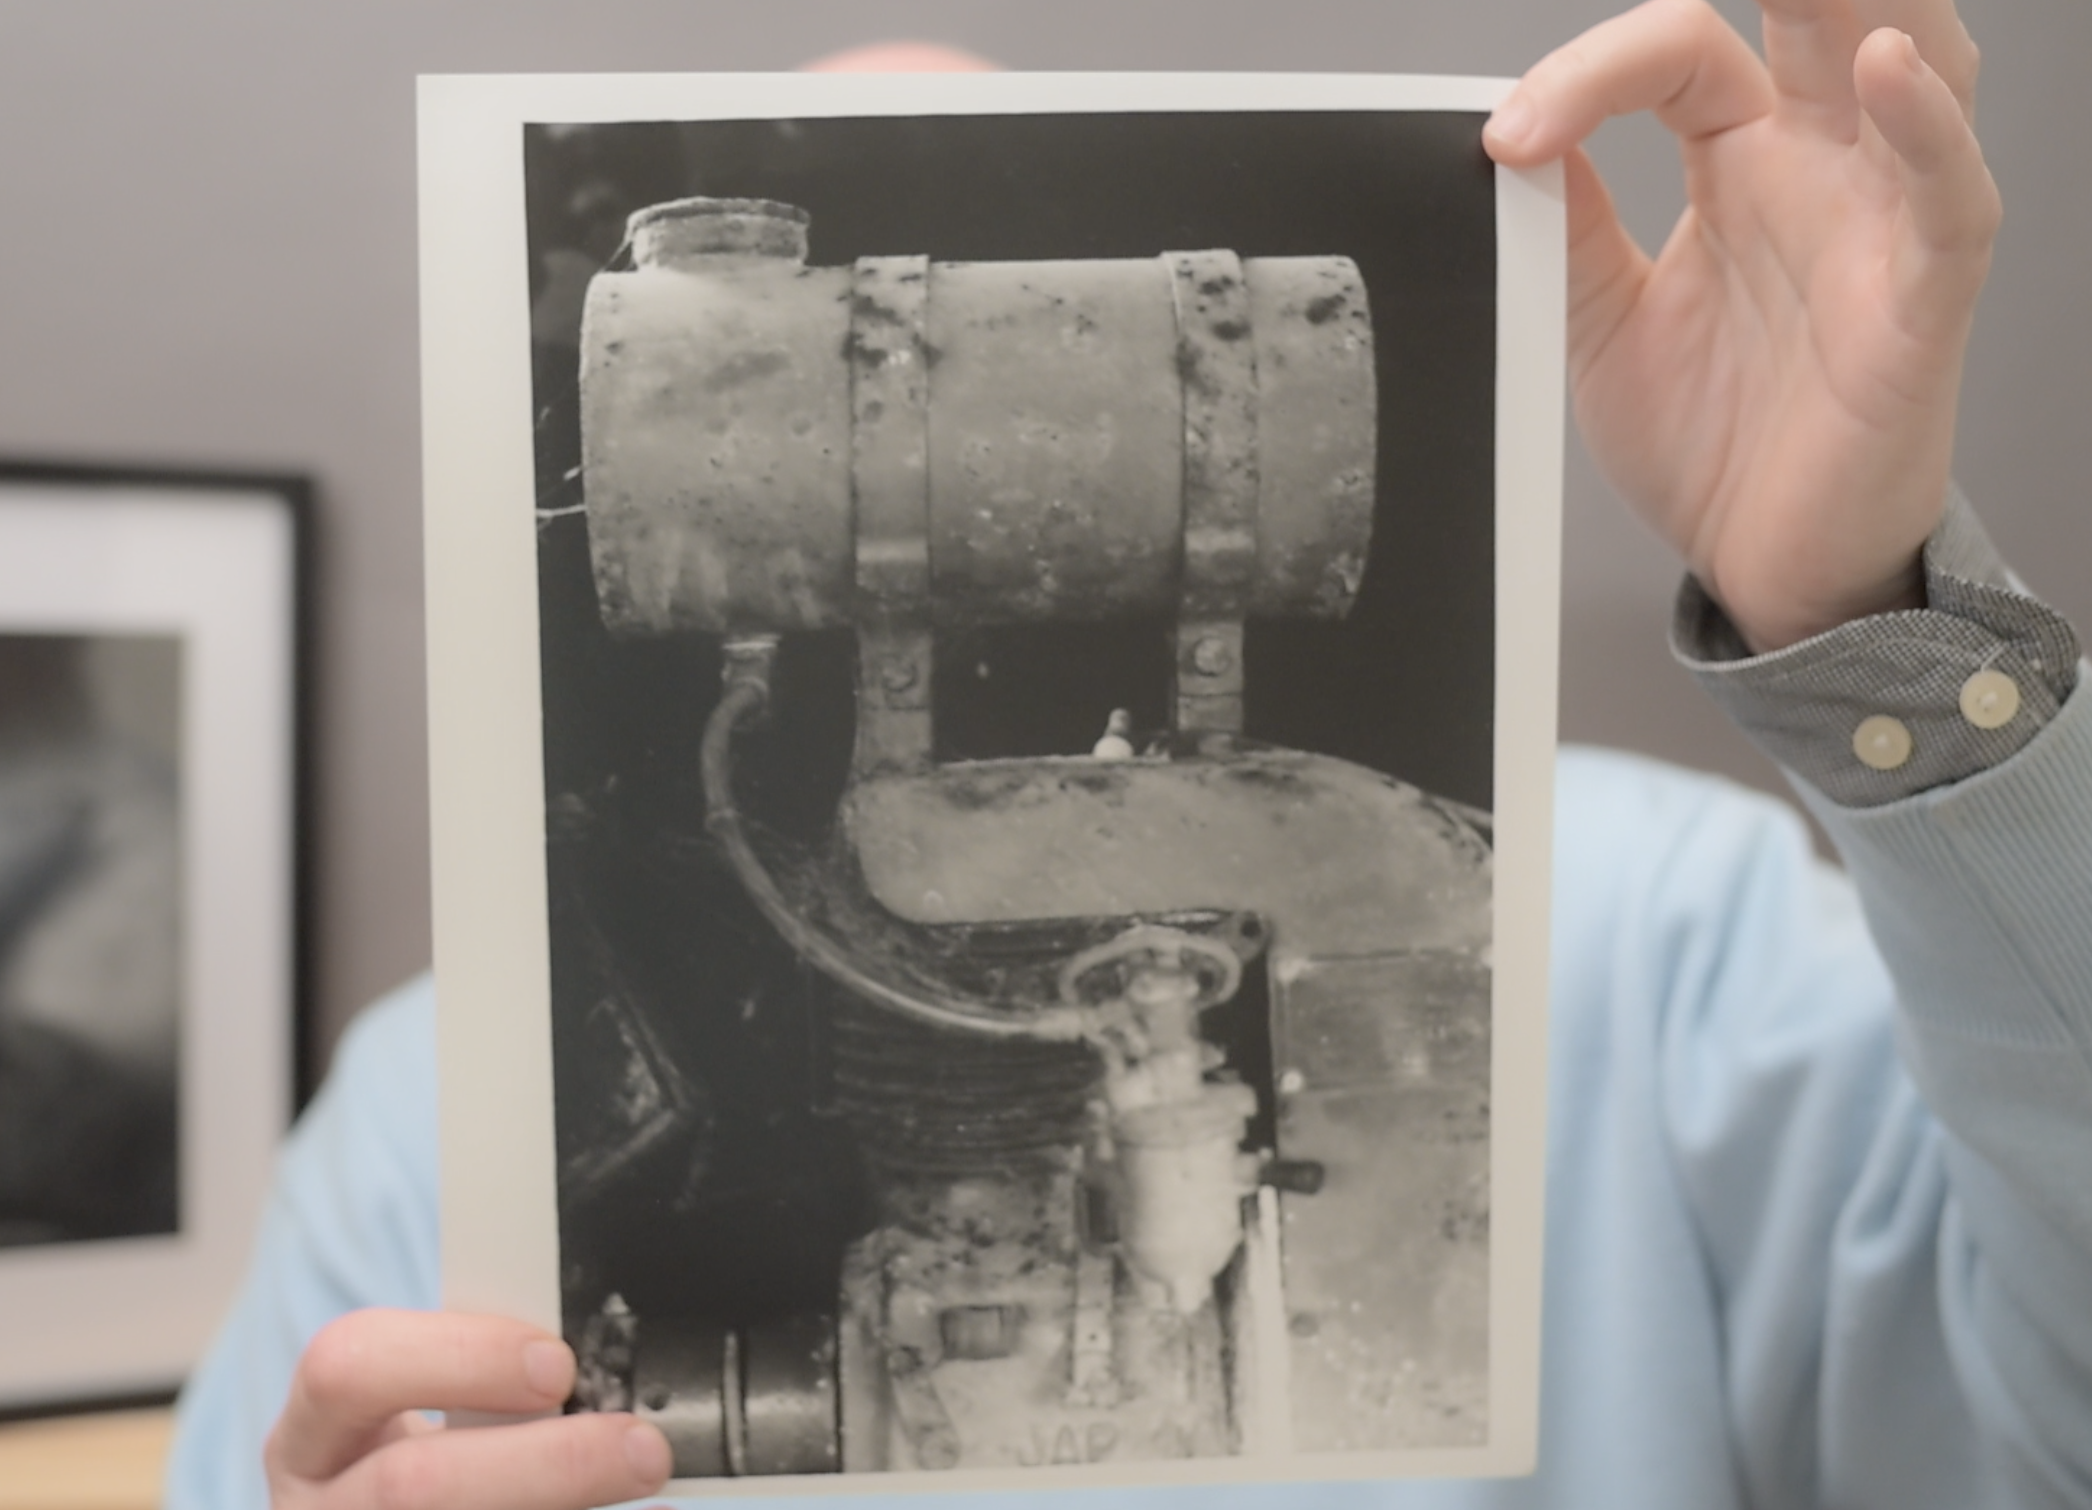
After doing some developing tests (you can see the video here) I set out to shoot some still life subjects indoors as a test. I have two rolls to play with. I set up a simple scene indoors with some rather old objects.
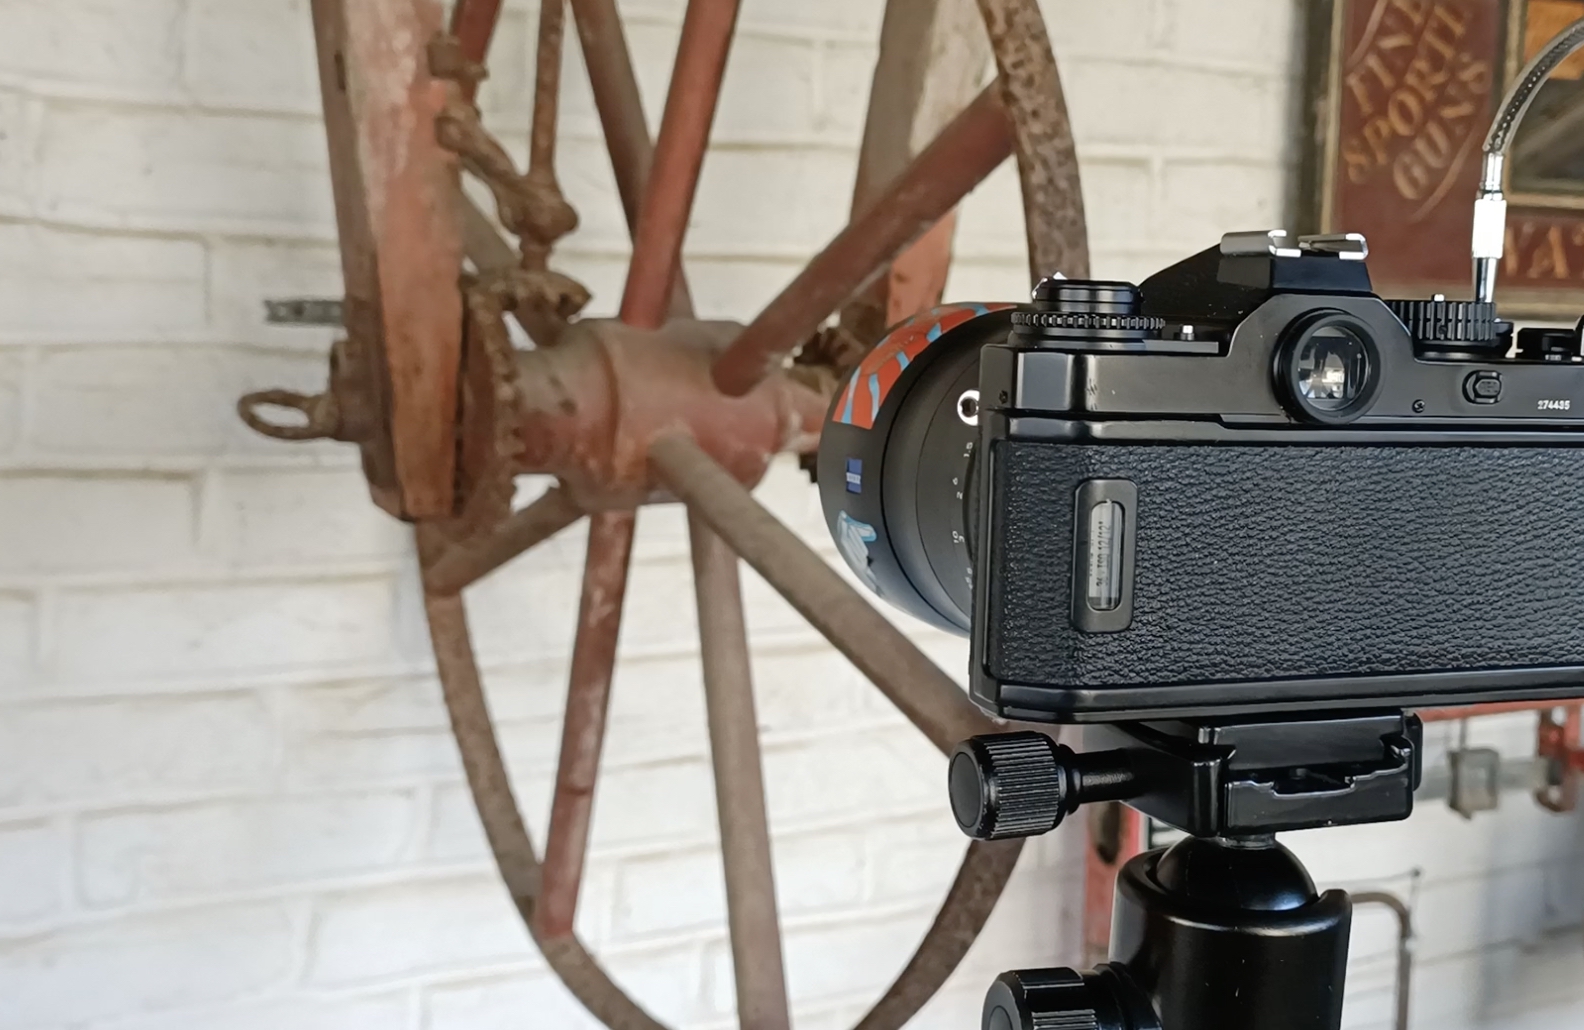
And here are the results after rotary processing in ID-11 for 9 minutes 1/1 at 20 degrees. Camera was a Nikon FM3A with a 50mm Zeiss Milvus Lens. I set the Aperture to f2.8 which gave me exposure times of just 1 second. I din’t want to go slower than that incase I hit reciprocity.
I then took the camera to a local attraction called Arreton Barns. This place is basically a Pub and Restaurant with a few small barn shops scattered around. The owner collects old stuff and he puts them on show around his premises.
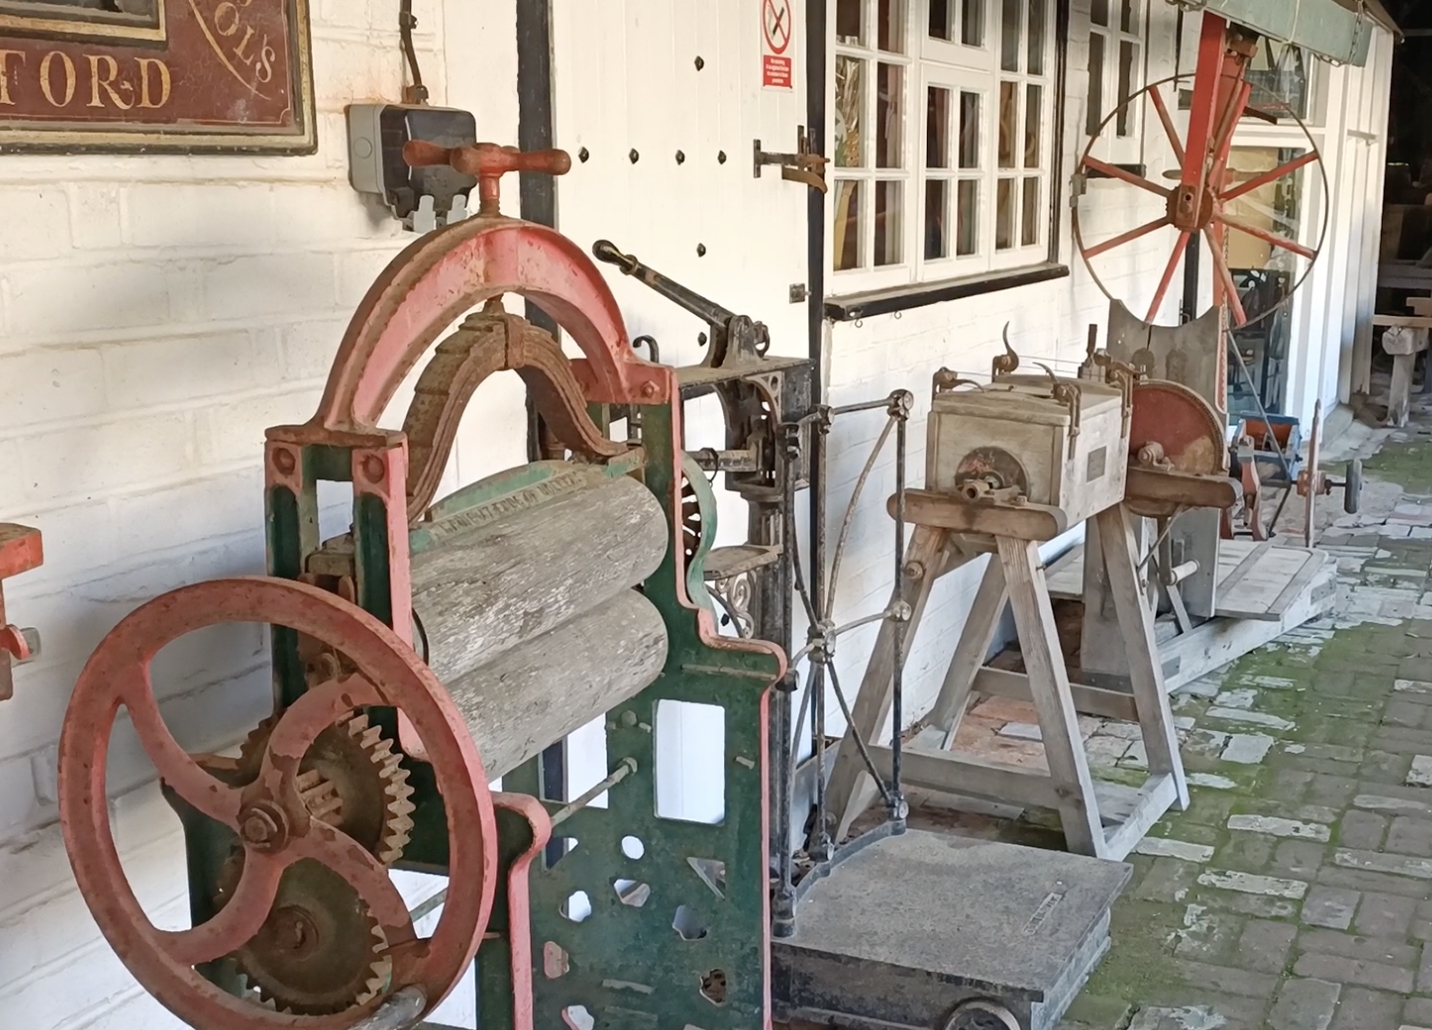
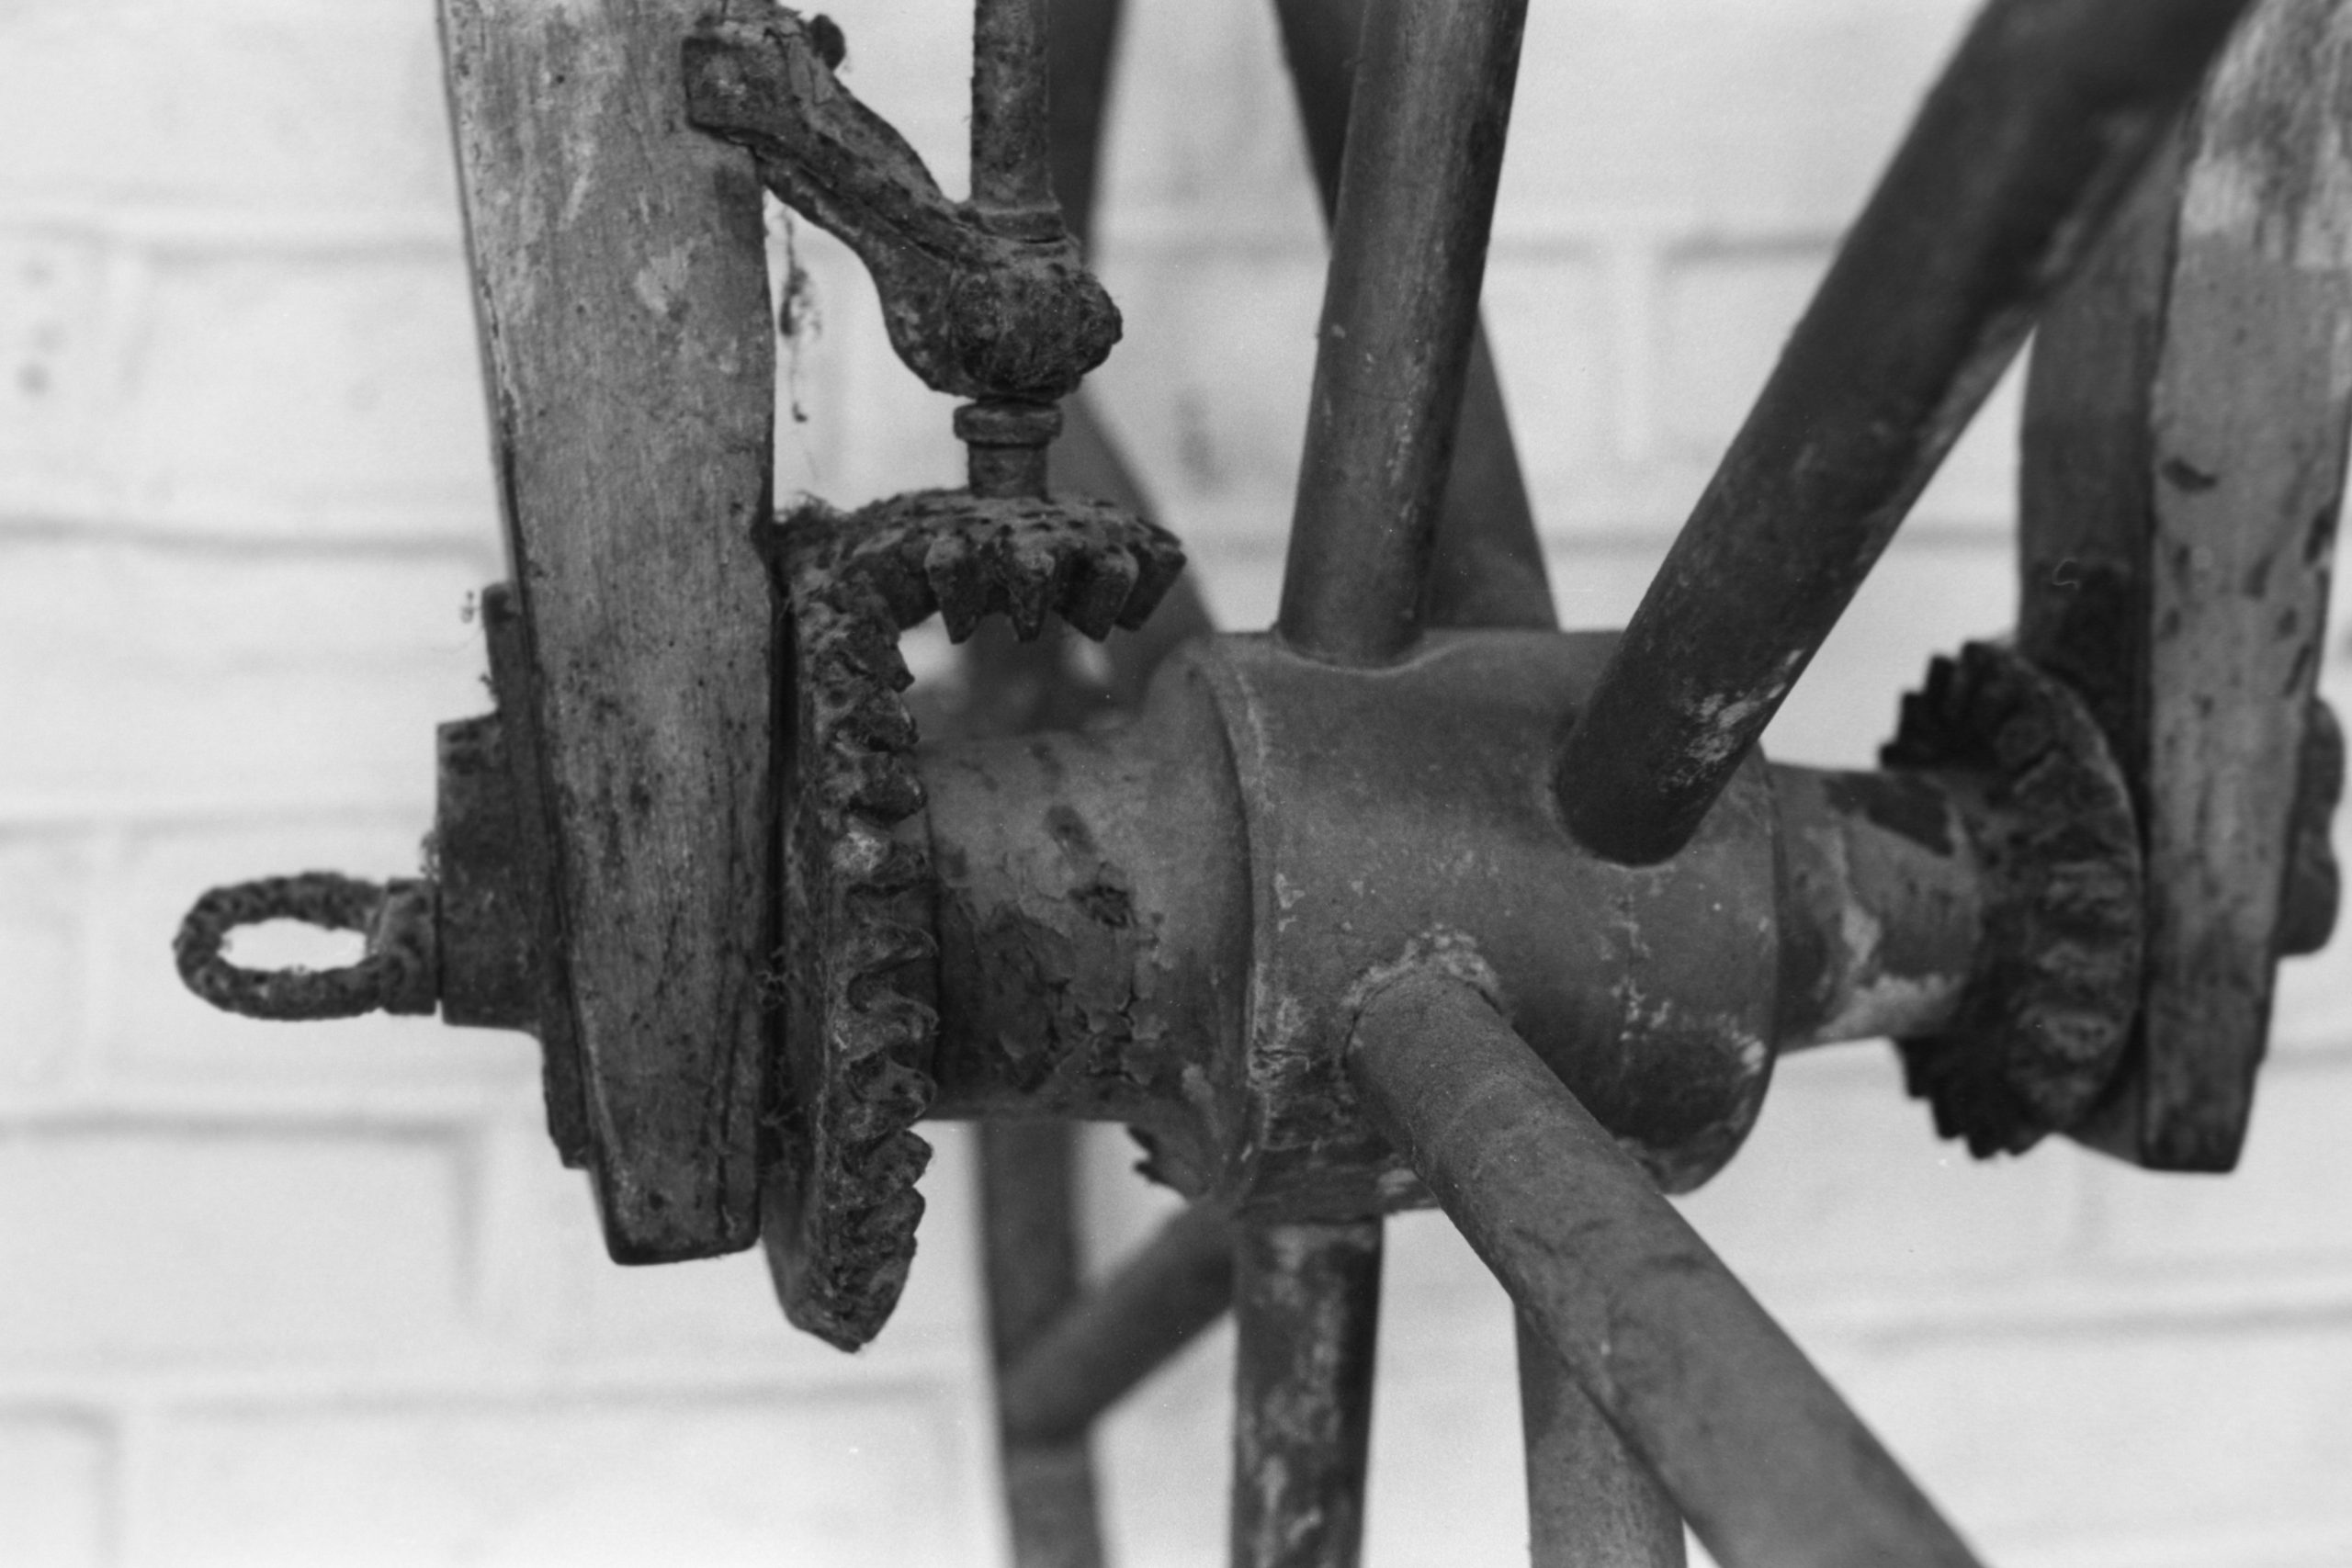
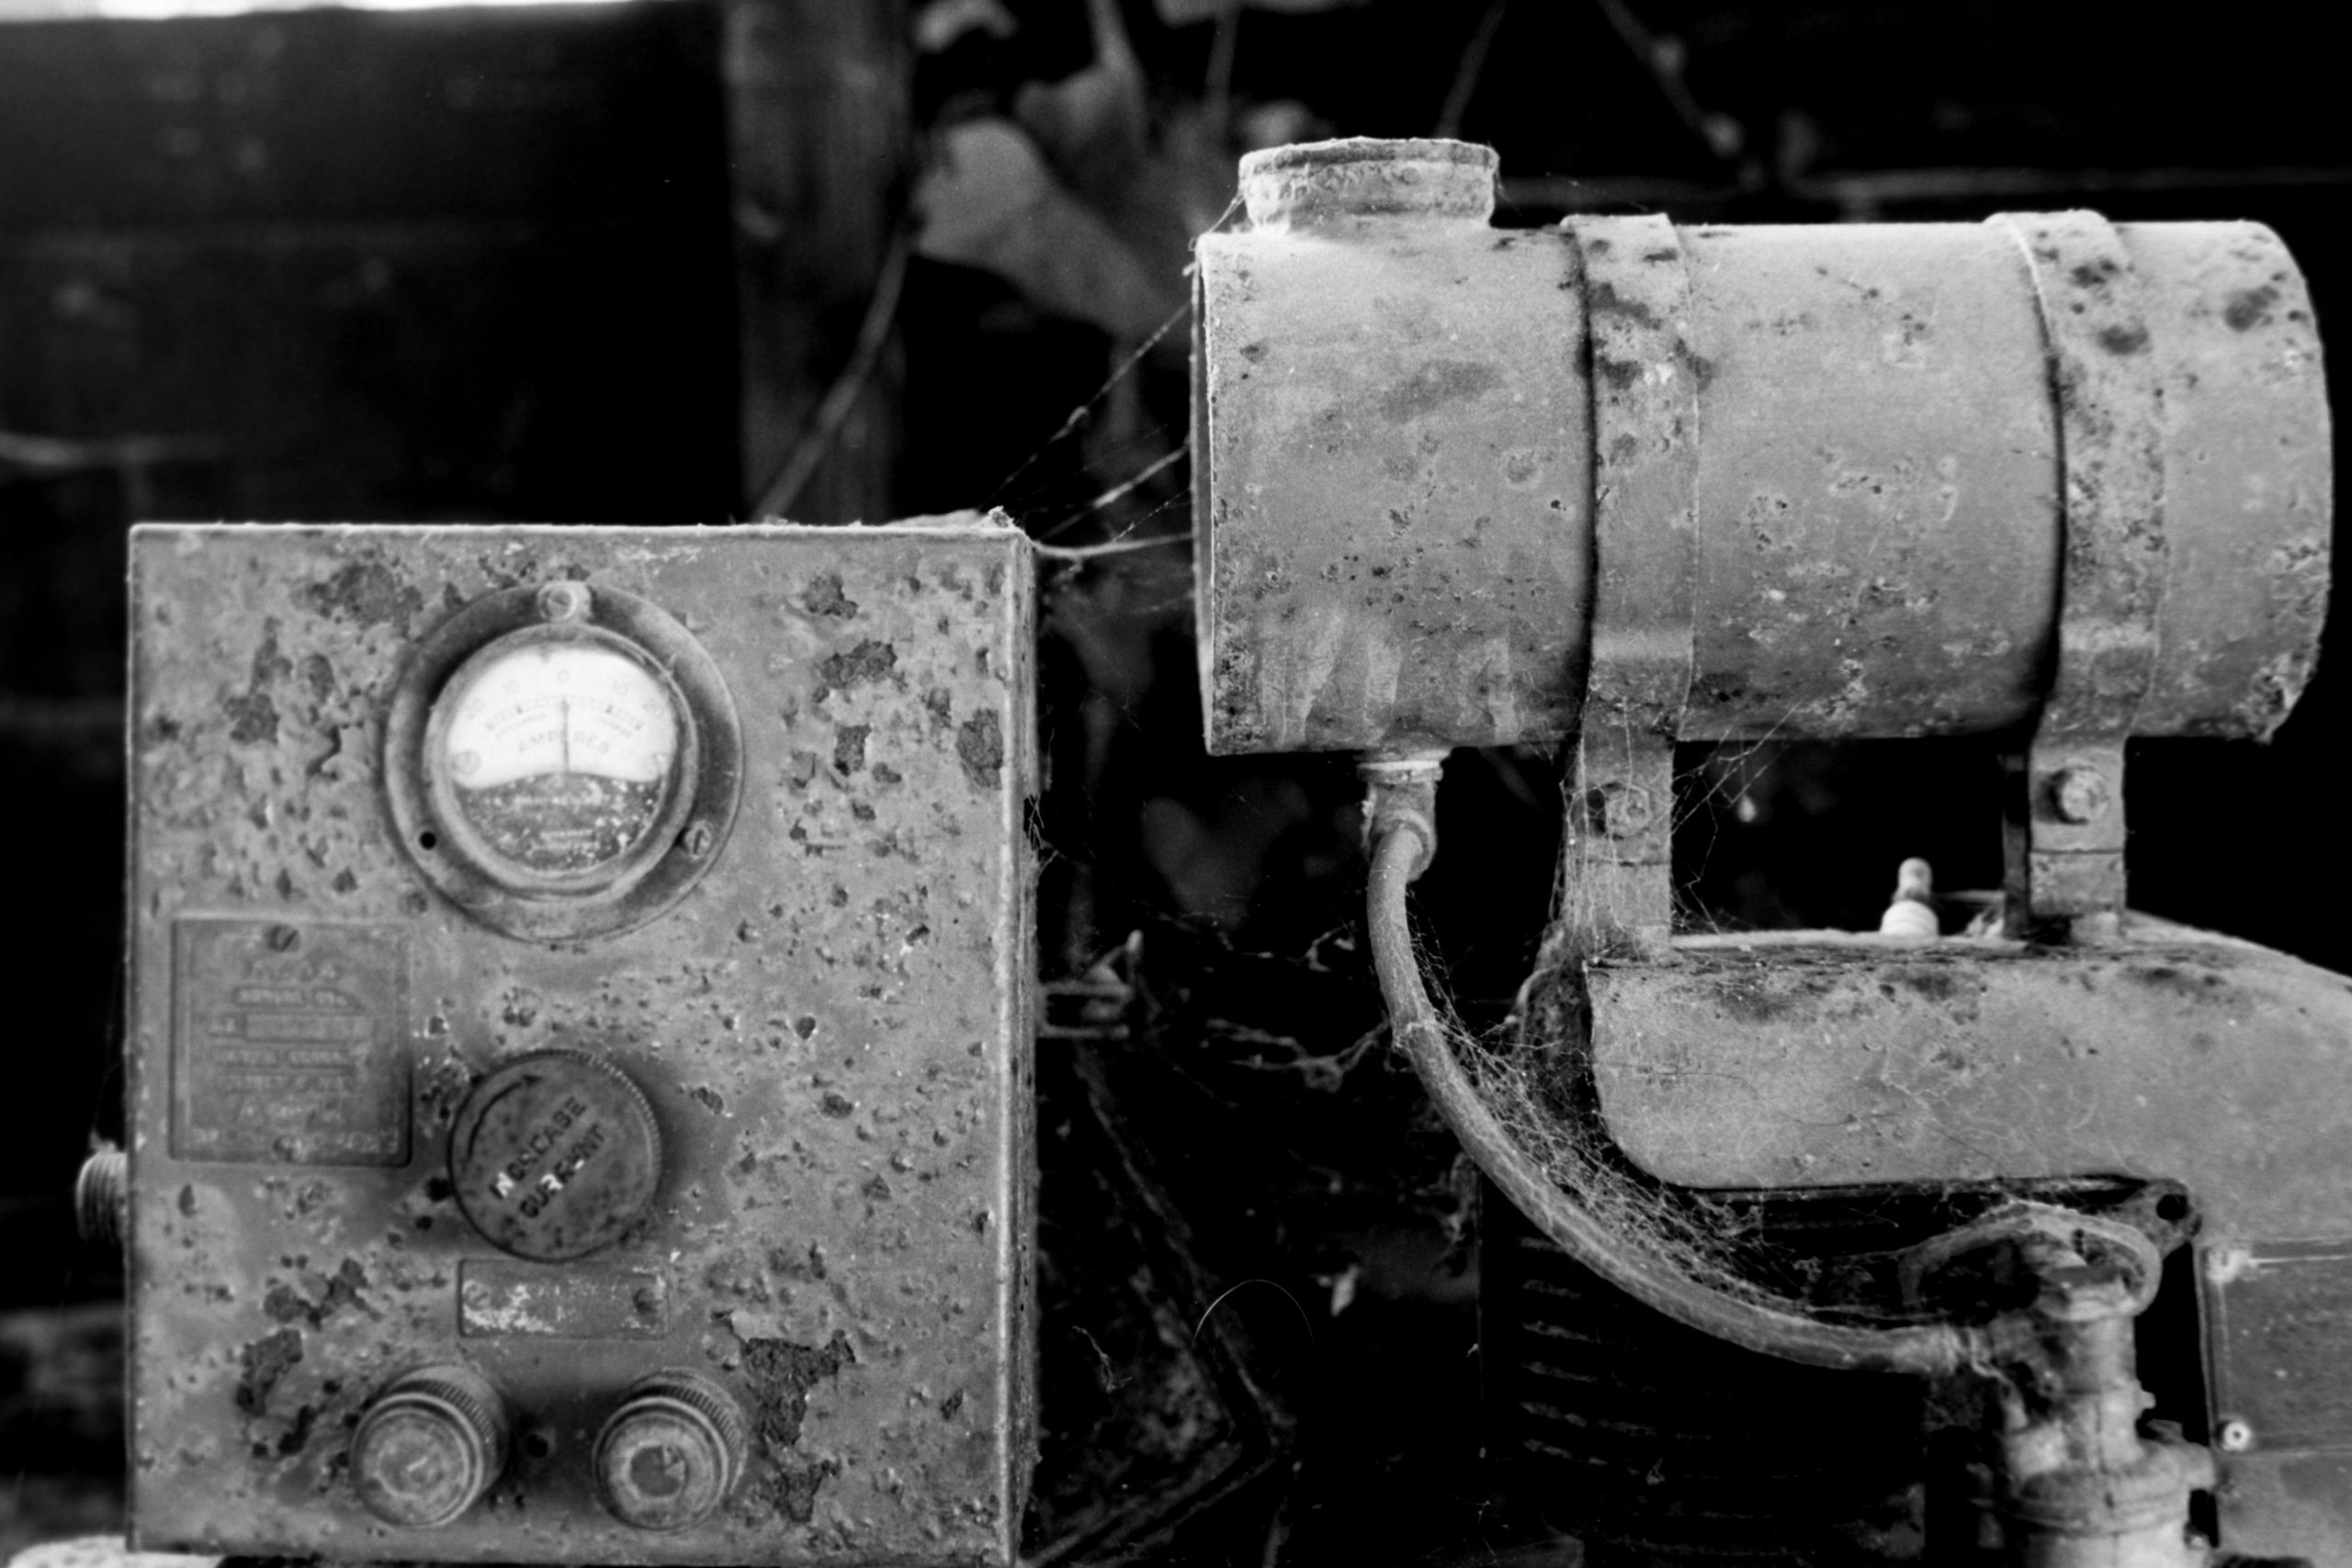
What a beautiful film! I must admit I was surprised. The film base feels very much like Ilford films. Quality. And for the price, which the guys in Ukraine are selling it at, £2.70 or there about it’s a steal!
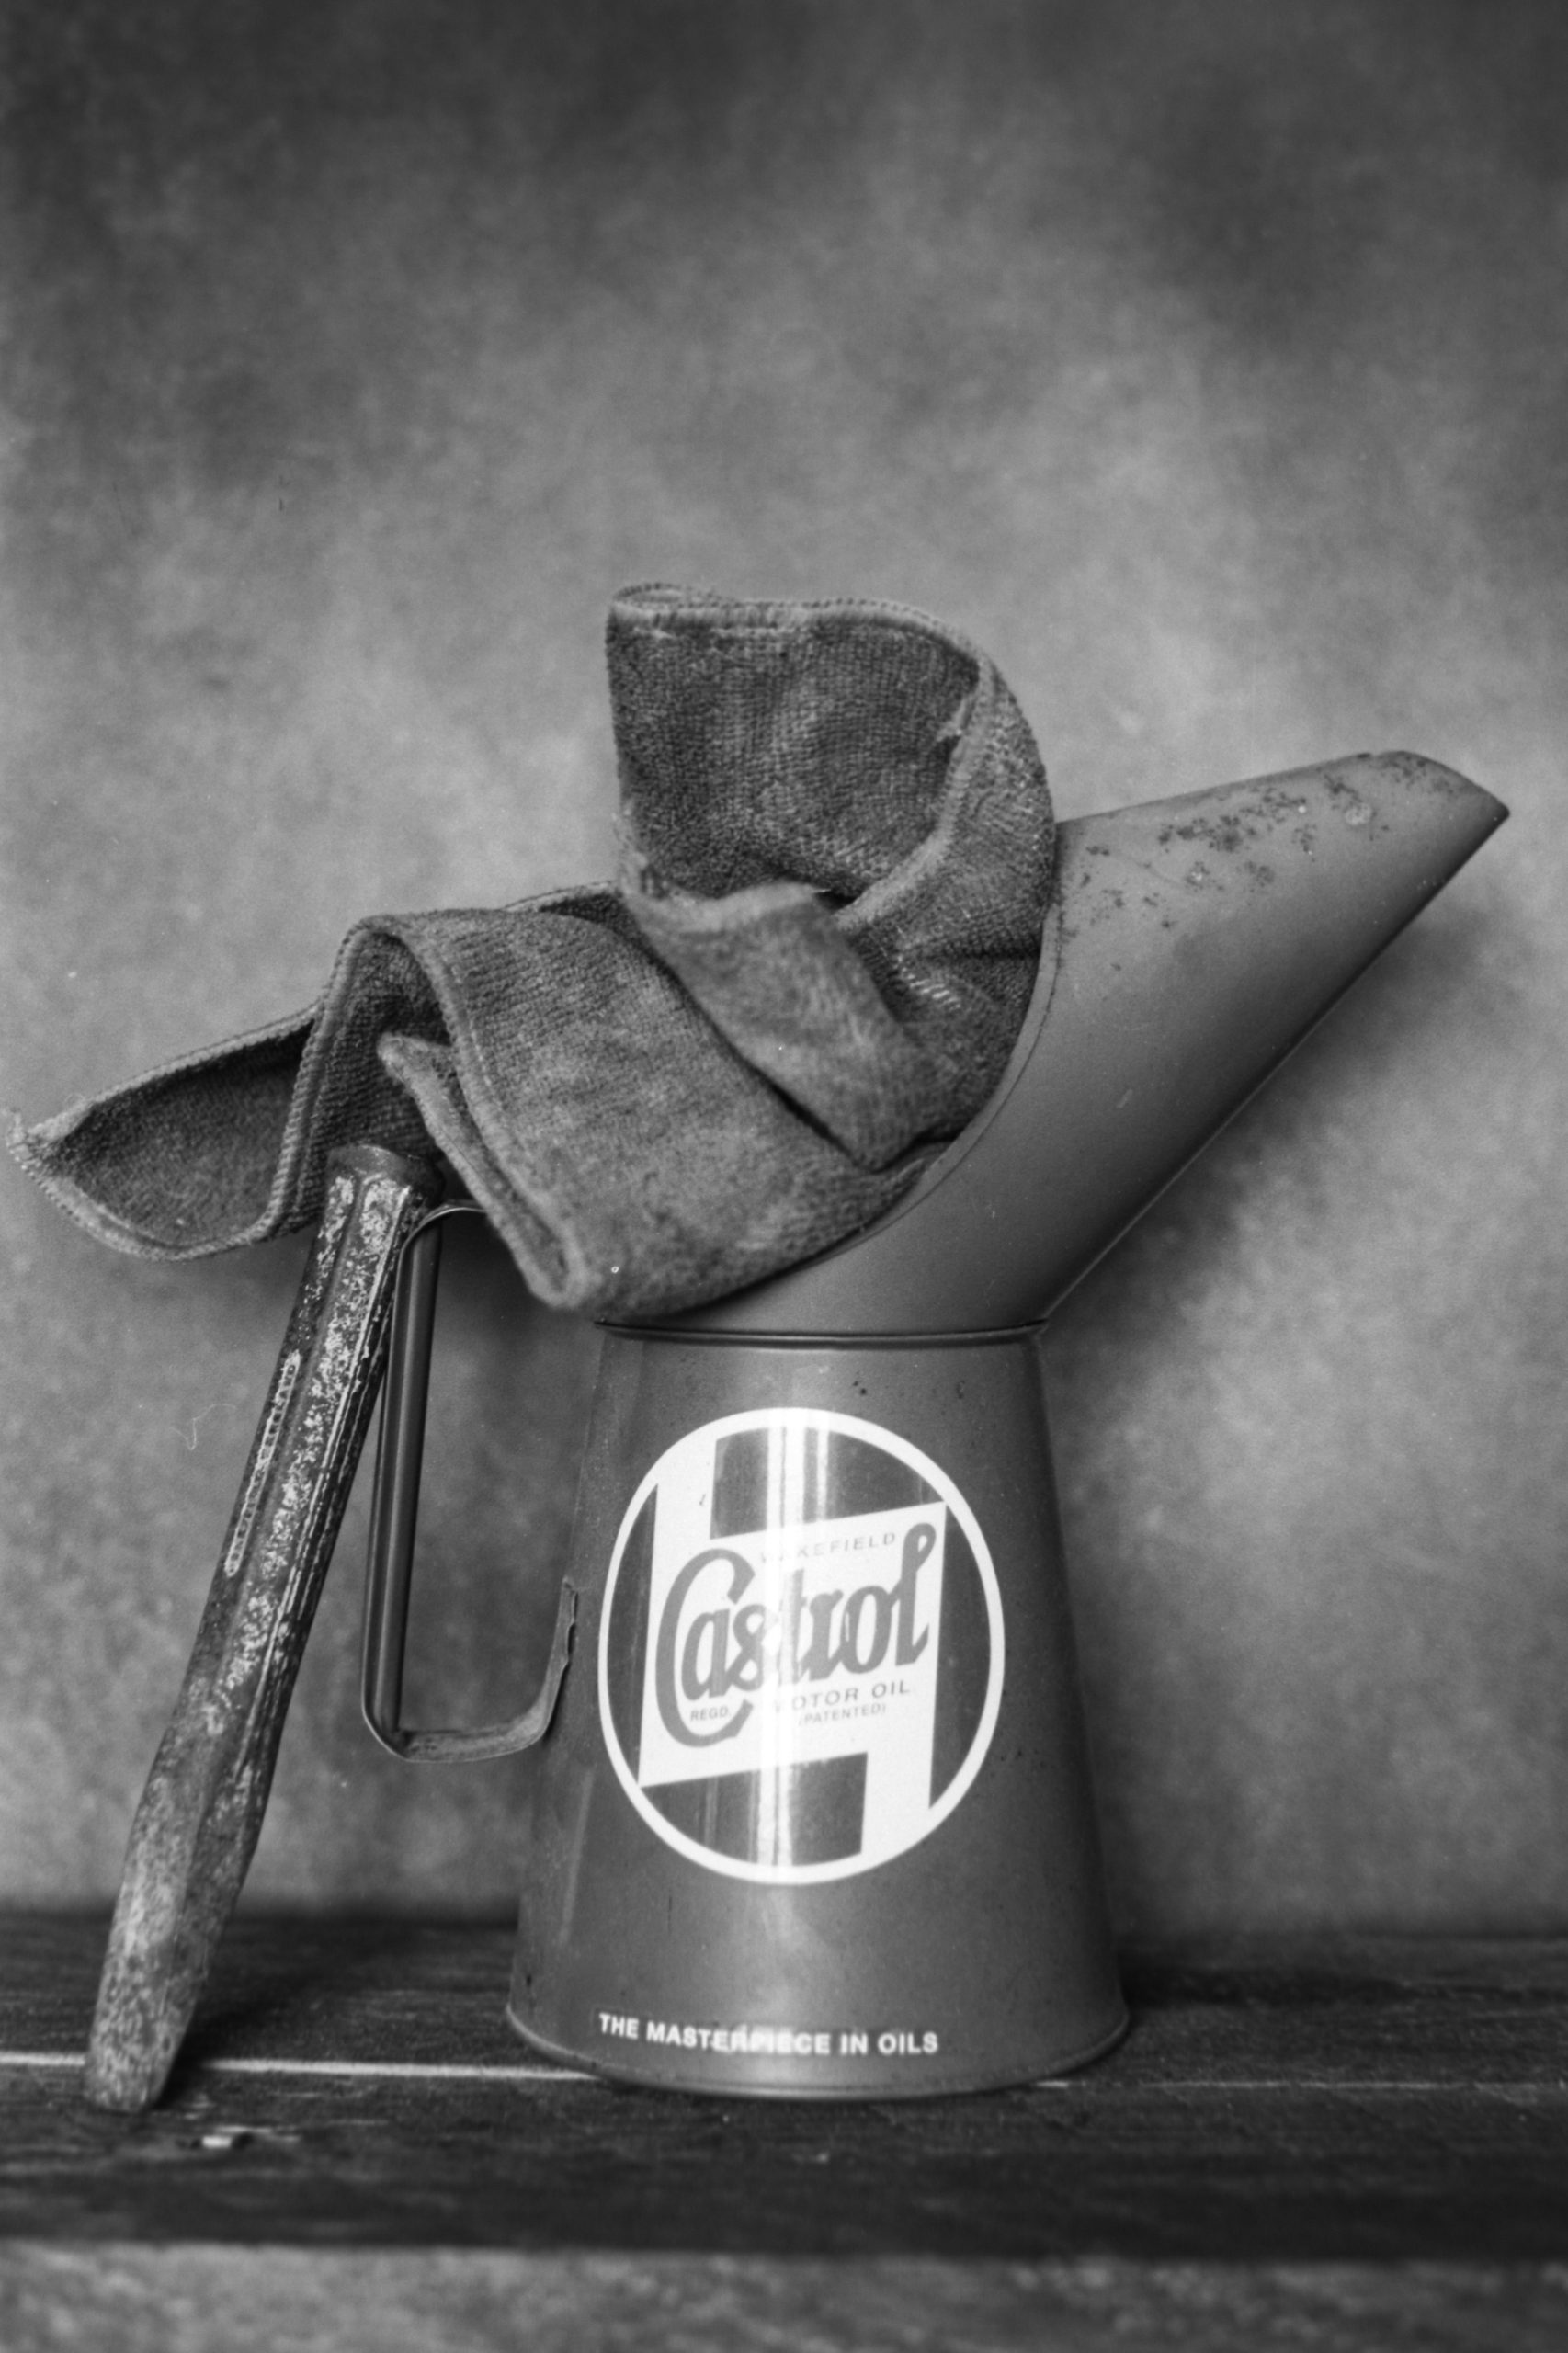
The negatives printed really well in the darkroom too with most straight off a 2.5 grade filter. The screenshot from the video doesn’t do it much justice.
And this one I framed.

It just goes to show that, even though expired film is a gamble, sometimes it has been stored well and still gives quality results today if exposed and developed correctly.
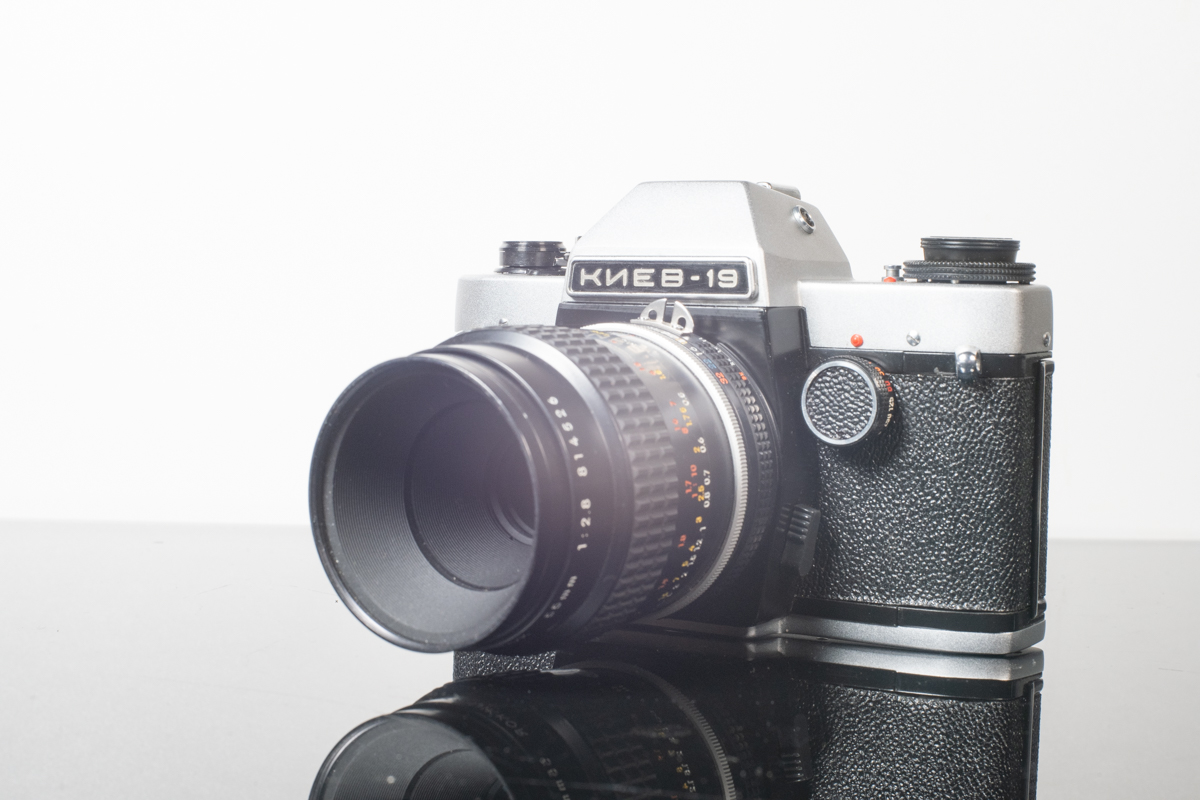
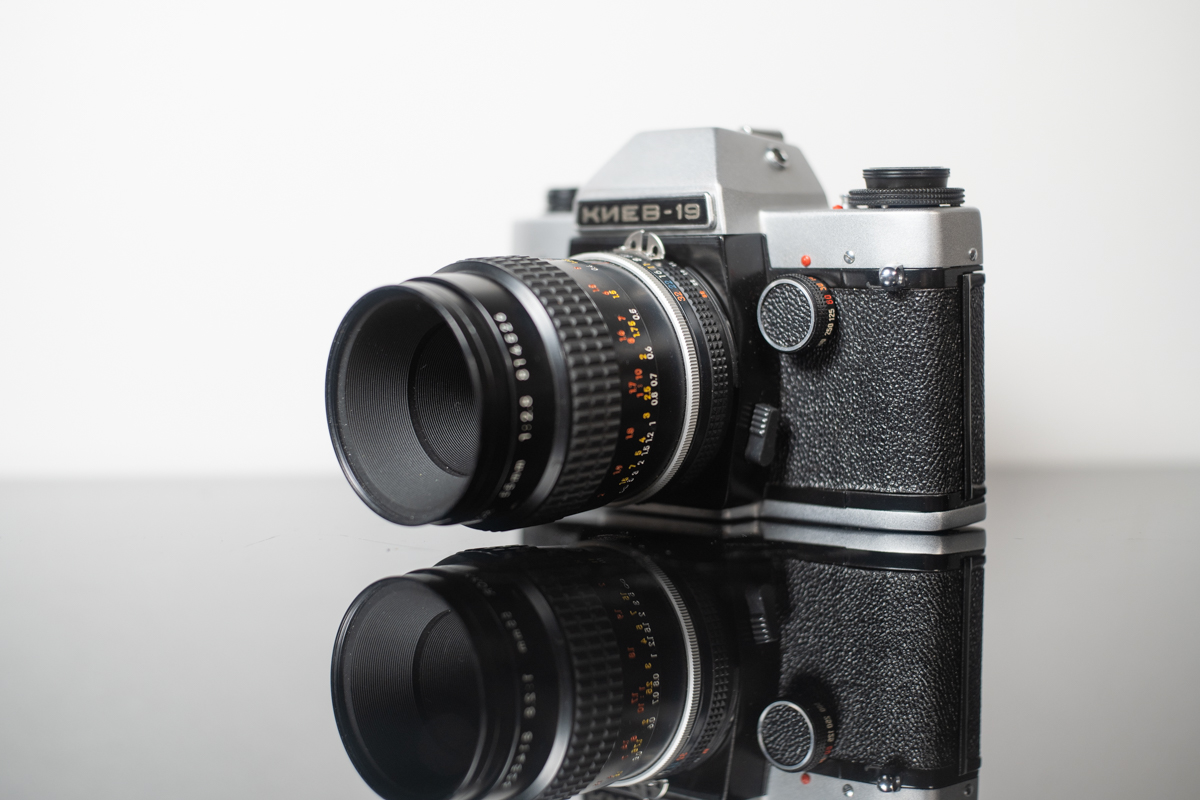
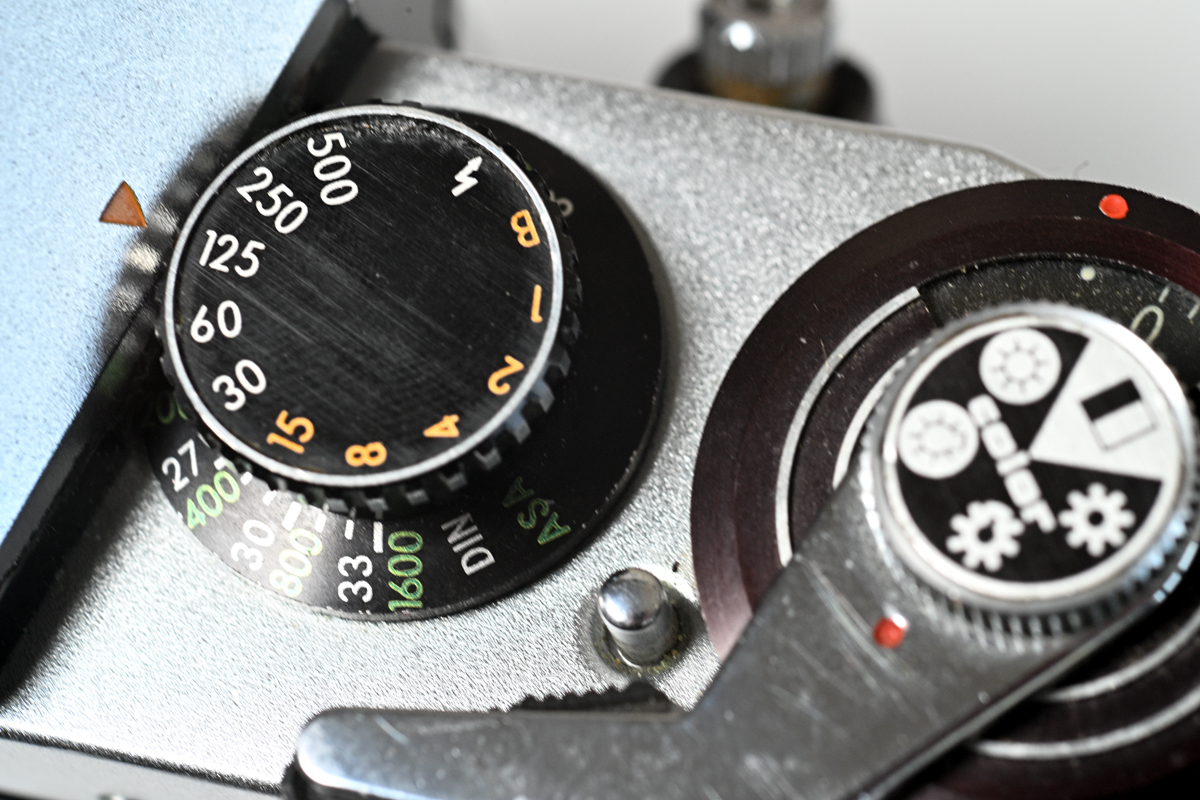
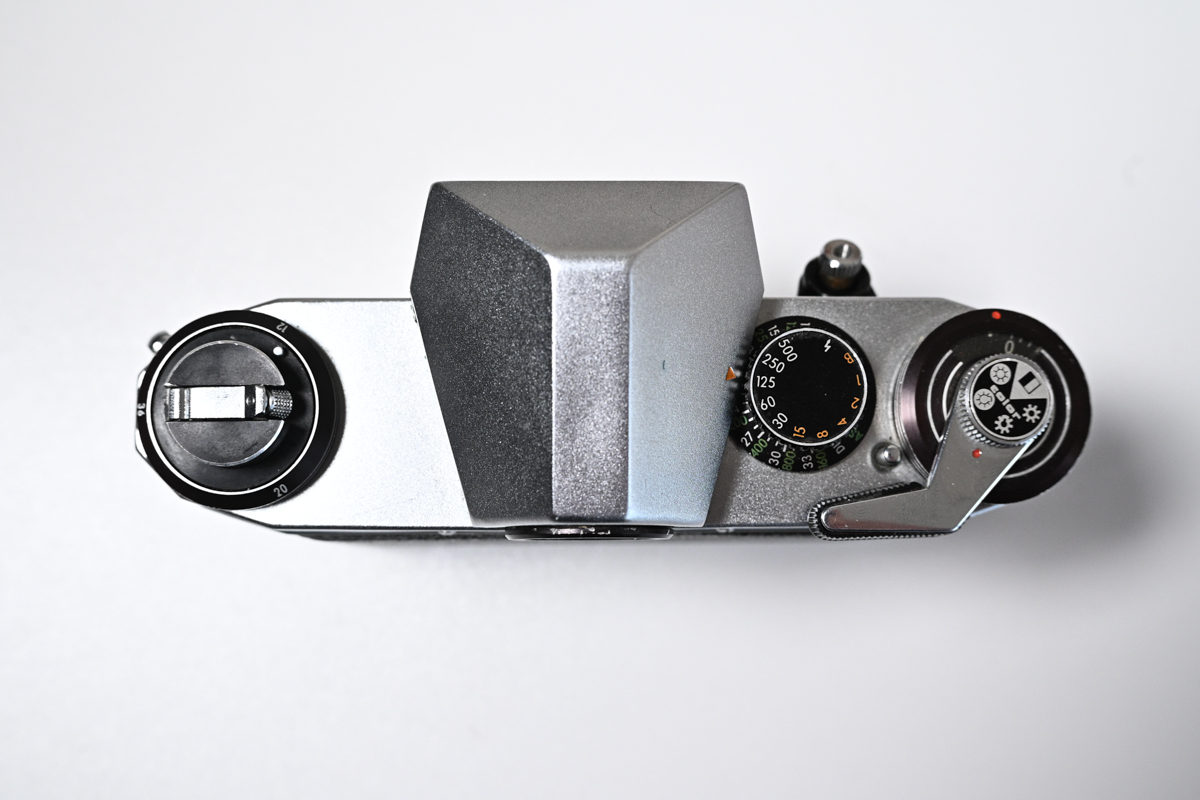
A Soviet Classic! The Kiev 19

I recently had the pleasure of receiving a very special camera from the Ukrainian Film Photography Community. Vitalli, one of the members, got in touch after watching my YouTube video about the Zenit B, a popular Soviet-era camera. They kindly suggested that while the Zenit has its fans, there might be better options out there, and offered to send me a Kyiv 19 to try. How cool is that? And before they sent it they also had the camera serviced! So I know I am in for a treat!
Now, I’m not one to get hung up on the technical specs of a camera. As long as it captures an image, I’m happy! Give me a lens, some film, and a photographic challenge, and I’m all in. But I also appreciate that there are passionate camera connoisseurs in the film community who possess a wealth of knowledge about all sorts of cameras – the good, the bad, and the unusual. Their expertise is invaluable!
The community also sent me a lens with the camera. A Helios 81H 50mm F2. I’ve never owned a Helios lens before! More on the lens soon!
Kiev 19
Let’s get straight into it! This camera is built like a Russian steam train! As is the Zenit B too! So no fear if you drop it! Just don’t drop it on your foot!
The Kiev 19 was produced in the mid 1980’s by the Arsenal factory in Kyiv, Ukraine and continued into the early 1990’s. Back then Ukraine was part of the Soviet Union. The camera is commonly known as KIEV? Even though the Ukrainian capital is KYIV, when it was under Soviet Union the name was KIEV.
It is a very simple camera and I found it comfortable to shoot.
- Speeds – 1/2 – 1/4 – 1/8 – 1/15 – 1/30 – 1/60 – 1/125 – 1/250 – 1/500 (Bulb)
- ISO – 12 – 400
- Average Metering
- 2xLR44 Batteries
- Hot Shoe / Sync Port
- Vertically-traveling metal focal-plane shutter
- Stop Down Metering / DOF Preview
- Strap Lugs
- Micro prism viewfinder with 93% coverage
- Lens mount – Nikon F
I found it strange that the shutter speed started at half a second and missed out the normal 1 Second time. But let’s face it. Most of us will be at 1/60th and above.
The ISO range on the other hand, the meter only accounted for films up to 400 speed. So if you want to shoot a 3200 speed film and rely on the meter you will have to compensate yourself using the shutter or lens aperture. I did wonder why Arsenal limited it to 400.
Focusing with the camera was very easy as it has a micro prism viewfinder inside so there is no problem getting a nice sharp focus on your subjects. Composition wise the viewfinder, apparently, covers 93%.
For me the real bonus of this camera in the lens mount. It is Nikon F! Which means I can use some of the Nikon and other Nikon F fit lenses that I have. But what about the Helios Lens?
Helios 81H
The Helios 81H 50mm f2 is a hidden gem from the Soviet era, and a fantastic lens to pair with the Kiev 19. It’s a fantastic lens that offers a unique combination of sharpness, character, and affordability. I’d say It’s a great choice for photographers who want to experiment with a classic Soviet lens. It feels tough, well made, has coated glass and smooth aperture blades and focusing. But I did notice one slight issue.
I put the lens on my Nikon ZF camera and here are some of the images.

I did notice with small apertures on darker subjects there is a slight haze in the centre of the glass that is visible and I really am not sure why this is. Even after inspecting the glass I could see no obvious signs.
Kiev 19 & Helios Lens.
For my YouTube Vlog I went to a few various locations loaded with an expired roll of Kodak 400CN Black & White Film. I have a few rolls of this film and it works fine, even though it is a C41 process film I developed it in Black & White Chemicals. I like the look. Contrasty and a bit of grain.
Metering
As I mentioned the camera has an internal metering system and with this camera being recently serviced it was very accurate. Inside the viewfinder it just shows a PLUS and a MINUS on the left hand side and when both are lit that means your exposure is correct. For the meter to work you need to use the Stop Down Lever (DOF Preview).
This photograph I took using the cameras internal meter, which I double checked with my Sekonic incident meter. F5.6
Conclusion
As I said earlier I’m not a camera geek. As long as a camera works and can take pictures with it then that’s all that matters. Even if a camera I have isn’t comfortable to use on a daily basis it’s still nice to own it and shoot it now and again, such as the Praktica MTL5B. I find the exposure button on that camera uncomfortable but it’s still nice to load and shoot.
This KIEV 19 I found to be comfortable and I’d have no problem using it all day for some street photography. And taking Nikon glass is an added bonus!
For total beginners I’d say it’s possibly not the best camera as the metering only accounts for films up to 400 ISO, but if you’re comfortable with shooting in manual and know your photography then it’s ideal you are looking for something a little different. As for the price I can see these online for less than £100 with a lens! So I wouldn’t say it’s in that bargain range as there are many other great cameras for similar price. Unless you are looking for a Soviet camera. If you are a Nikon shooter you will find the F mount exciting as I did.
Reliability
Looking online there is a mixed bag. While the Kiev 19 might not be as reliable as a modern camera or a top-of-the-line professional model, it can be a solid and dependable shooter if you take good care of it. Many photographers still enjoy using the Kiev 19 today, and with a bit of attention, it can provide years of photographic enjoyment.
Finally
Finally Vitalli sent me an interesting read about Soviet cameras and the manufacturers. I will leave you with what he said.
The Western film community often dismisses Soviet cameras as nothing more than exotic, unreliable display pieces. This perception holds some truth but does not tell the whole story. Cameras produced in the USSR often seem archaic and peculiar, and this impression is frequently accurate. However, to understand why, one must consider the context and circumstances under which they were created. In this account, I aim to explain why the Kiev-19 camera is special and worthy of attention.
The Soviet Camera Industry: Three Key Players
There were three major photographic equipment manufacturers in the USSR. The first was KMZ, the most well-known internationally. Their cameras showed minimal progress from model to model, and their top product at the time, the Zenit-19, exhibited worse reliability than the cheaper Kiev-19 during tests conducted internally by KMZ. It is worth noting that the Kiev-19 bodies used in these tests were obtained through the State Optics Institute (GOI) and had already undergone rigorous state trials, meaning their mechanisms were significantly worn. Despite this, Zenit cameras were produced in massive quantities and widely exported.
The second major player was LOMO, the company that inadvertently gave rise to the lomography movement by producing compact cameras so flawed they became appealing. When tasked with creating a professional camera to compete domestically with Nikon’s F-series, LOMO developed the Almaz lineup. The Almaz-103, for example, was so unreliable that repair shops were overwhelmed with returns, and production ceased due to the design’s complexity and lack of durability.
Finally, there was Arsenal, which, in my opinion, was the only Soviet manufacturer truly dedicated to its craft. While KMZ might have been indifferent due to its primary focus on military production, the same could be said about nearly any Soviet factory. KMZ’s list of military products was similar to Arsenal’s, yet Arsenal consistently produced cameras of higher quality. Arsenal’s photographic division was a logistical challenge for the plant, which primarily manufactured gyrocompasses for missiles such as the SS-21 and SS-18, as there was insufficient space for both operations.
The Kiev Camera Lineup
One could write extensively about favoritism and other factors that limited Arsenal’s exports compared to KMZ, but for brevity, here is a summary of the Kiev-19’s history. The lineup began with the Kiev-17 and included three and a half released models (the 17, 20, 19, and 19M) and two unreleased models (the 18 and 21).
The Kiev-20 was never intended as a professional camera—that role was reserved for the Kiev-18—but it accidentally became the best Soviet SLR. Priced at $352 in 1985 (including a Helios-81 lens), it was too expensive for the general public, leading to the development of the Kiev-19. The Kiev-19 was designed as an entry-level SLR, priced at around $110. To reduce costs, features like the AI ring and a sophisticated mirror-lifting mechanism were removed, replaced with simpler designs. Despite these changes, the camera remained extremely reliable, even under harsh conditions. Criticism of its metering system often stems from confusion with the Kiev-20, which used in-house microchips prone to failure from slight overvoltage. The Kiev-19, however, resolved this issue.
Why the Kiev-19 Stands Out
The Kiev-19, produced from 1985 to 1991, was a simplified version of the Kiev-20 from the 1970s. It omitted features like a self-timer, multi-exposure capability, and a broader shutter speed range (limited to 1/2–1/500 seconds) to make it more affordable. It used a Nikon F-mount, allowing compatibility with Nikon lenses, though some lenses could jam in the mount. The Kiev-19 was praised for its reliability and ease of use, producing high-quality images even with its standard lens. However, it remained virtually unknown in the West, as it was not exported like Zenit cameras. The unauthorized use of the Nikon F-mount also prevented official sales outside socialist countries.
The Soviet Photography Landscape
The Soviet Union was a vast country where photography became a popular hobby due to limited entertainment options. However, the industry prioritized military equipment, leaving consumer goods as an afterthought. Mass-produced plastic cameras like the Smena and Lubitel were widely available but often of poor quality. Serious hobbyists faced limited choices, and what was available was frequently defective straight from the store. Professional photographers, especially correspondents for major newspapers, relied on imported modern cameras, which were prohibitively expensive.
In the 1970s, several Soviet factories began developing professional SLR cameras. KMZ produced the Zenit-19, LOMO the Almaz-103, and Arsenal the Kiev-20. While the Zenit and Almaz models were plagued by reliability issues—certified service centers even refused to provide warranty repairs for Almaz cameras—Arsenal’s Kiev lineup was reliable and user-friendly. This was largely due to Arsenal’s advanced production culture, which stemmed from its work on high-tech products like missile guidance systems and spacecraft components. Arsenal also had prior experience with high-end professional equipment, producing the Salyut (a copy of the Hasselblad 1600F) since 1957 and developing innovative automatic SLR cameras like the Kiev-10 and Kiev-15 in the 1960s and 1970s.
The German Influence
Arsenal’s photographic division benefited from the post-World War II relocation of the Contax factory from Germany to Kyiv. This included equipment, documentation, and even German engineers who helped establish production. The legacy of Contax craftsmanship influenced the high quality of Arsenal’s cameras, which consistently outperformed other Soviet-made models.

Explore your areas chasing the sun!
Ever find yourself staring blankly out the window, a camera sitting idle nearby, and a nagging feeling of ‘what should I even shoot today?’ Yep, that’s photographer’s block, and it happens to the best of us.
Whether you’re a seasoned pro or just starting out, that creative slump can hit hard. One minute you’re brimming with ideas, the next you’re stuck in a rut, overthinking every possibility and talking yourself out of even picking up the camera. It’s like your creative energy has hit a brick wall, and even the most inspiring scenes outside your window seem…blah. Happens to me… a lot!
So how do we overcome it?
While the weather can certainly be a major factor in our photography plans (especially for those of us in notoriously unpredictable climates!), relying entirely on sunshine or storms can sometimes limit our creativity.
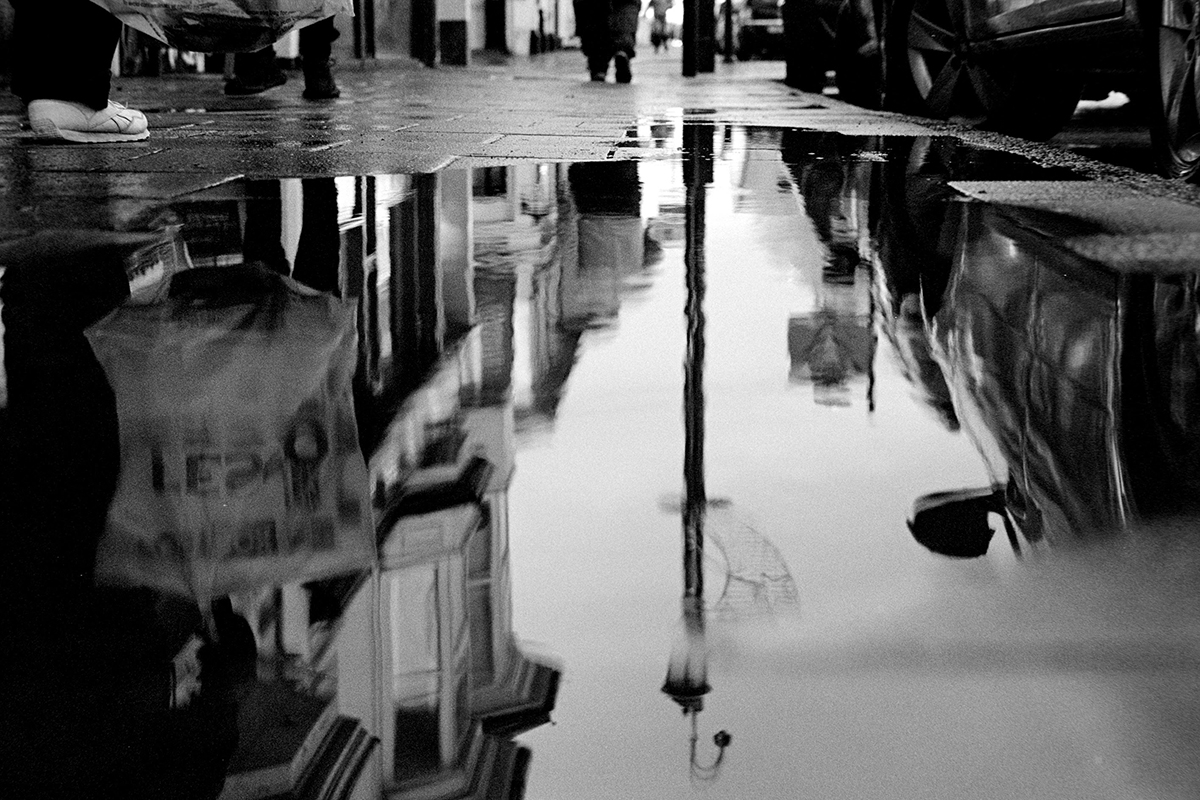
It’s easy to fall into the trap of thinking, ‘Oh, it’s raining, guess I can’t shoot today.’ But what if we saw those gray skies as an opportunity? Rainy days offer a unique mood and atmosphere, perfect for capturing reflections, dramatic light, and intimate portraits.
And even on those ‘perfect’ sunny days, stepping outside our comfort zones and challenging ourselves to find new perspectives can lead to unexpected and rewarding results. So, while the weather forecast might offer some guidance, let’s not let it dictate our creativity!”
Even when we’re eager to shoot, that nagging question lingers: ‘Where do I go?’ It’s easy to feel trapped by familiar surroundings, especially if we’re trying to avoid long journeys. The same old locations can lose their lust, and the thought of taking yet another photo of that same iconic landmark might feel like a waste of time and energy.
But here’s the secret. Even the most familiar places hold hidden gems waiting to be discovered. Instead of focusing on grand landscapes or popular tourist spots, try shifting your perspective. Explore the backstreets, look for intricate details, experiment with different angles and lenses. Challenge yourself to see your surroundings with fresh eyes.
Sometimes, the most unexpected and captivating photographs are found right under our noses.
My recent shoot
The other morning, I woke up to an unexpected sight. Brilliant sunshine streaming through my window. This was a delightful surprise, especially since the forecast had predicted a week of gloomy rain. It was one of those moments that makes you want to grab your camera and head straight out the door.
And that’s exactly what I did! With the sun shining brightly, I was immediately drawn to the idea of capturing strong contrasts. But as I started planning my route, a familiar feeling crept in. The sense of repetition, of revisiting the same old locations.
Determined to break out of my routine, I decided to try something different. Instead of focusing on the usual landmarks, I resolved to explore my local towns with a fresh perspective. And that’s when it hit me. why not look up?
To push myself even further, I loaded my Leica MP with a roll of ADOX HR-50, a film known for its fine grain and sharpness. But here’s the twist. I decided to shoot it at ISO 100 and extend the development time. Why? To amplify the contrast and create a truly dramatic look.
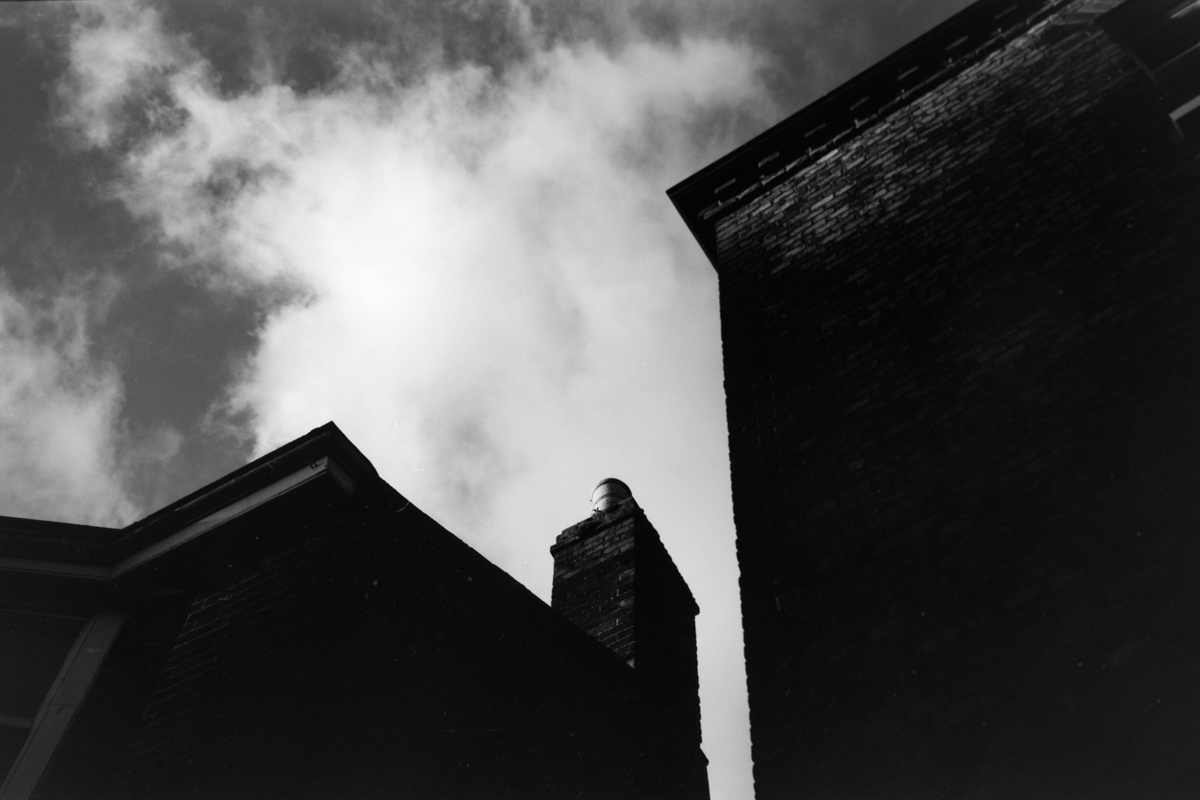
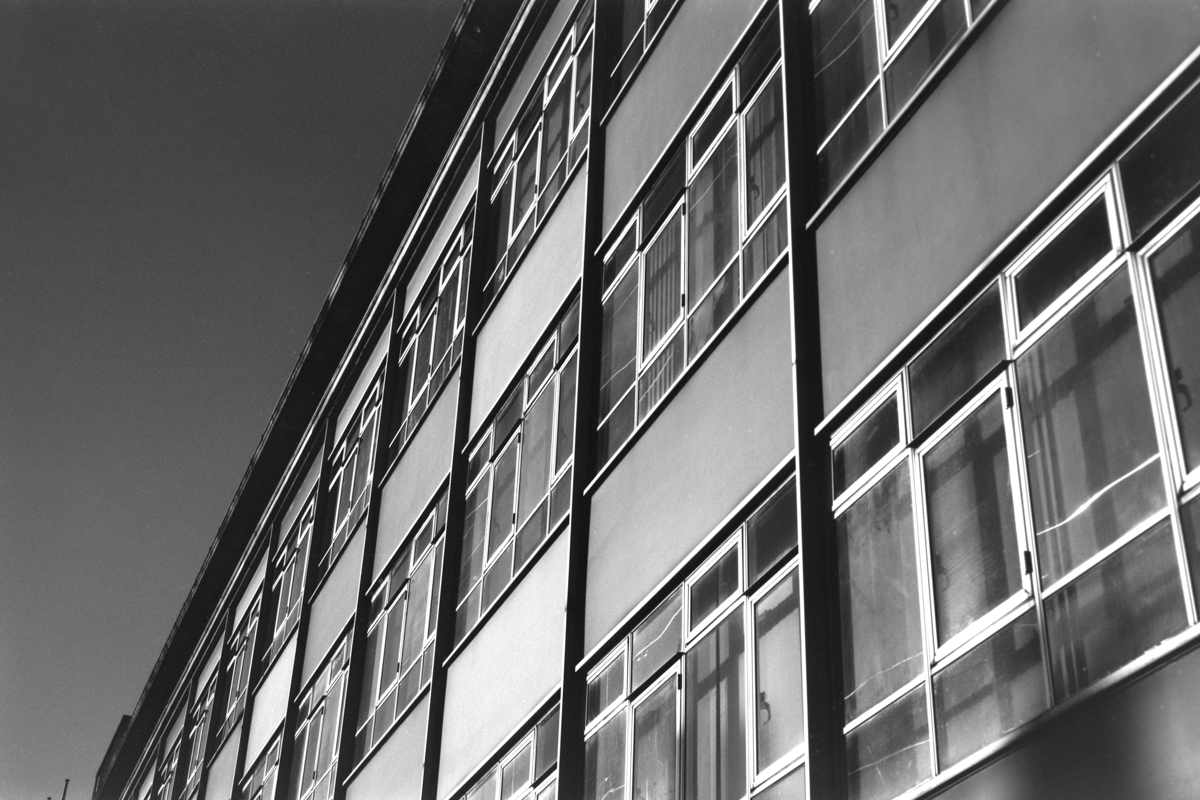
With my camera loaded and a vision in mind, I set out on my urban exploration. My mission. To find buildings bathed in sunlight, with deep shadows adding depth and intrigue. This simple constraint led me down unfamiliar paths and into hidden corners of my town, places I might never have noticed before.
As the afternoon sun descended, I followed its path, chasing the dramatic light and seeking out compositions that accentuated the contrast between light and shadow. By deliberately metering off the brightest areas of the buildings, I ensured that the shadows would fall into deep blacks, creating a striking visual effect.
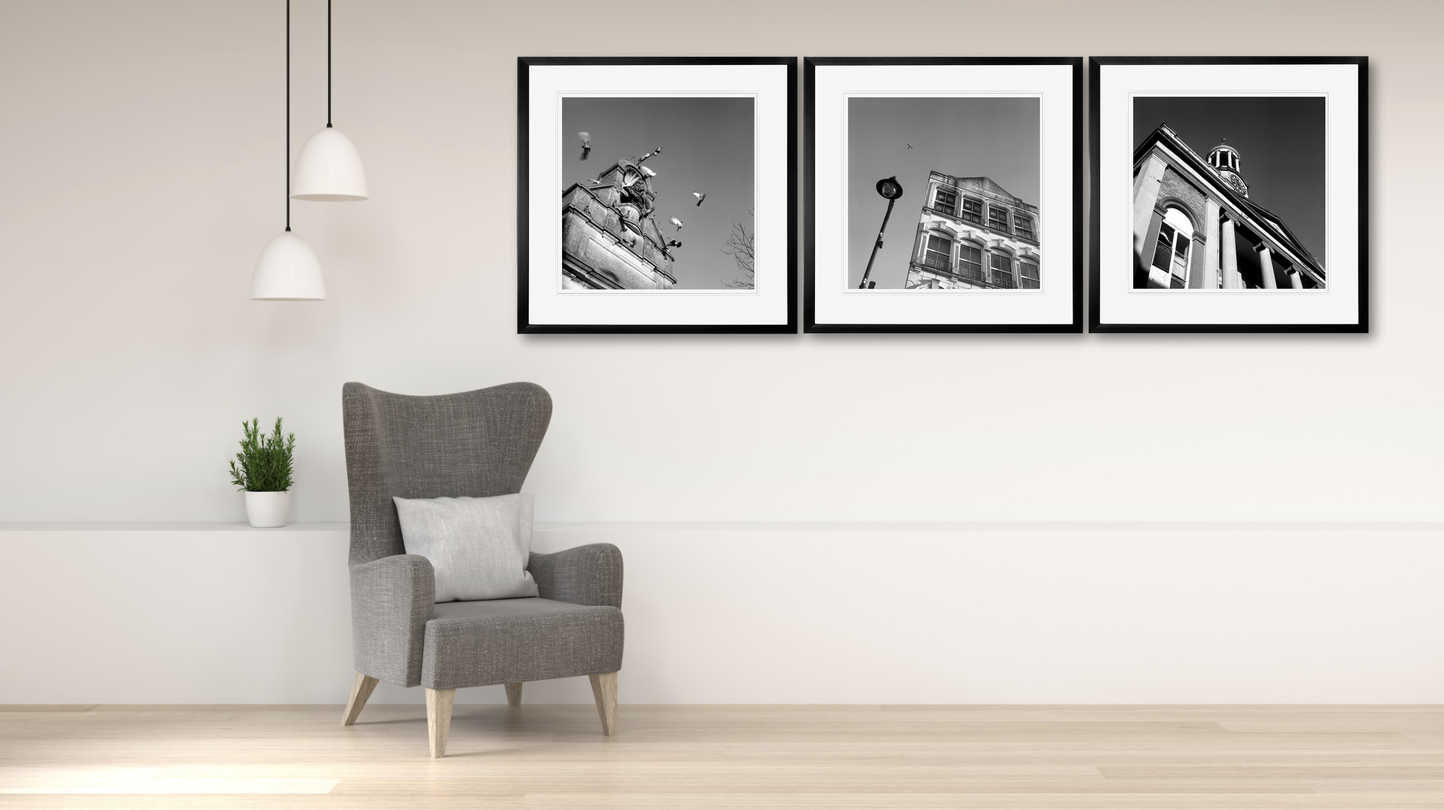
All the time I was shooting I kept imagining I was going to frame three of my photographs as a collage on a wall in some swanky office or posh home. That helped me compose my shots.
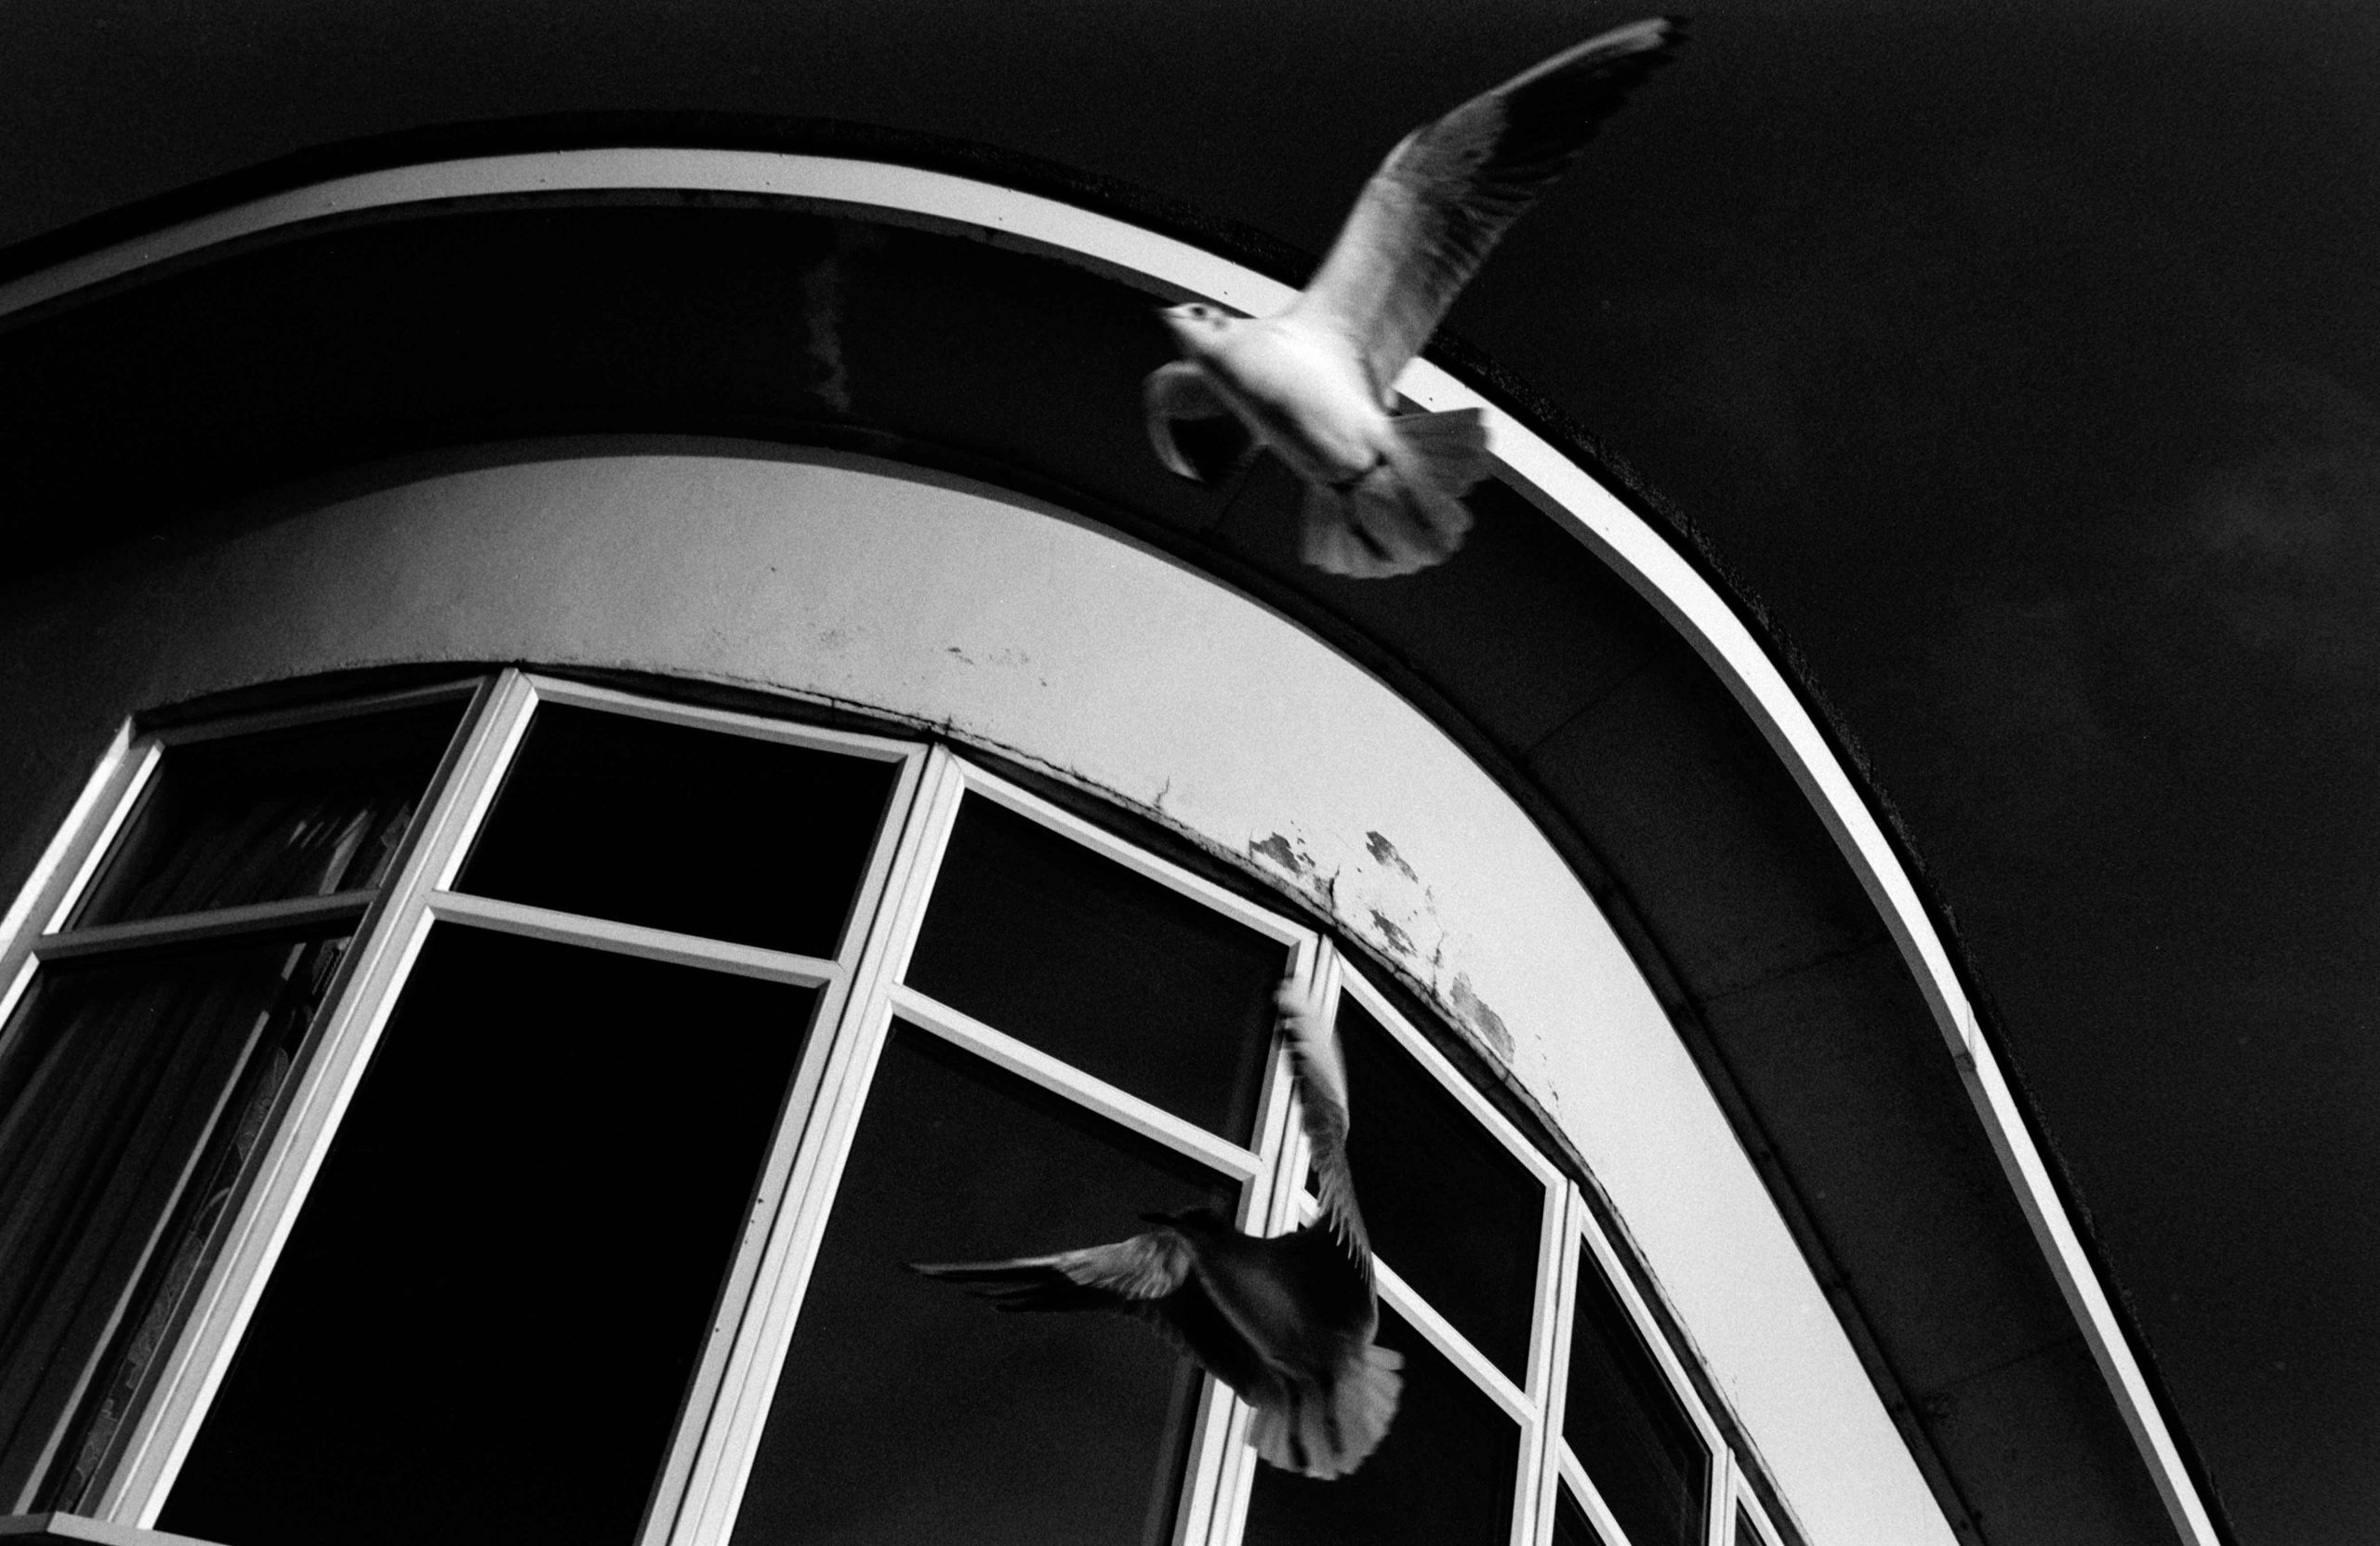
Waiting for birds!
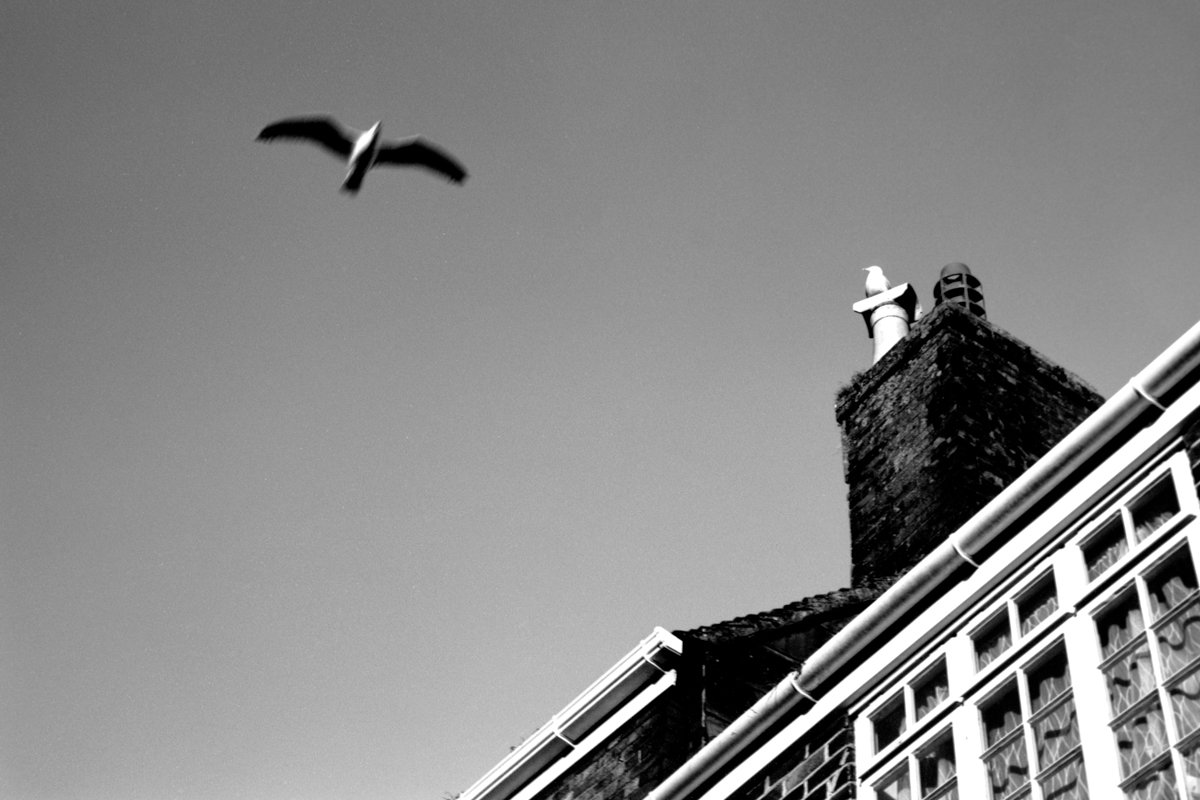
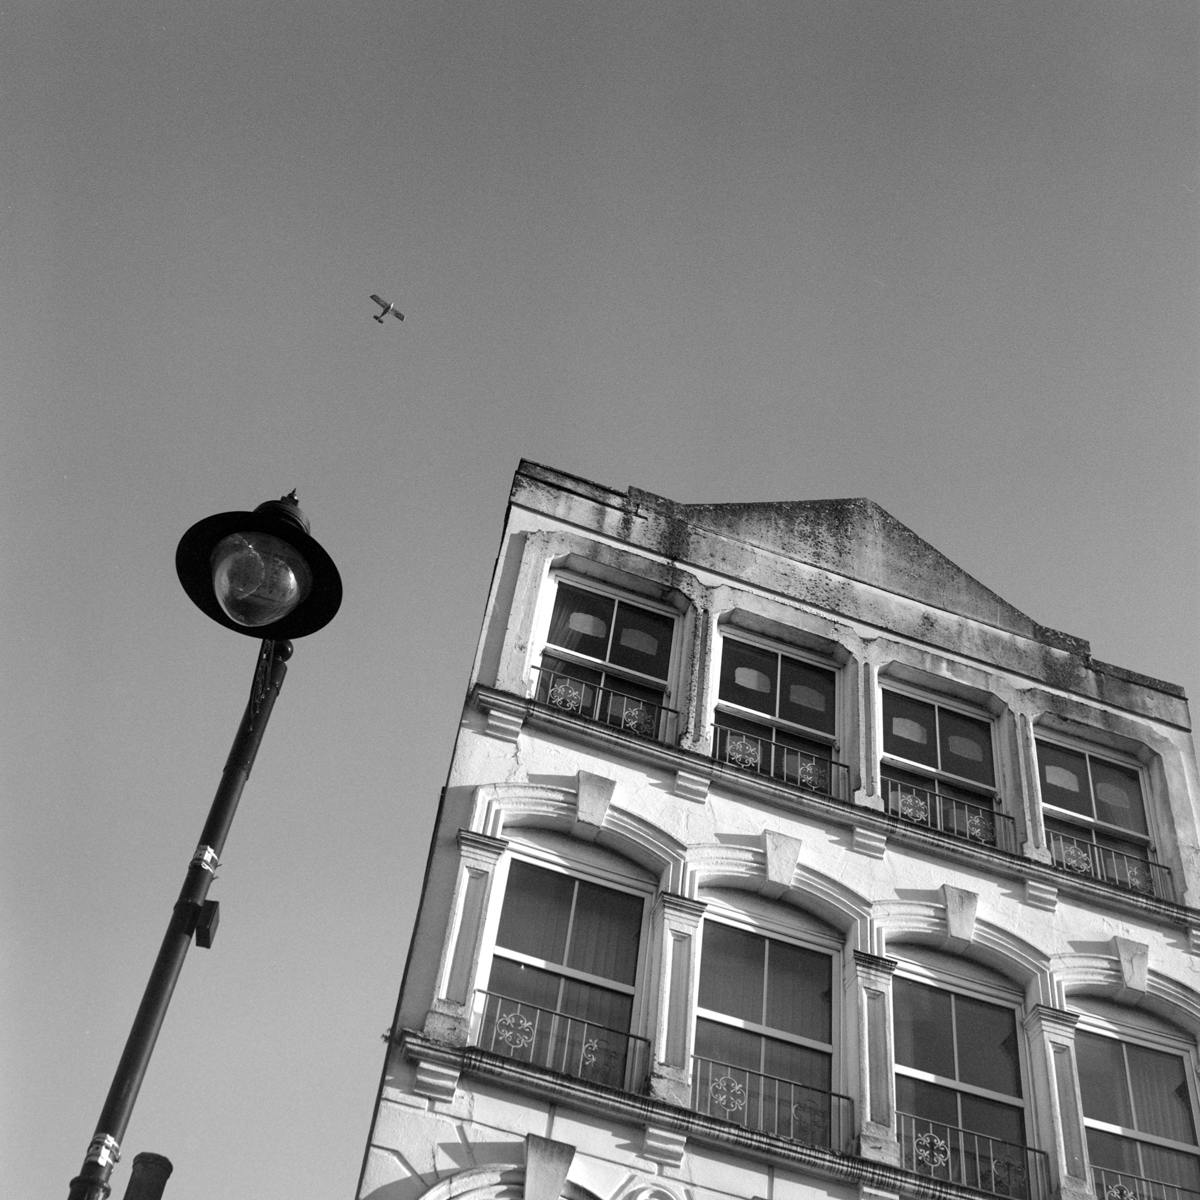
As I explored these sun-drenched streets, a new idea took hold. Wouldn’t it be amazing to capture a bird soaring through the frame, adding a sense of movement and life to these architectural compositions?
With this in mind, I found myself gazing skyward, camera poised, patiently waiting for the perfect avian cameo. Minutes ticked by as I stood there, neck stretched and crook, finger hovering over the shutter release. I’m sure I attracted some curious glances from passersby, but I was undeterred.
And then, it happened! A lone bird glided effortlessly through my frame. The most rewarding shots require patience, persistence, and a willingness to embrace the unexpected.


The Downside
I found there was only one downside to this project. The camera! Some scenes I was waiting ages in position for a bird to fly by which gave me a stiff neck after! Walking away from the shot rolling my neck in circular motions to loosen the stiffness. If I’m going to continue this as a project I feel I needed to change something. So the next day was another bright day but with less cloud! I went back out again early afternoon and chased the sun around a different town until it was so low it had stopped casting shadows.
I took with me a TLR camera. The Yashica MAT 124 G. And a roll of expired AGFA APX 100 from 2009 which had been in my fridge. This was a much better choice as I could hold the camera at waist level looking up! Unfortunately It was hard to find the birds to include in the photos. This town is more close to the sea so most of the seagulls are there.
The meter inside this camera works but there is no battery. So I used my Sekonic Meter in spot mode to take readings from the brightest part of the building. That would give me middle grey. So I took the reading and then over exposed by two stops. So if the meter read f22 I would shoot at F11. And it worked well. The APX didn’t give me that banging contrast that the ADOX HR50 did but still it’s hard.
Tempting as it was to try and encourage them to move, I knew it was important to respect their space and avoid causing them any distress. But I needed them in flight. Clapping my hands did the trick.
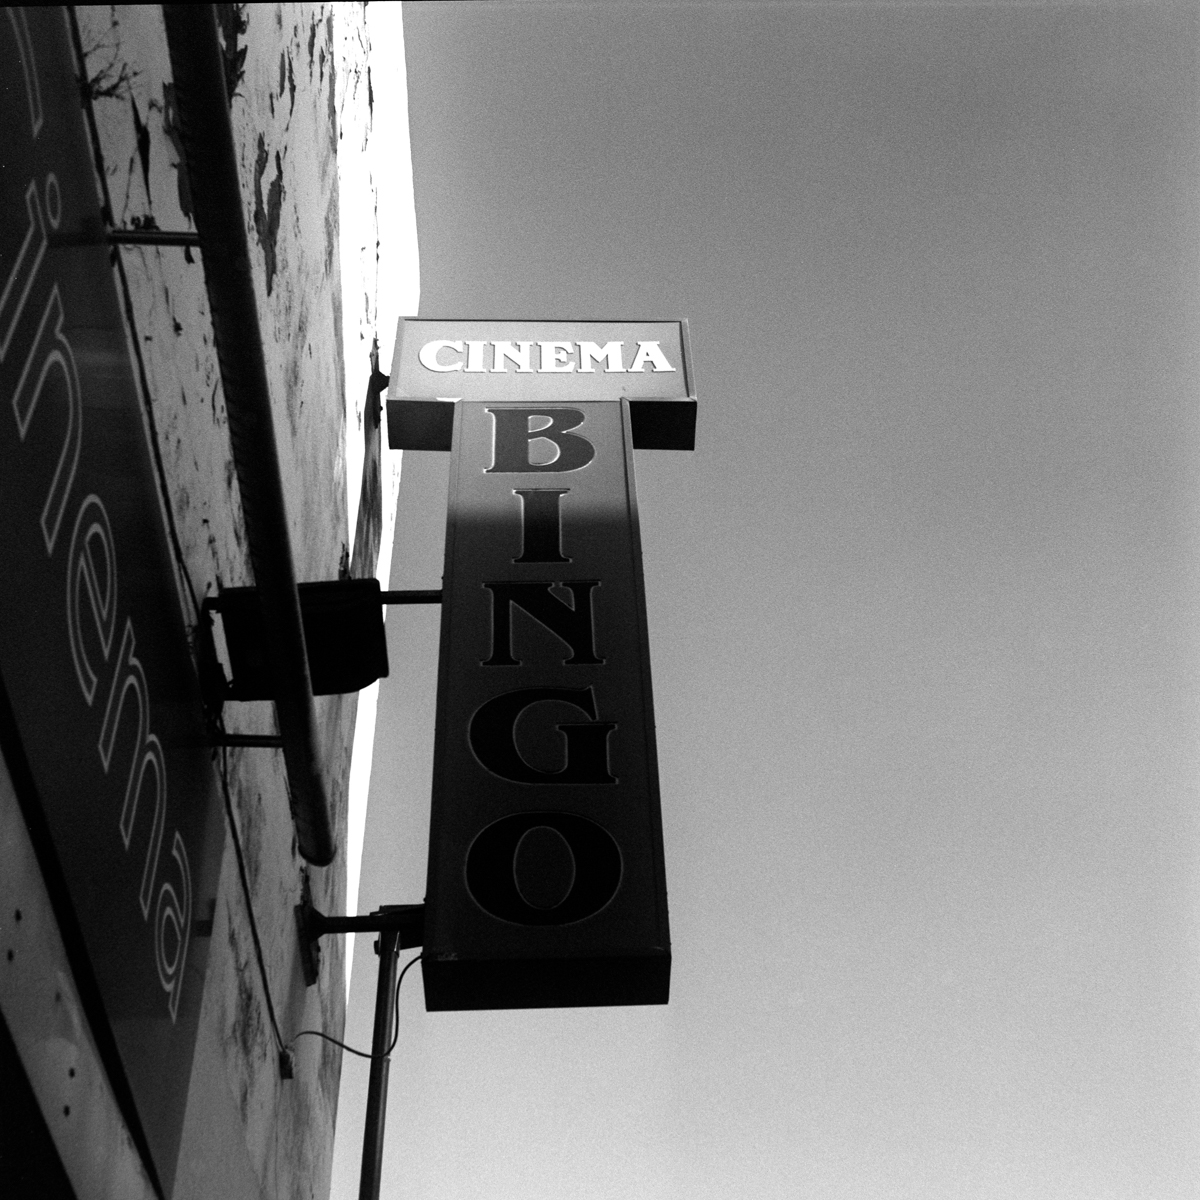
And the old Bingo Hall and Cinema as I was walking back toward my car.
Conclusion
So from thinking that I had shot everything in my area I realised there is so much more that can be done if you just get out and go for a walk with a plan in mind. My plan was simple. Look up at old buildings that are in the sunlight with the hope a bird comes along. Then of course I had the choice of camera, lens and film. I found the 50mm lens to be best. Anything wider wouldn’t have had such impact I felt.
I think this will make for a good collection of prints so going forward I would like to try this in other areas. But they have to be of interest such as these old buildings. At least for me!
And keeping the thought in mind of the photographs being printed and behind glass helps me along the way with composition.
From the two afternoons I was out, the sun falls in the UK around 3:30PM. So I had a small window. I think earlier the sun would have been higher up in the sky. With it being lower I found I was able to find more interesting contrasts. I would get the same in the morning but by being in the afternoon you are literally racing against the clock following the sun casting its light on buildings before it goes down.
Zenit B 35mm SLR Camera!
A Window into Soviet Camera History
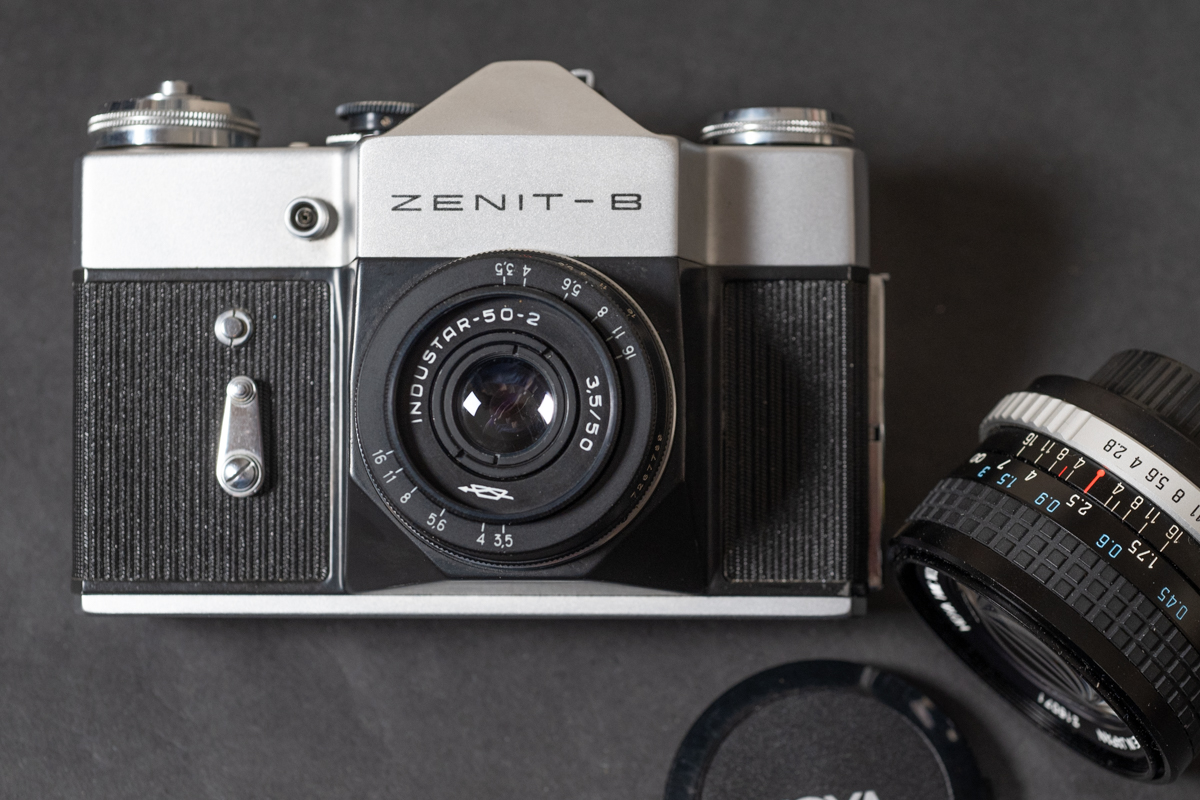
Hey everyone! I recently received an amazing gift from Phil, a regular viewer of my YouTube channel – a classic Zenit B film camera. This beautiful piece of photographic history got me digging into the Zenit brand, and I discovered a fascinating story of Soviet-era camera production.
Phil purchased this camera back in the 1970s along with two lenses and he wanted it to go to someone that would use it and keep it taking pictures. He said he purchased it from his Brothers catalogue.

Zenit: A Legacy Forged in the USSR
What do I know about the Zenit brand? Not a lot! I’ve never even used one before OR had the thought of getting one! BUT… I knew of the brand. Who doesn’t? And when I received this camera my first impressions were “This thing is indestructible!”. I’ve yet to put a roll in the camera as I write this, and I do intend to feature it on the SFLaB channel and shoot the S**T out of it, as I always do! But without loading a film – so far so good. It works… And it’s MINT! Watch the Video Review Below.
With the good ole internet by my side I looked deeper into this cameras past. It’s quite a fascinating story.
Zenit has a reputation of robust, affordable, and undeniably “Soviet” 35mm SLR cameras. Born out of the Krasnogorsky Mekhanichesky Zavod (Say that after a few sherbets!) (KMZ) factory near Moscow. Zenit cameras were mass-produced to bring photography to the masses in the Soviet Union and beyond. According to most sources, approximately 889,617 Zenit B cameras were produced between 1967 and 1979. I guess a bit like the Praktica brand from Pentacon they were mostly sold in the Eastern Block but crept its way into Europe and beyond.
It all began after World War II. KMZ, originally an optics factory, was tasked with producing cameras. Their first model, the Zorki, was heavily inspired by the pre-war German Leica II. But it was in 1952, with the introduction of the Zenit, that the brand truly came into its own. This camera was based on the Zorki rangefinder and featured the M39 lens mount and a distinct FED/Leica design.
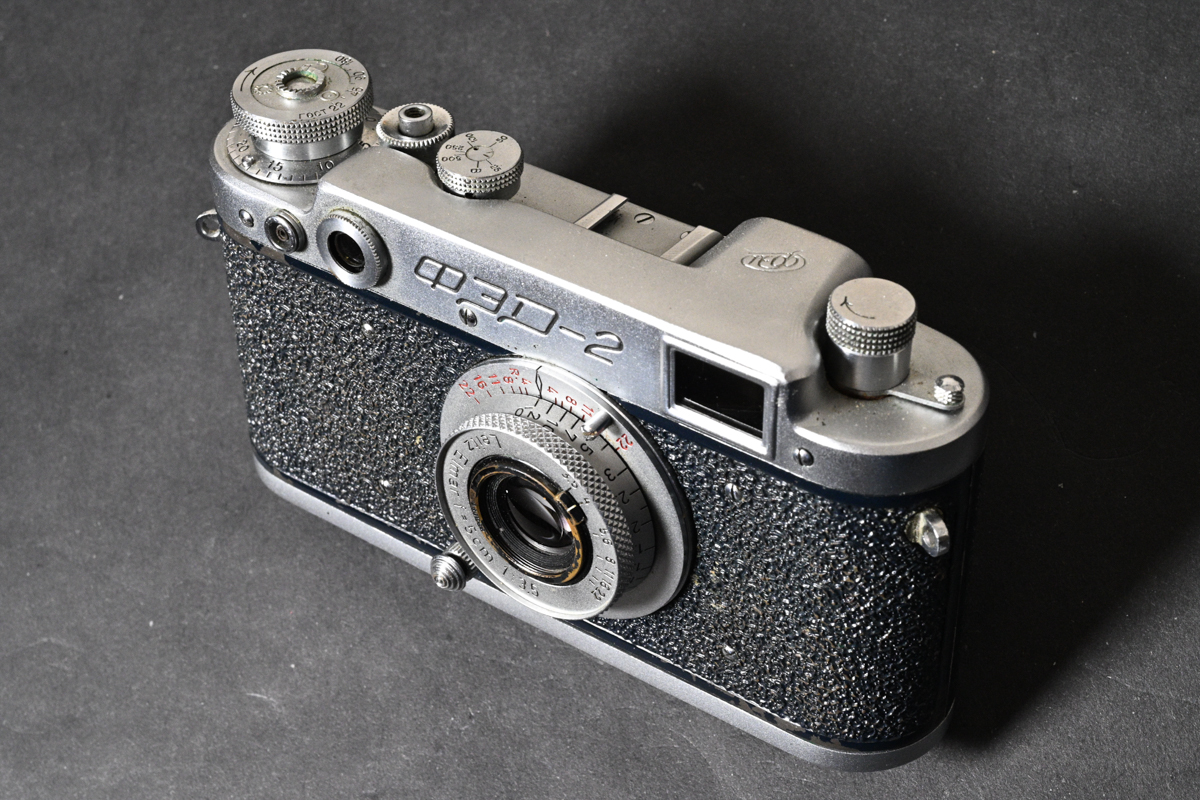
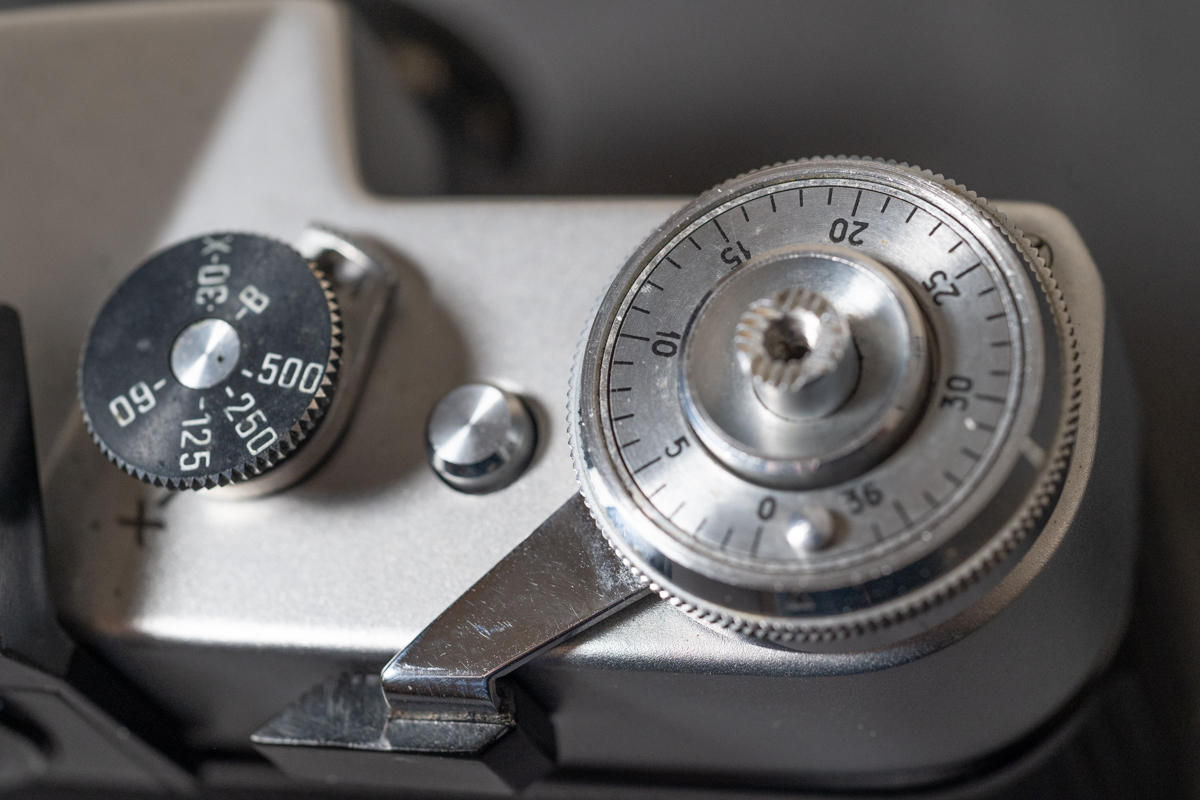
And it doesn’t surprise me that these cameras were inspired by the Leica II. Like the FED camera it features that spinning shutter speed dial, which I absolutely love! Be careful advancing. Some say to change the shutter speed after advancing. Others say before advancing. The manual states either way. There appears to be a lot of word of mouth about this rule so always try and download a cameras manual if you can to find the correct procedure.

The Zenit B: A Classic Refined
The Zenit B, gifted to me by Phil, is a slightly later model, produced from 1967 to 1979. It’s a refined version of the original Zenit, boasting several improvements:
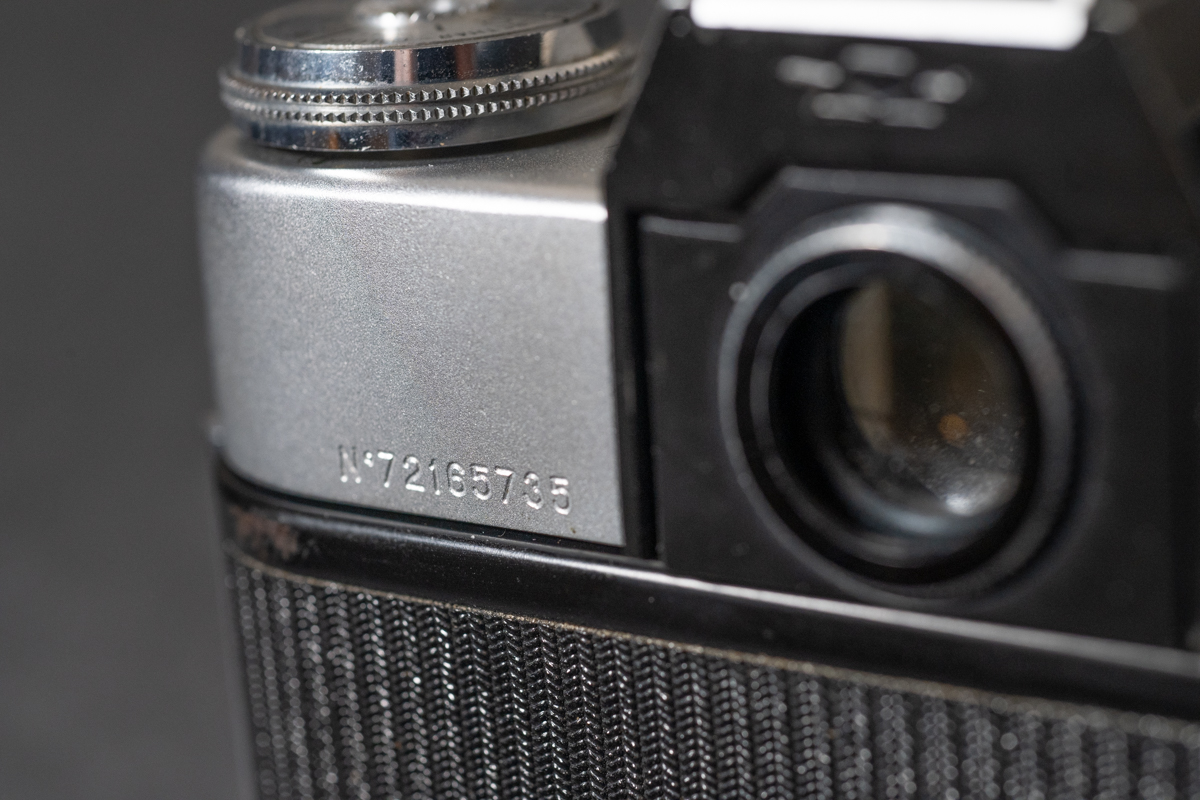
(The serial number on the camera donates the year the camera was made by taking the first 2 numbers, in this case 1972).
Features:
- Shutter speeds from 1/60th to 1/500th of a second: Which is fine. I don’t need to slow down and I don’t need to speed up! Mostly I guess I will be in lighting conditions offering 1/125th.
- Attachment Shoe: (Not Hot)
- Flash sync Port: Enabling use of flash.
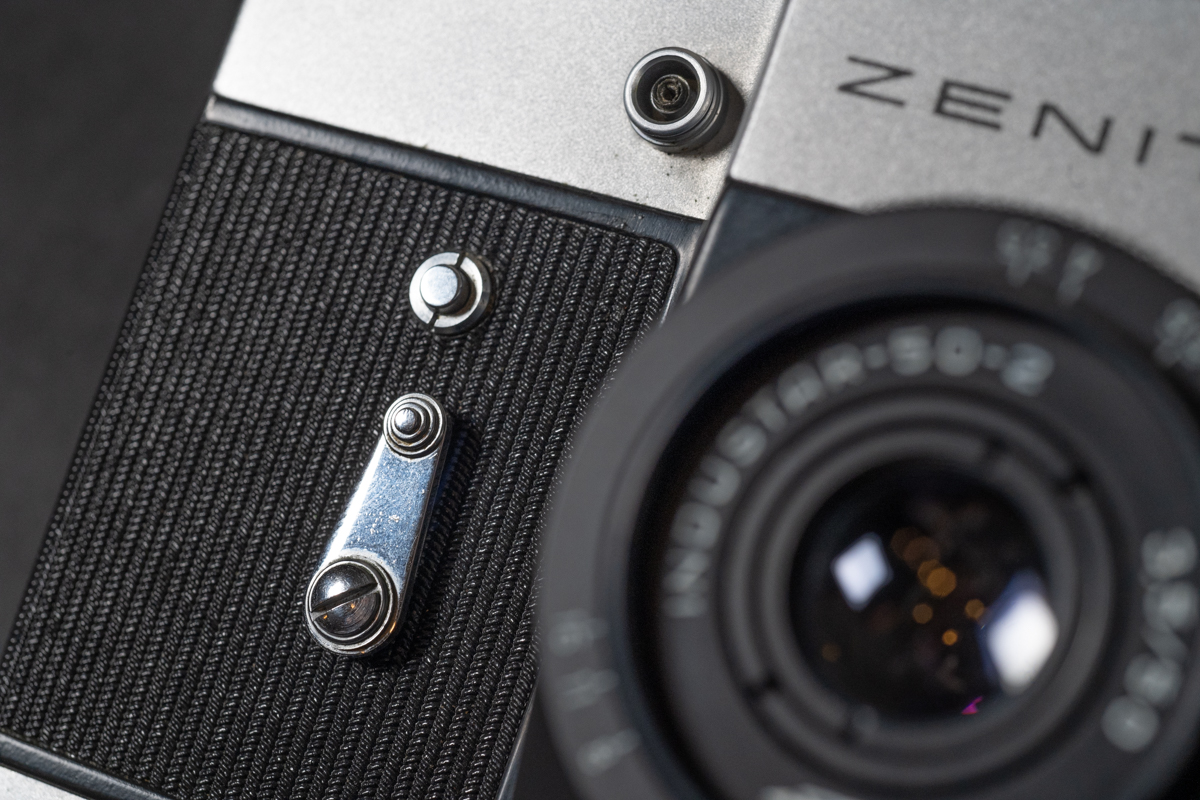
- Self-timer: A handy feature for self-portraits or group shots. And it works!
- Cloth shutter curtain: Like many of these style cameras the shutter curtain is cloth, or silk. Unlike the Pentacon SIX the curtain is protected from sun pinholes by the cameras mirror. Don’t leave the Pentacon Six pointed at the sun with the lens cap off! I found that out the hard way.
Even the inside back of the camera looks like it’s built to withstand anything. The film feeder spool does look a bit fiddly though!
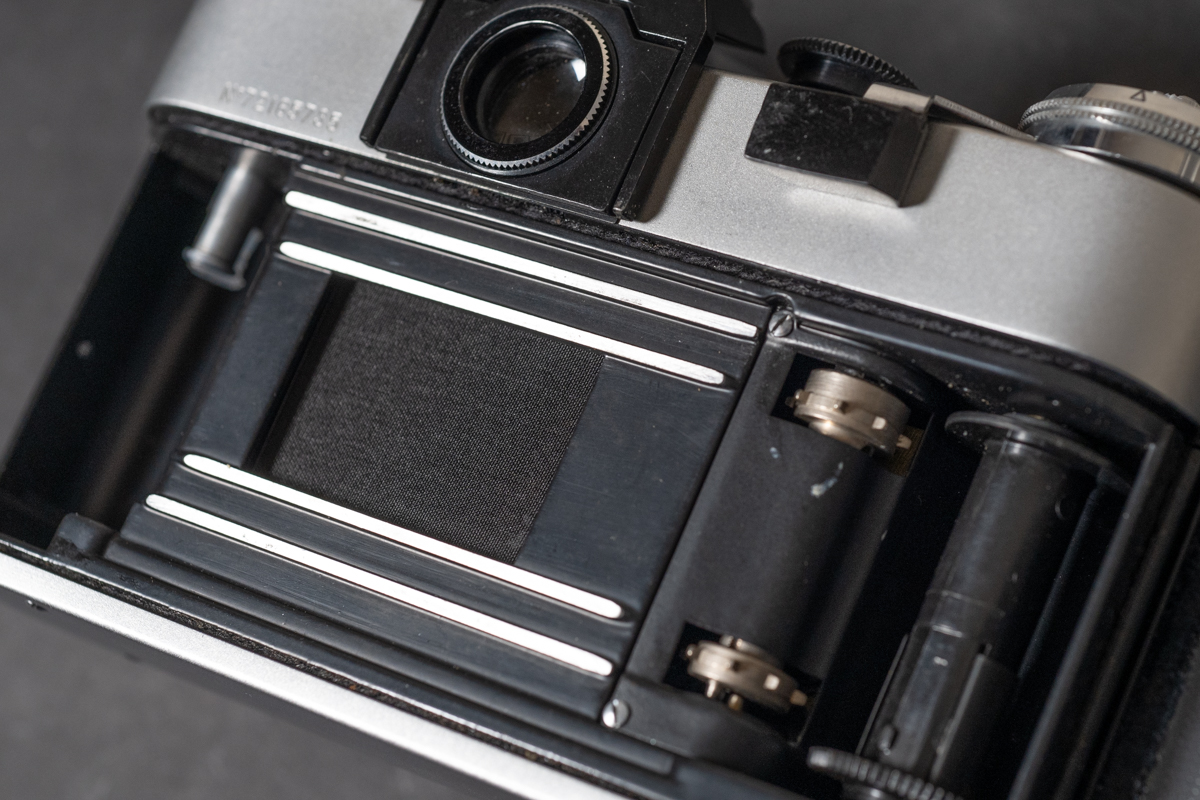
- M42 lens mount: Zenit upgraded their cameras to the more popular M42 Mount Providing access to a wide range of affordable lenses. These are plentiful online and some at a very fair price. And there are dozens of classic cameras supporting the format. The Screw Version.
- Durable metal construction: Ensuring the camera could withstand the battering of everyday use. This thing feels indestructible! It’s heavy too weighting just over 800g.
- Simple, mechanical operation: Nothing fancy here at all. And possibly a perfect camera for those wanting to delve into photography, like many other old classics. No auto this and that. Just pure hands on photography. Not even a light meter! But at least you have TTL focusing!
- Frame Counter: This model features a DIY frame counter. Yup! You have to position it to frame 1 at the start of your film, and it will magically count up as you advance frame by frame.
Crikey!! Don’t we have it easy today with our Digital Cameras.
The Zenit Legacy
Zenit cameras, including the B model, were exported worldwide, becoming particularly popular in Eastern Europe and the UK due to their affordability. They offered a gateway into SLR photography for many aspiring photographers who couldn’t afford the pricier Western alternatives. I remember my Brother getting into Photography with a Praktica 35mm camera. Being a little S**T brother I’d play with it when he was out.
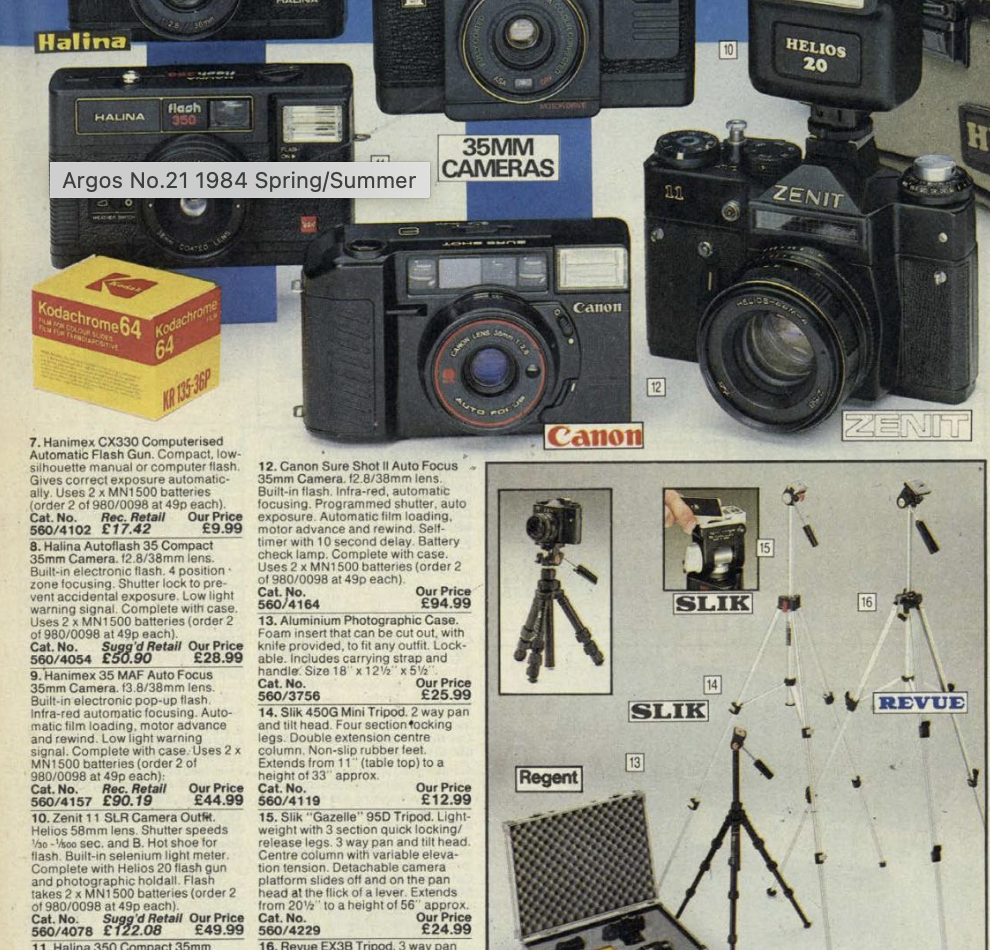
I also remember seeing these cameras in Argos back in the 80’s. Along with other affordable brands. Here’s one I found in an old Argos Catalogue online. The price? £49!! I’m not sure but I would imagine Dixons were also selling these cameras back then so you can see how far the brand travelled and they were popular back in the day for enthusiasts. Credit: www.issuu.com
While Zenit production eventually dwindled with the fall of the Soviet Union, the brand left an undeniable mark on photographic history. These cameras are a testament to Soviet engineering and a reminder of a time when photography was a more mechanical and deliberate process unlike today’s click and look. And thats not a knock on Digital. Digital is fantastic and professionally I’d be lost without it. But it has made photography So much easier and more available to everyone with camera phones. I’m guessing somehow this is why film is making such a comeback. Those that love photography and have always had a digital camera phone in their pocket and take it for granted. Let’s try film! Thats different.
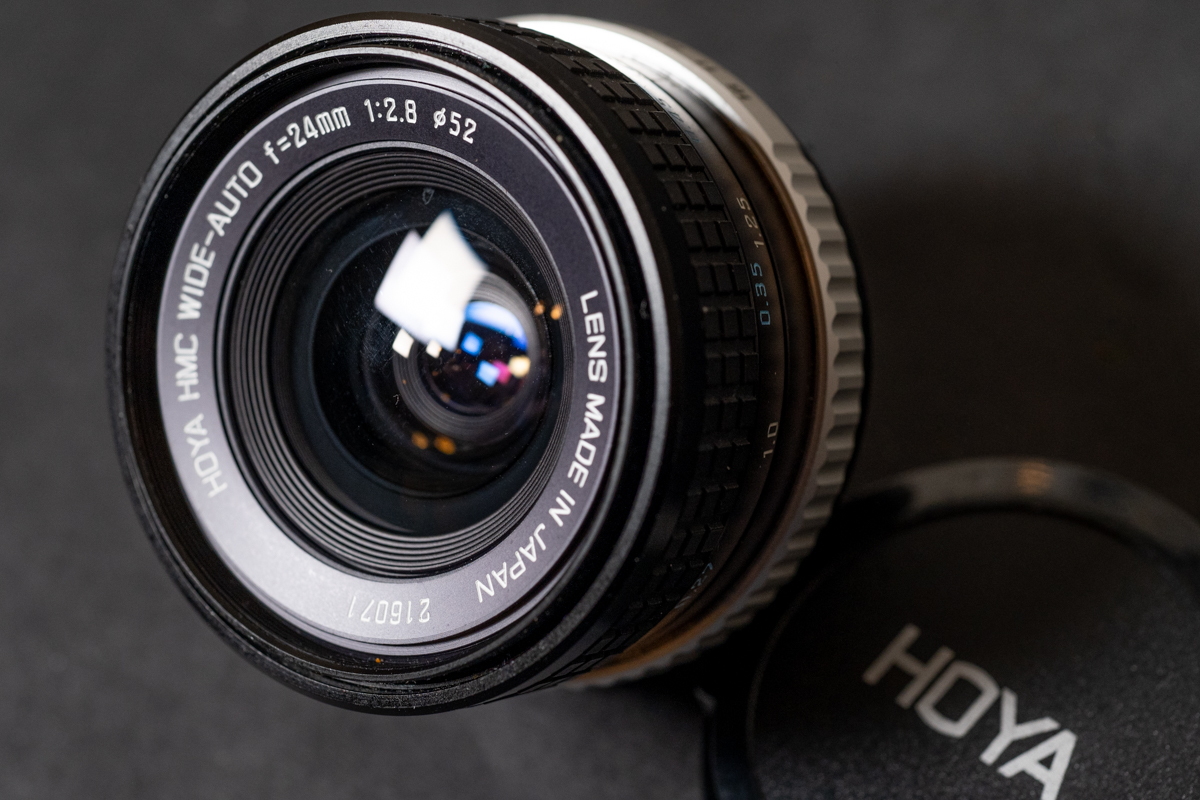
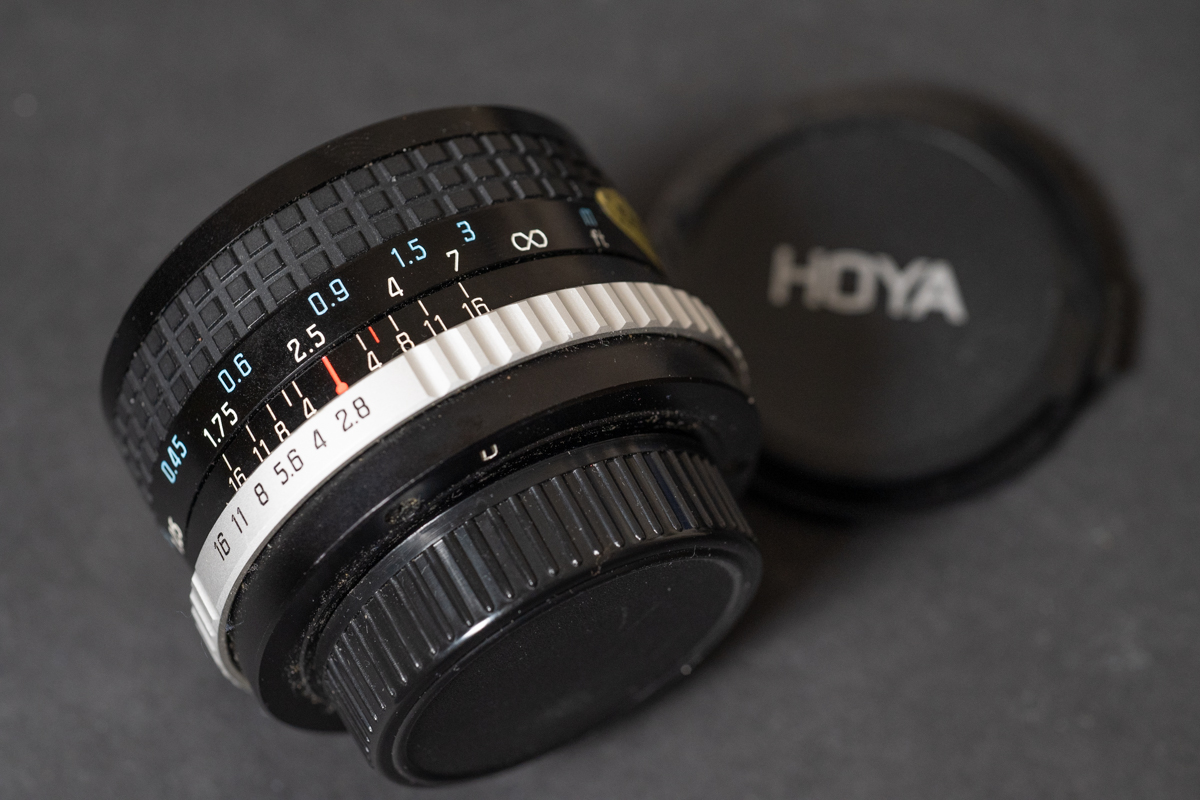
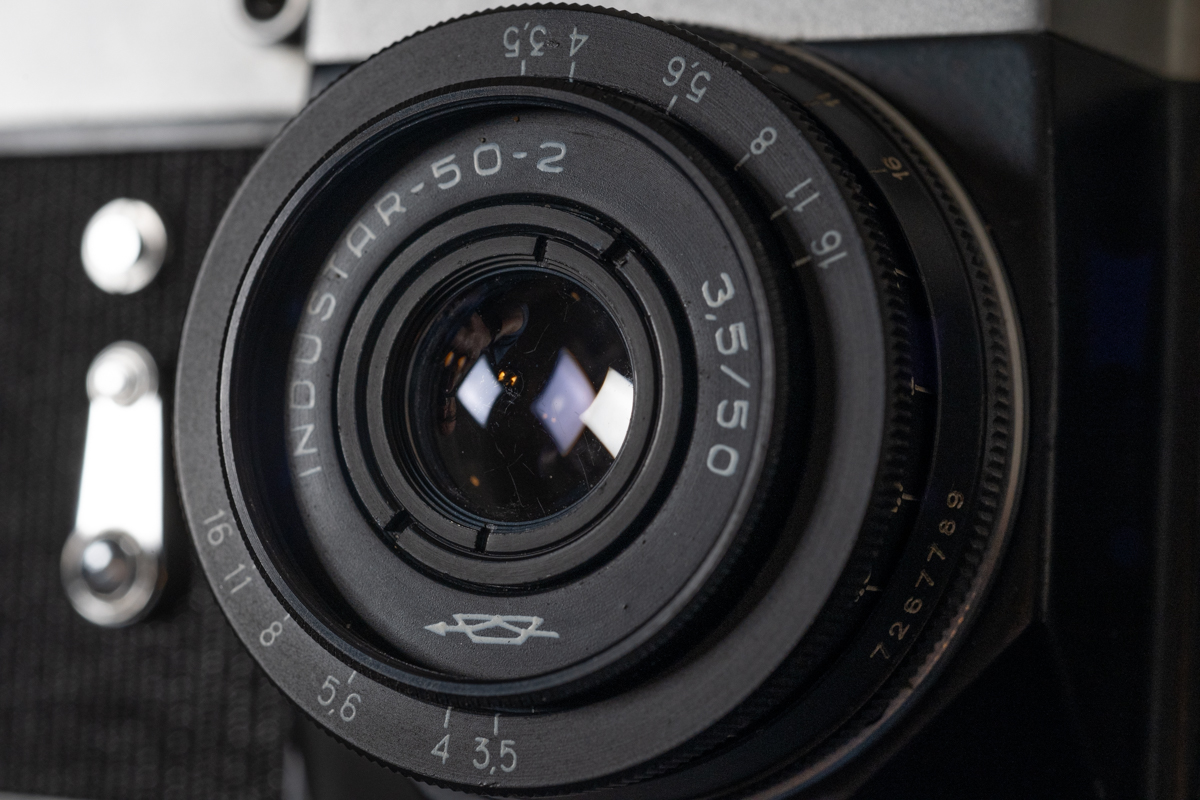
Phil also included a couple of M42 Lenses. An Industar 50mm f3.5 lens and a wide 24mm Hoya Lens. I look forward to seeing the 24mm perform as it’s the widest lens on my film cameras so far.
A Big Thank You to Phil!
Phil, thank you so much for this amazing gift. It means a lot to me, and I can’t wait to put it to good use!
If you want to know more of the Zenit history here is a link https://zenit-kmz.com/eng/about-history/
The Vlog Photos.
Here are a few photographs I took on Ilford FP4. Developed in 510 PYRO.
Industar 50mm f3.5 Lens
Hoya 24mm f2.8 Lens (Orange Filter)
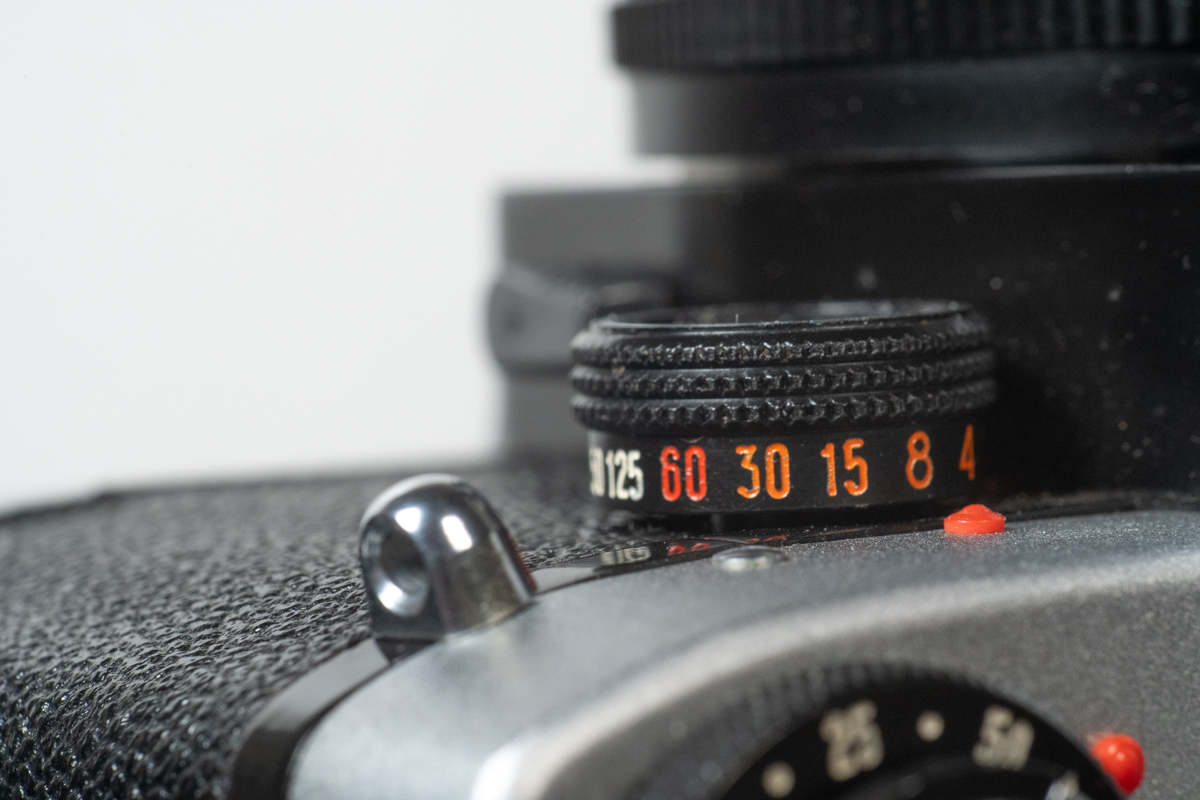
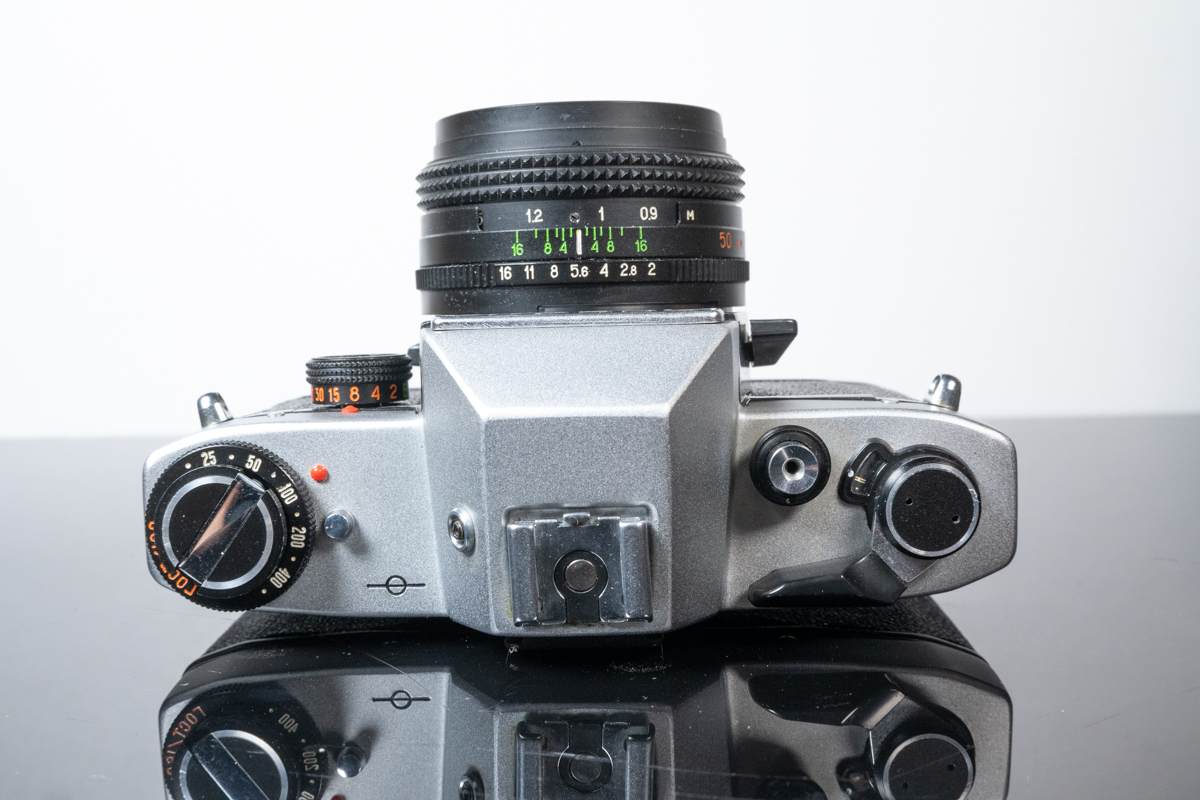
Praktica Super TL. The workhorse!
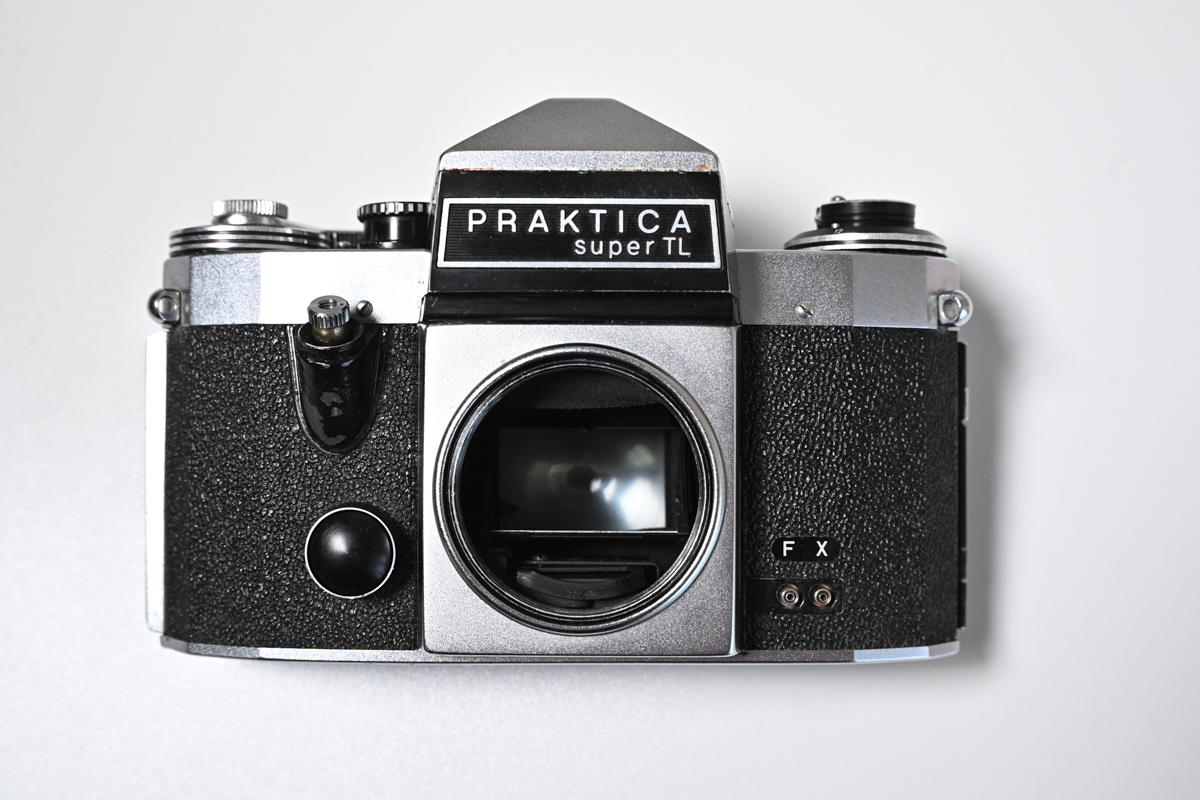
For those who haven’t seen the video yet (seriously, go check it out!), the Praktica Super TL is a 35mm SLR camera produced in East Germany from 1968 to 1976. It’s a sturdy, all-mechanical workhorse known for its reliability and ease of use. My friend Dale gave me this camera a few months back, and I’ve been having a blast shooting with it.
What Makes the Super TL Special?
- Built to Last: This thing is a tank! Seriously, it’s all metal and feels like it could survive a drop or two (though I don’t recommend testing that especially on your foot!). This build quality is typical of cameras from that era, and I found it a big part of the Super TL’s appeal.
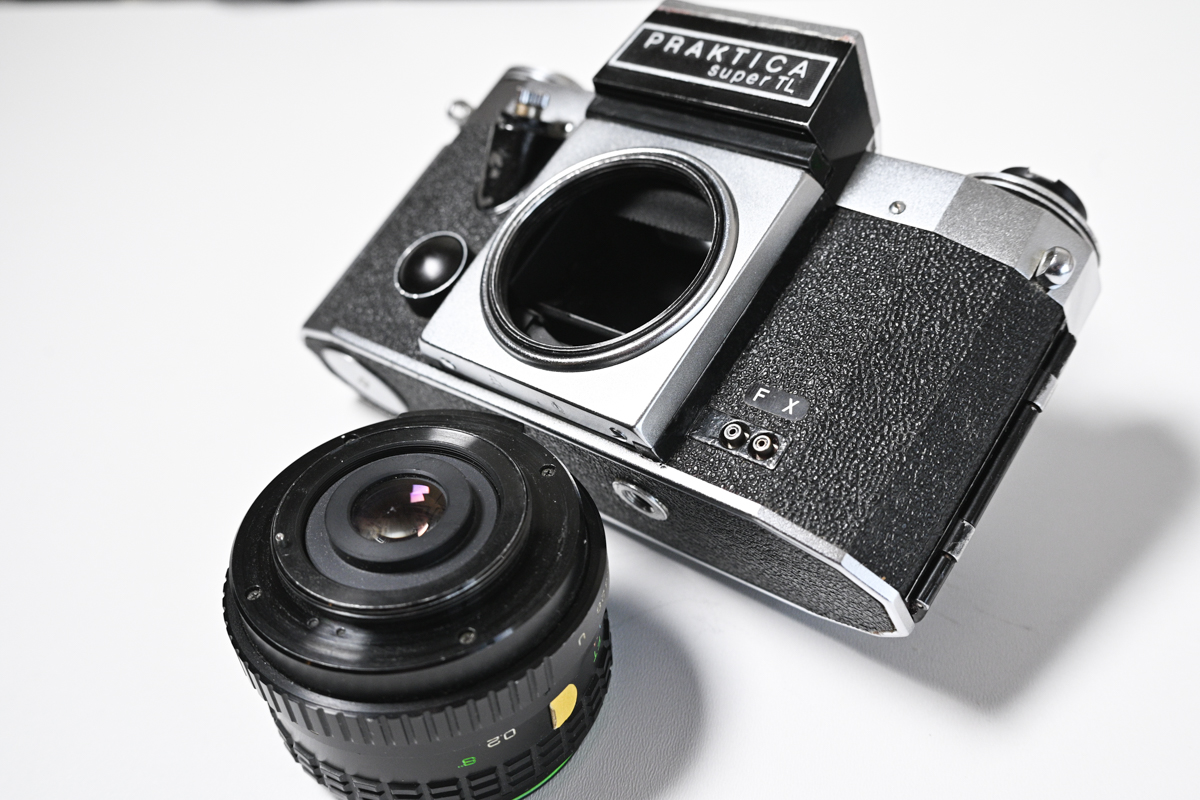
- M42 Lens Mount: The Super TL uses the popular M42 screw mount, which means you have a huge selection of vintage lenses to choose from. This opens up a world of creative possibilities for experimenting with different looks and feels and some you can pick up for a very reasonable price!
- Simple and Intuitive: One of the things I love about this camera is its simplicity. The controls are straightforward and easy to understand, even for beginners. It’s a great camera to learn the basics of photography on.
- Light Meter: Unlike its predecessor, the Praktica TL, the Super TL has a built-in needle light meter which can measure film speeds from 6ISO to 1600ISO. It was Prakticas first SLR to have an internal light meter. This makes it much easier to get accurate exposures, especially in challenging lighting conditions. For the light meter to work it needs a 1.35v battery and they are available. I was using a standard LR44 (1.5v) and so my light meter was off and I think the difference in voltage caused it.
To set the meter to the film speed there is a film speed selector under the shutter speed dial. You need to align the white dot to the speed of your film by lifting the dial and rotating. The speed dial and ASA dial are then coupled. It is a bit fiddly though!
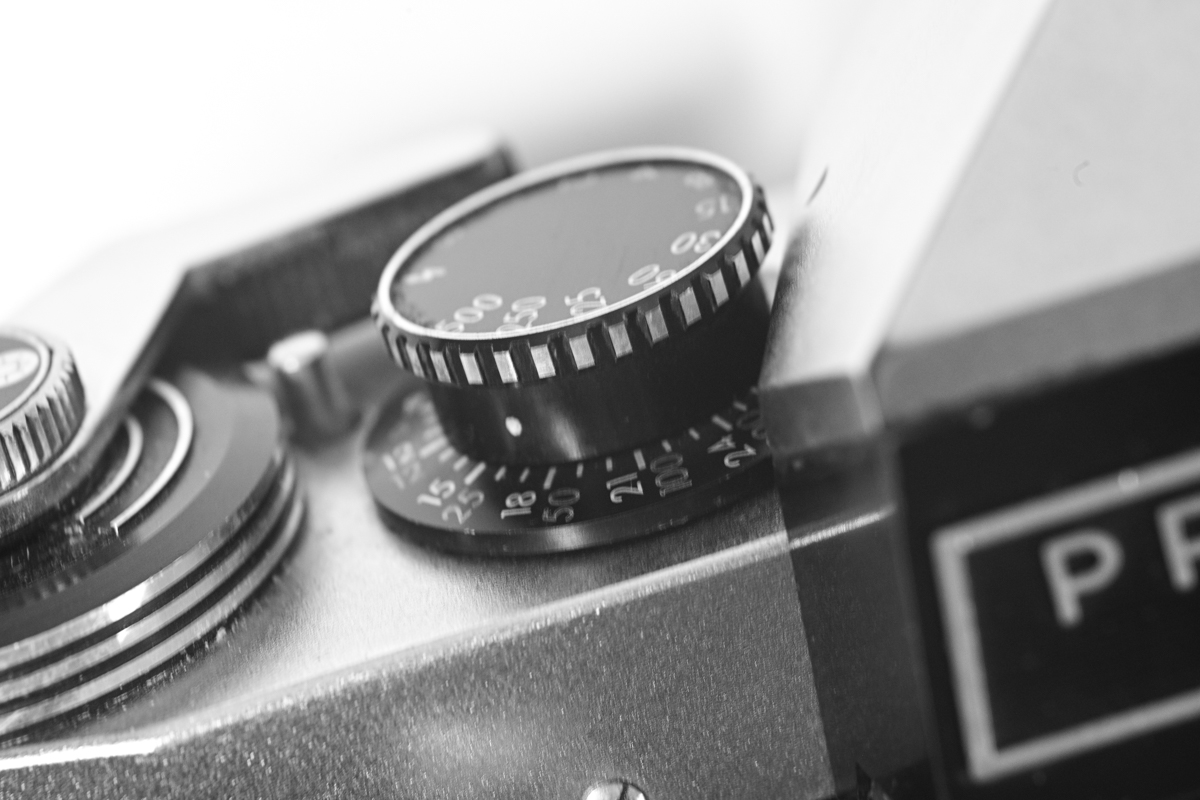
- Shutter Speeds: It offers a good range of shutter speeds, from 1 second to 1/500th of a second, plus Bulb mode for long exposures.This gives you plenty of flexibility to control motion blur and capture different types of shots. Unless you are shooting fast sports action you’re not going to miss the 1/1000 speed offered with many other SLR cameras of that era.
- Features: It’s not packed with features. Other than the light meter it has two flash sync ports (F&X), it has a DOF preview button. Oh, and a pretty little film indicator on the film advance lever.
- Focusing: The viewfinder on the Super TL is surprisingly bright, which makes it easy to see what you’re focusing on. This is especially helpful in low-light conditions.
- Micro prism Focusing Aid: In the centre of the viewfinder, you’ll find a Micro prism ring. This helps you achieve precise focus. When the image is out of focus, the micro prism will make the subject appear broken. As you turn the focus ring on the lens, the image will snap into clarity within the micro prism. If your eyes are good! I always have a struggle with these. I prefer a split prism but it’s fine. It just takes me a bit more time to focus in.
- Ground Glass Focusing: Surrounding the micro prism is a ground glass focusing screen. This gives you a good overall view of the scene and helps you judge composition and depth of field. And as I said earlier there is a DOF preview button. You can see it in the image below. The big black one! It also powers the light meter needle inside the viewfinder. You can also use the exposure fire button as a DOF preview if you press it halfway down. Be careful though… It’s a bit delicate and with the cost of film these days you don’t wan to be taking photos of your feet!

While the Praktica Super TL might not win any awards for ergonomics by today’s standards, it’s still a comfortable camera to use. Somewhat!
- Solid Build: That sturdy, all-metal construction I keep mentioning? It doesn’t just make the camera durable; it also gives it a nice heft and a sense of quality in your hands.
- Compact Size: The Super TL is relatively compact and lightweight for an SLR, making it easy to carry around. It’s not going to weigh you down on a day of shooting.
- Simple Controls: The controls are logically laid out and easy to reach, so you can adjust settings without taking your eye away from the viewfinder. Apart from the fiddly ISO dial!
- Smooth Operation: The film advance lever is smooth and easy to operate, and the shutter release button has a nice, responsive feel. Unfortunately my advance lever appears to not want to go back into position after advancing the film. I think there is an issue here as the film counter window doesn’t work! But thats no problem. I can still take great photos with the camera.
Who used it?
I can’t imagine this camera was a choice for professional photographers back in the 60’s and 70’s. There were other cameras that took the leading role with the Nikon F and the Pentax Spotmatic. I would imagine the camera was used by enthusiasts who wanted to get into photography on a more friendly budget. Saying that, there is no reason this camera couldn’t have been used professionally with the wide range of superb M42 fit lenses, especially from Pentax, which would have been compatible with this camera. It just didn’t offer the accessories like Nikon did. Changeable prisms, motor wind unit and of course, those wonderful Nikon lenses! I did ask this in the video if anyone used it professionally back in the day so if you want to know jump over to the comments section on YouTube.
My Thoughts!
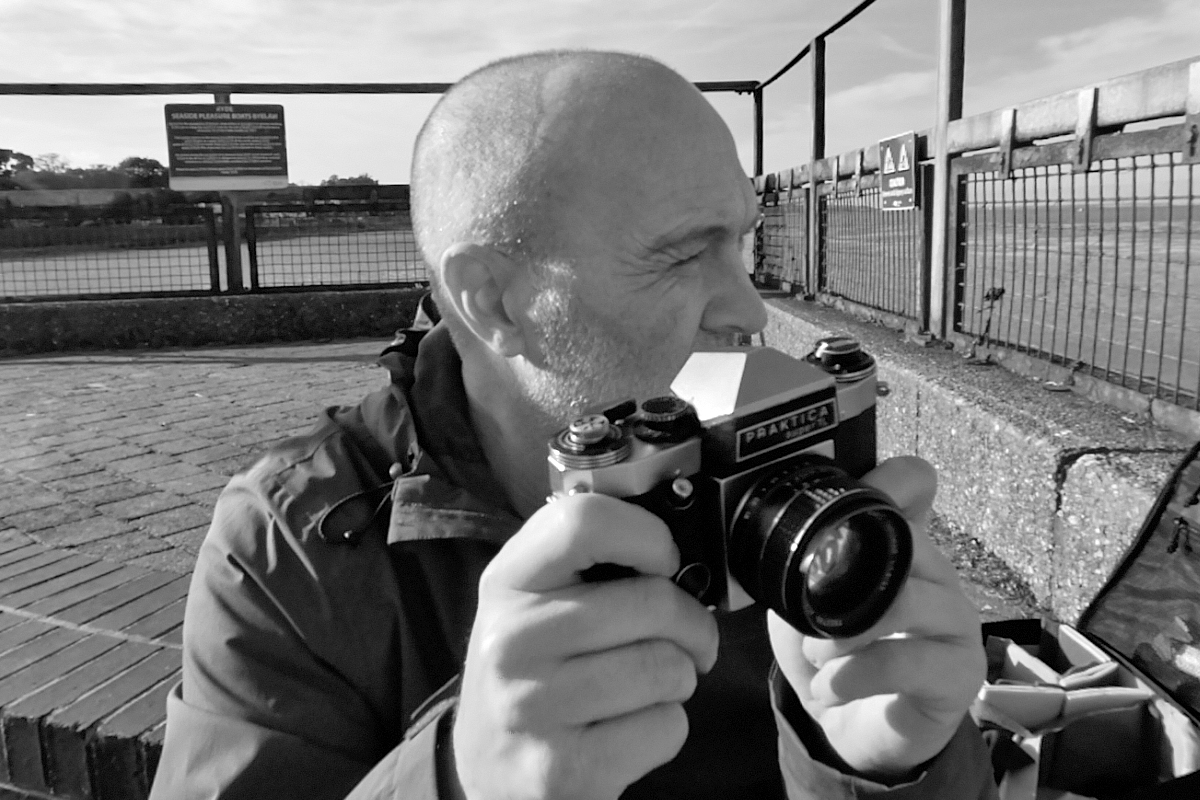
I’m a sucker for cameras. I love all my cameras and each of them I use fundamentally. But, would I use this camera for a commissioned portrait shoot? I doubt it. I have much better lenses for other camera brands but for street photography I think it is ideal if you are looking for a camera that just works. (Except my dodgy film counter). And for the price of these cameras (I saw one claiming to be fully working for £12) they would be ideal for someone getting into film photography, especially with the M42 Lenses being so widely available and plentiful too. These camera styles where the exposure button is on the front instead of the top plate I find to be a bit uncomfortable, but thats because I am used to it. After a day or two shooting the Super TL I got used to the camera in the hands. I did find the big black button was in way of my grip as I kept pressing it. I did use the camera for a portrait of Emma using a TT Artisan 75mm f1.5 Lens (top), a Chinon 135 f2.8 lens (middle) and a Hanimex 28mm f2.8 lens (Bottom).
Film – Ilford FP4. Developer – 510 PYRO.


We all know it’s not the camera, it’s the lens but the camera does need to be comfortable in the hands.


So, thats my view on the Praktica Super TL.
Thanks for reading!
Laser/Light Meter for Photography
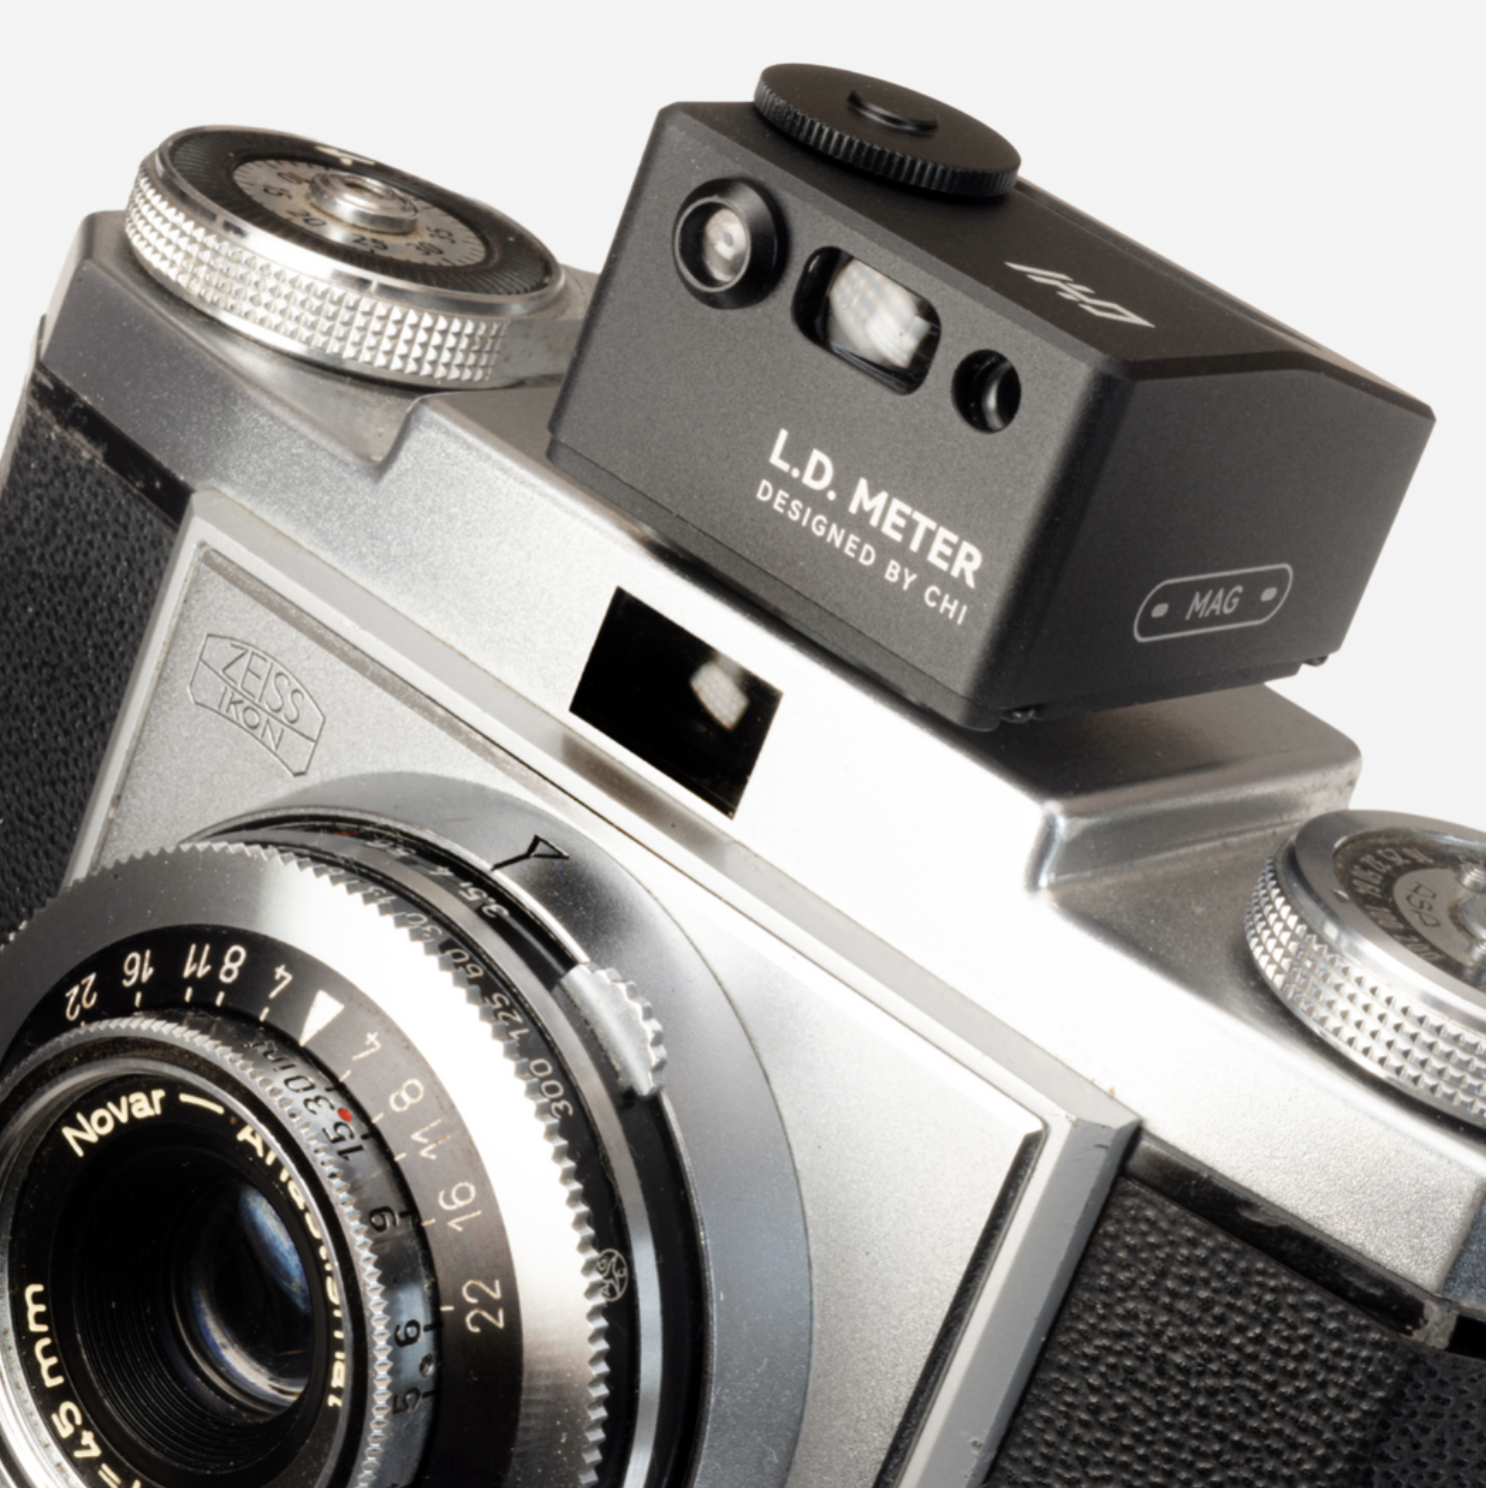
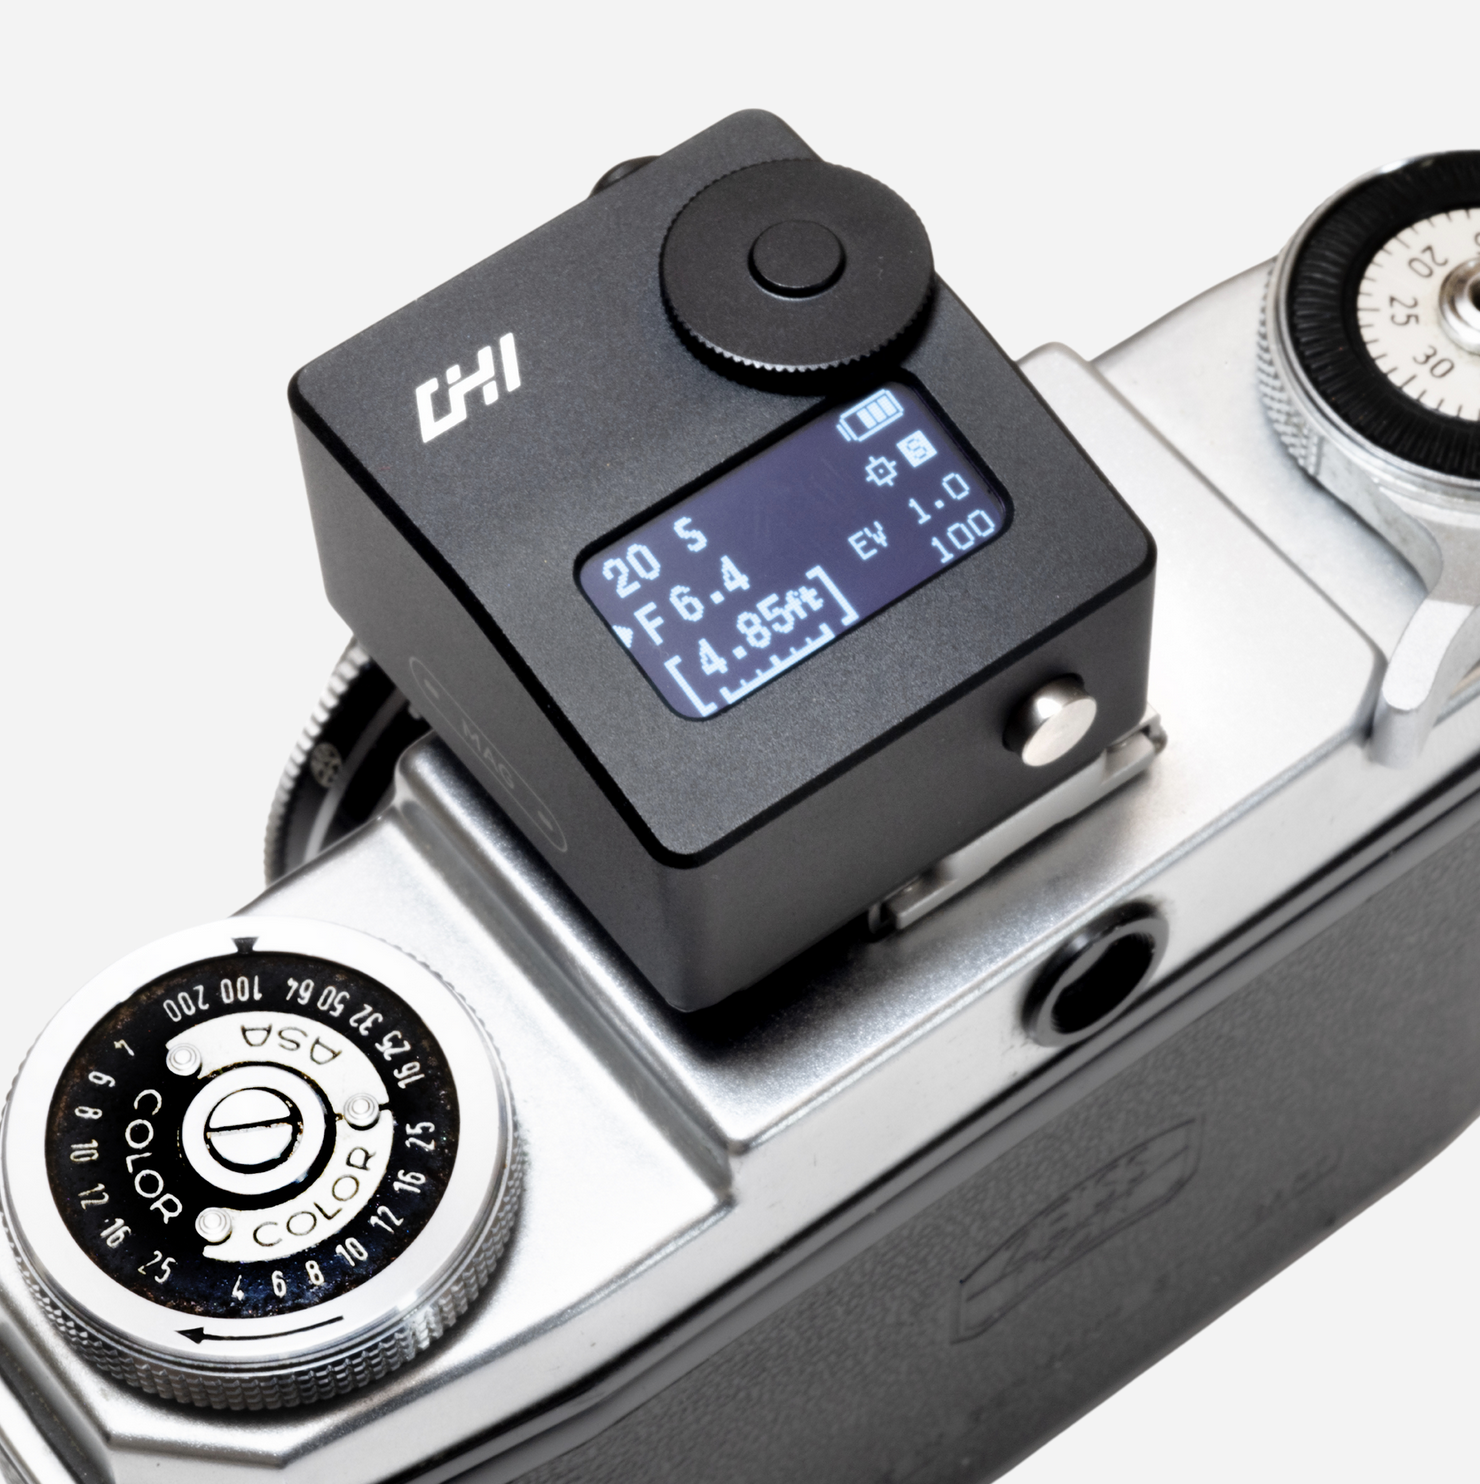
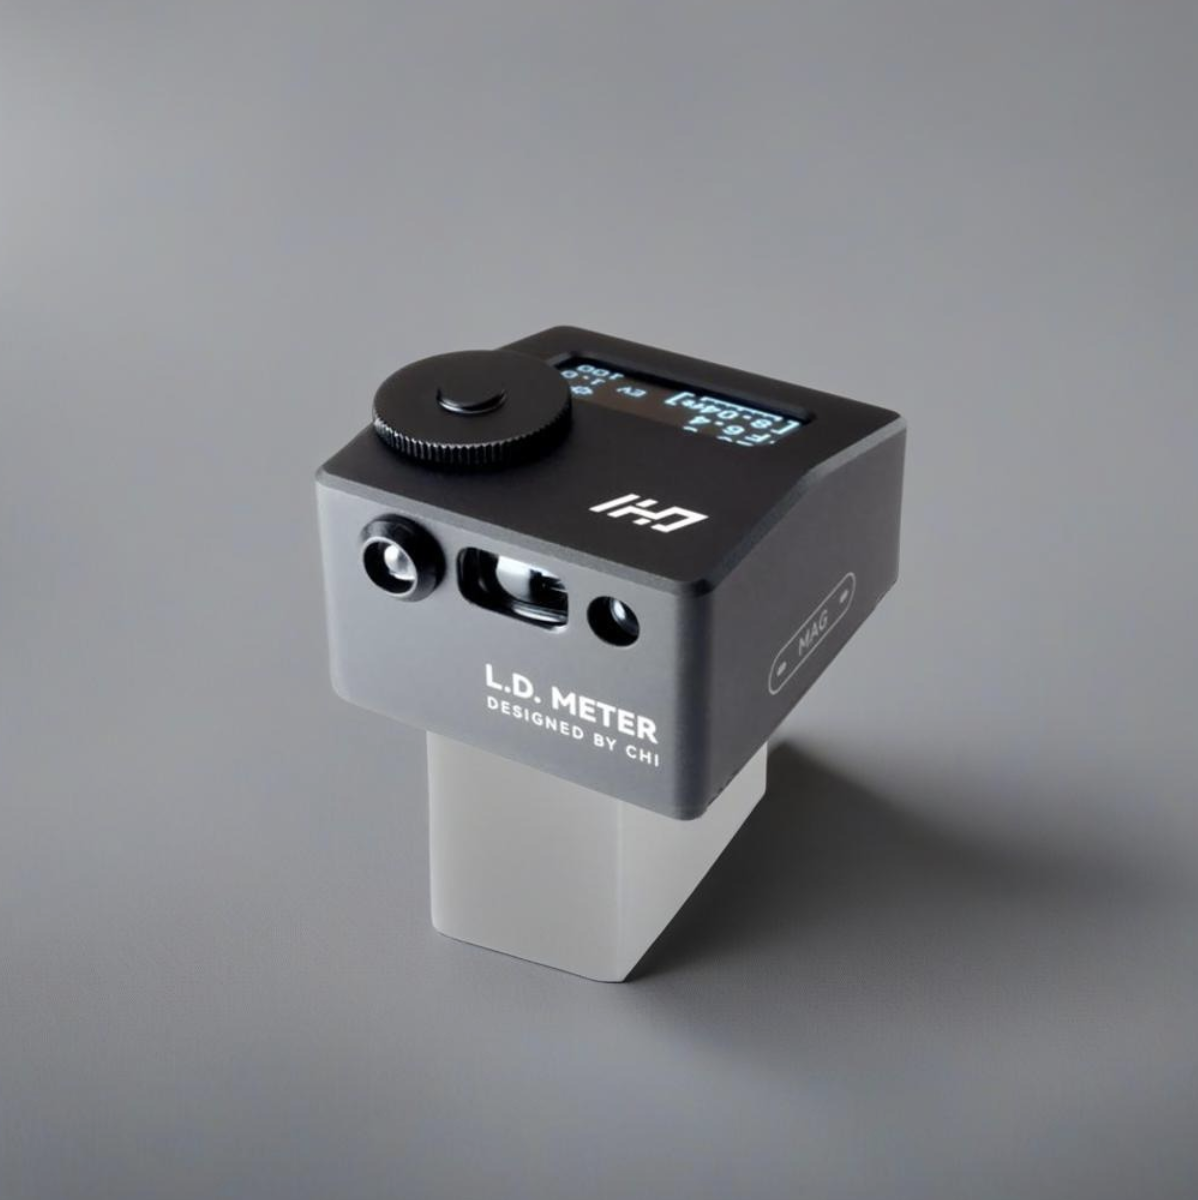
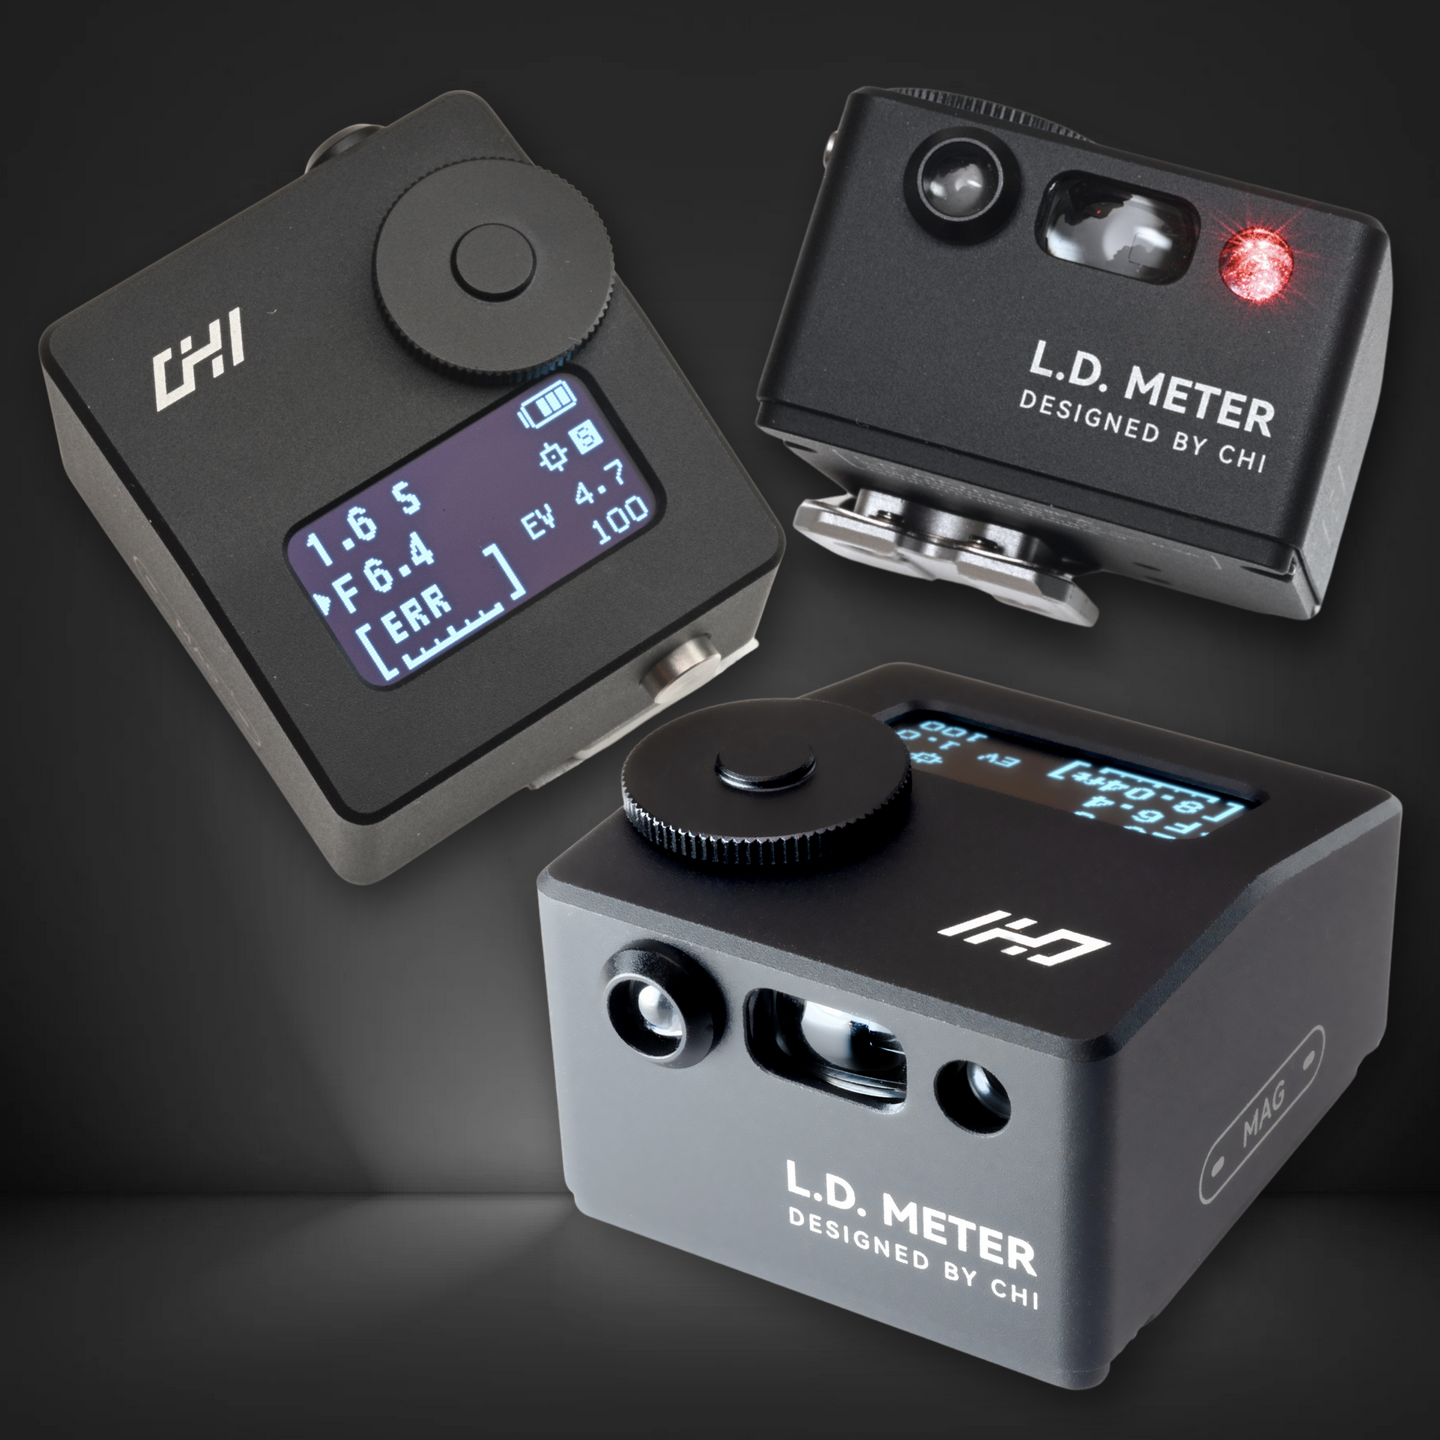
L.D. METER by Chi
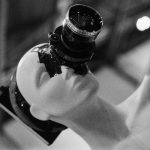
If you shoot classic cameras like the Zeiss Ikon Contina (pictured above) or vintage folders, you know the struggle of focusing. I’ve lost count of how many times people have asked me where I got my ROWI Rangefinder! It’s old, but there are many rangefinders on the used market for your fully manual classic!
But then, CHI, a company in China, sent me their new Laser Light Meter. Could a laser pointer on a camera actually replace my trusty ROWI rangefinder? I was eager to find out! Until now, the only photography-related lasers I knew were those bulky handheld devices used on construction sites. Lugging those around with a Sekonic Light Meter is quite a load in your pockets!
See the video Review – Or read on…
As you can see it is small, stylish and compact. Perfect to carry about or fit on one of my folding cameras. I’ll go over the features of the meter and then show you some images I took using it.
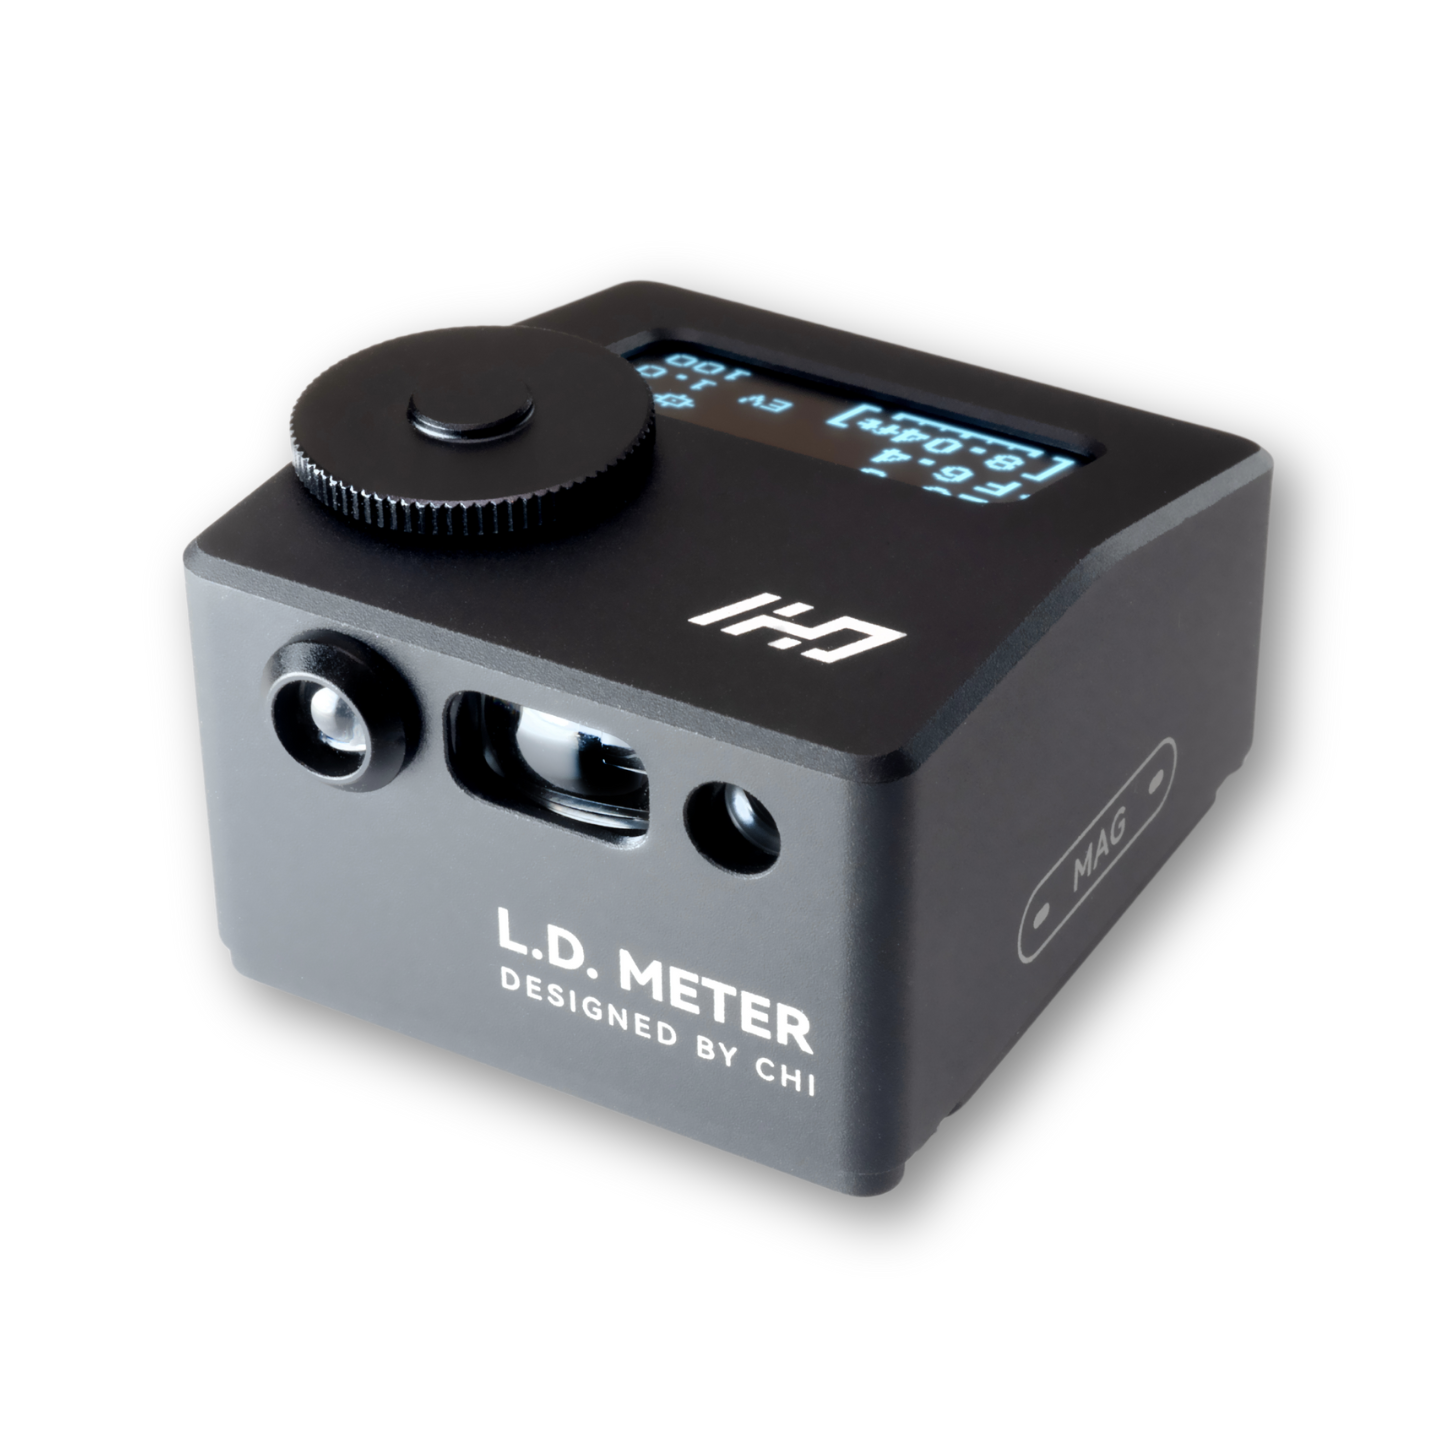
Features
This little meter packs a punch! It measures reflected light and offers both aperture priority and shutter priority modes, giving you creative control. With a 30-degree light receiving angle, it captures a good chunk of the scene. And the built-in laser rangefinder? It’s accurate from 0.1 to 50 meters! You can even switch between meters and feet. All this information—shutter speed (from a super-fast 1/8000th of a second to a full 60 seconds!), aperture (f/1 to f/64), distance, ISO (3 to 8000!), and exposure value—is displayed on a clear 0.96-inch LCD screen.
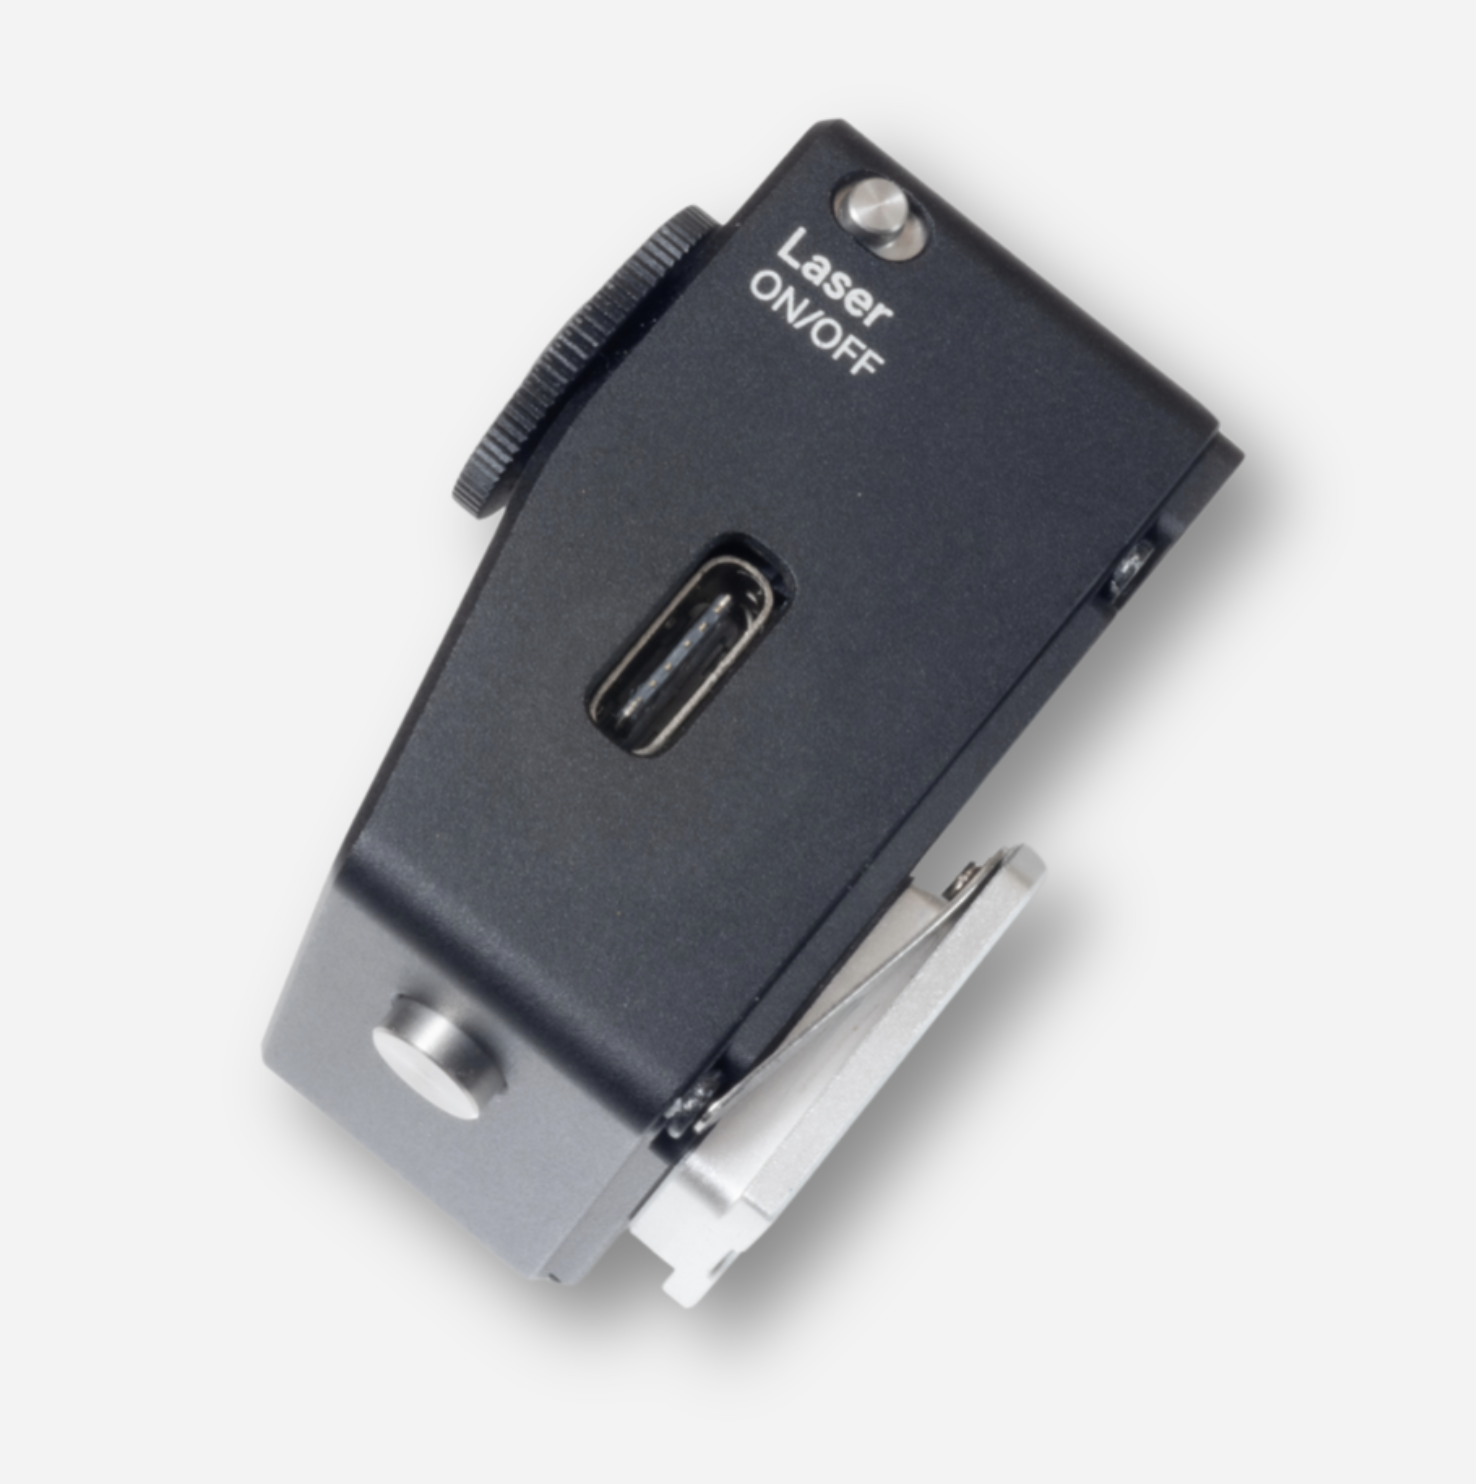
One of the things I love about this meter is its versatility. You can use it as both a light meter and a rangefinder, simply by switching the laser on or off. And with a rechargeable battery that lasts up to 90 days of standby time! and convenient USB-C charging, it’s ready to go whenever you are.
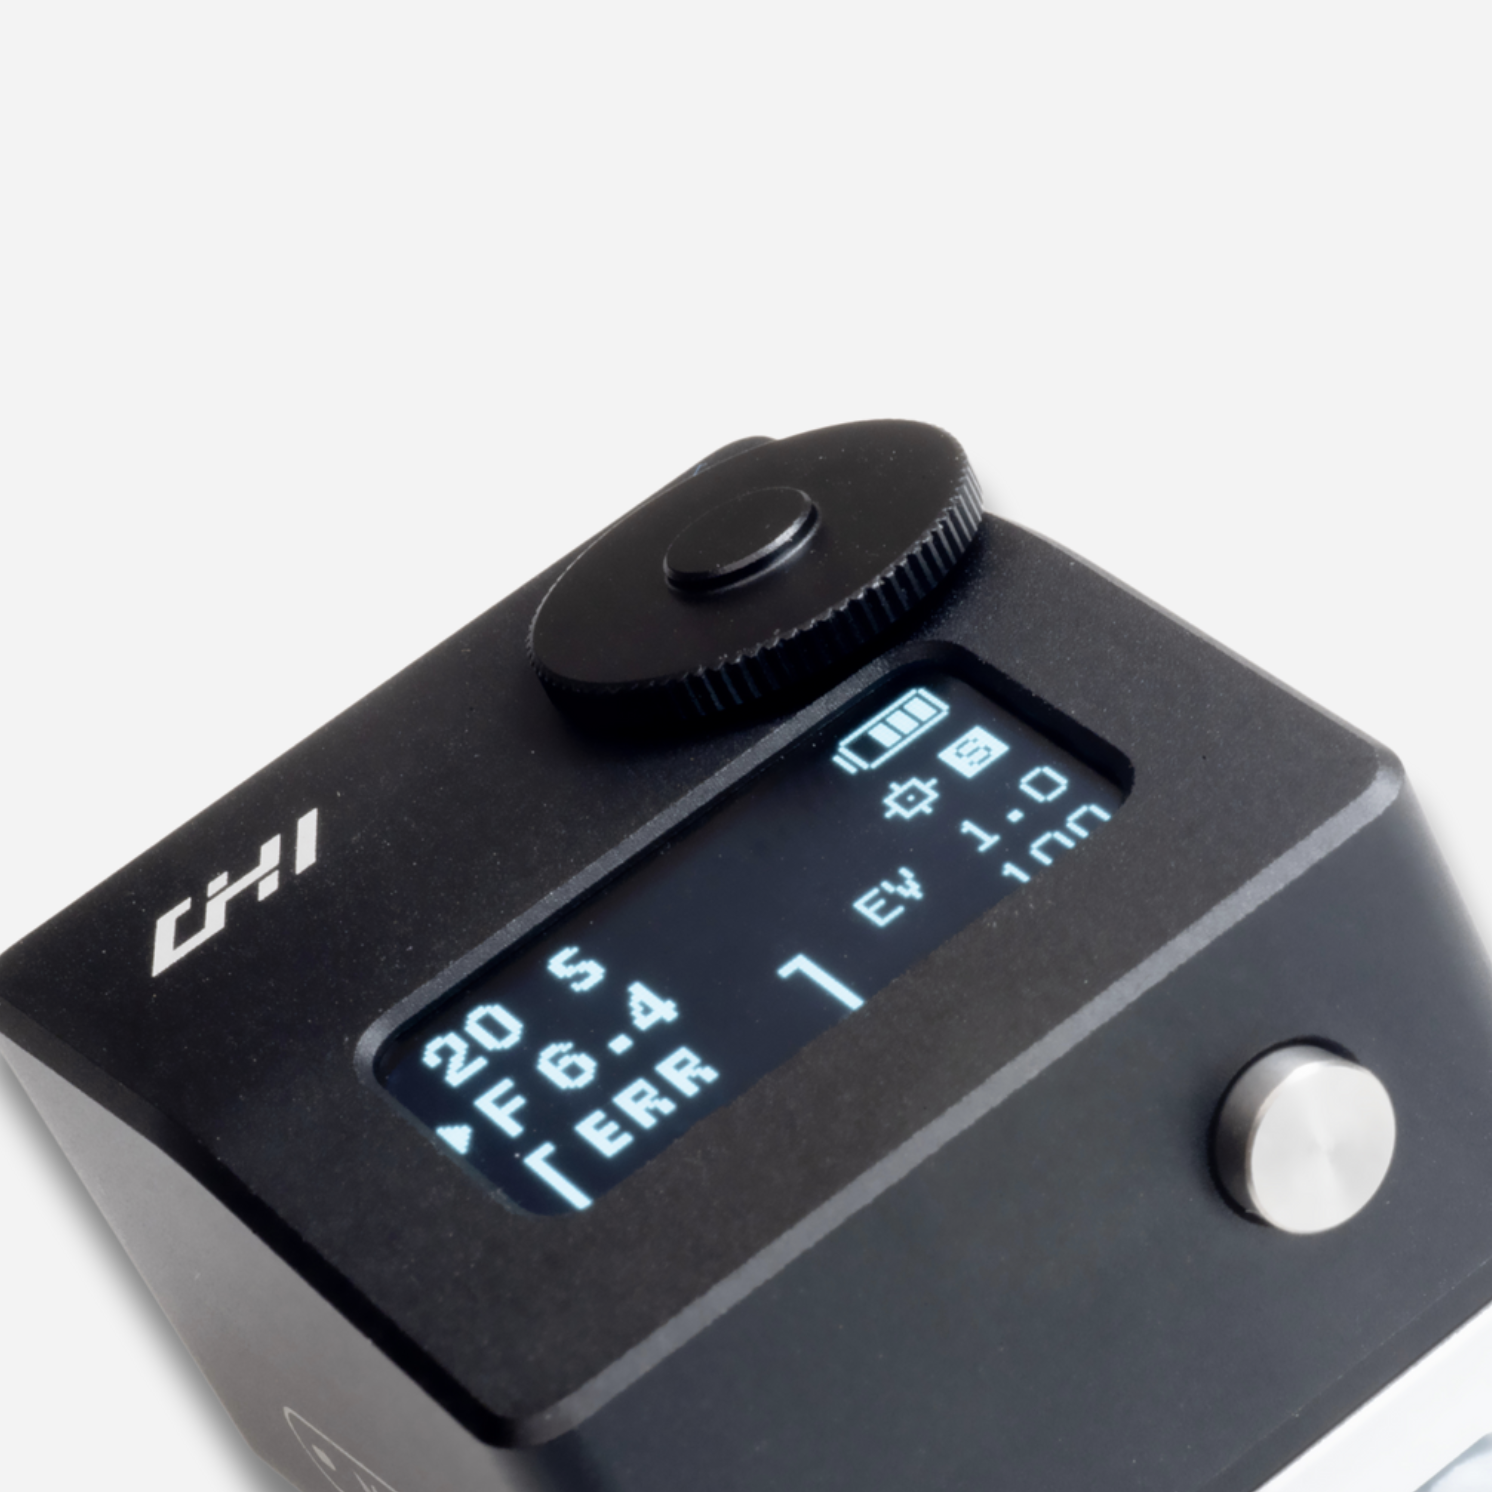
Functions
Navigating the CHI meter’s settings is incredibly intuitive. A small silver button and a jog wheel give you complete control. The jog wheel cycles through aperture, shutter speed, and ISO settings. It even lets you switch the laser distance measurement between meters and feet—a huge plus for those of us with cameras that use both! The laser itself offers impressive flexibility. Choose between a continuous blinking dot, an on-demand burst, or a permanent flashing measurement. And if you want to disable the laser entirely, a handy side switch lets you do just that.
The silver button has two functions. Press all the way down or press half way down.
To get a quick burst of laser light, simply press the button halfway down. The distance reading will remain on until you press it again. For continuous laser pulses, hold the button down for a few seconds, and the laser will emit short bursts automatically, giving you plenty of time to find your target. Switching between aperture and shutter priority is easy—just press the button fully down twice. To adjust the ISO, press down and hold the button for a few seconds. The ISO will start flashing, allowing you to use the jog wheel to select the desired value.
To activate constant mode for the light meter, press and hold the button for a few seconds until the mode switches from “S” (Single) to “C” (Constant). In this mode, the light meter will continuously read the light levels wherever you point it. The laser will also operate in continuous mode, emitting pulsating flashes. If you don’t want the laser on, simply switch it off using the side switch.
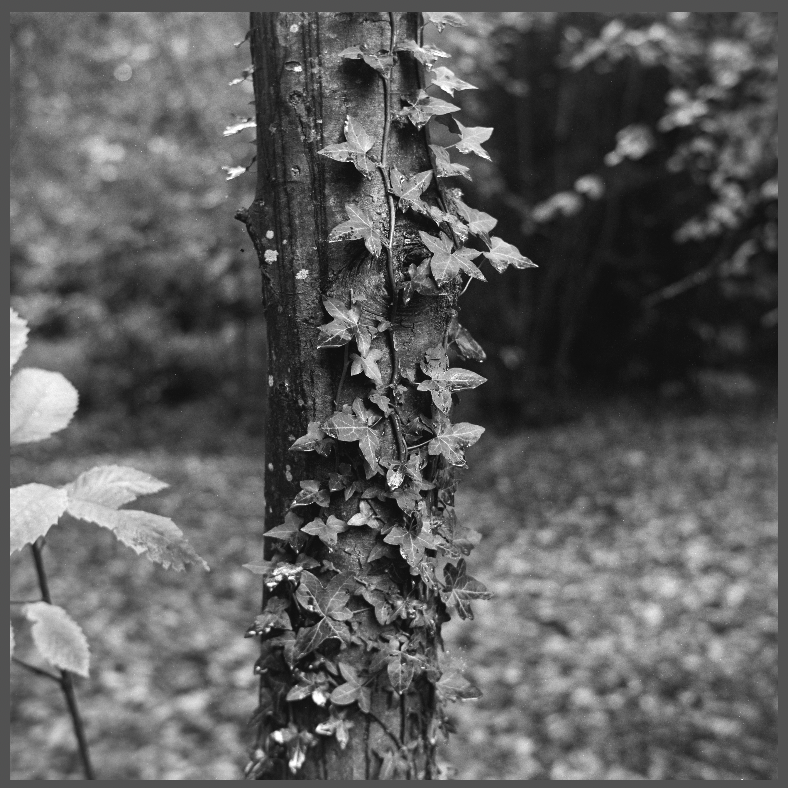
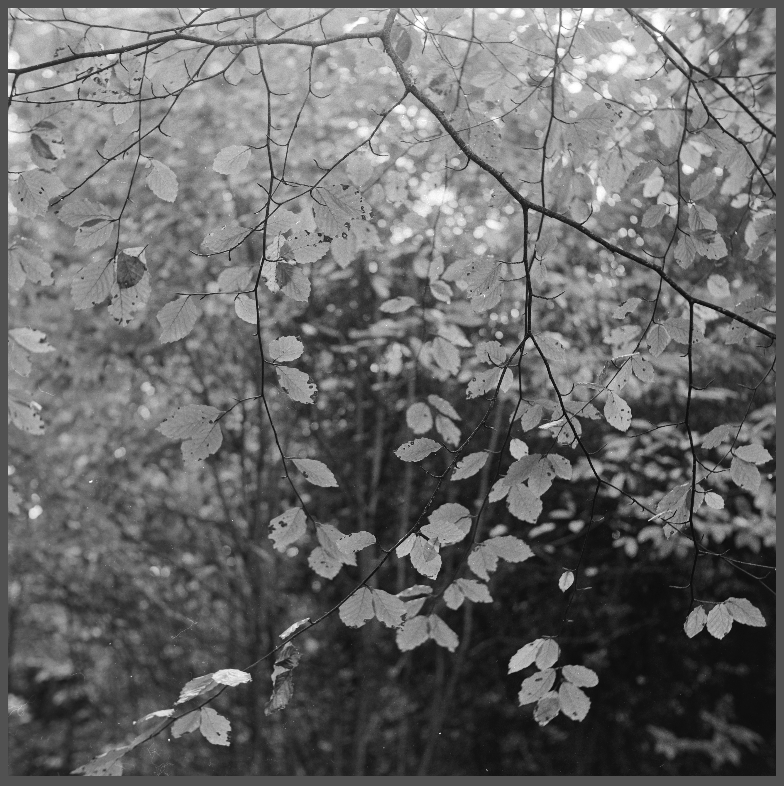
Easy to use
It is real easy to use on the field. But I did find it slowed me down a tad. Larger scenes such as tree trunks and walls I could see the red dot perfectly. It was a bit more tricky on smaller subjects such as leaves. But who minds slowing down, we shoot film! And we need accuracy in our focusing right? In my experience the sun was starting to go down so I needed to be a bit quicker. The ROWI Rangefinder would have saved time but not that much.
Going Forward
So, going forward with my photography will this device make me leave my ROWI Rangefinder at home? It’s possible! I still have only used it once in the woods. Time will tell but I can see no reason why I would take both out. Maybe I will alternate as they both do the same thing, except switching between Meters and Feet! And as it has a light meter built in it’s a no brainer to take it with me most of the time!
Tiny Light Meters
I have reviewed a few of these tiny pocket light meters on the SFLaB Channel. Something I never thought I would use as I have an awesome Sekonic Spot/Incident Meter but these tiny light meters work very well indeed! I find attaching a lanyard on them and slipping over your neck to be very convenient. I don’t take them out with me all the time though as most of my cameras have built in meters but I find myself taking them out with my SLR’s that don’t and usually when I am shooting street. Just to check the light quickly. When I am shooting my larger medium format cameras such as the Mamiya RZ67 and also Large Format I will use the Sekonic. Because thats what I am used to.
Photos
I used a Franka Solida III Folding Camera which has a very nice lens! All these photos were focused and metered using the CHI. Fomapan 100 developed in 510 PYRO.
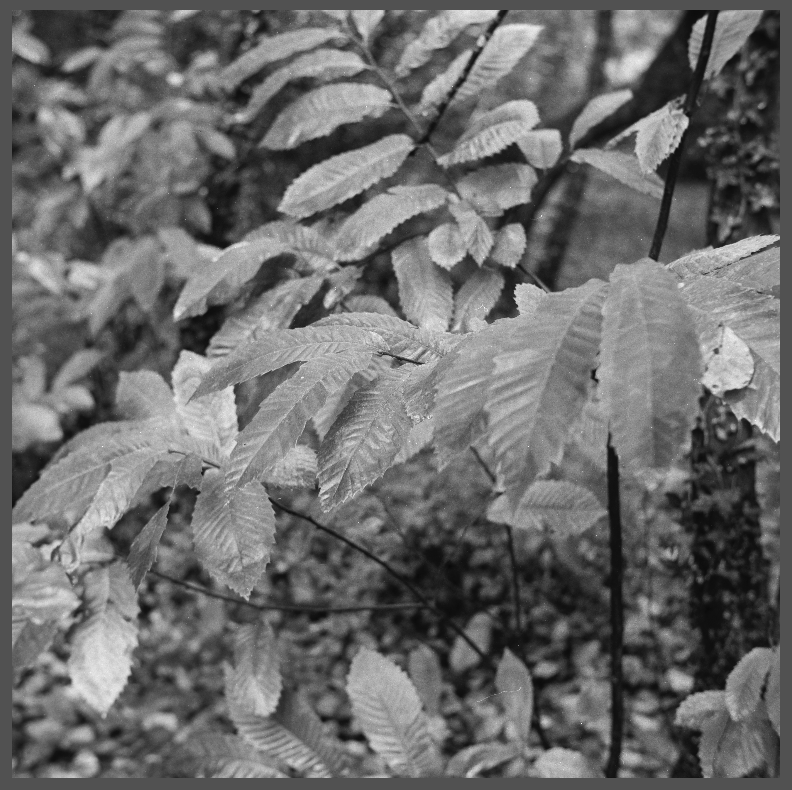

The last photograph was an accidental double exposure!
I hope you enjoyed this little review and no doubt you will see me using this device on the channel in the coming months. You can read more on the CHI website, although it is a bit vague. https://chinotechs.com