Zone Focusing
I use Zone Focusing a lot and get asked many questions about how to use it so hopefully I can explain what I know on this post. I shall try and keep it simple!

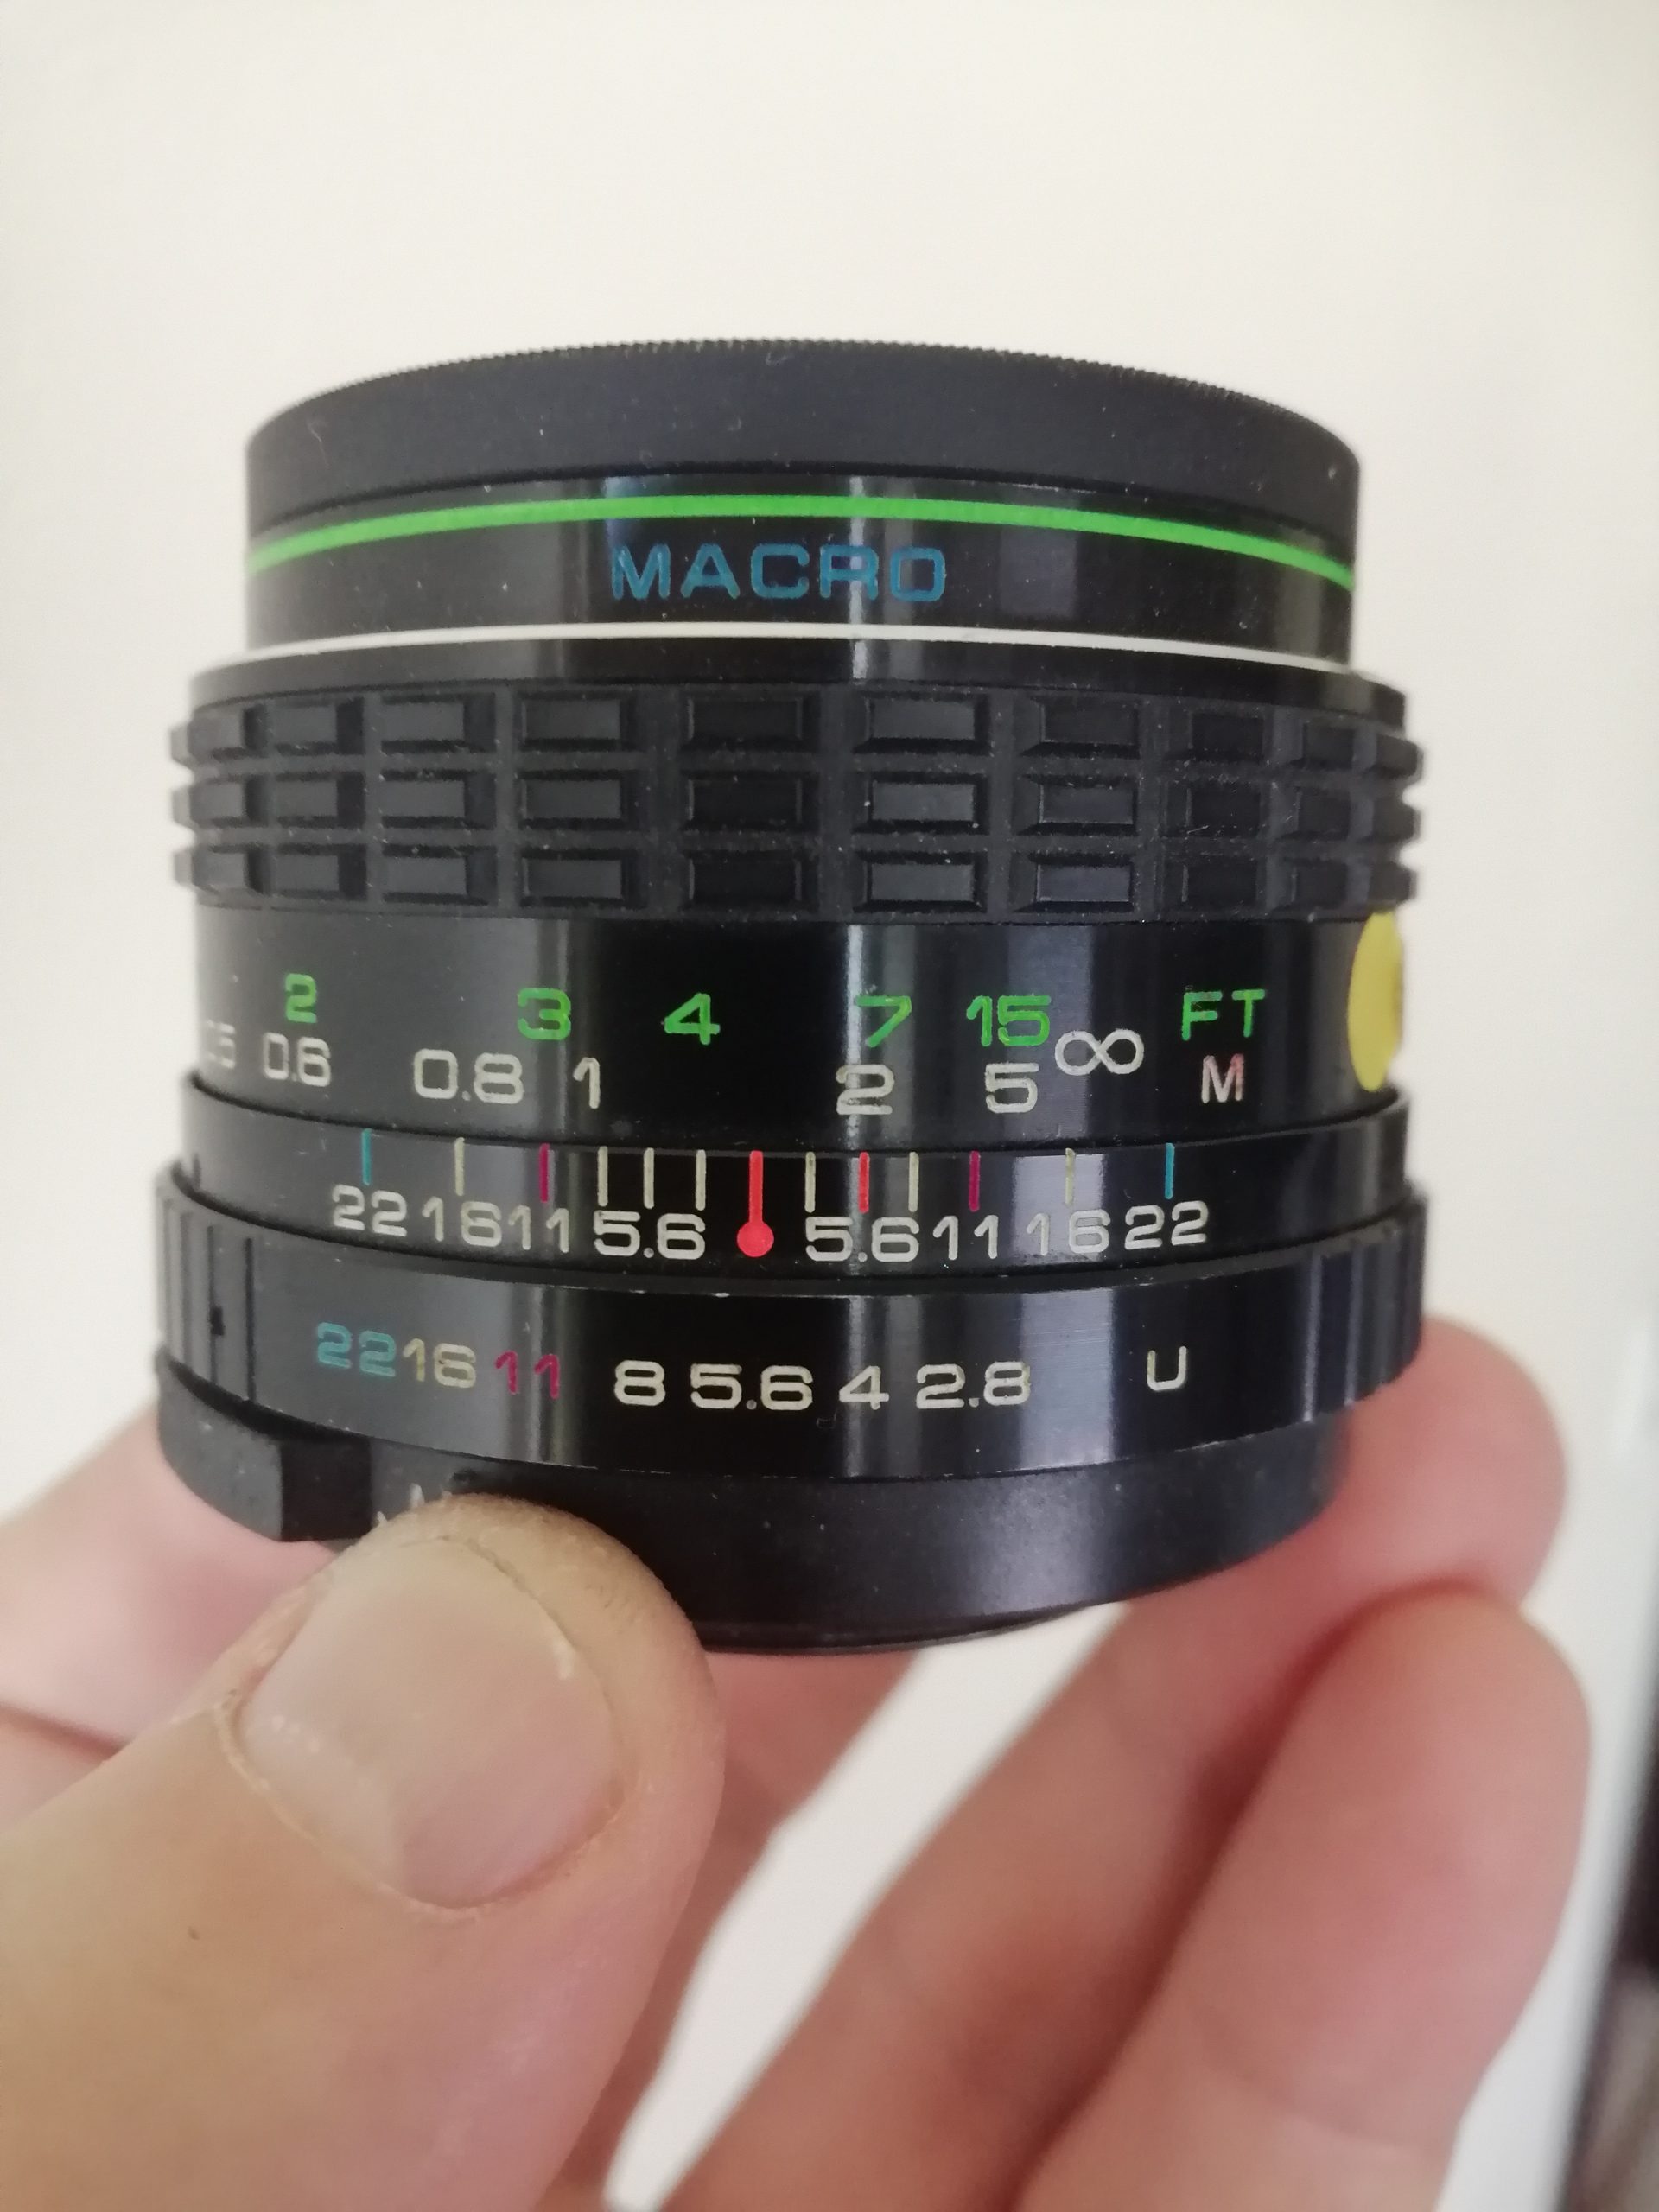
Have a look at your lens. If it has aperture markings similar to the above image you can use Zone Focusing.
Notice my aperture is set to f/16. We all know it’s a small aperture allowing a great depth of field. In the left green zone you can see an Infinity symbol. Infinity means endless, think of Buzz Lightyear! “To infinity and beyond”.
So I can set my lens to infinity and get good focus from a particular near point of distance to infinity.
In the example above I am shooting at f/16 and so I turn the focus ring until the infinity symbol is at f/16. I then read what the opposite side reads at f/16 which in feet (in yellow) is appx 8 Feet. And in Meters (White) appx nearly 3 Meters.
So when I take my photographs I know that anything in my scene that is just under 3 Meters or 8 feet is my closest focusing distance and everything will be in focus from that distance to infinity. Anything in my scene that is closer than 8 Feet or 3 Meters will be out of focus.
It’s that simple. I think this is called “Hyper Focal” when you use the infinity symbol. But I just say “Zone Focusing” to keep it easy.
Let’s take another example.
I want to go out and shoot some street photography. I don’t want to be having the camera to my eye and trying to focus each shot. That will take time which I won’t have especially to capture the action. So I will preset my focus.
I want to shoot at f/11. I want to capture people close to me at a distance of about 3 feet. Thats relatively close! So all I need to do is set my “Zone Focusing” so that 3 feet matches the aperture I am shooting and the lens will tell me my furthest distance that I can expect to be in focus.
In this case you can see I have set the Zone Scale to 3 Feet at F/11 and anything between 3 Feet and just under 15 Feet (more like 12 I’d say) will be in focus. In this case anything in the middle of that distance (between 4 feet and 10 feet will definitely be in focus so I would try and keep my subjects between 4 feet and 7 feet to be on the safe side. No problem for street photography. Except anything closer than 3 feet and anything further than 15 feet will be slightly out of focus. That may not be the look you want for street photography. You may want everything in focus in which case you would need to shoot at f/16 or f/22 so you can have a larger depth of field.
In that case I would set the scale so that the infinite symbol is aligned with F/11 which would give me my closest distance at around 4 feet. (Excuse the pen on my thumb tip).
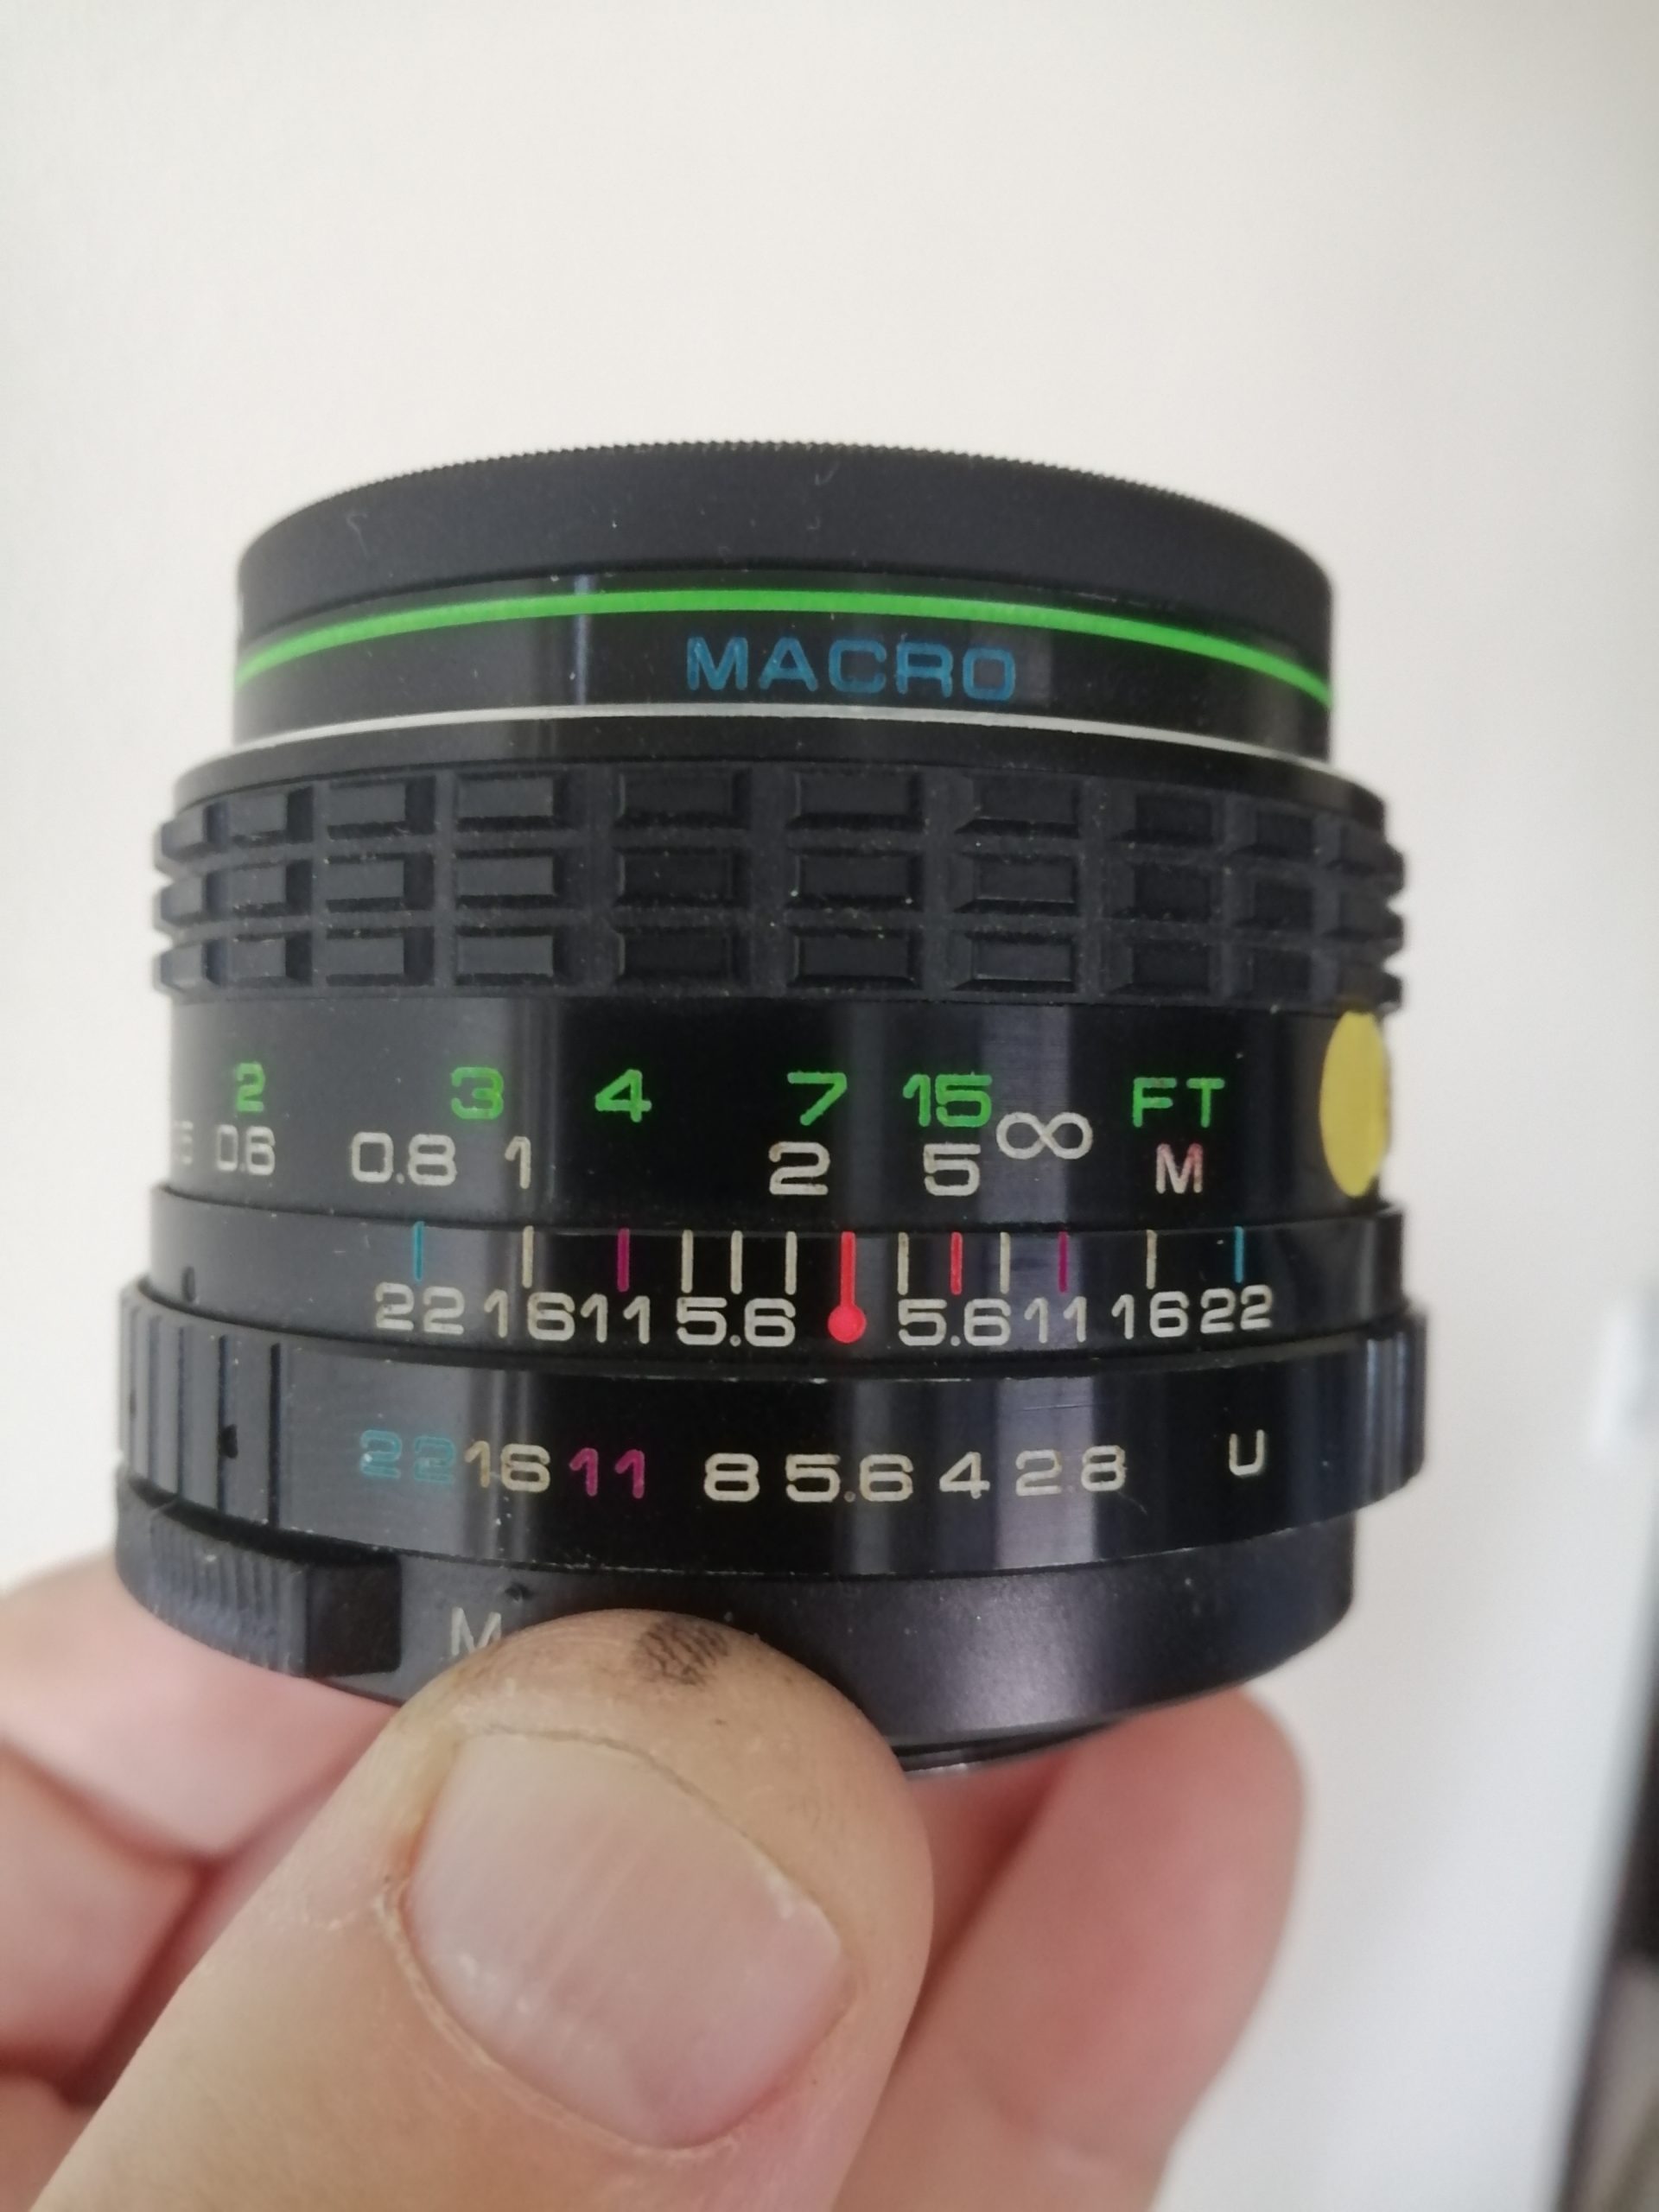
You can see from the scale that the smaller the aperture say f/22 the larger the depth of field or focus. And The wider the aperture, say F/5.6, the narrower the depth of field.
So that is all there is to Zone Focusing. Except I think if you set using the infinite symbol that is Hyper Focal. But to me it’s all the same.
So why would you use this system?
Most modern cameras have automatic focus and don’t show the scale on their lenses. More classic cameras do.
Zone focusing is handy when I am using my old view finder cameras that don’t have a rangefinder.
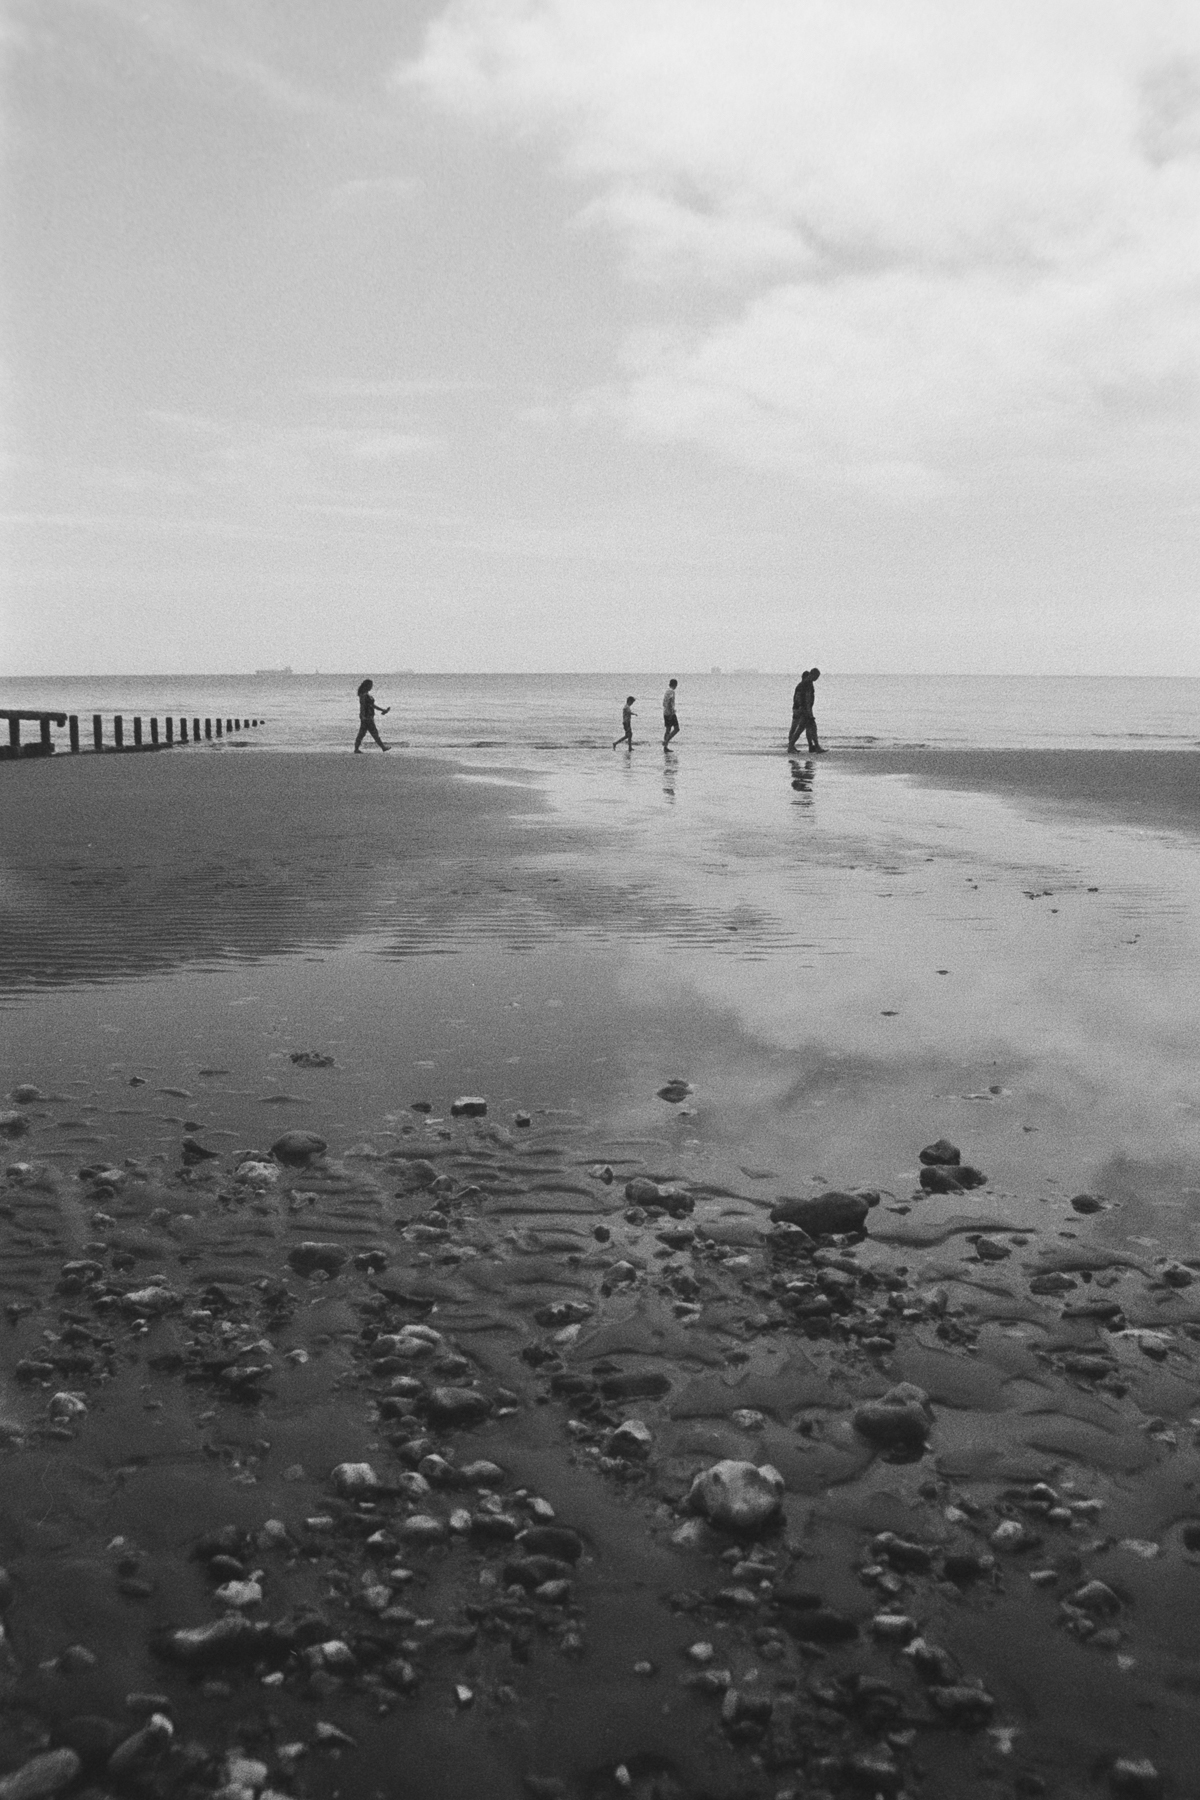
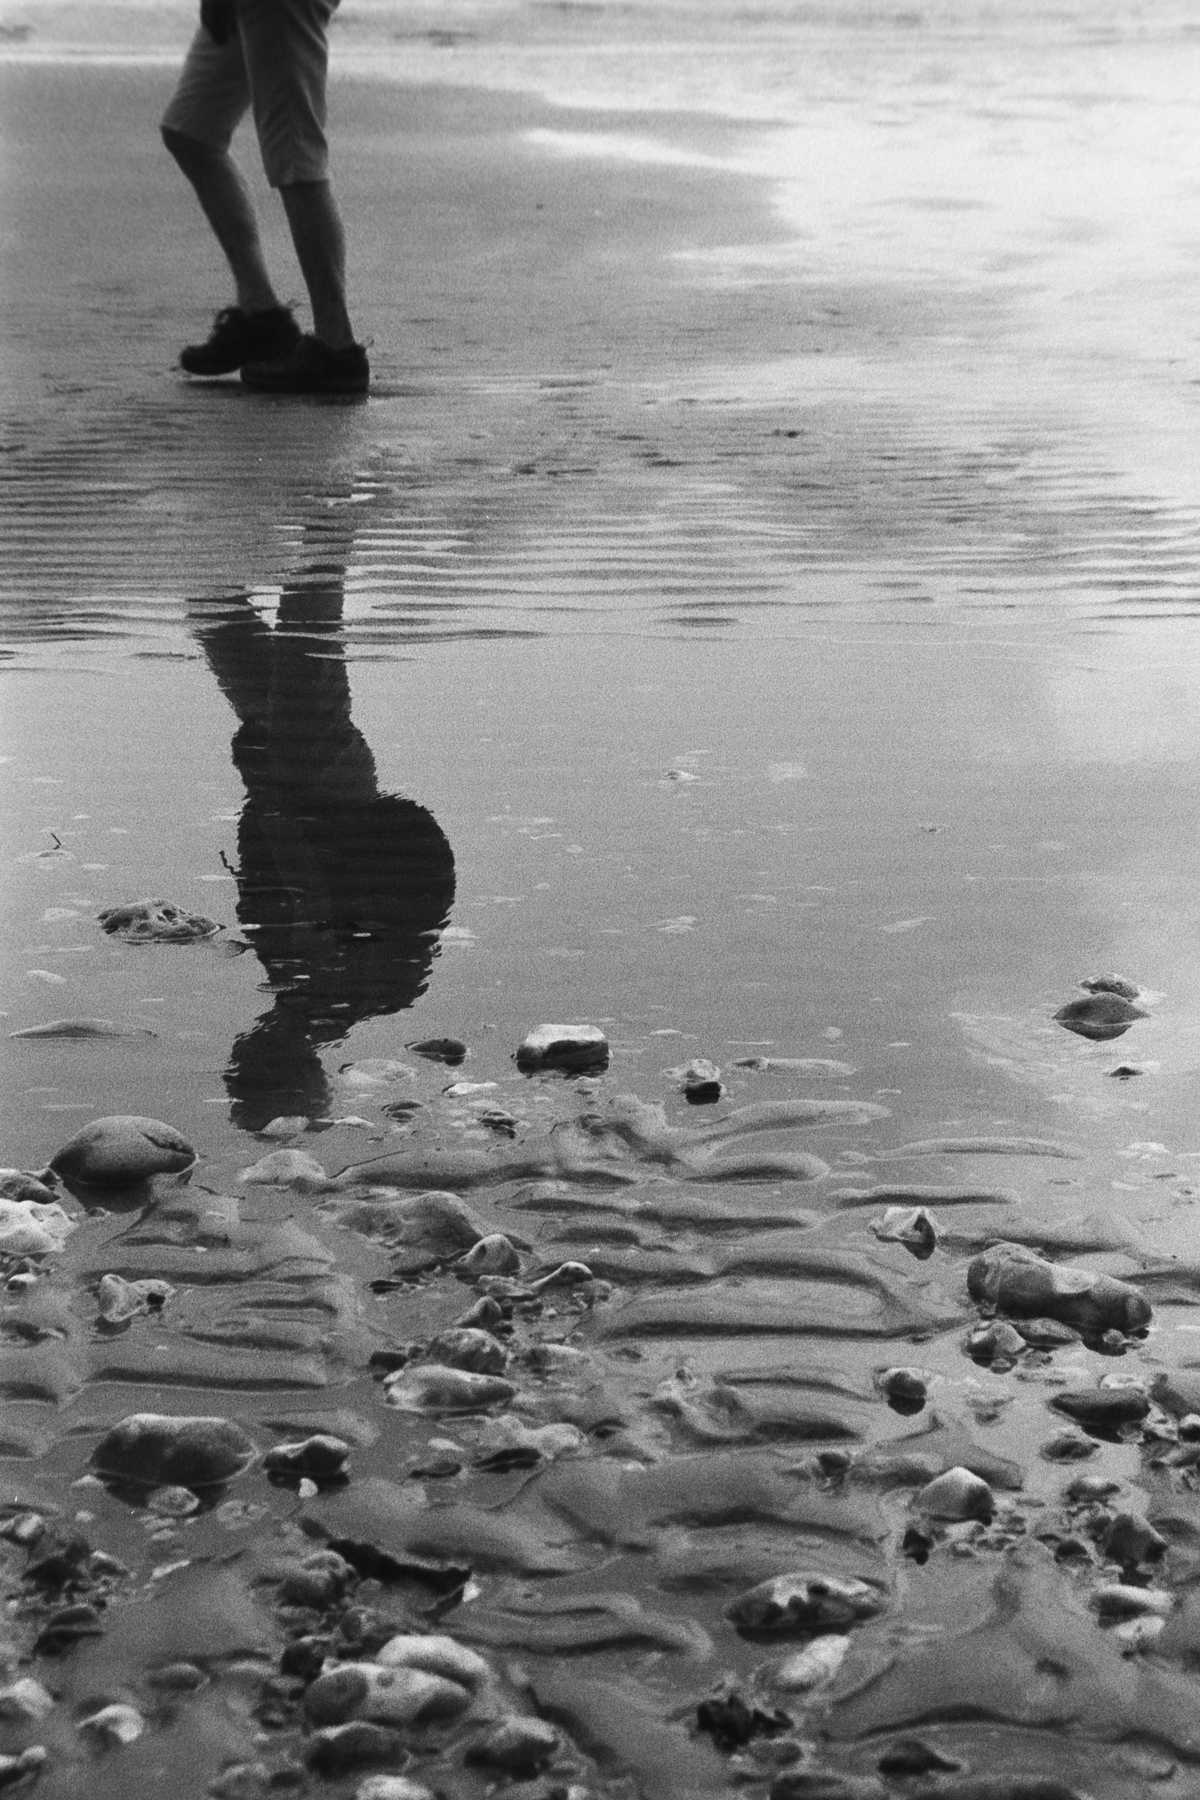
I also use zone focusing when I am shooting landscapes low to make sure I know where my closest focus area or range is. Imagine a small stone on wet sand. I want to make sure the stone is in focus as well as the scape behind it. My zone focusing will tell me where to place the stone if I set my infinite symbol to my aperture.
I can also use it for when I am doing low down shots and can’t bend down far enough to look through the view finder to focus.
Zone focusing is also great for street photographers as I mentioned so they don’t have to keep trying to focus. They know their zone and keep within it.
When would I not use the system?
Portraits and other close objects. With these subjects my focusing needs to be more precise such as the models Eye or the Flowers Petal.
I hope this helps anyone that is confused. It’s really easy and handy to use once you get used to it.
ORWO UN54
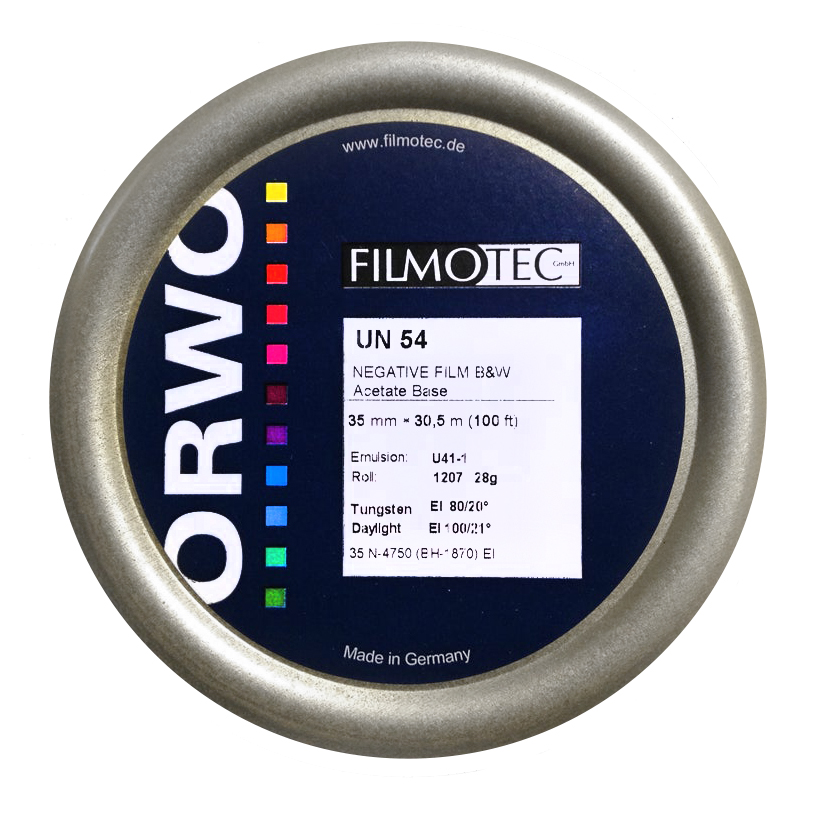
I first came across ORWO when I purchased a few rolls of Silberra 54UN from Russia. I liked the film that much and knew Silberra wasn’t the manufacturing the film so it didn’t take me long to find out I had been shooting ORWO UN54.
The only place I could find that supplied the film was Nik & Trick in Folkestone.
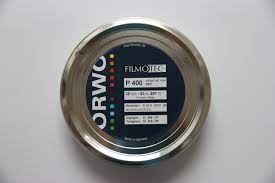
ORWO UN54 is a motion picture film manufactured by OWRO in Germany and the company has a long history of making emulsions for various uses in the motion picture industry. So needless to say the film comes in feet reels encased in a tin. That was no good to me as I, at the time, did not have a bulk loader or the confidence to do so! And ORWO do not sell individual rolled cassettes. Nik & Trick were rolling these for sale and I purchased some more.

I use a lot of different films especially for a mix of variety on the channel. One particular film I started to like was Lomo’s Potsdam 100. No wonder I liked it. It is ORWO UN54!
Recently Luca on Instagram sent me a various mix of ORWO Films to try, one being the UN54. Luca sent me a 35mm and also a 120. I was surprised at seeing the 120, however, turns out ORWO release a 120 reel now and again and folk like Luca snap it up and load it onto 120 reels for medium format work.
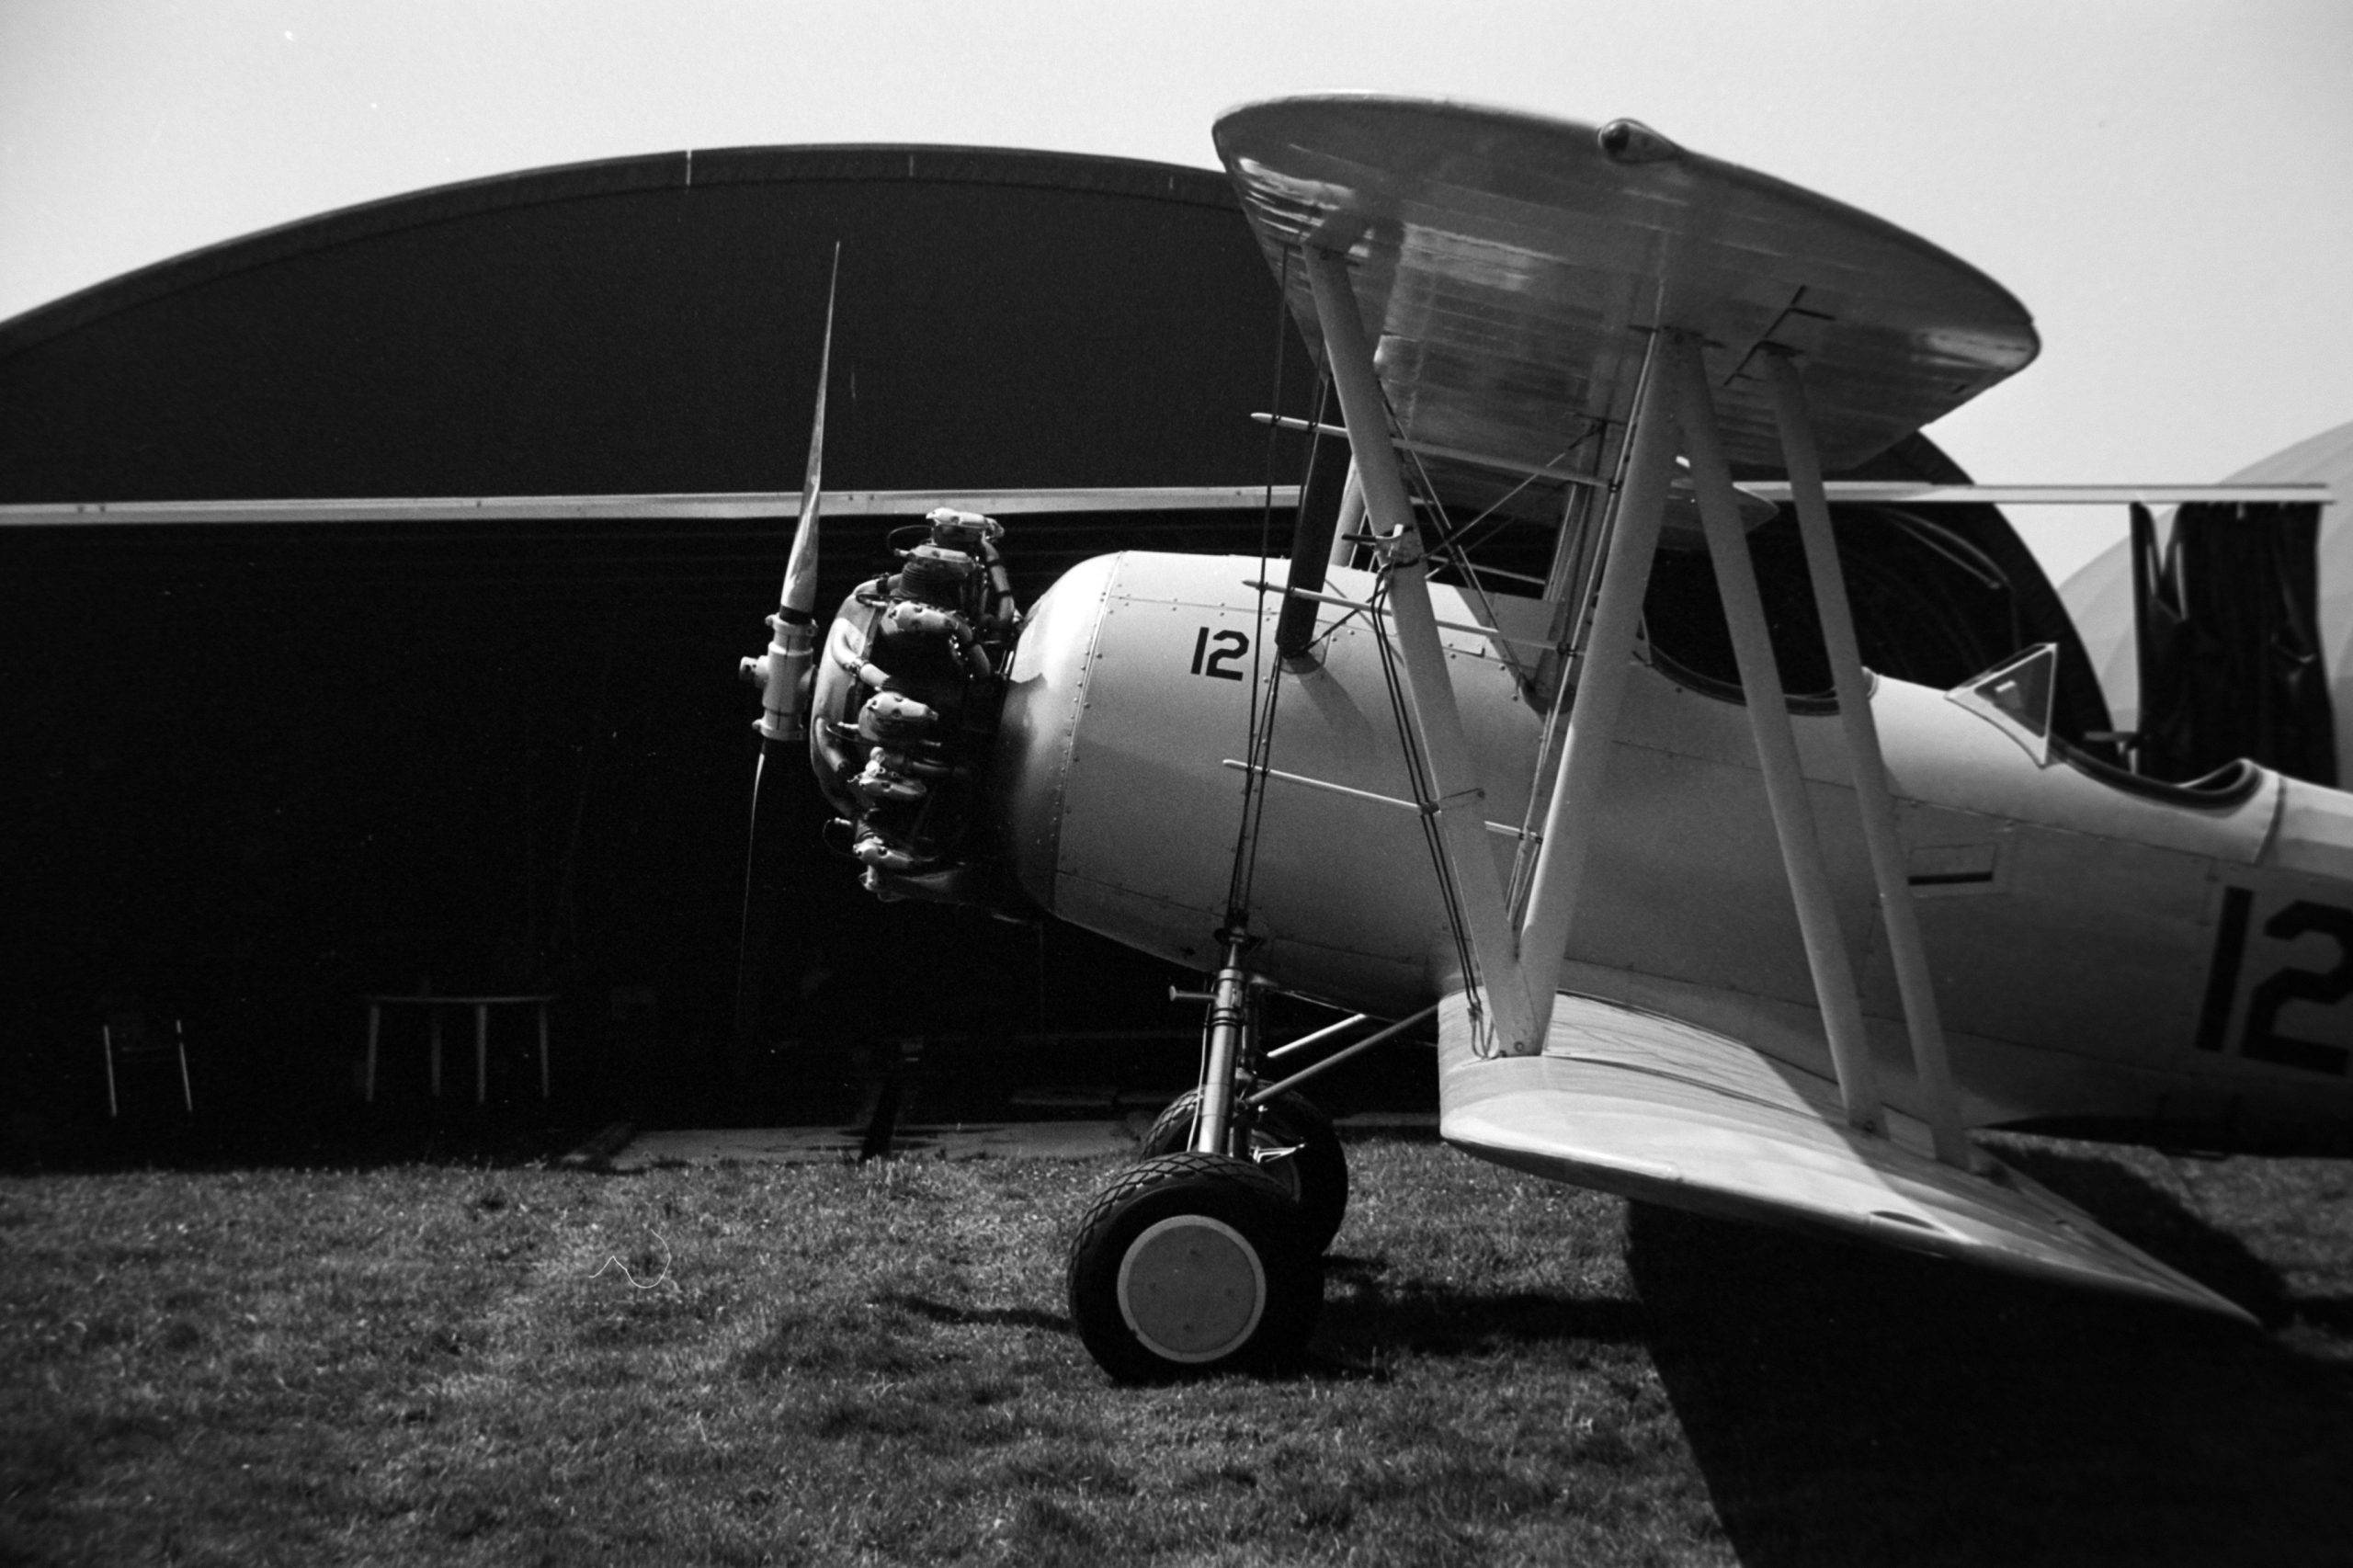
So recently I took the 35mm roll to an airfield and used a 1950s WERA Camera.
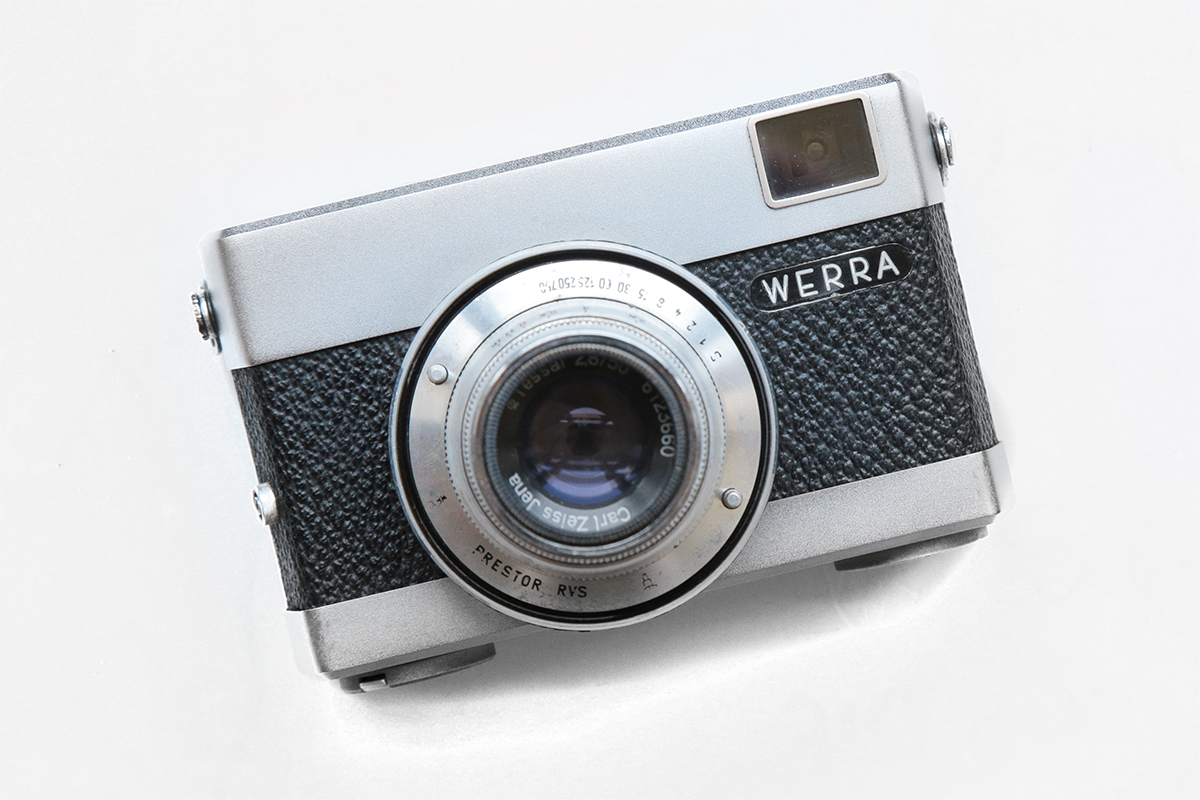
It was a bright sunny day and with this camera there is no internal light meter or rangefinder or through the lens focusing. So I used the Sunny 16 shooting 1/250th and F/11 and used Zone Focusing for simplicity.
I developed the ORWO UN54 in XTOL at 1:1 at 25° for 5 minutes. Why 25°? It’s a heatwave here and my tap water was not as cold as it usually is and even though the XTOL was sitting in a cupboard, that too was not as cool. I could have chilled it down to 20° but I’m always up for a challenge.
The negatives came out really nice as expected. I made a few prints and under the focus finder the grain was very fine and even printing 14×9 inch the prints came out with a pleasing fine grain and sharp too.
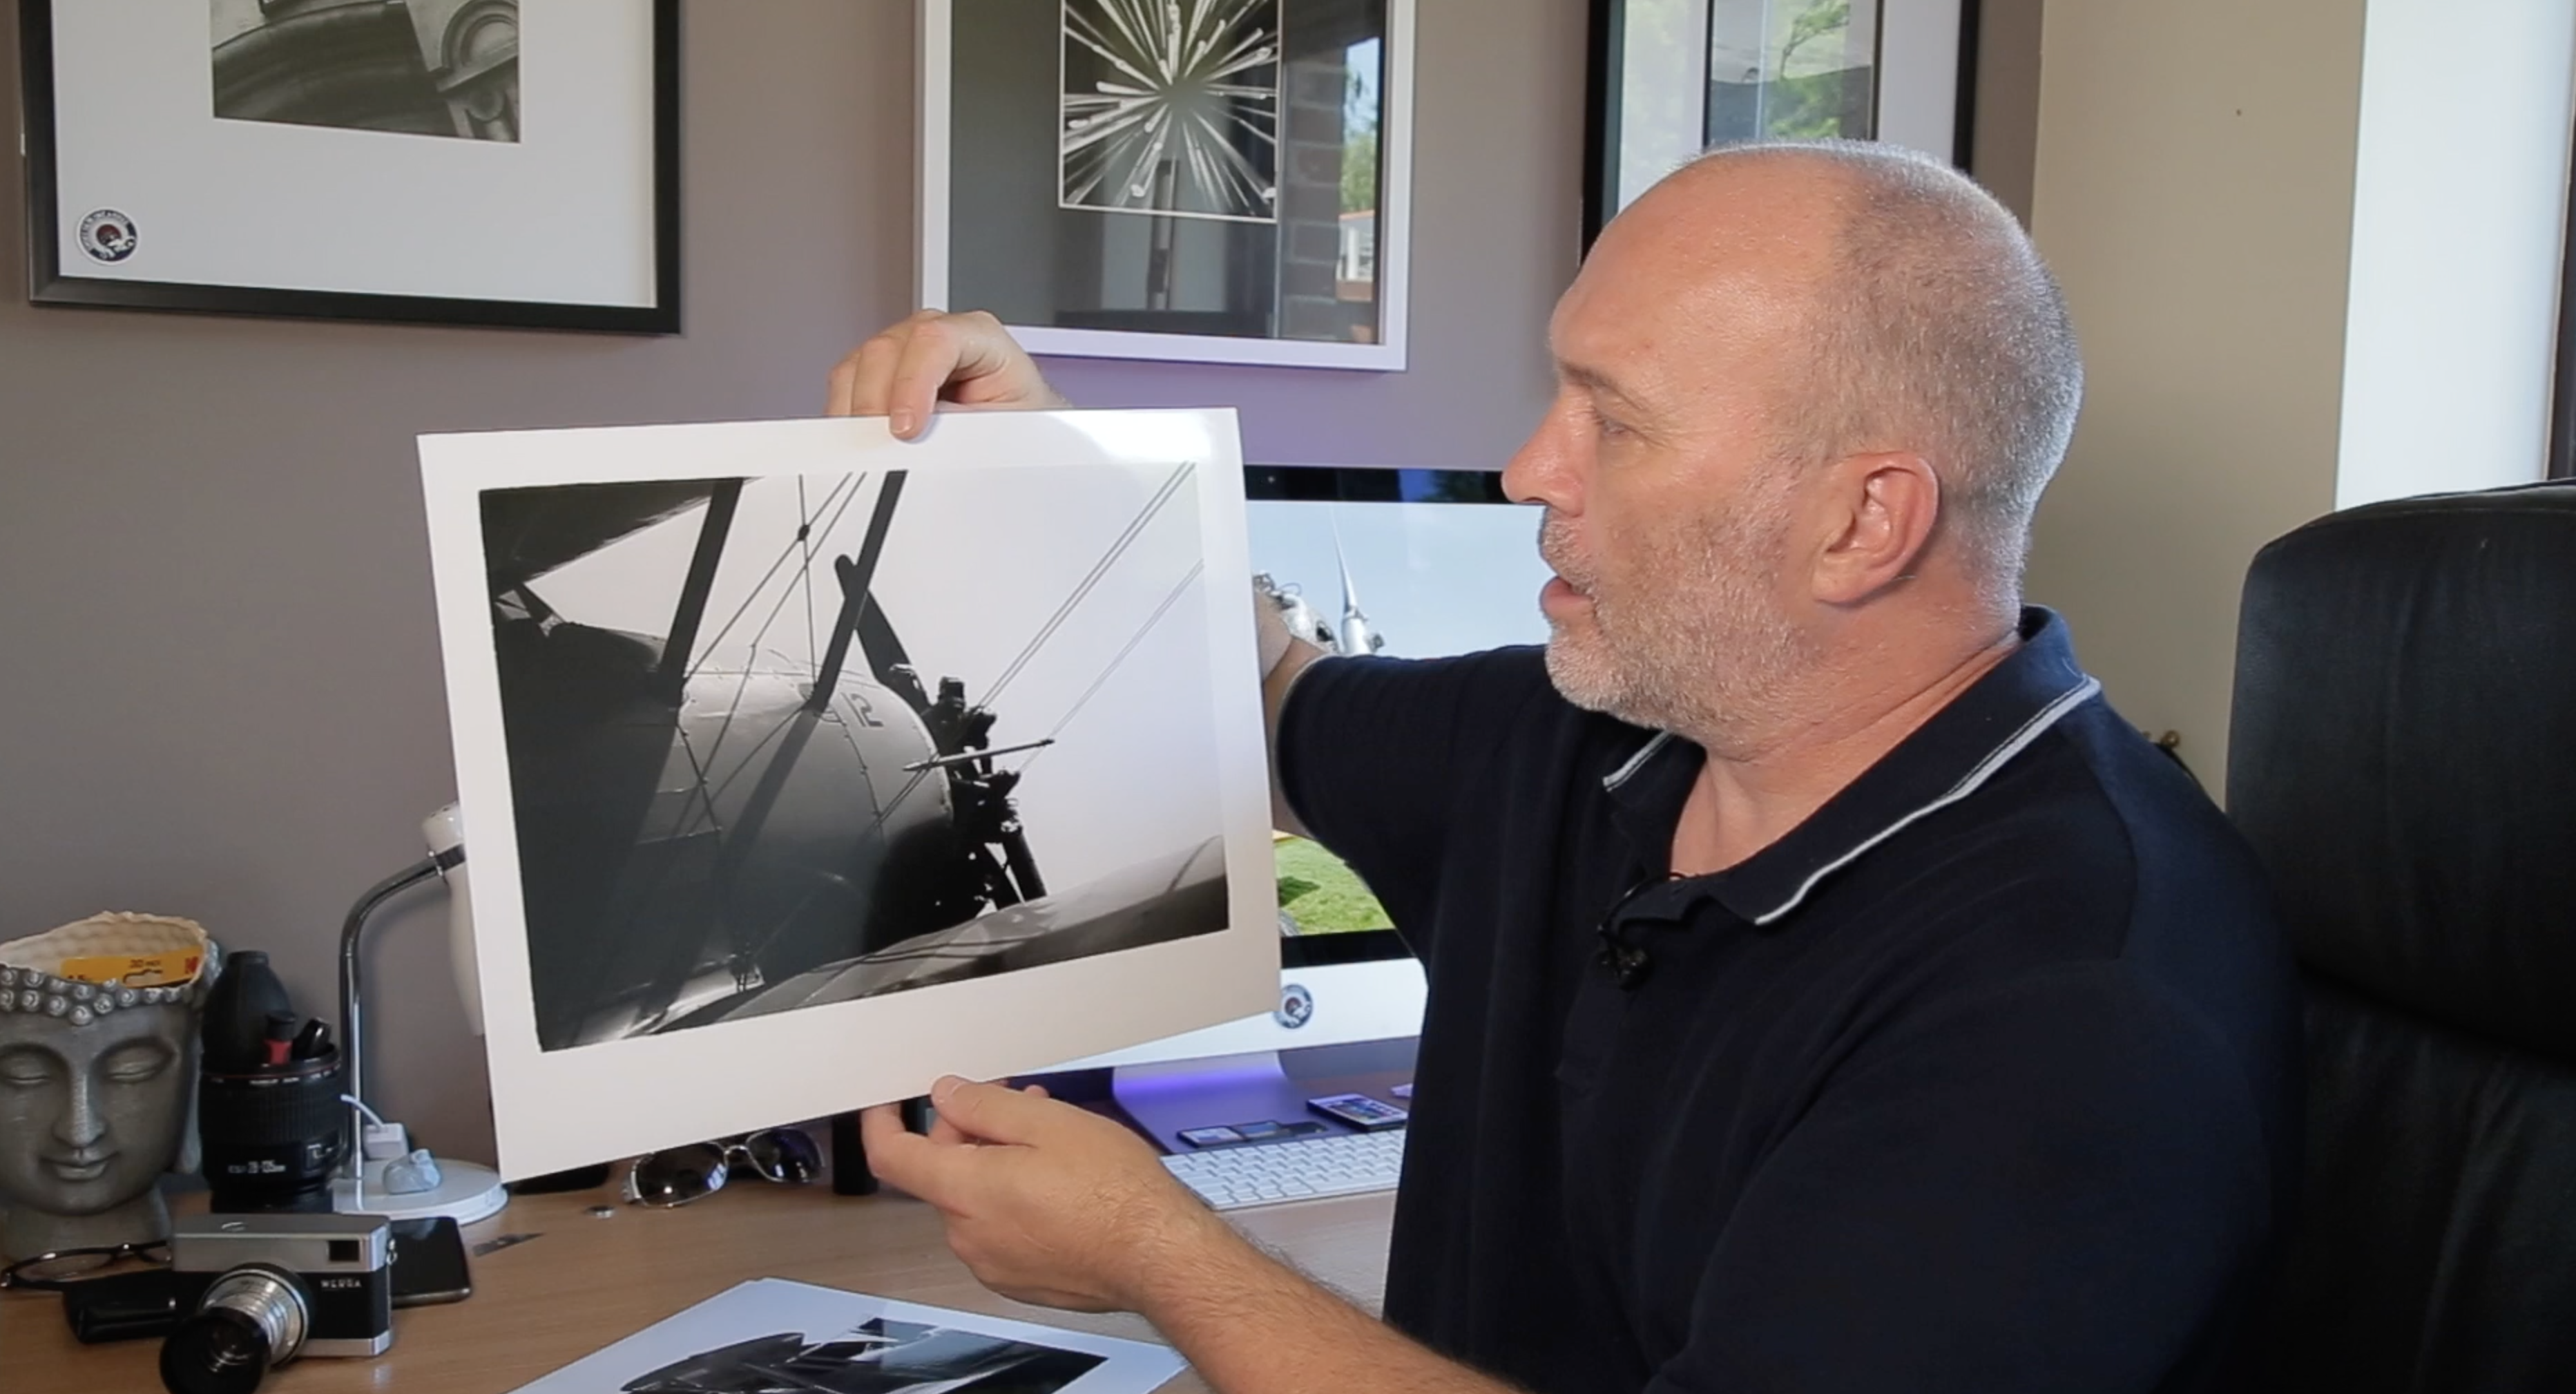
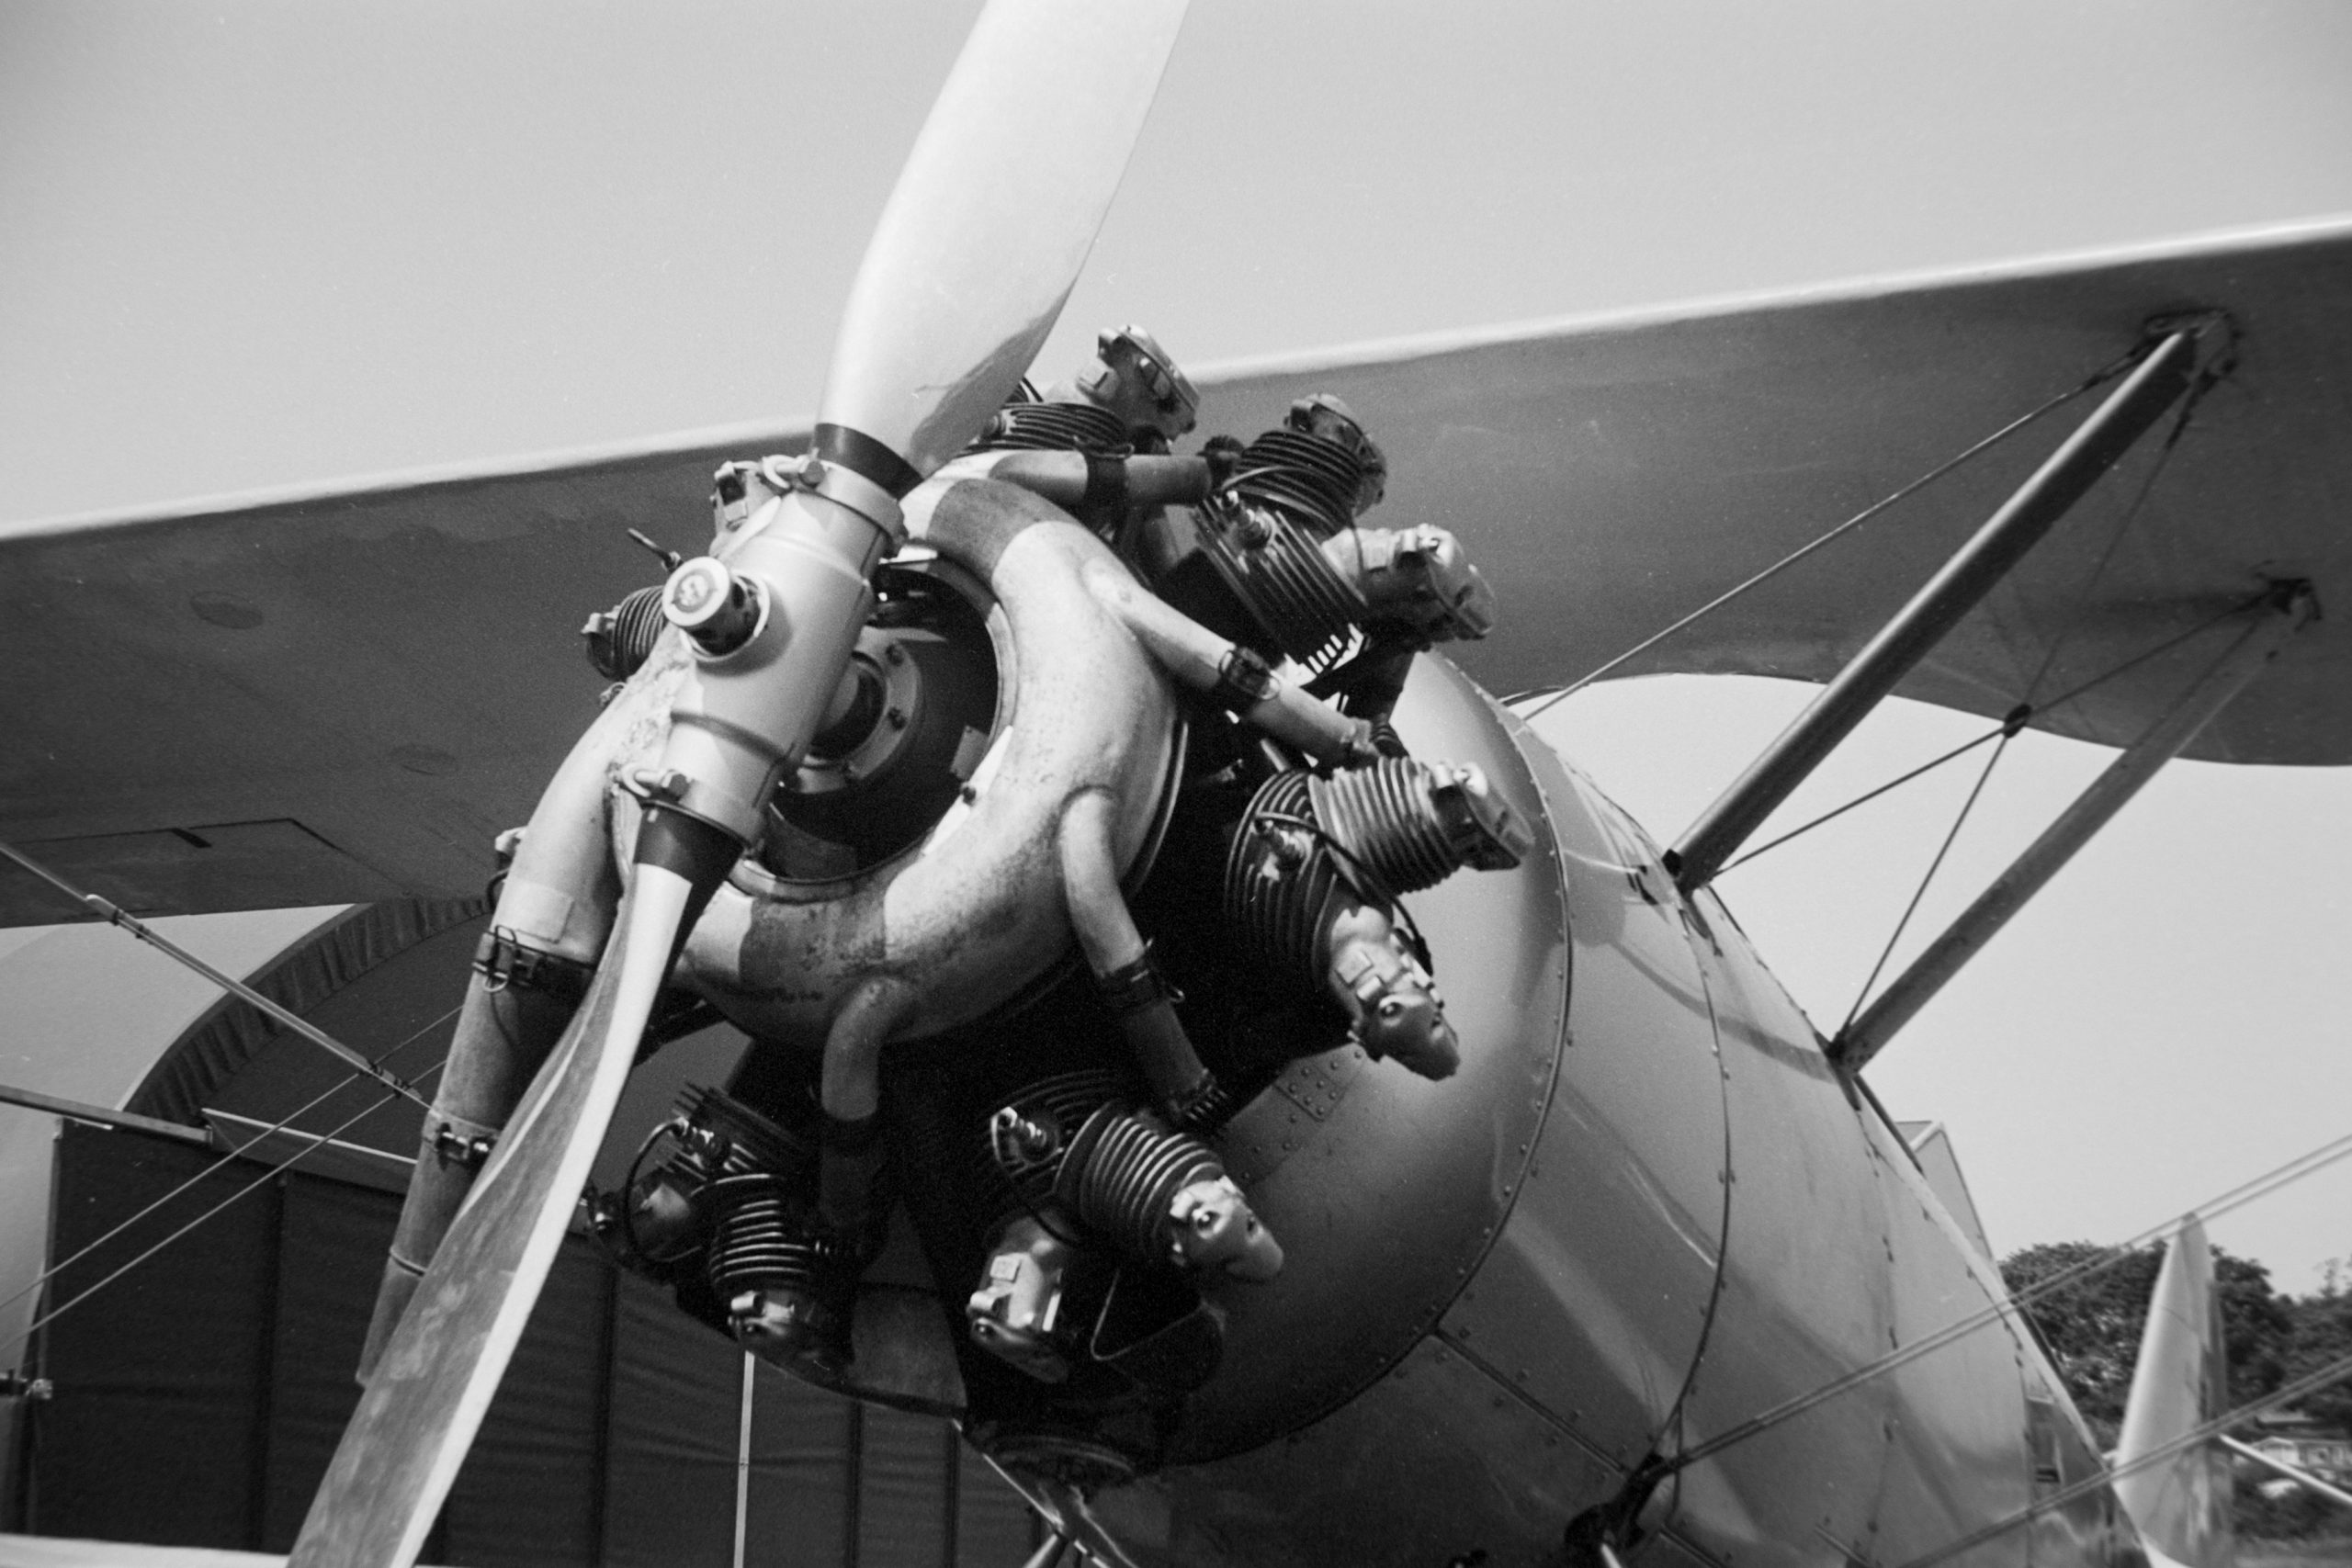
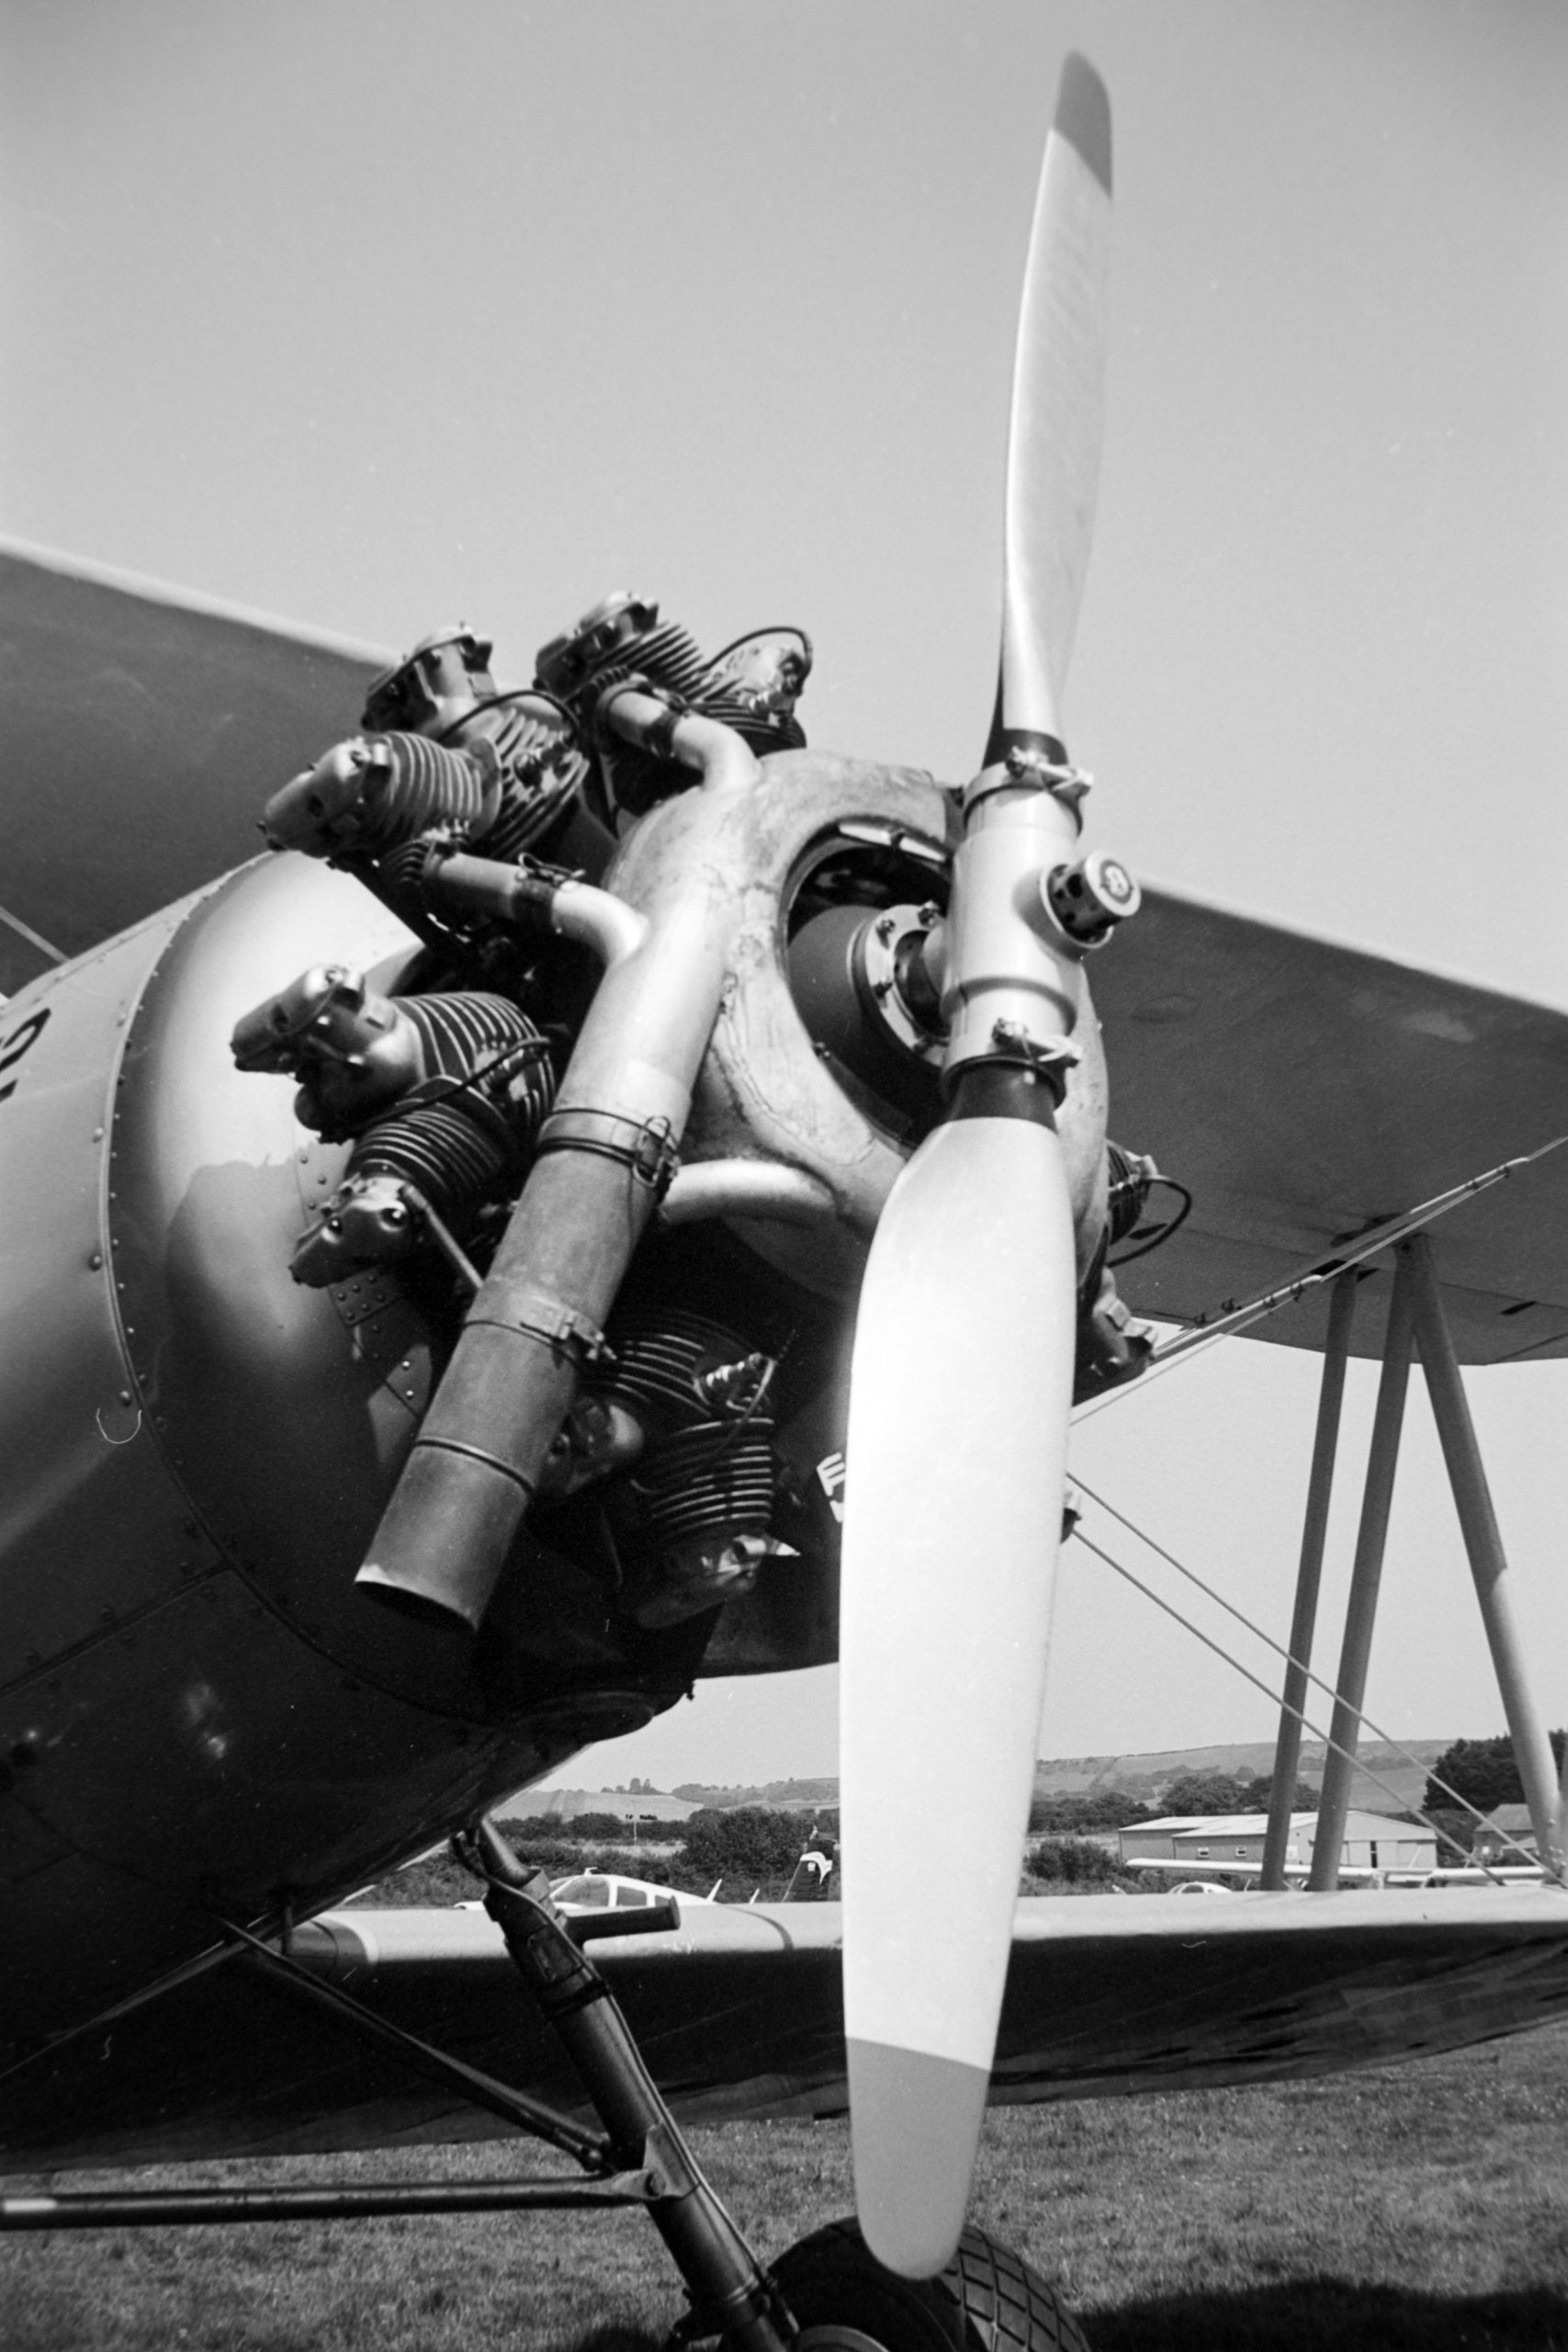
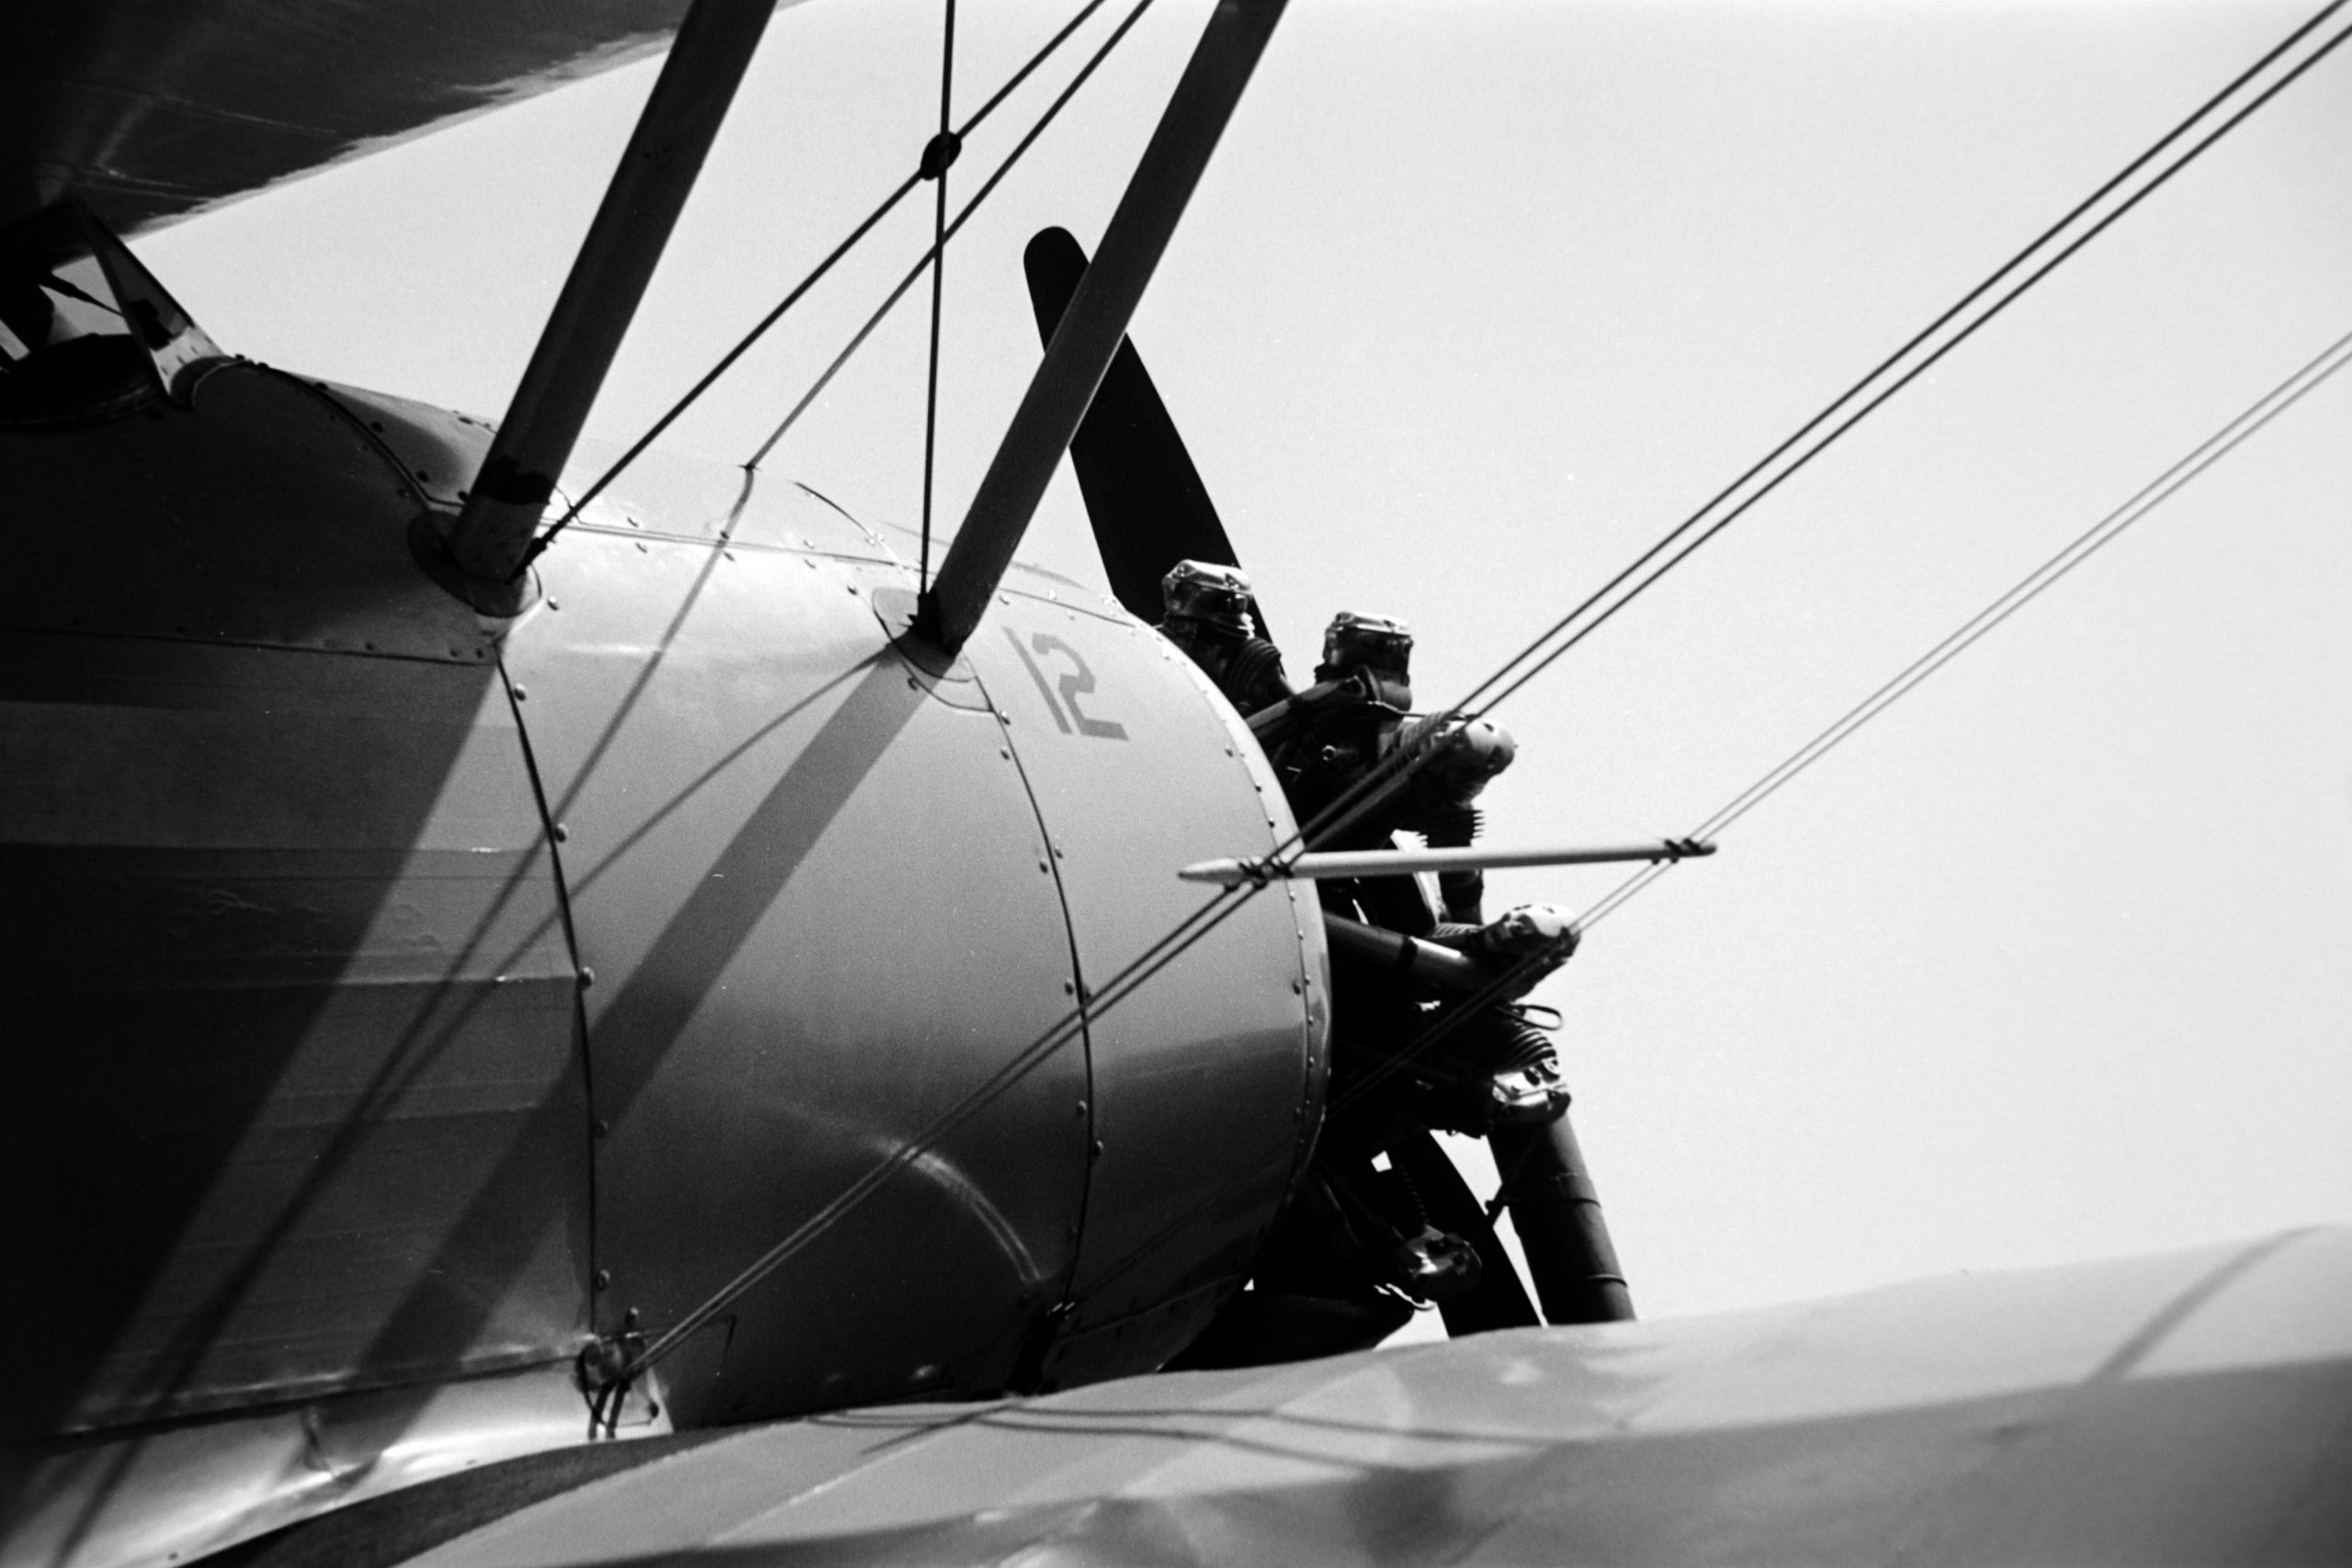
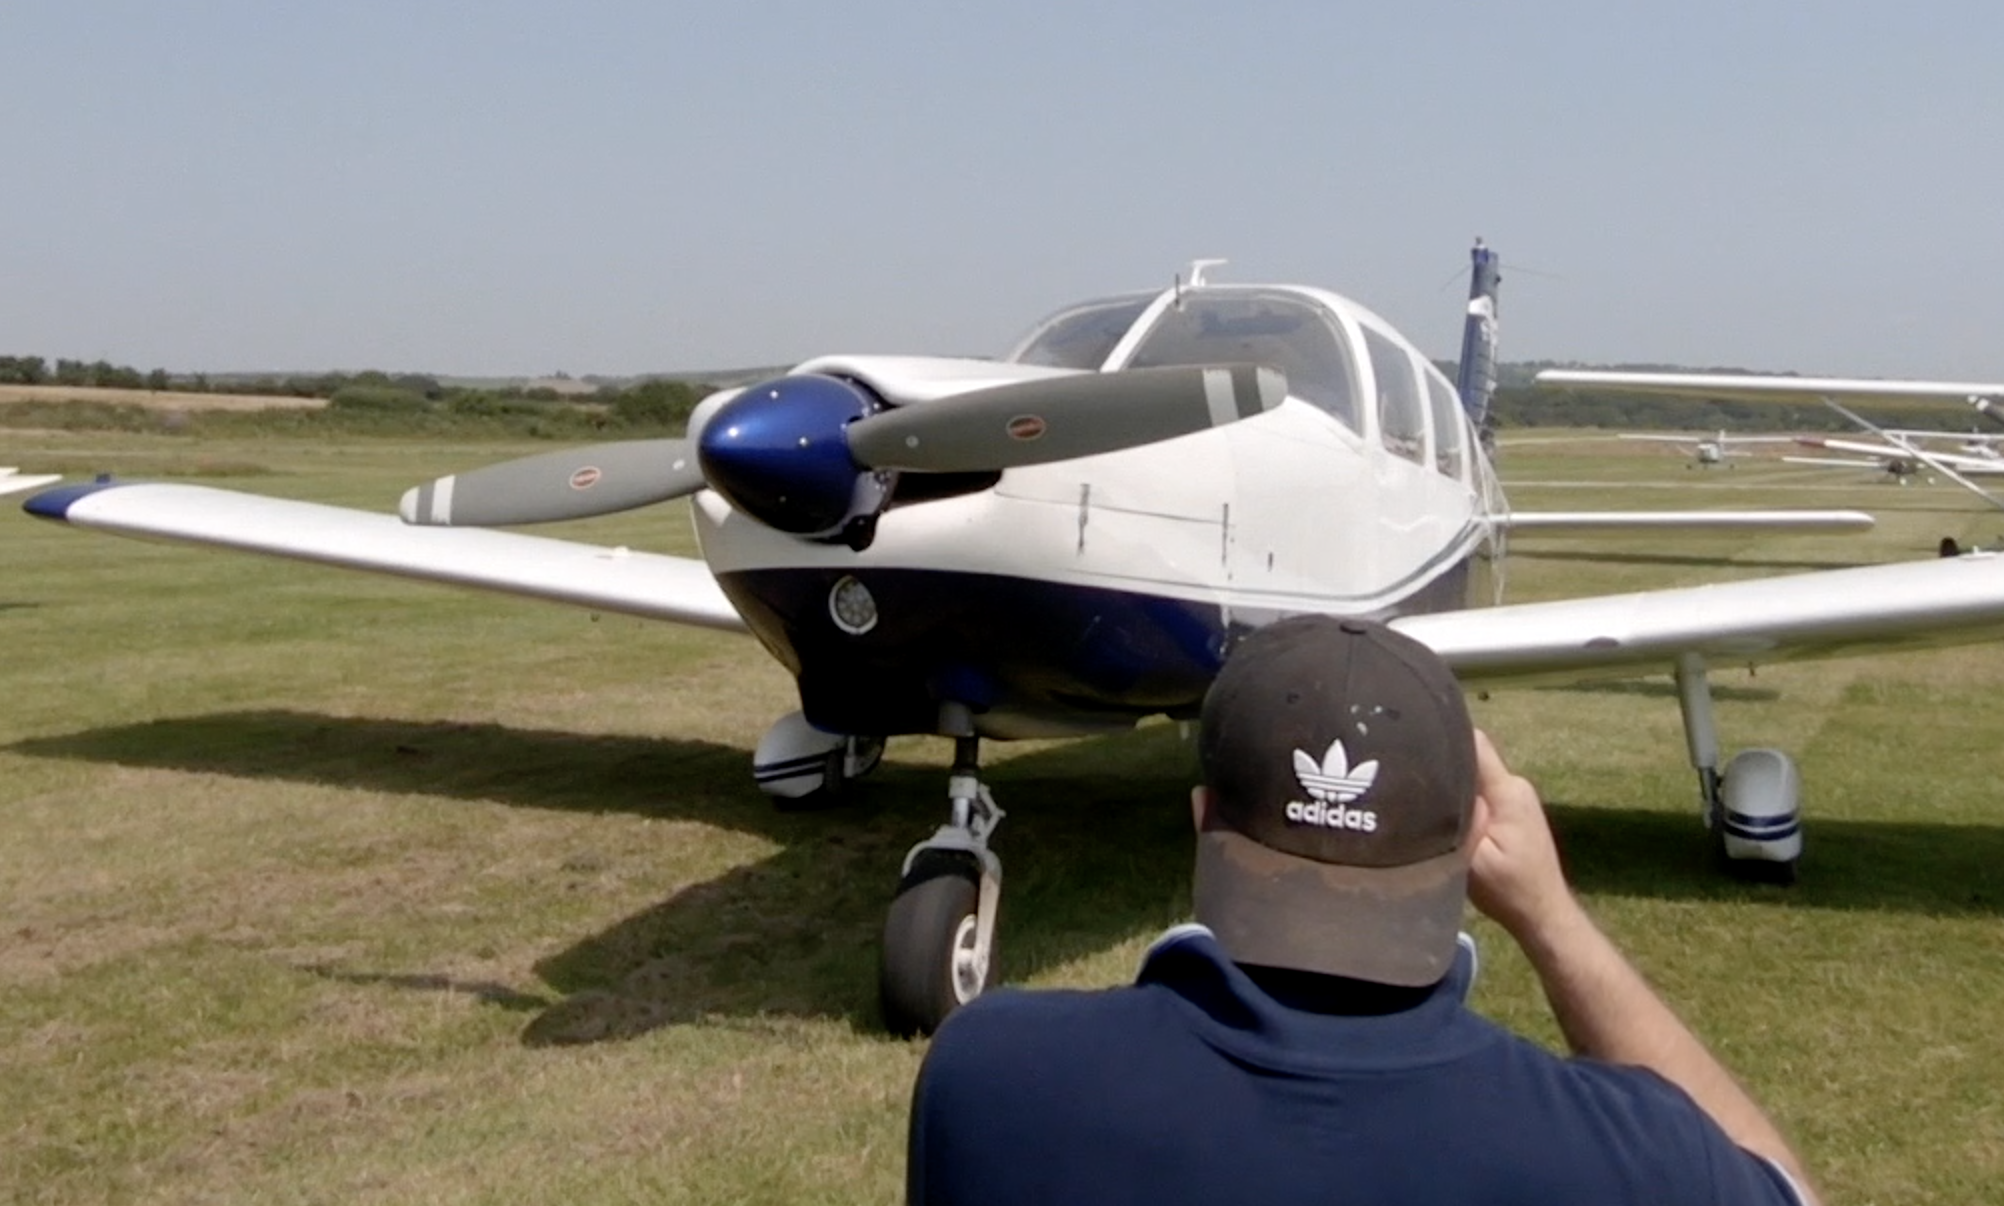
Some of the planes were tricky to shoot in the sun as they were white, however, one plane was Yellow and from that I could see the tonality of the ORWO UN54 Film.
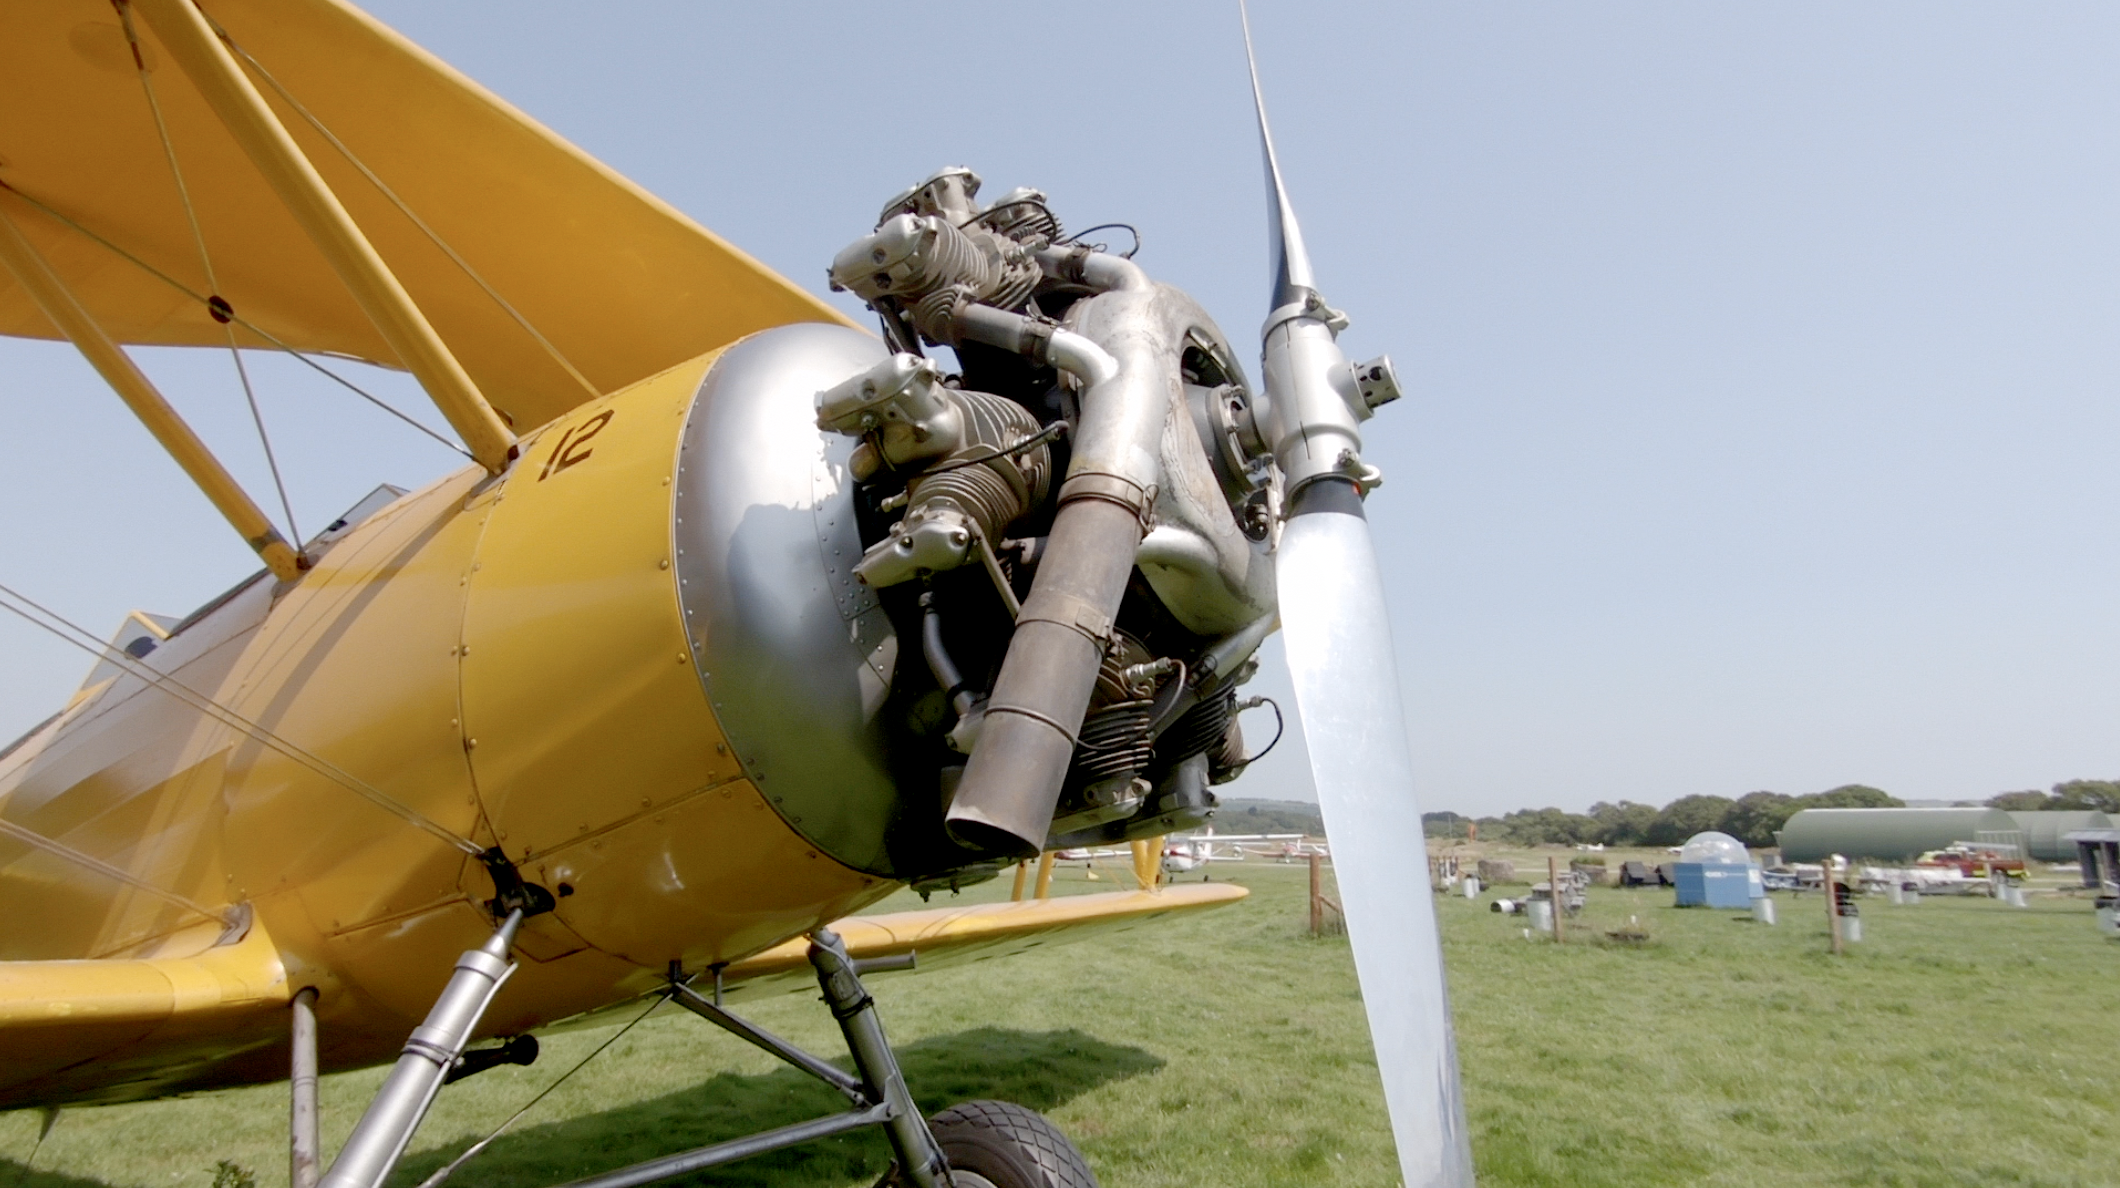
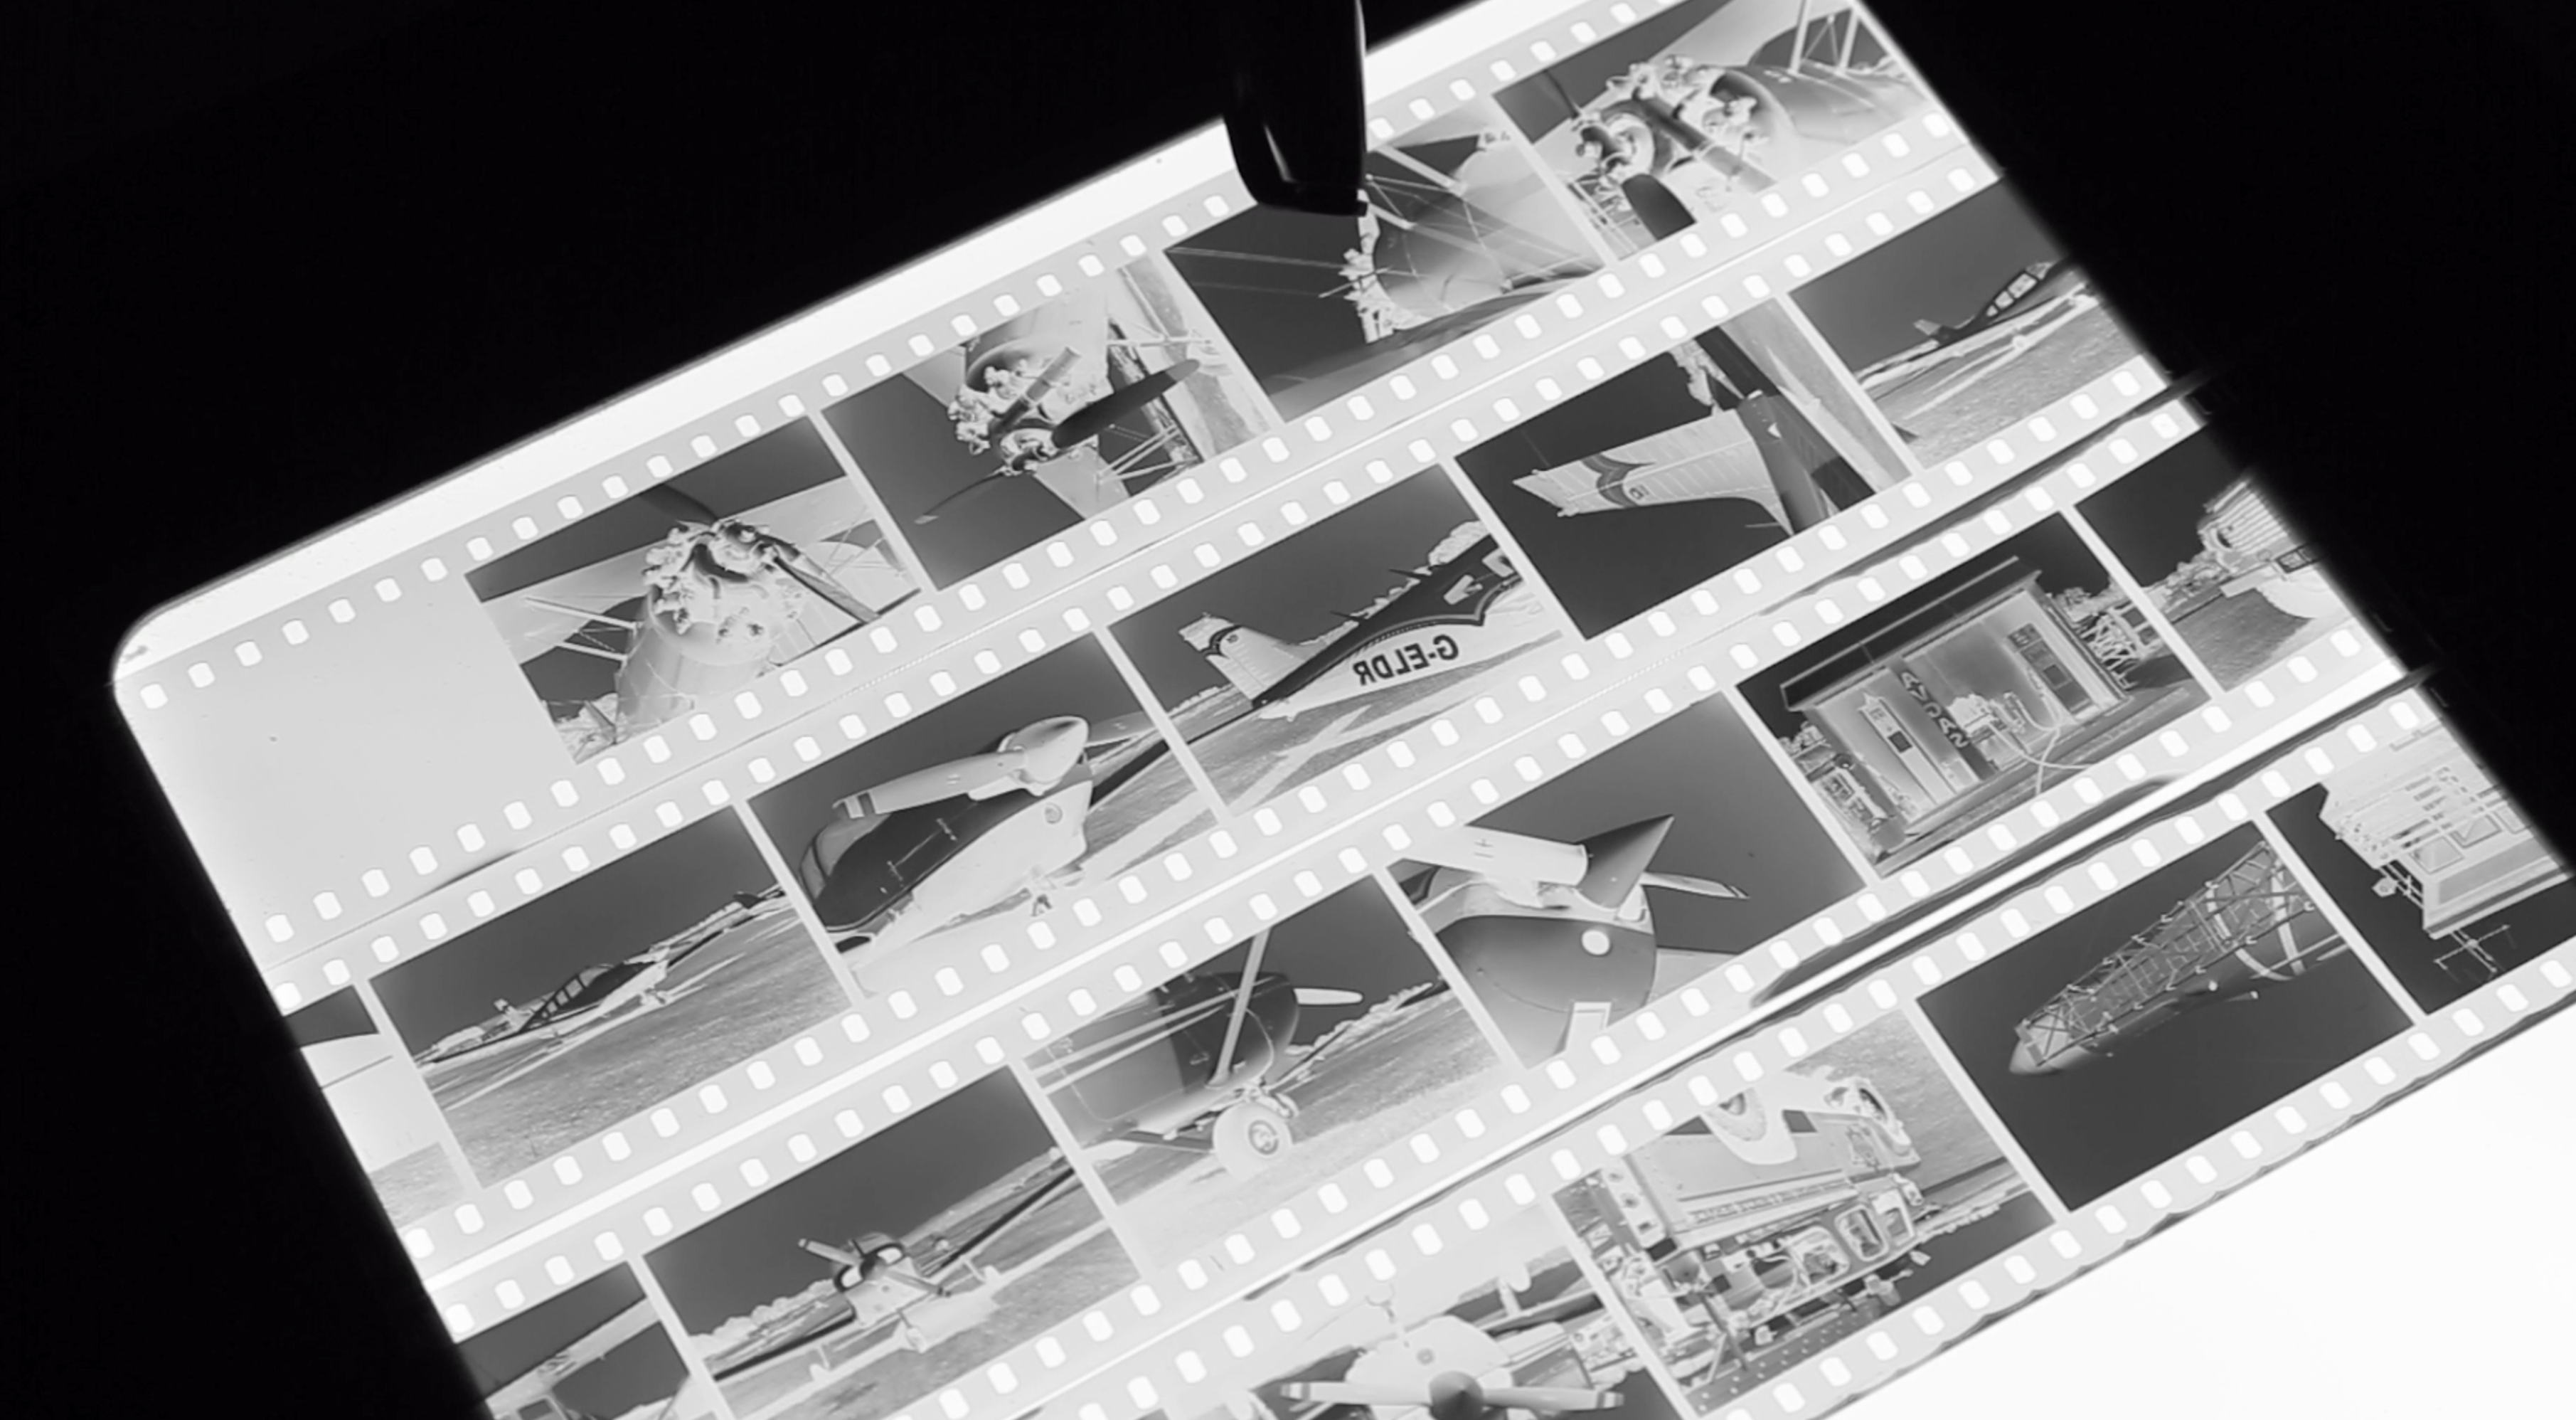
So here are some of the negatives I scanned using my DSLR. You can see on the Yellow plane there is loads of tonality with nice deep rich blacks. Even some of the highlights on the planes engine where the sun was bright seemed to handle very well. Relatively sharp too baring in mind I was using Zone Focusing.
When you look at the spectrum scale of this film, as seen on the data sheet, it has a sharp dip in the blue area. The scale starts high in the purples showing that purples render lighter on the film.

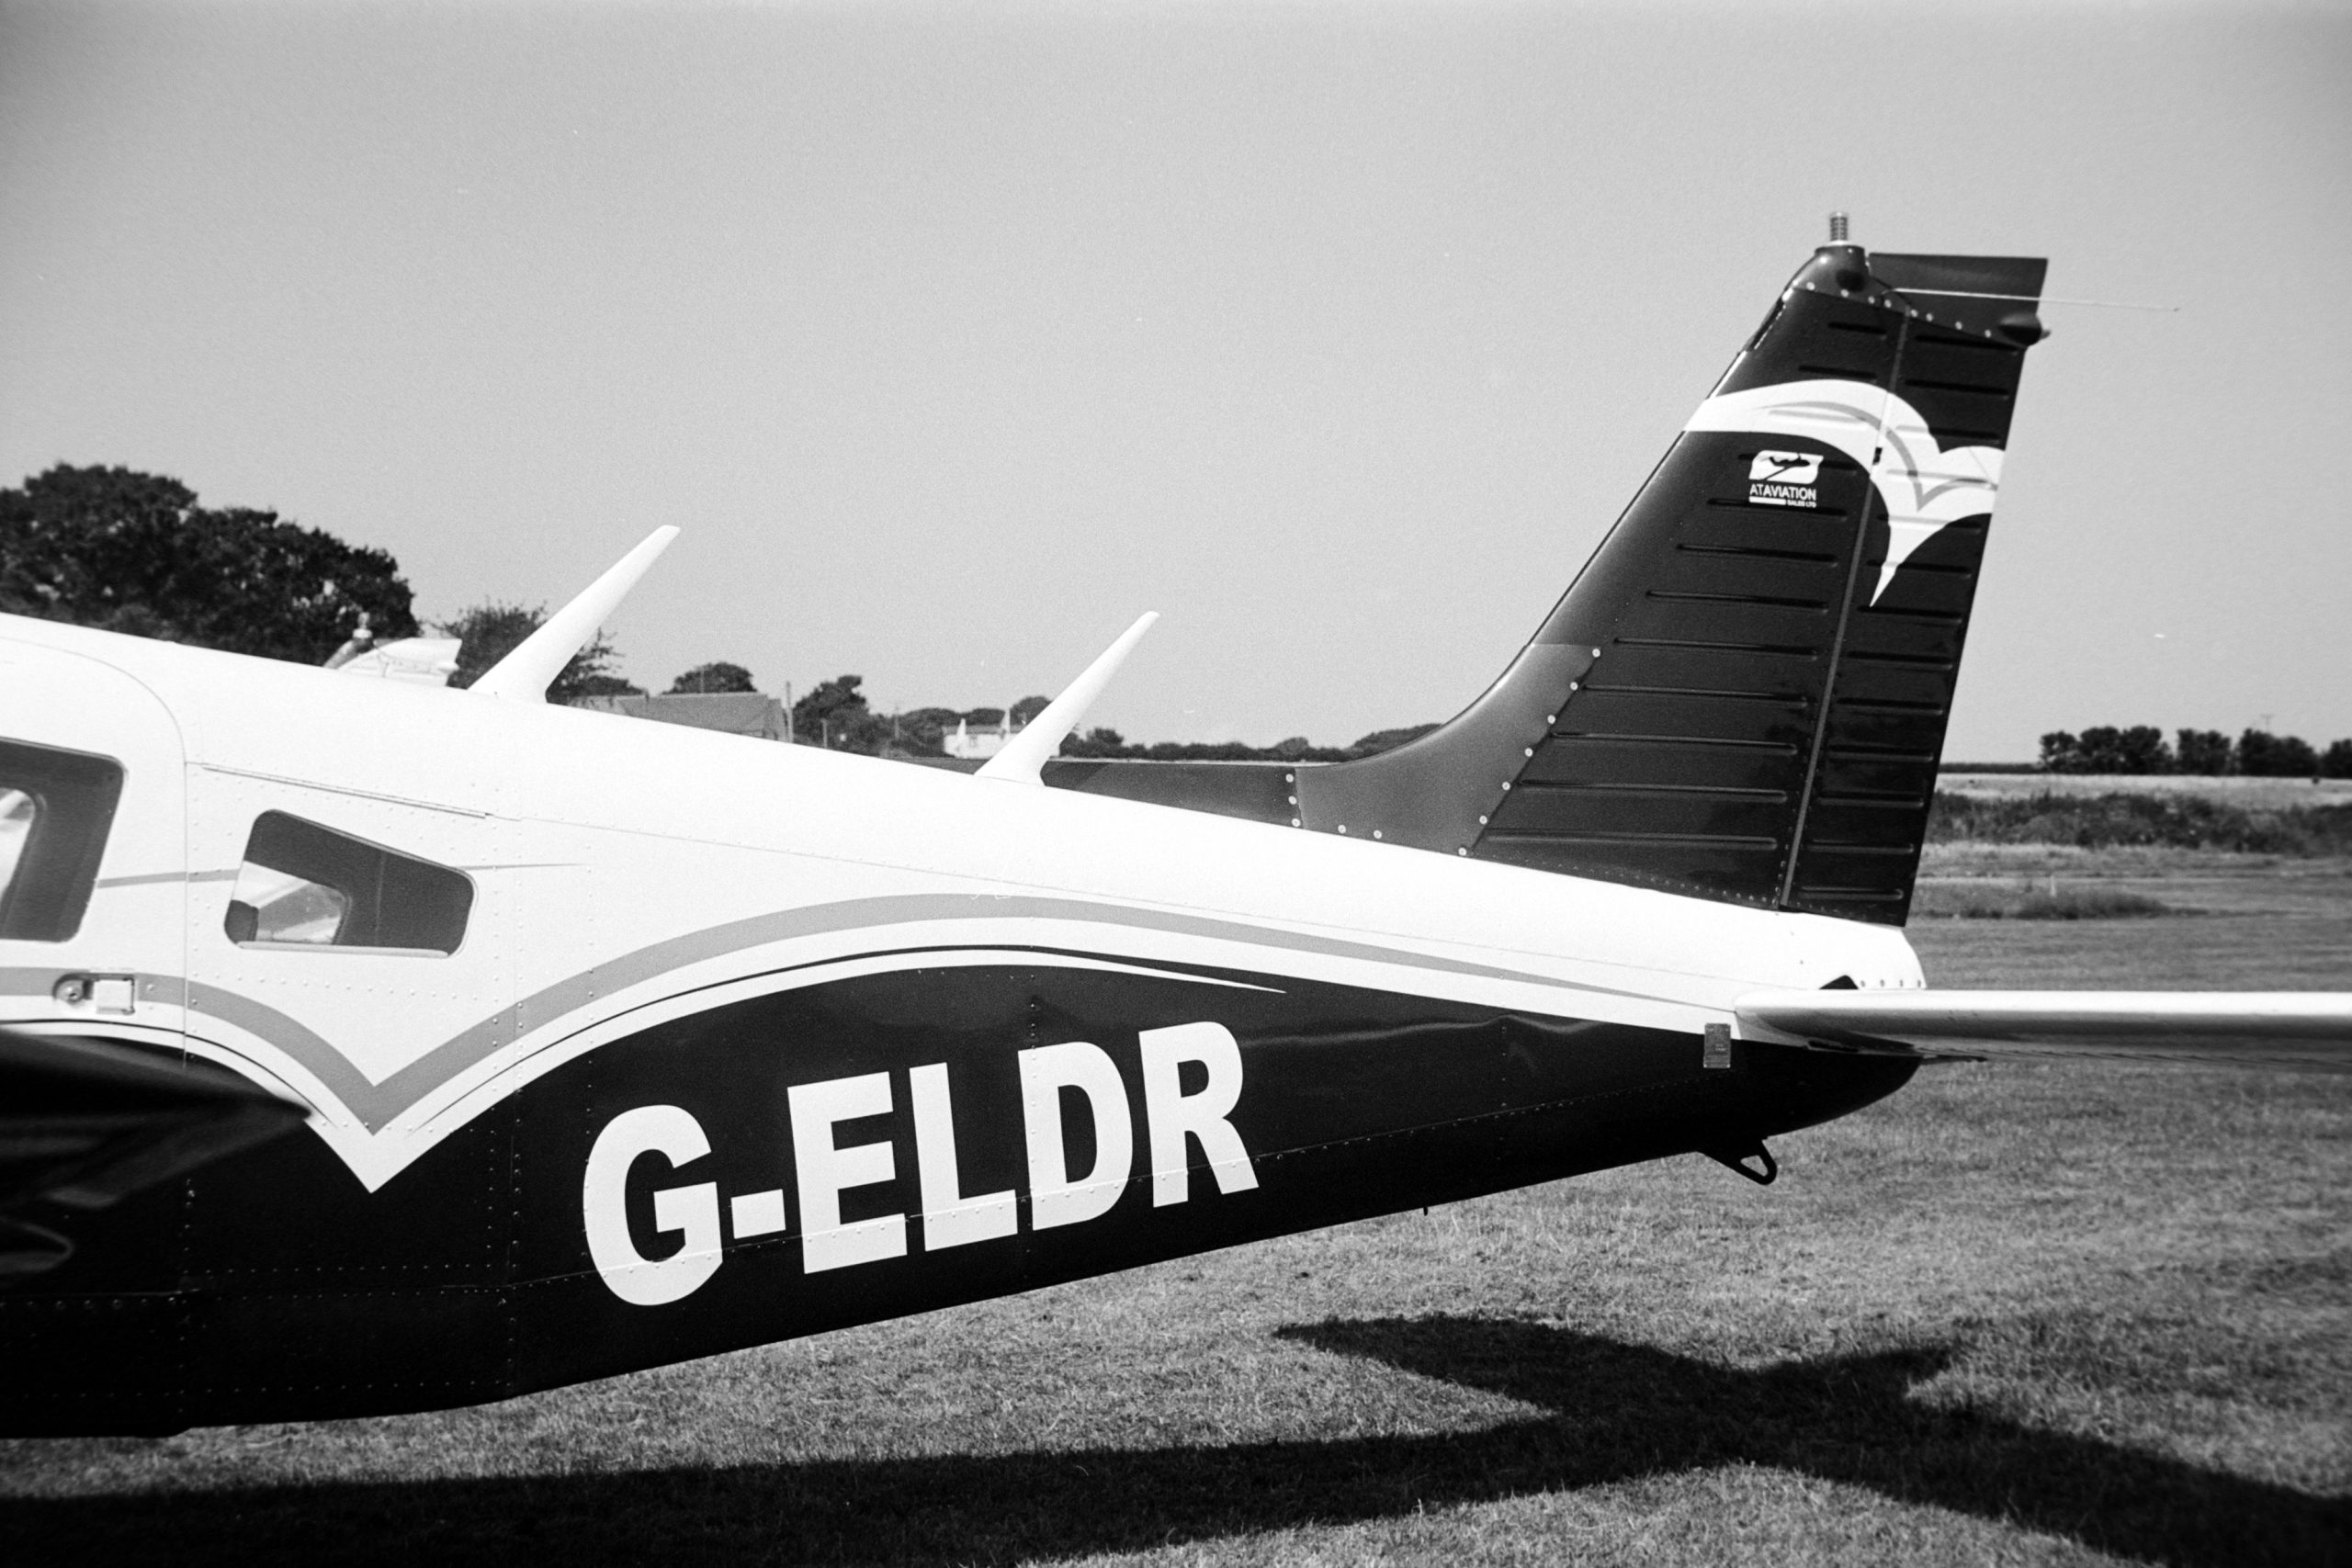
When we look at the 2nd plane, which had a blue tail and body you can see how the film rendered the blue quite dark. I like that!
I am starting to like this film, a lot and shall soon be bulk loading my own cassettes for more tests with scenes and developers and videos for the channel.
Here is the video from this shoot.
ORWO P400 Film
I was lucky enough to have been sent a few various ORWO Films to try from lukaszimagda on instagram.

ORWO (Germany) has a huge history in film manufacturing. The following was taken from their website –
“Currently, the ORWO cutting edge range of black and white film products incorporates negative film for motion picture production, duplicating film, print film, sound recording film, and film leaders for the processing and distribution business. Further technically skilled manufacture for the Security Industry features developments in holographic film solutions for personal and product identification, and film for traffic surveillance under the ORWO brand.”
My favourite ORWO Films are UN54 (ISO100) and N74+ which is a 400 speed. Both of these stocks you can buy in Bulk reels, however, are often rebranded by Silberra 54UN , Silberra 74N+. See what they did there?
So when Luka sent me a roll of p400 to try I was eager to see how it performed.
P400 is a panchromatic duplicate negative film with other suggestions of it being a surveillance film with a speed of 400 ISO. You can purchase this film if you look online. Available in 24 or bulk.
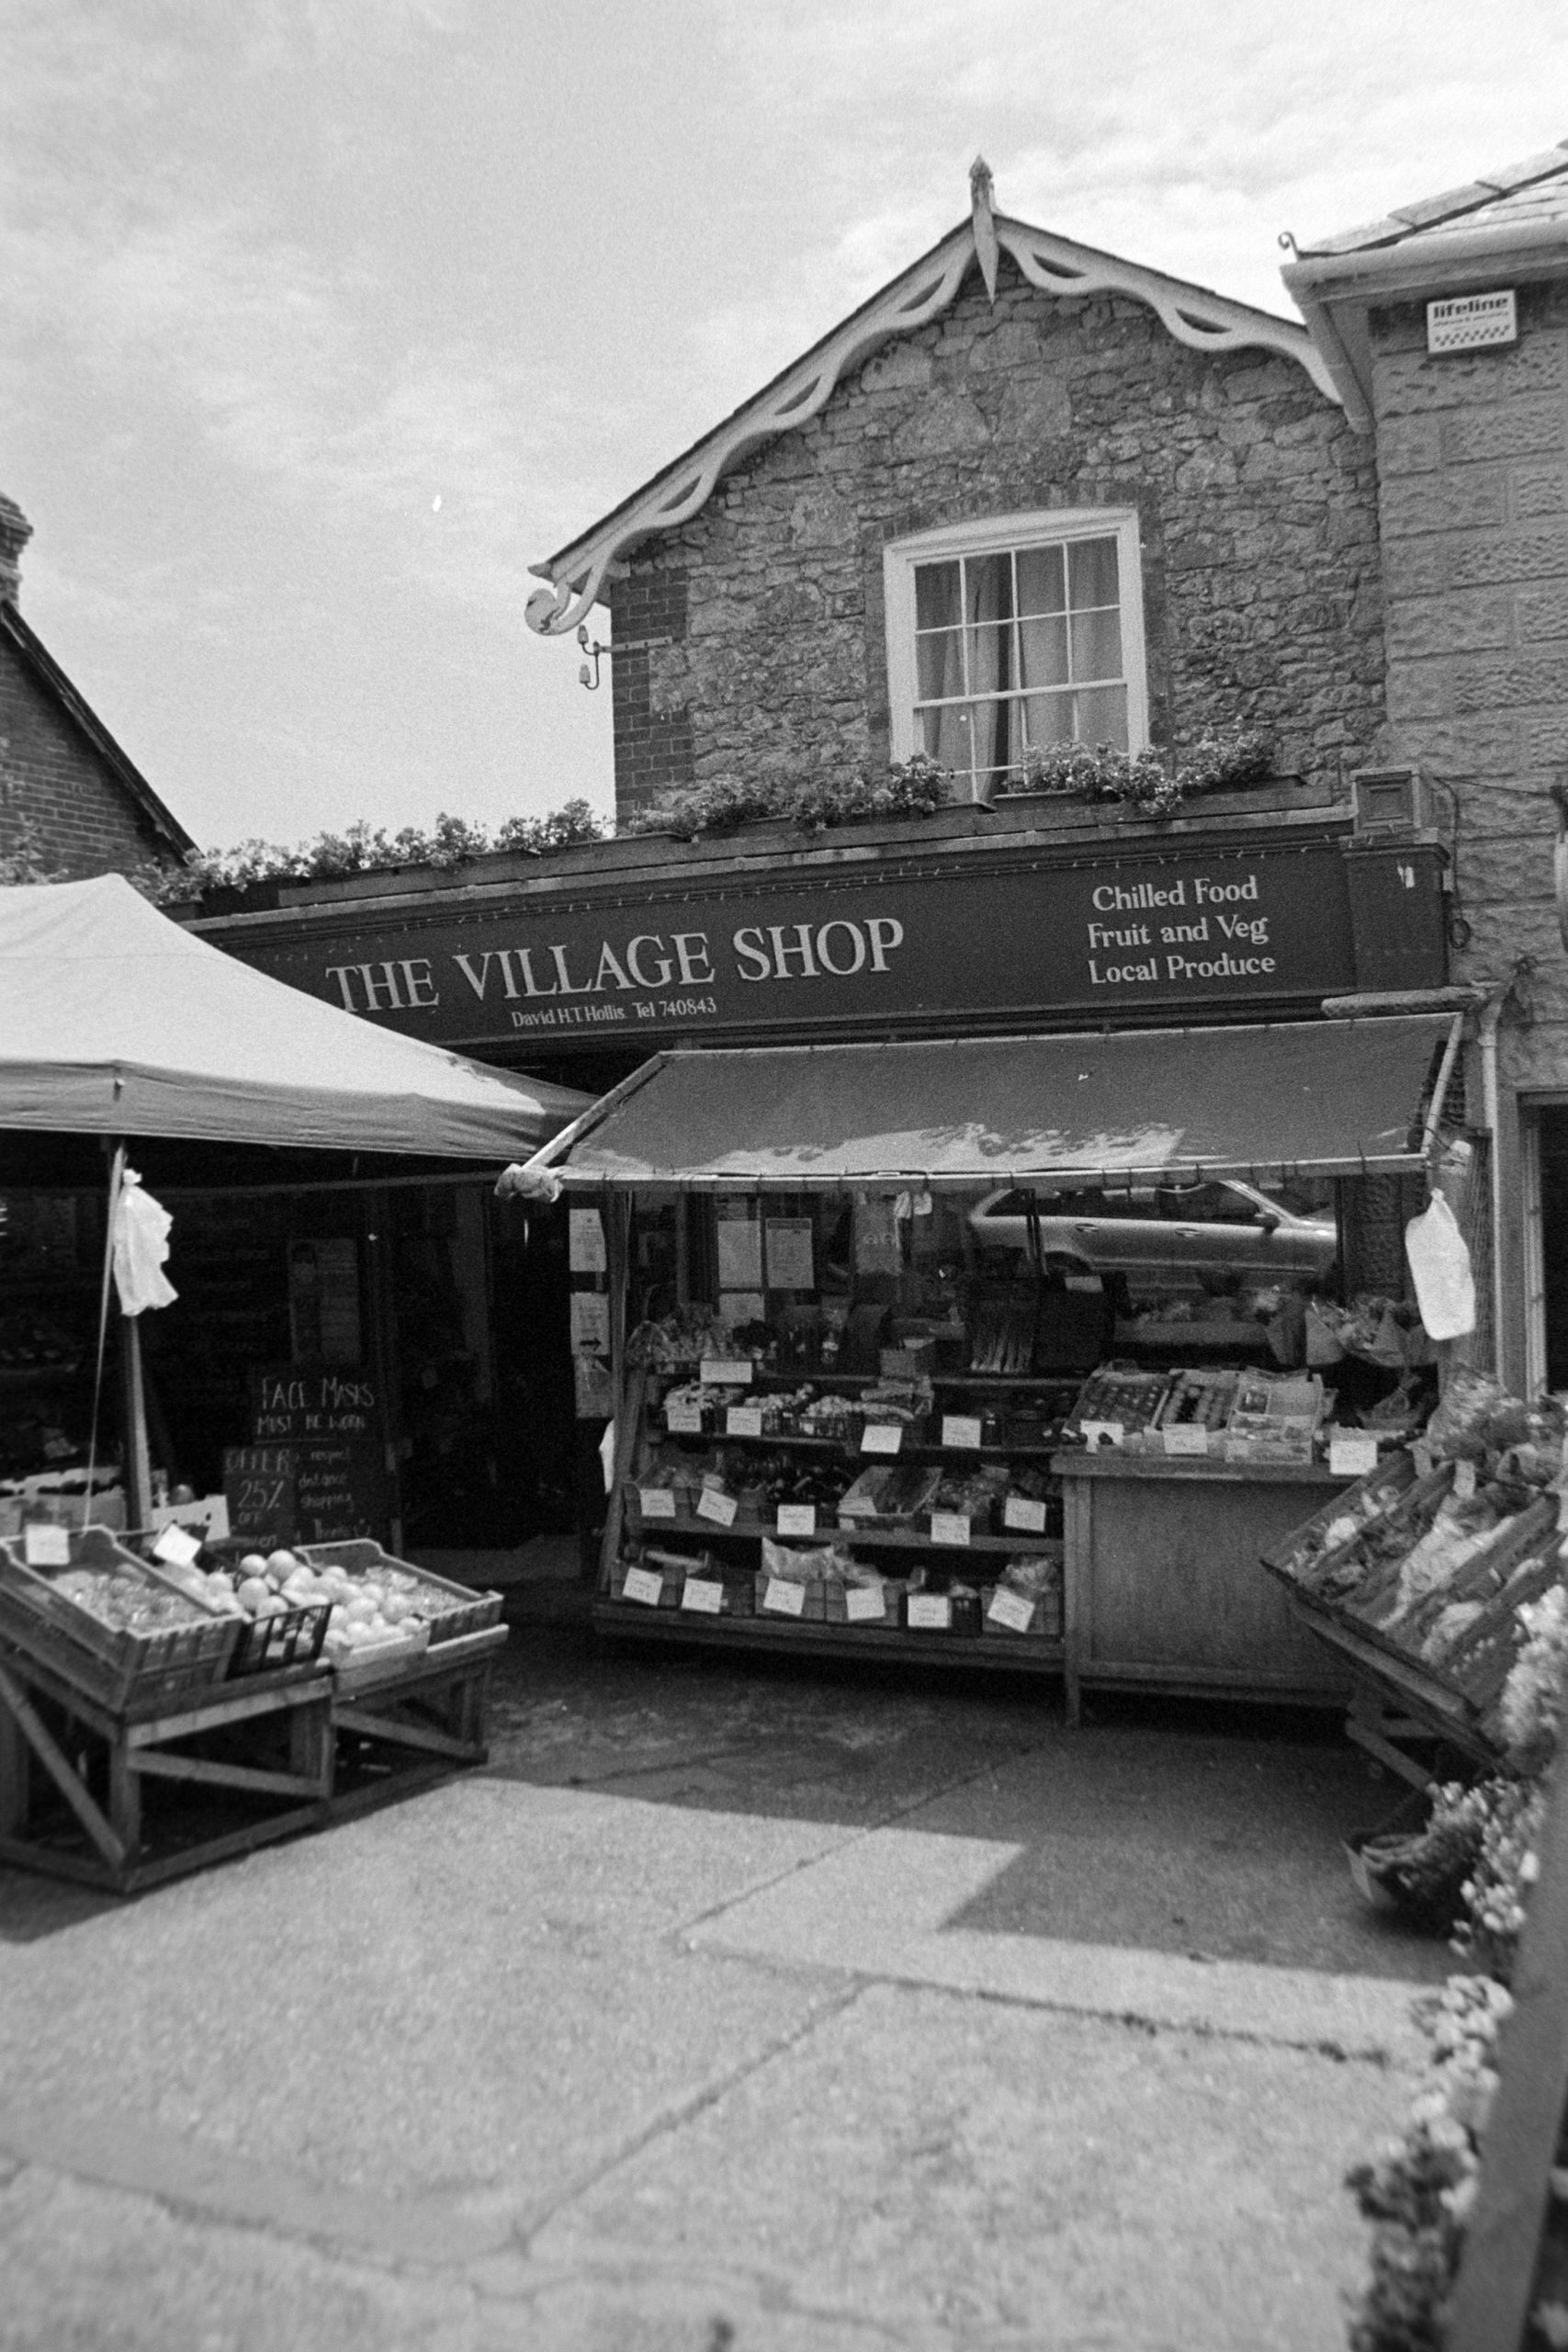
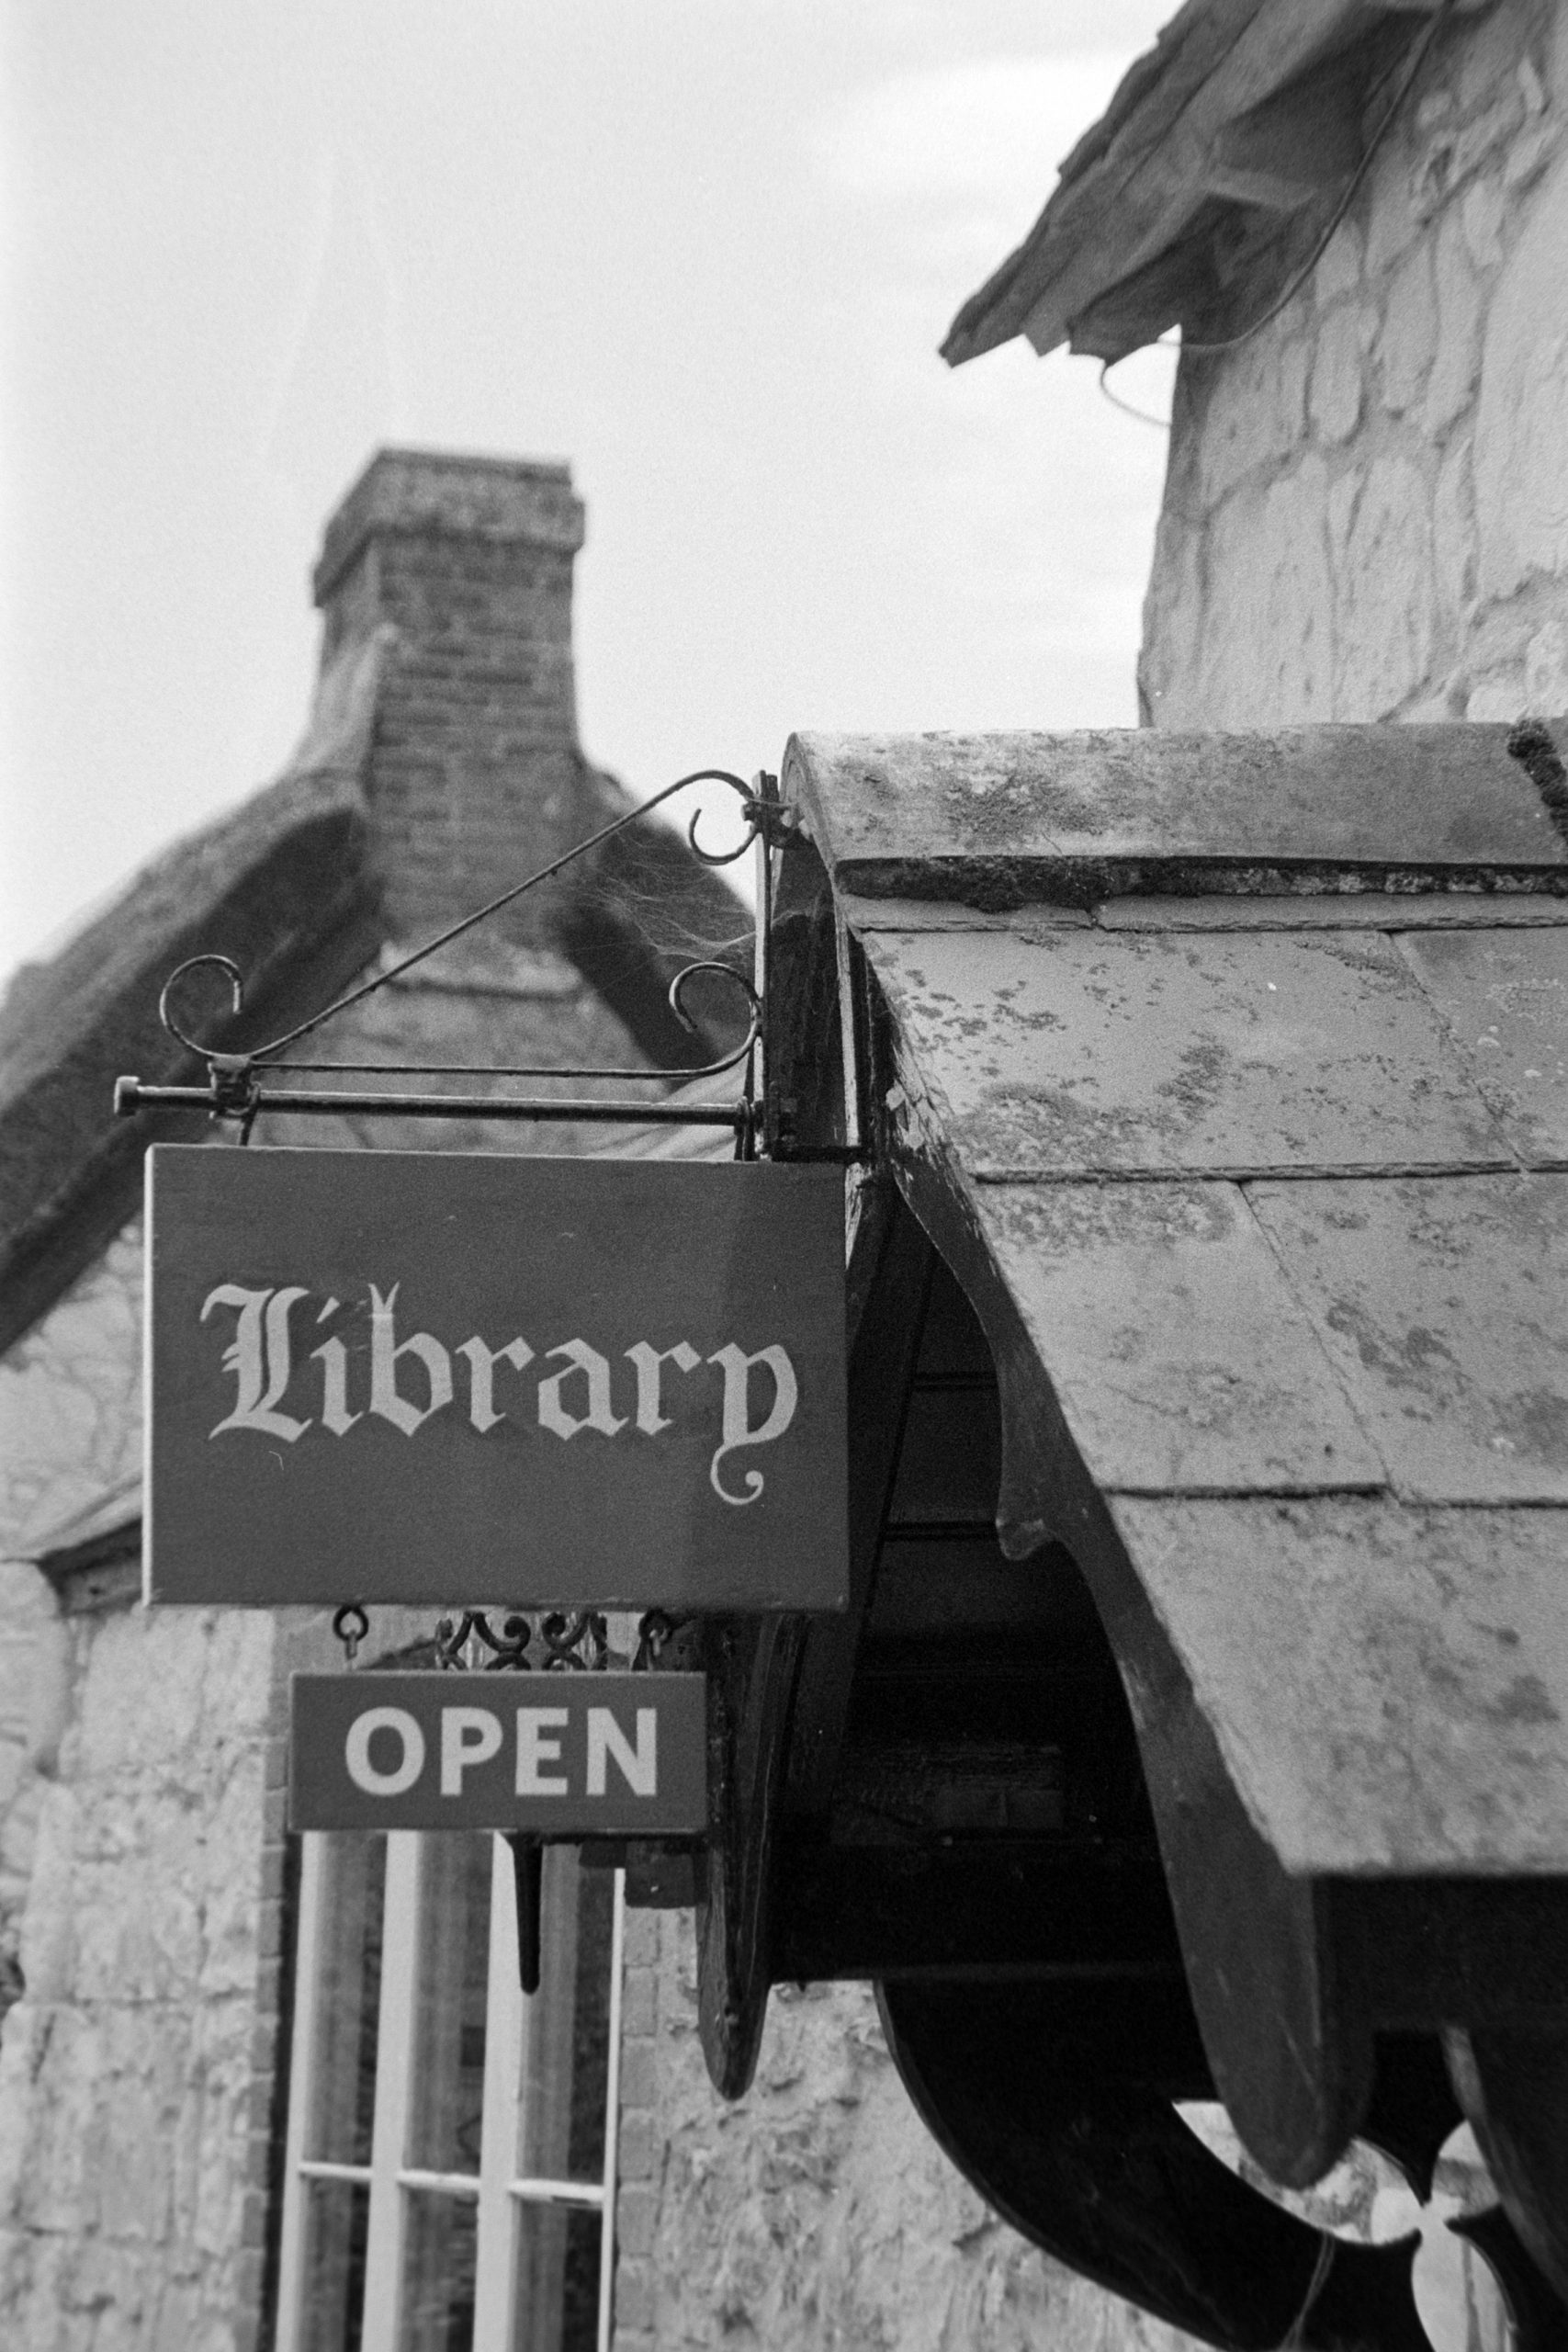
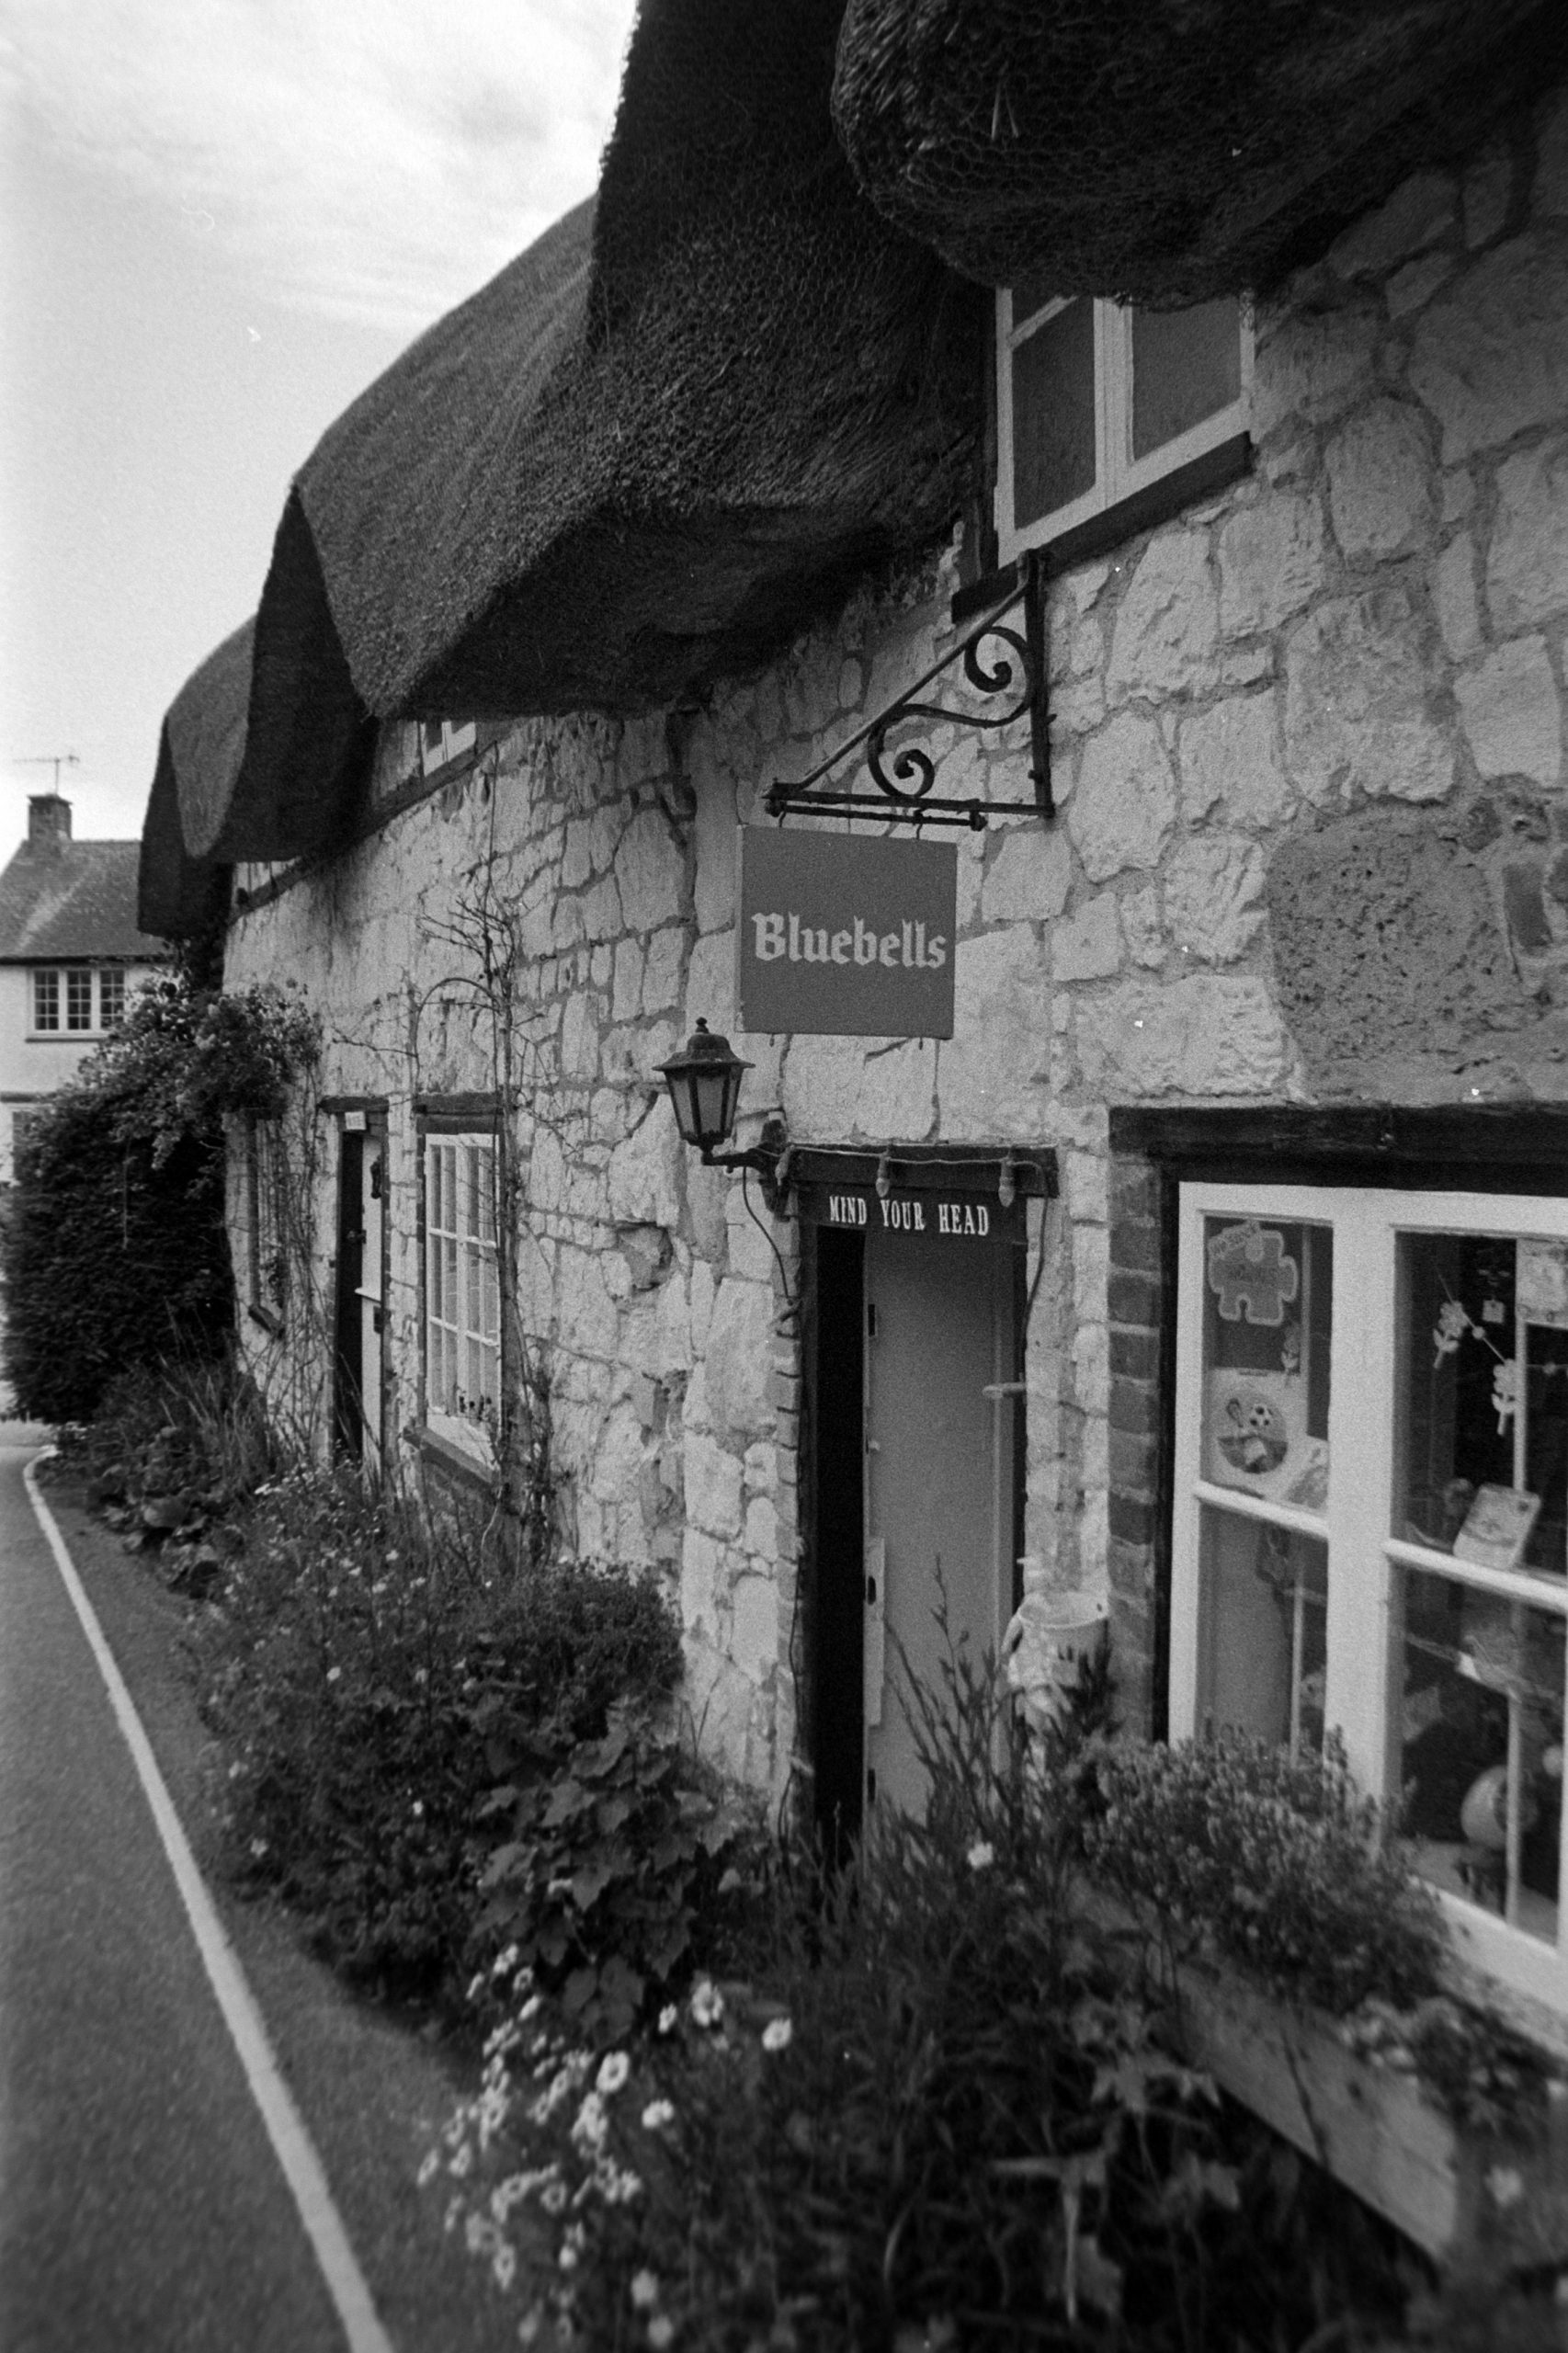
I loaded the roll in my Nikon F5 and went to a village to take a few pics. These were taken in aperture priority and I had the camera set to spot metering.
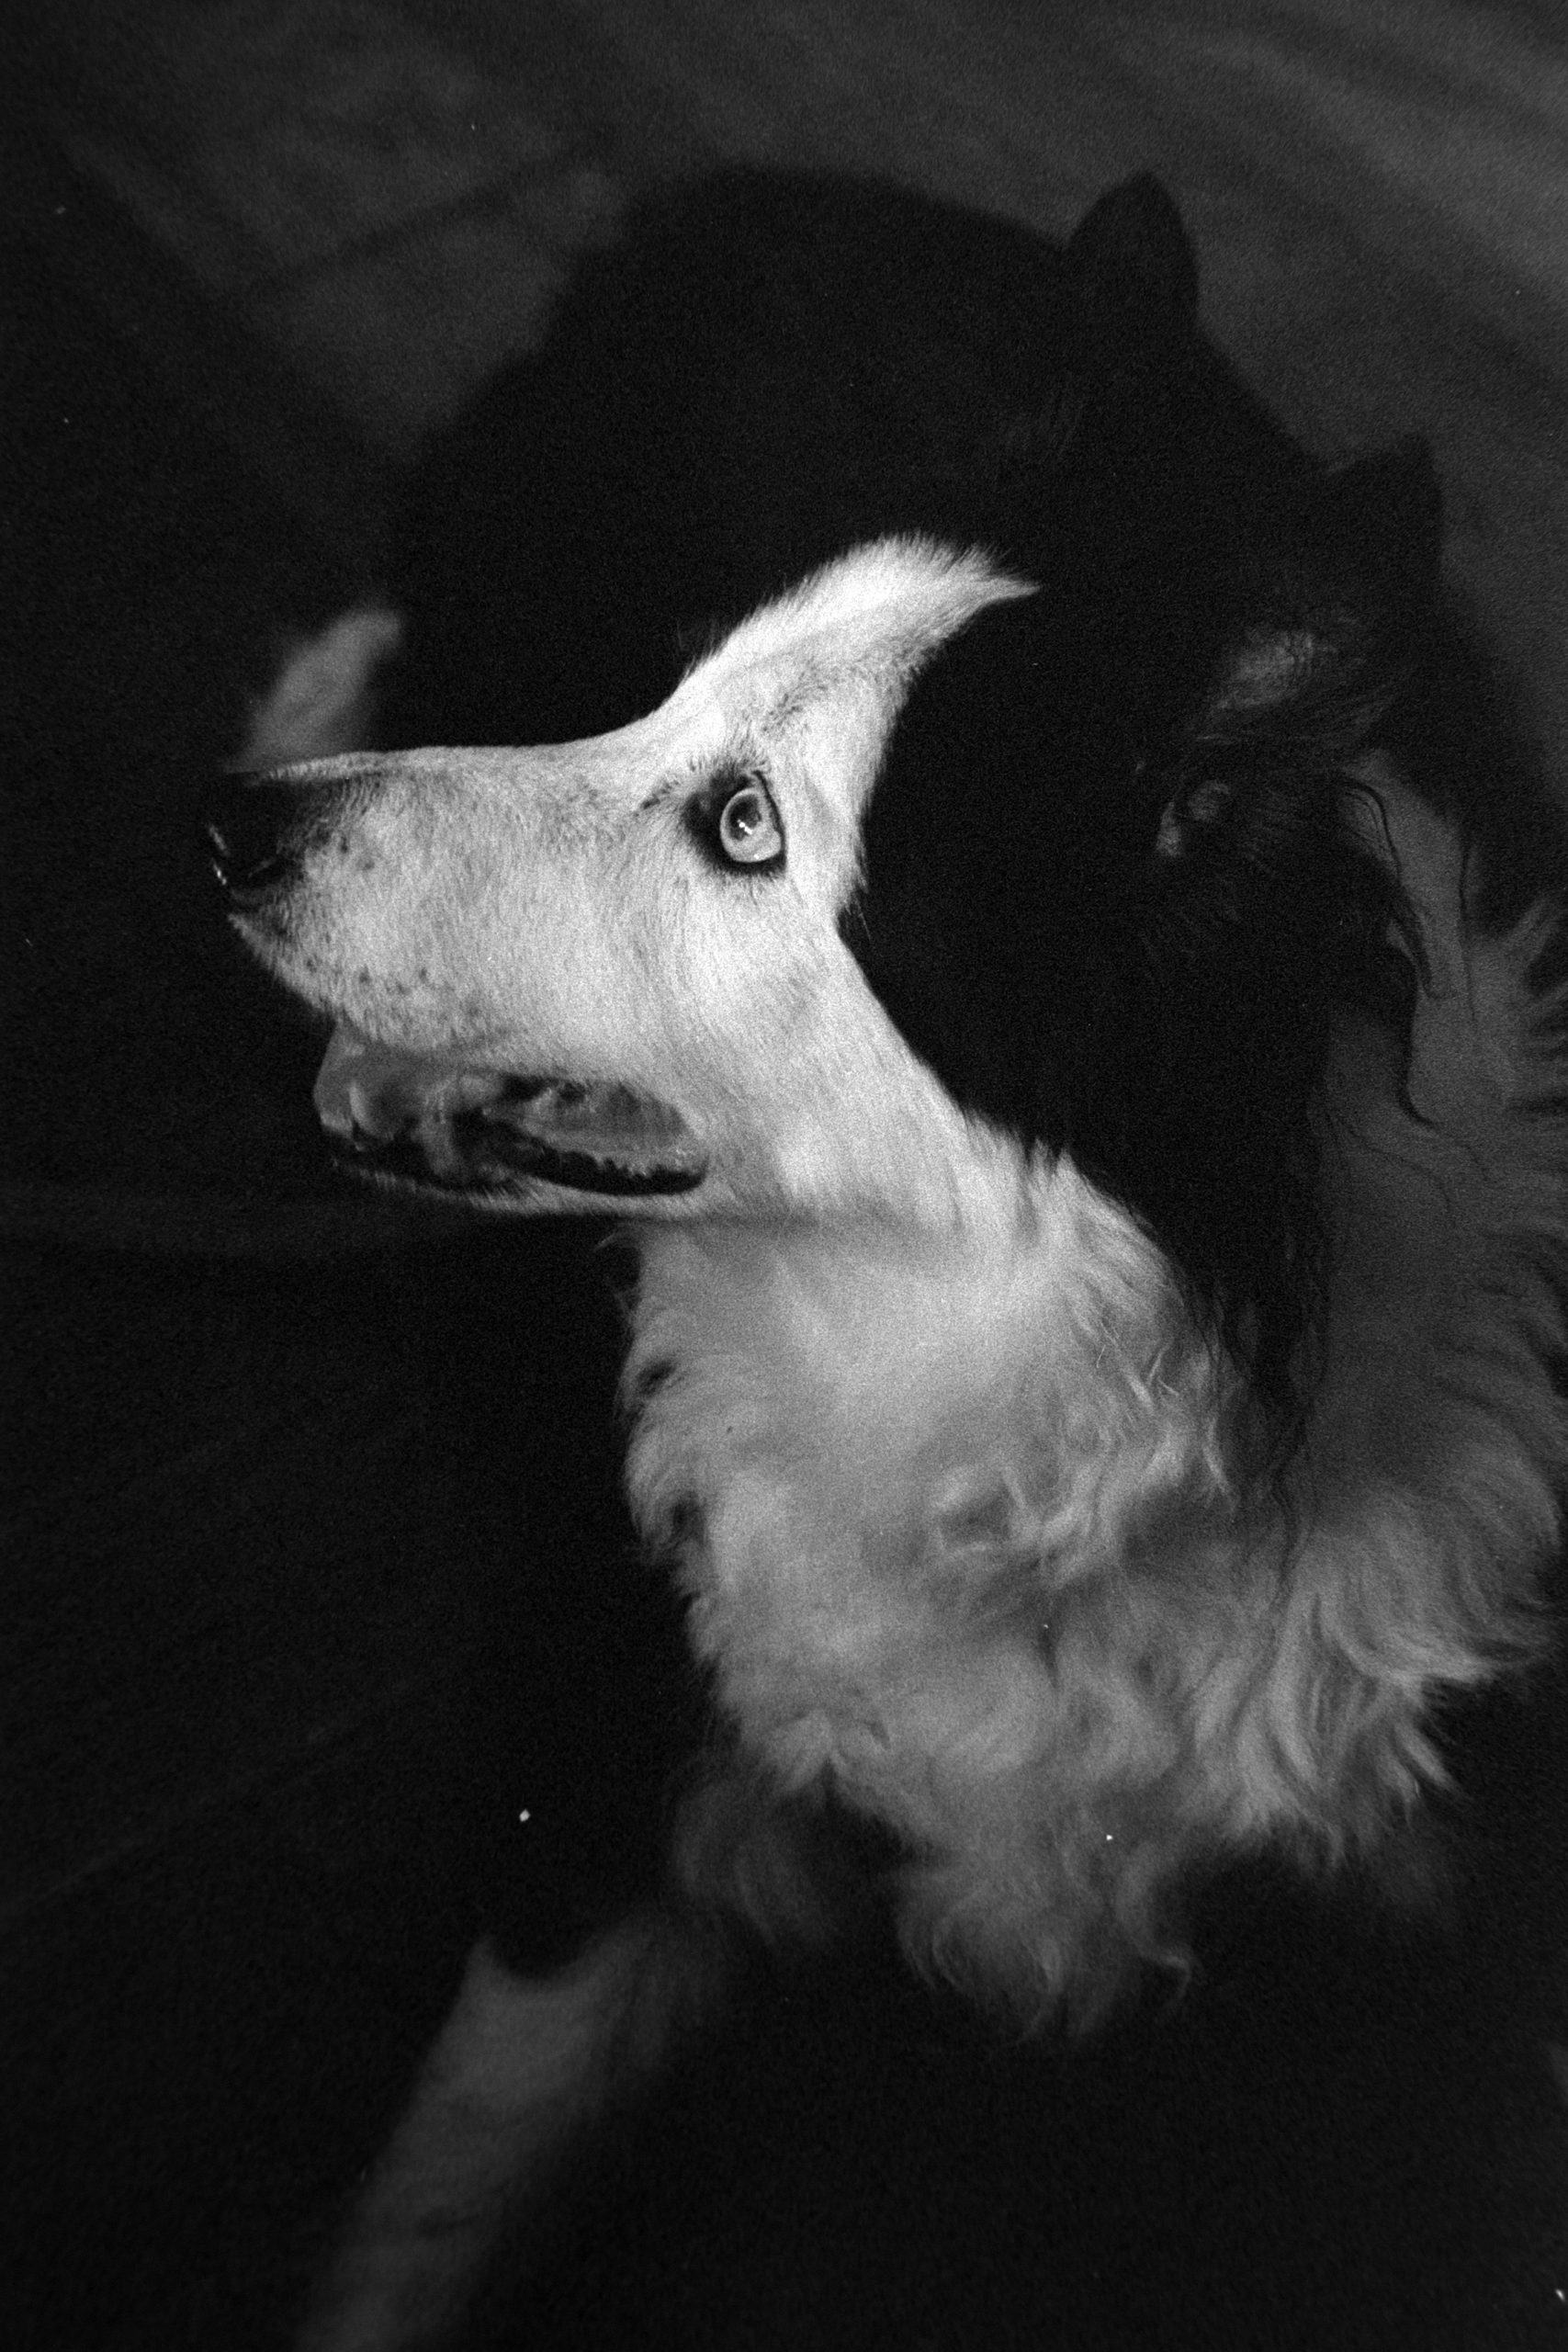
The film has bags of tone, lovely deep rich blacks whilst maintaining shadow detail and relatively fine grain for a 400 speed in XTOL. The dog for example was taken indoors a few feet away from a window.
I developed the film in XTOL at 1:1 for 10 mins normal inversions. I found the information on the massive dev chart.

Bracketing your photography
Should you bracket your shots? Is it cheating?
Bracketing is where, usually, You would take three (or more) photographs of the same scene one after the other. One at your metered value. Another one stop under and another one stop over.
So for example if you metered for a scene and the meter said f/11 at 1/125th shutter then you would take that photograph and then shoot two more. One over exposed by one stop (1/60th) and another one stop under exposed (1/250th).
The benefit of this is that it gives you three negatives of the same scene at different exposures so when you finally develop your film one of those three will be good to print. It’s basically a fail safe. We all know what it’s like when we see our negatives and think, hmmm, it looks slightly over exposed, or hmmm, it looks a tad under exposed. We can still work on it in the print but it’s always nice to get a good negative to work with.
Many photographers will argue that you should learn to master your metering and get it right first time. I don’t believe that at all. You will still have taken your first photograph that you metered to the best of your knowledge. Bracketing just gives you that extra few negatives to learn from. It’s no different to trying on a few pairs of Jeans in the store to see which pair fit best.
If anything the only downside to bracketing is using (not wasting) more film. And I say not wasting because you are using those extra frames for your own understanding. A cheap price to pay for a little knowledge and experimentation.
I only ever bracket for two reasons. Maybe I am not that confident with my metering on a scene and it’s the only chance I will ever get to shoot it. Makes sense to bracket.
Or if I go out to shoot a scene and thats all I want. Large Format and single sheets would be ideal but I don’t have that option.
If I have a scene in mind that I want to shoot and the last thing I want to do is take my photograph and then ponder what to shoot the rest of the roll on. With 35mm Film I can easily cut the exposed film from the camera and develop it. But if its Medium Format 120 Film then I need to shoot the whole roll. So rather than ponder what to shoot next I can just shoot the whole roll on the same scene at various apertures and shutter speeds.
My first frame would be the frame that I metered for and thus, in my mind, the perfect negative to print. And then experiment with various apertures and shutter speeds making sure my next two frames were one stop over and one stop under.
Here is an example.
FRAME 1 – F11 – 1/125th (My correct metered exposure)
FRAME 2 – f11 – 1/60th (1 stop over)
Frame 3 – f11 – 1/30th (2 stops over)
Frame 4 – f11 – 1/250th (1 stop under)
Frame 5 – f11 – 1/500th (2 stops under)
I’ve just taken 5 photographs of the same scene. One of them will look great on the negative, hopefully frame 1. If it is then I’ve nailed my metering and development. If my perfect negative is any of the others then that is something I need to look into. If I metered correctly maybe my camera needs an CLA or maybe my development needs adjusting.
I would then use the other five frames in the same way except trying a wider aperture so my scene has a more shallow depth of field which may look better than F11. Still working from my metered value. (Assuming the light has not changed, I.E if you are out doors).
Frame 6 – f5.6 1/500th (My correct metered exposure)
Frame 7 – f5.6 – 1/250th (1 stop over)
Frame 8 – f5.6 1/125th (2 stops over)
Frame 9 – f5.6 1/1000th (1 stop under)
I can’t go to 1/2000th so I’ll leave it there. The chances I metered two stops over exposed is slim anyway.
The remaining frames I can experiment with f22.
Frame 10 – f22 / 1/30th (My correct metered exposure)
Frame 11 – f22 / 1/15th (1 stop over)
Frame 12 – f22 1/8th )2 stops over)
If you are 6×6 then 12 frames is all you get and 15 frames for 6×45 but you get the point.
So my first 5 frames at f/11 would really be my preferred aperture and from those frames I can see if I nailed my exposure and development and keep notes for next time.
My frames at f5.6 will give my scene a different perspective and shallower depth of field.
My frames at f/22 will also give a different perspective with a slower shutter speed. Great if I am shooting a landscape as the slower shutter would give motion blur on clouds or grass.
If you don’t want to shoot the whole roll on one scene than you can still plan other scenes on the same roll and bracket each scene with three frames. One metered, one over and one over. Then move on. If you are shooting medium format you’ll get 4 scenes on a 6×6 and 5 scenes on a 6×45.
The beauty of this is you can plan just a few nice scenes in a day and, hopefully, get a perfect negative for each scene.
So there you go. It’s not a sin to bracket your own photography. It’s not unprofessional or cheating oneself. It’s ensuring you get the best negative to make a print from and if your best negative is not the one you metered for then it’s a chance for you to note exactly what you did and put it into practice next time.
Like I said, if your best negative is not the one you metered for then it’s possible you did not meter correctly, or your development was not spot on or maybe your camera needs a service on the shutter speeds.
So don’t be put off by anyone if you want to bracket your shots. It’s your photography!
Spot Metering and Hard Contrast and Pulling Film
I always find it useful to practice around the home metering scenes and trying new film/dev combos. I don’t have to go far! Everything I need is around me.
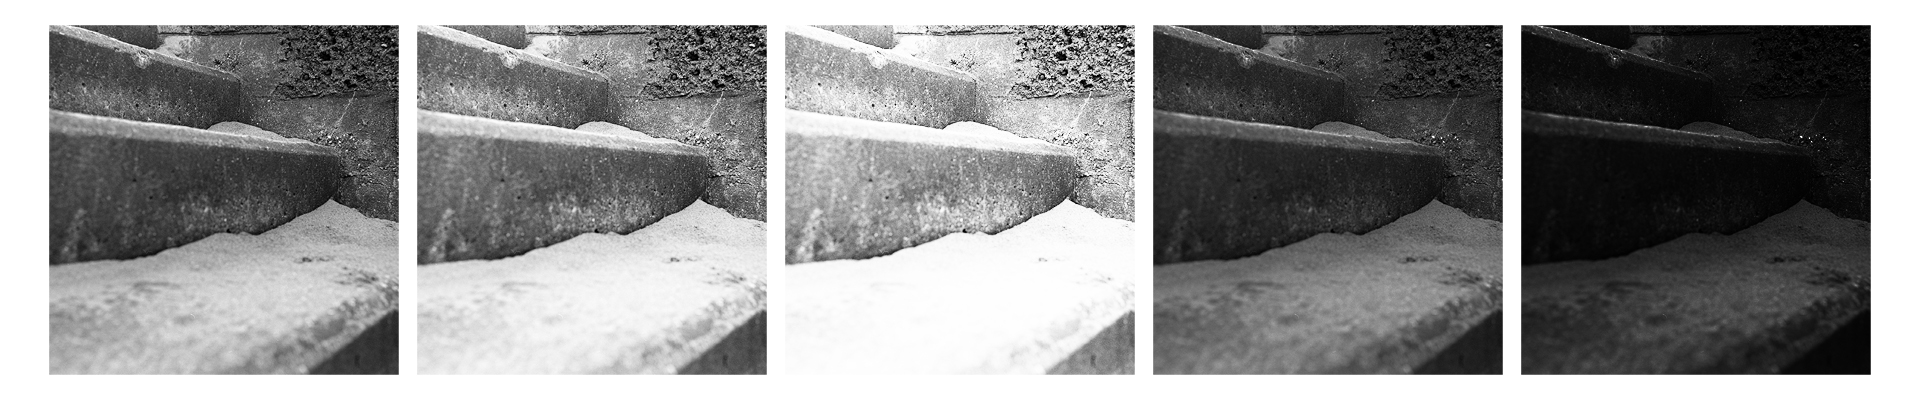
So it was a very bright sunny day. I thought I would try and use my Spot Meter and shoot scenes that were very bright and dark at the same time. Because most scenes I would be way off the latitude scale (5 stops) I shot a roll of Ilford Ortho 80 at 20 ISO. 2 Stops over Exposed and to compensate I would Pull the development. Normal development time was 10 minutes in Kodak XTOL. So I pulled the development by 15% per stop. That’s 30%. 7 Minutes. Pulling the film will give me a flatter, low contrast negative with fine grain. Perfect for the scenes I was shooting.
Here are the scenes and how I metered them. They were all scanned using my DSLR. In Photoshop I adjusted the levels slightly to boost the contrast.
- Spot meter on the Bright area. Spot on the shadow area. Shoot the average. F11 1/4s EXP

2. Spot meter on the Bright area. Spot on the shadow area. Shoot the average. F11 1/2s EXP
3. Spot Metered on a Grey Card in front of George. f4 1 Second EXP

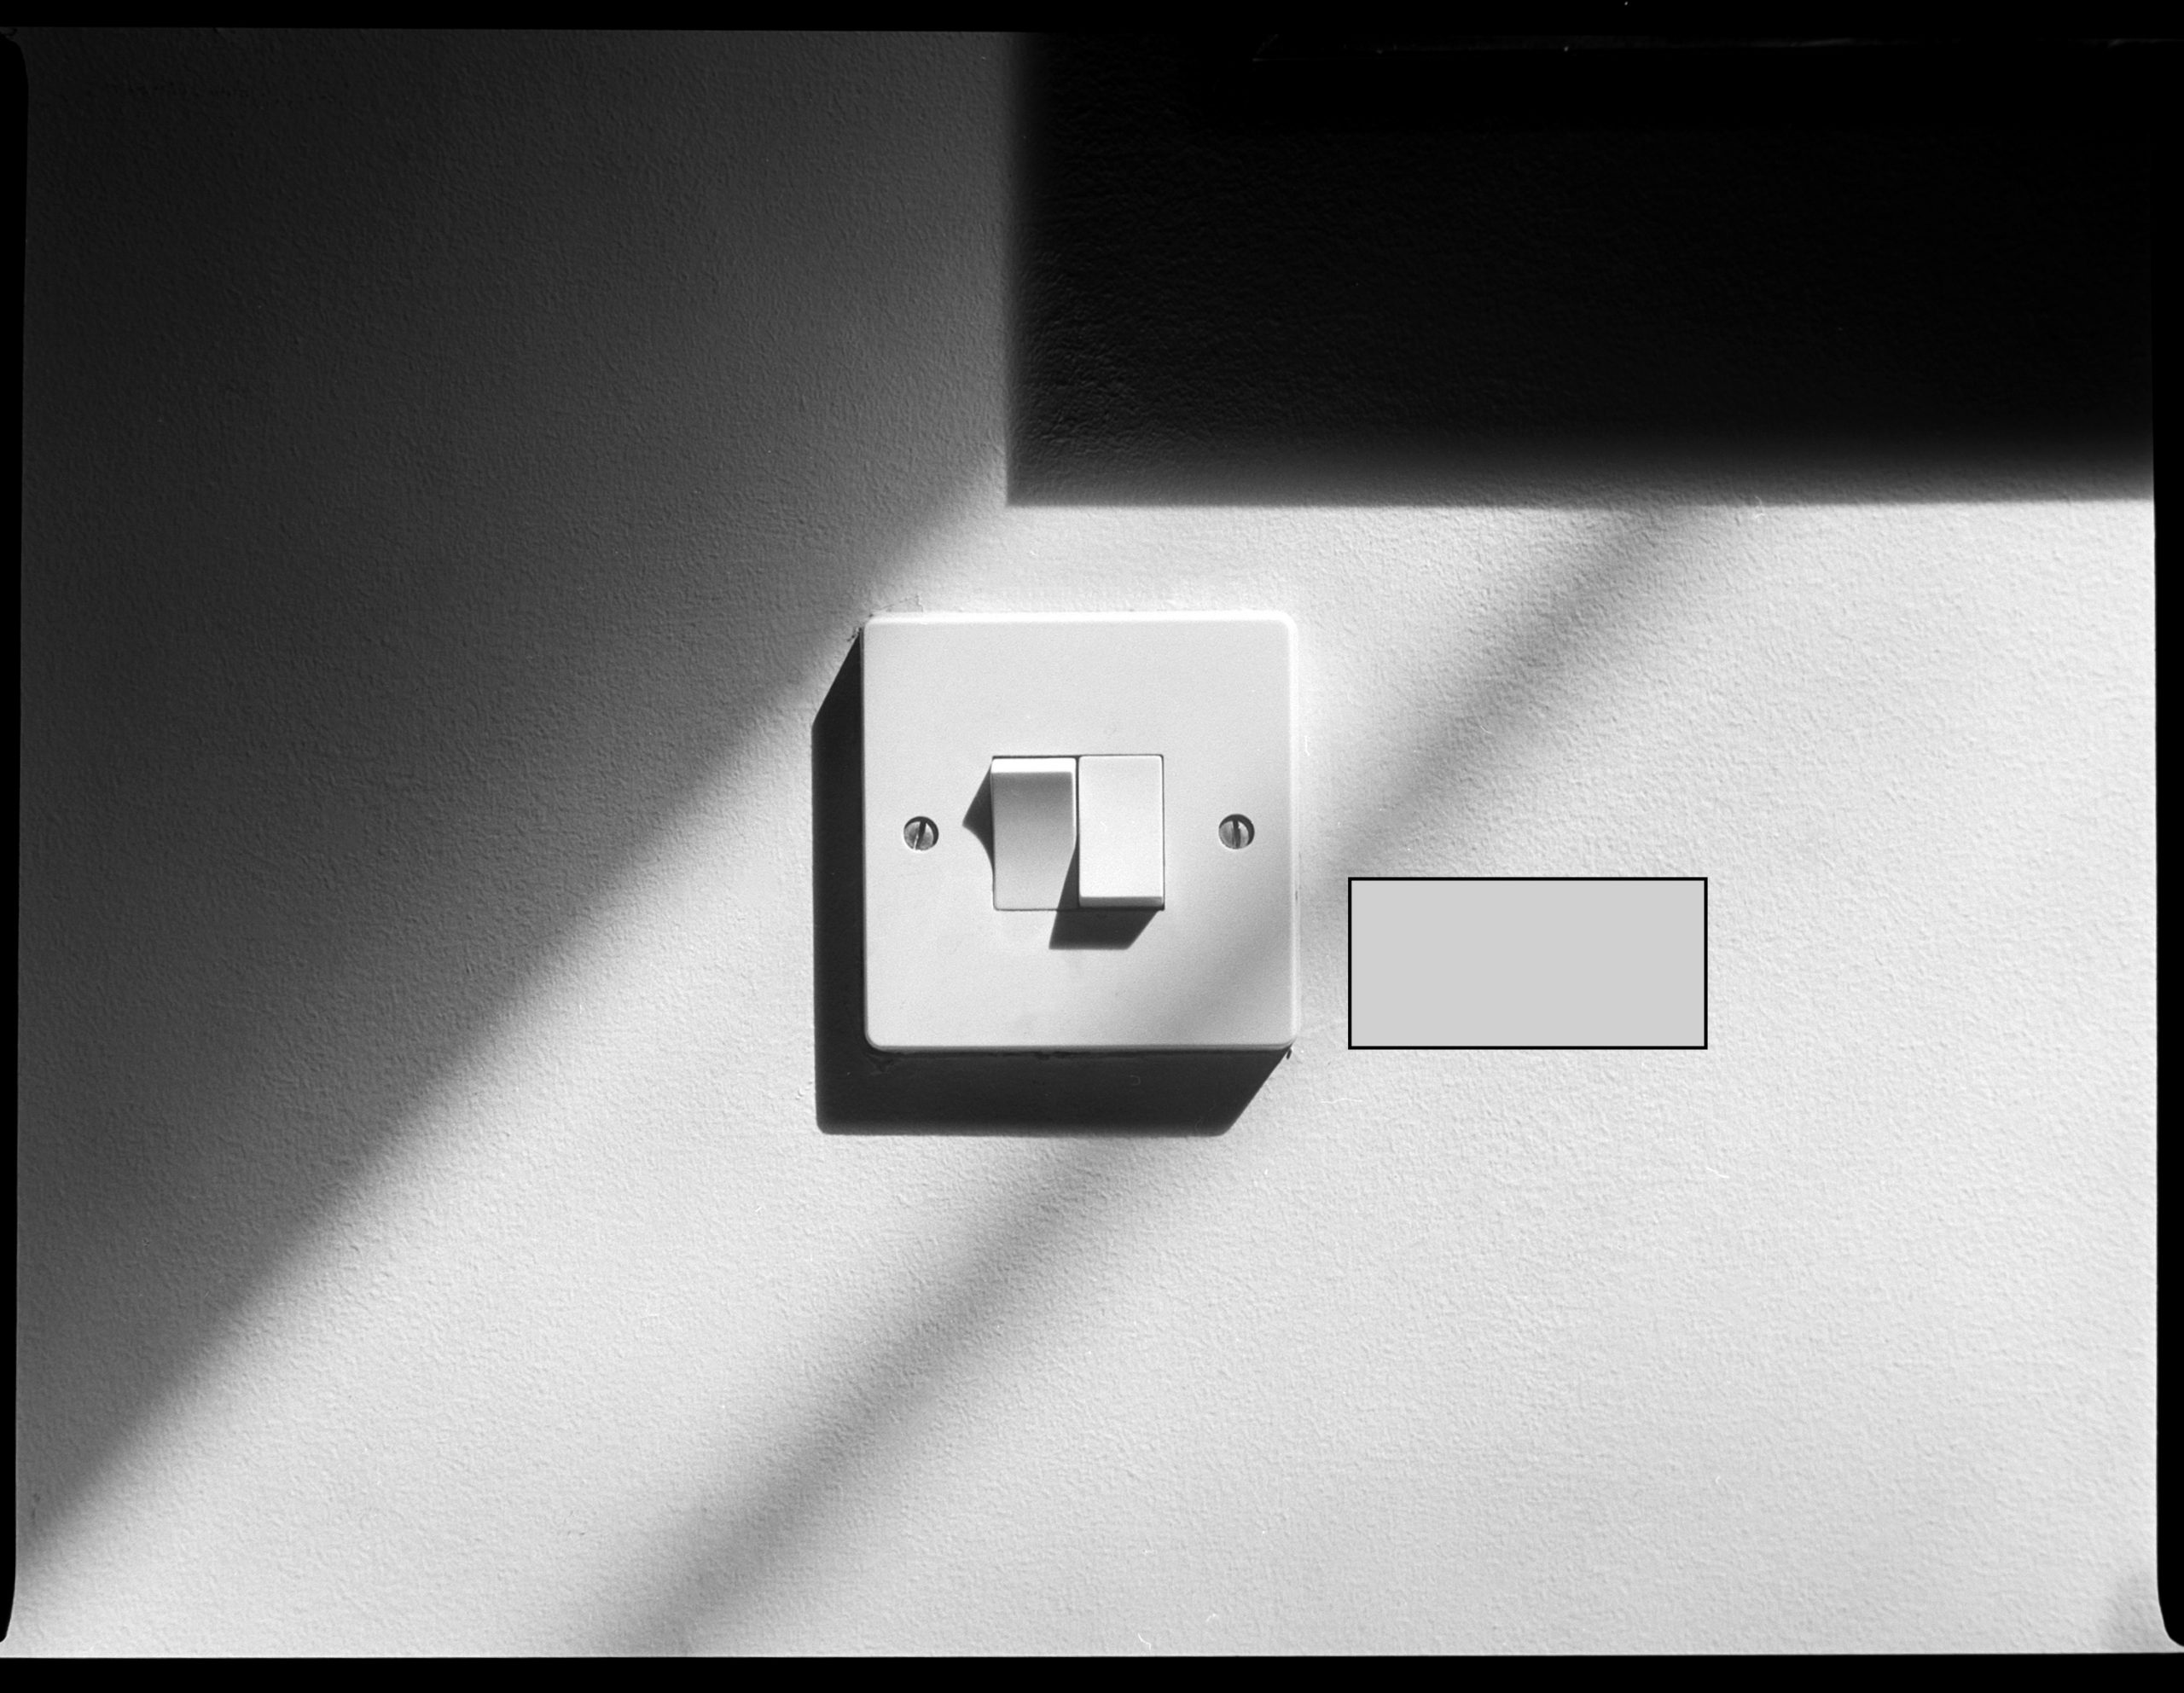
4. Spot Metered on a Grey Card next to switch. f11 1/15th EXP.
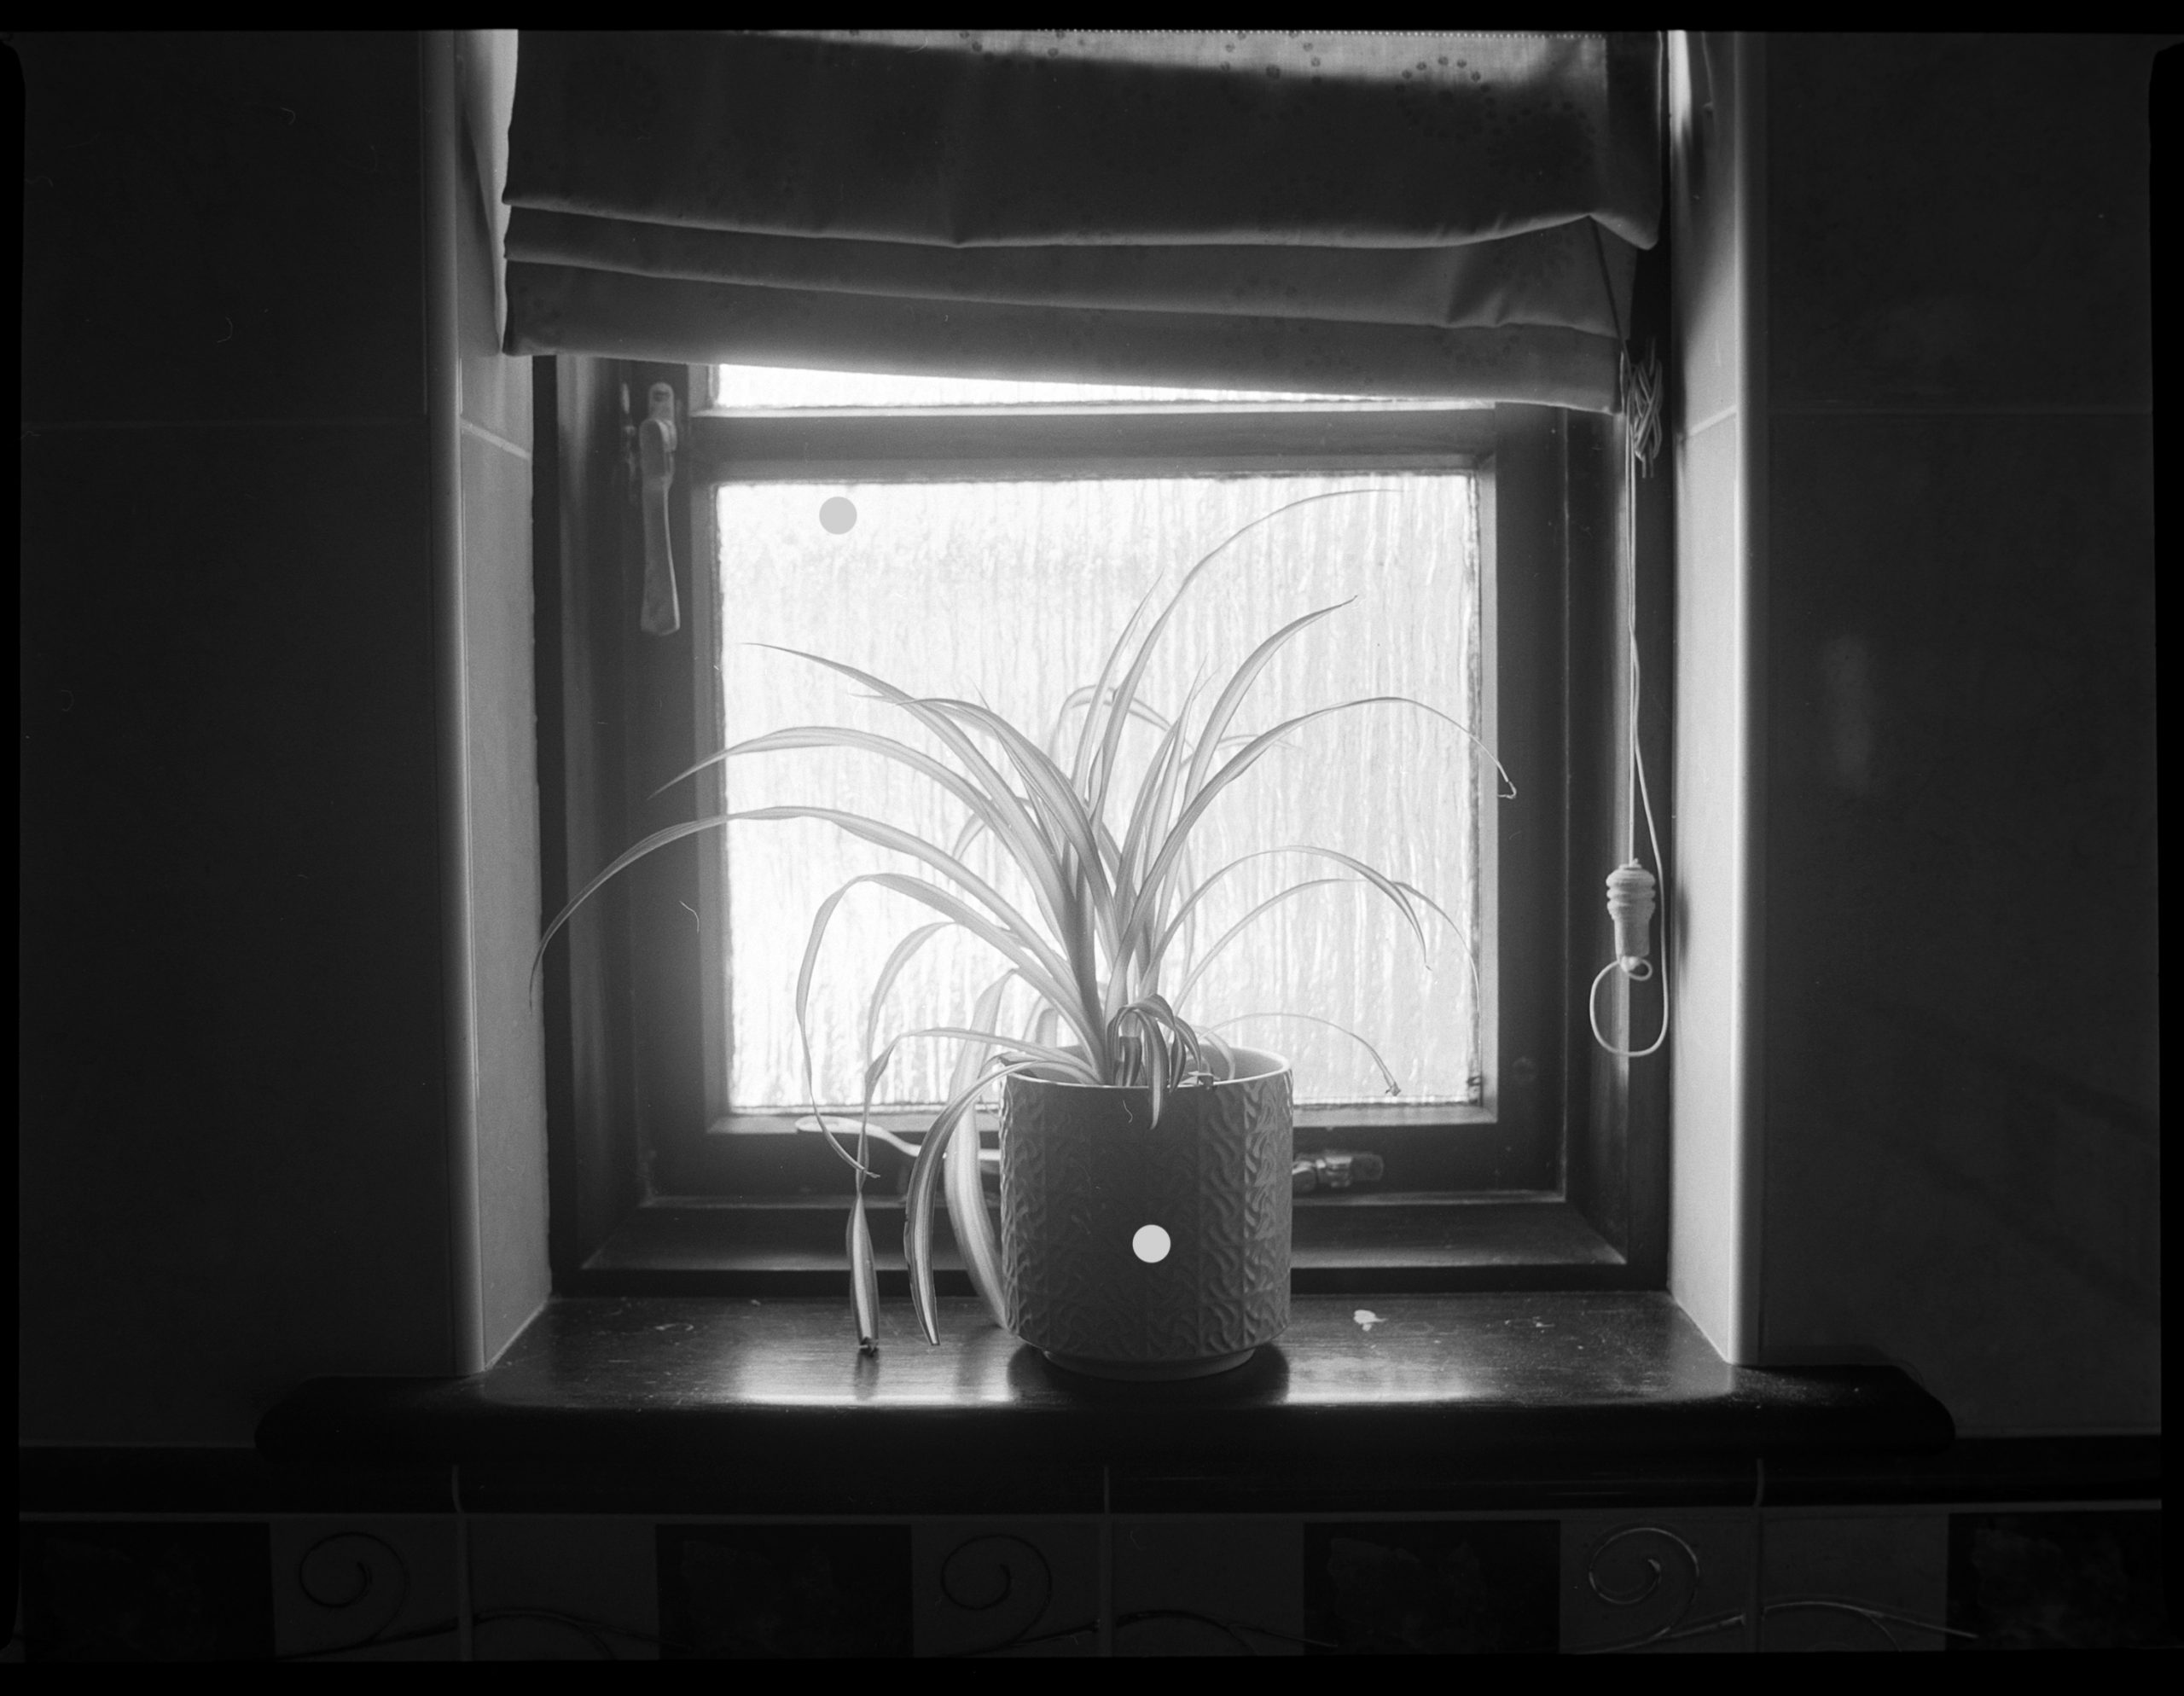
5. Plant. Spot meter on the Bright area. Spot on the shadow area. Shoot the average. F5.6 1/2s EXP
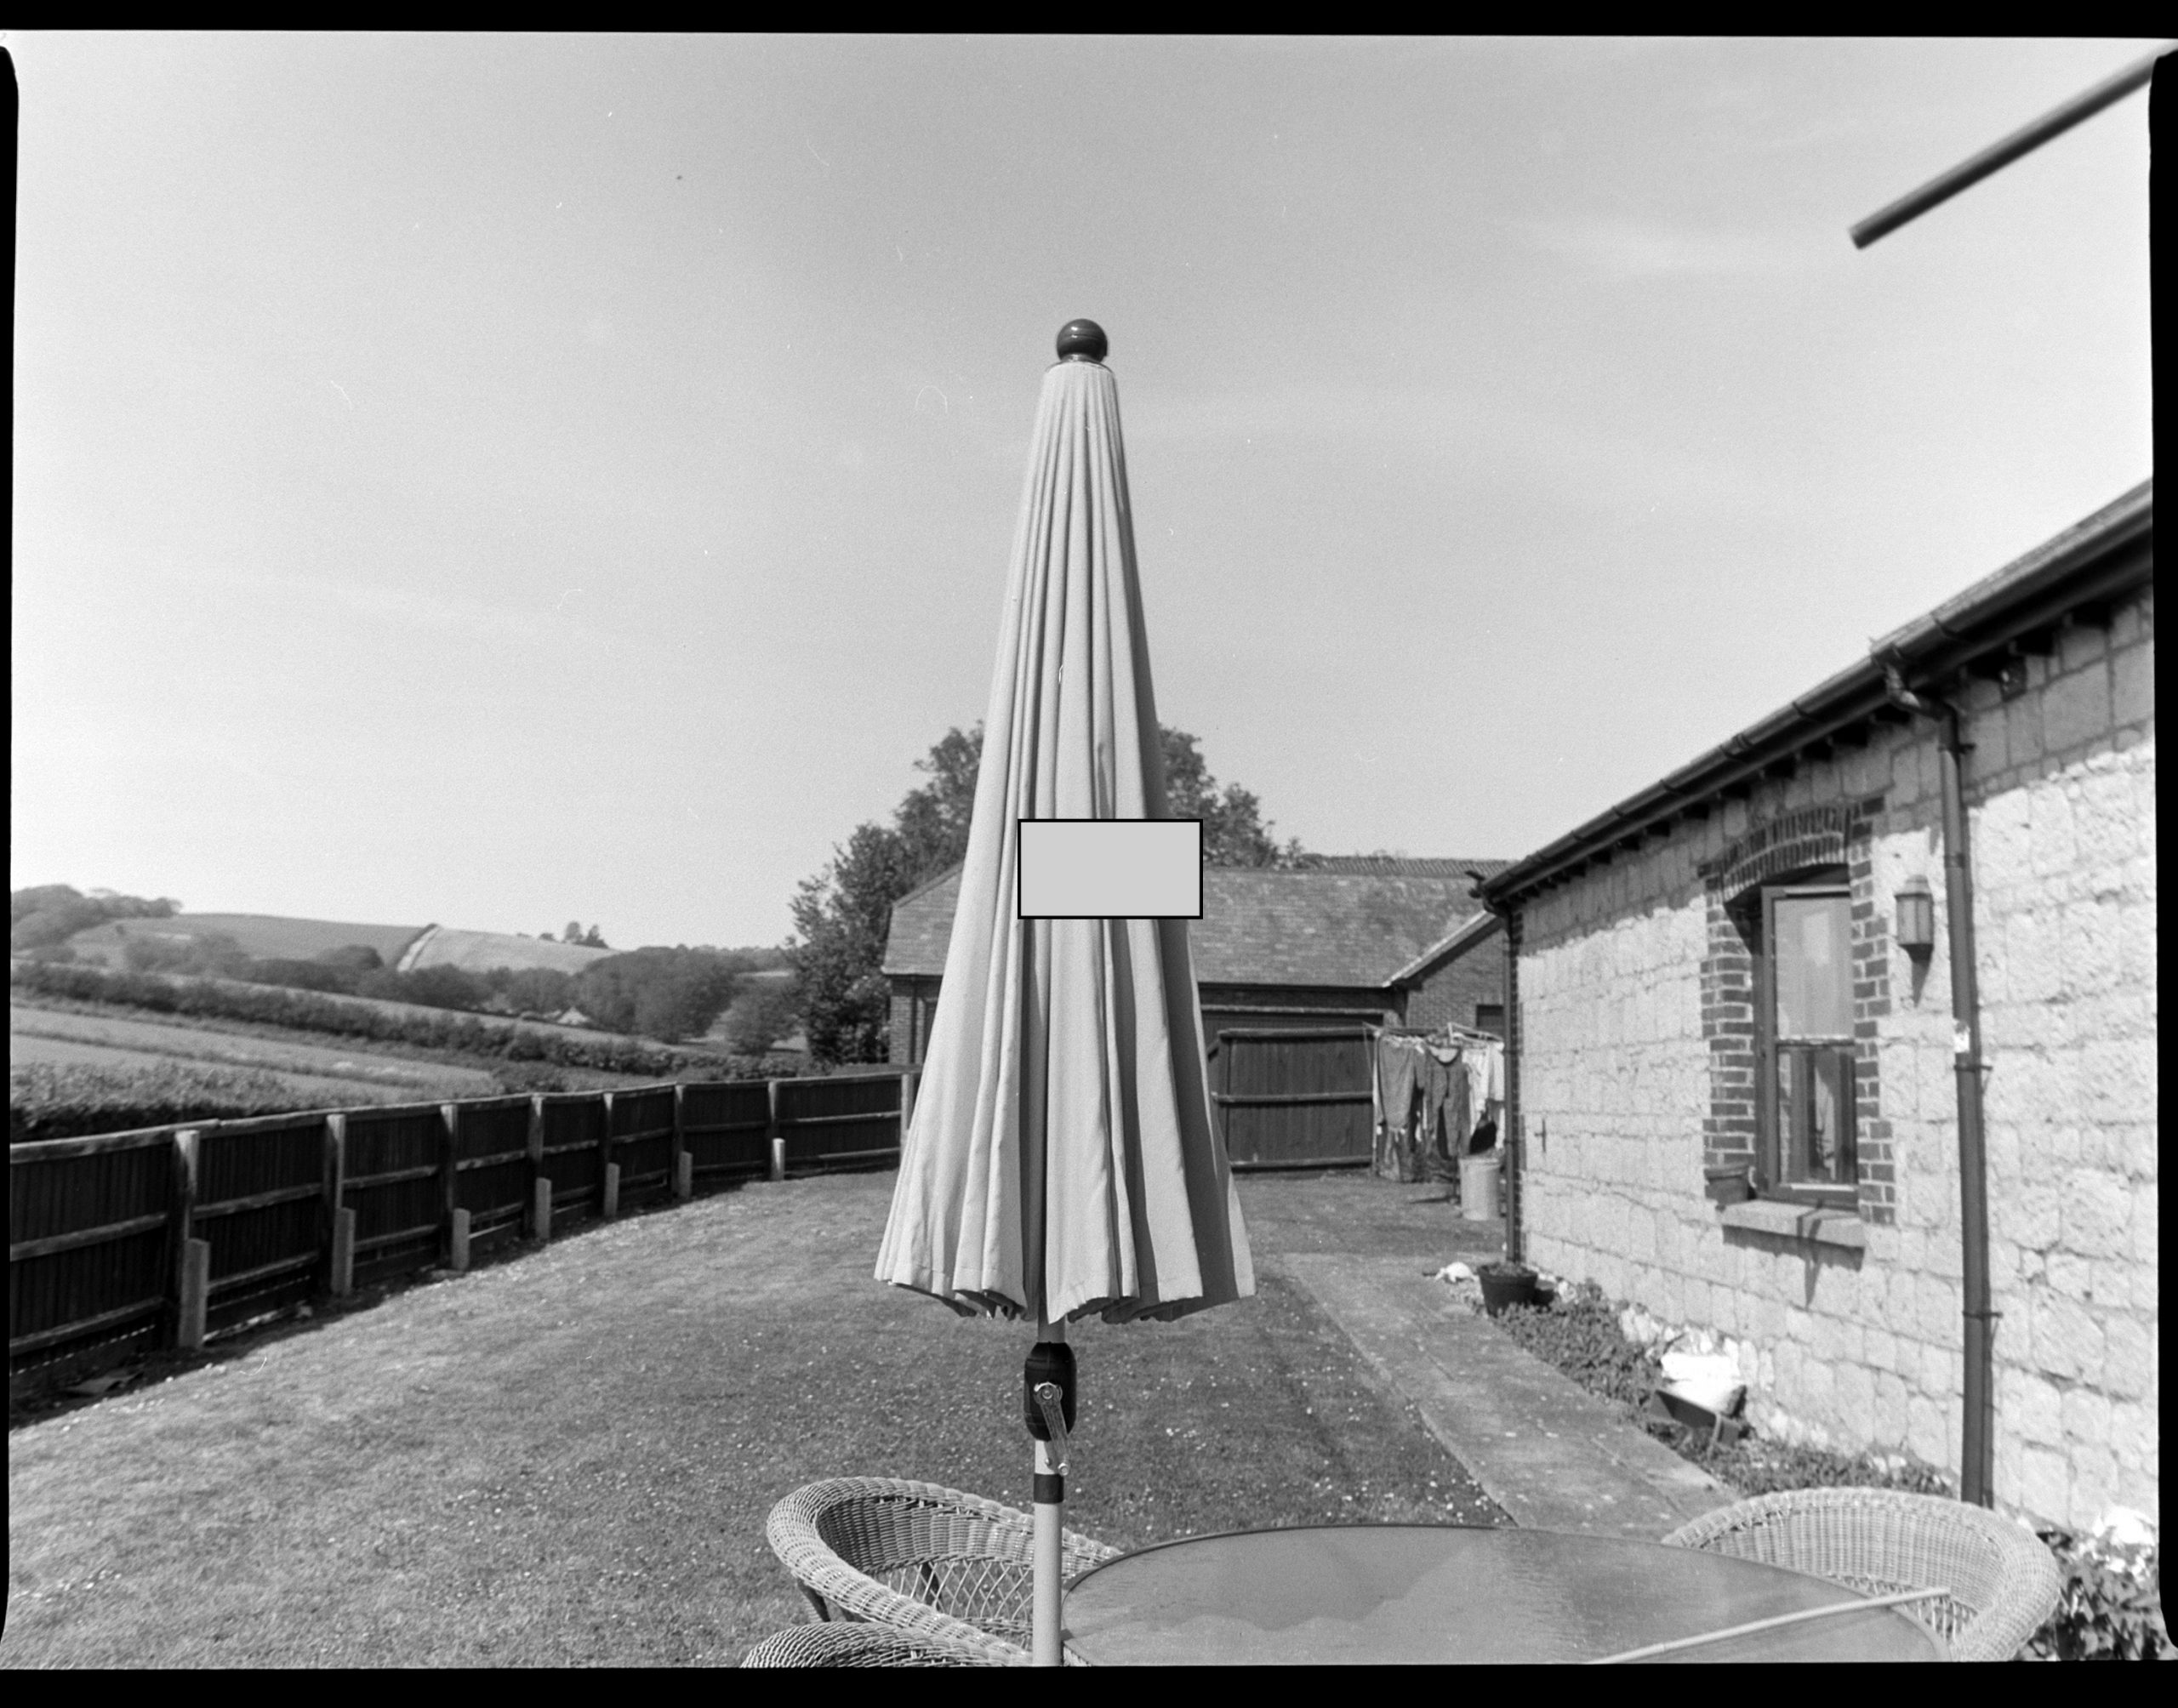
6. SunBrolly. Gary Card placed next to brolly. f11 1/30th
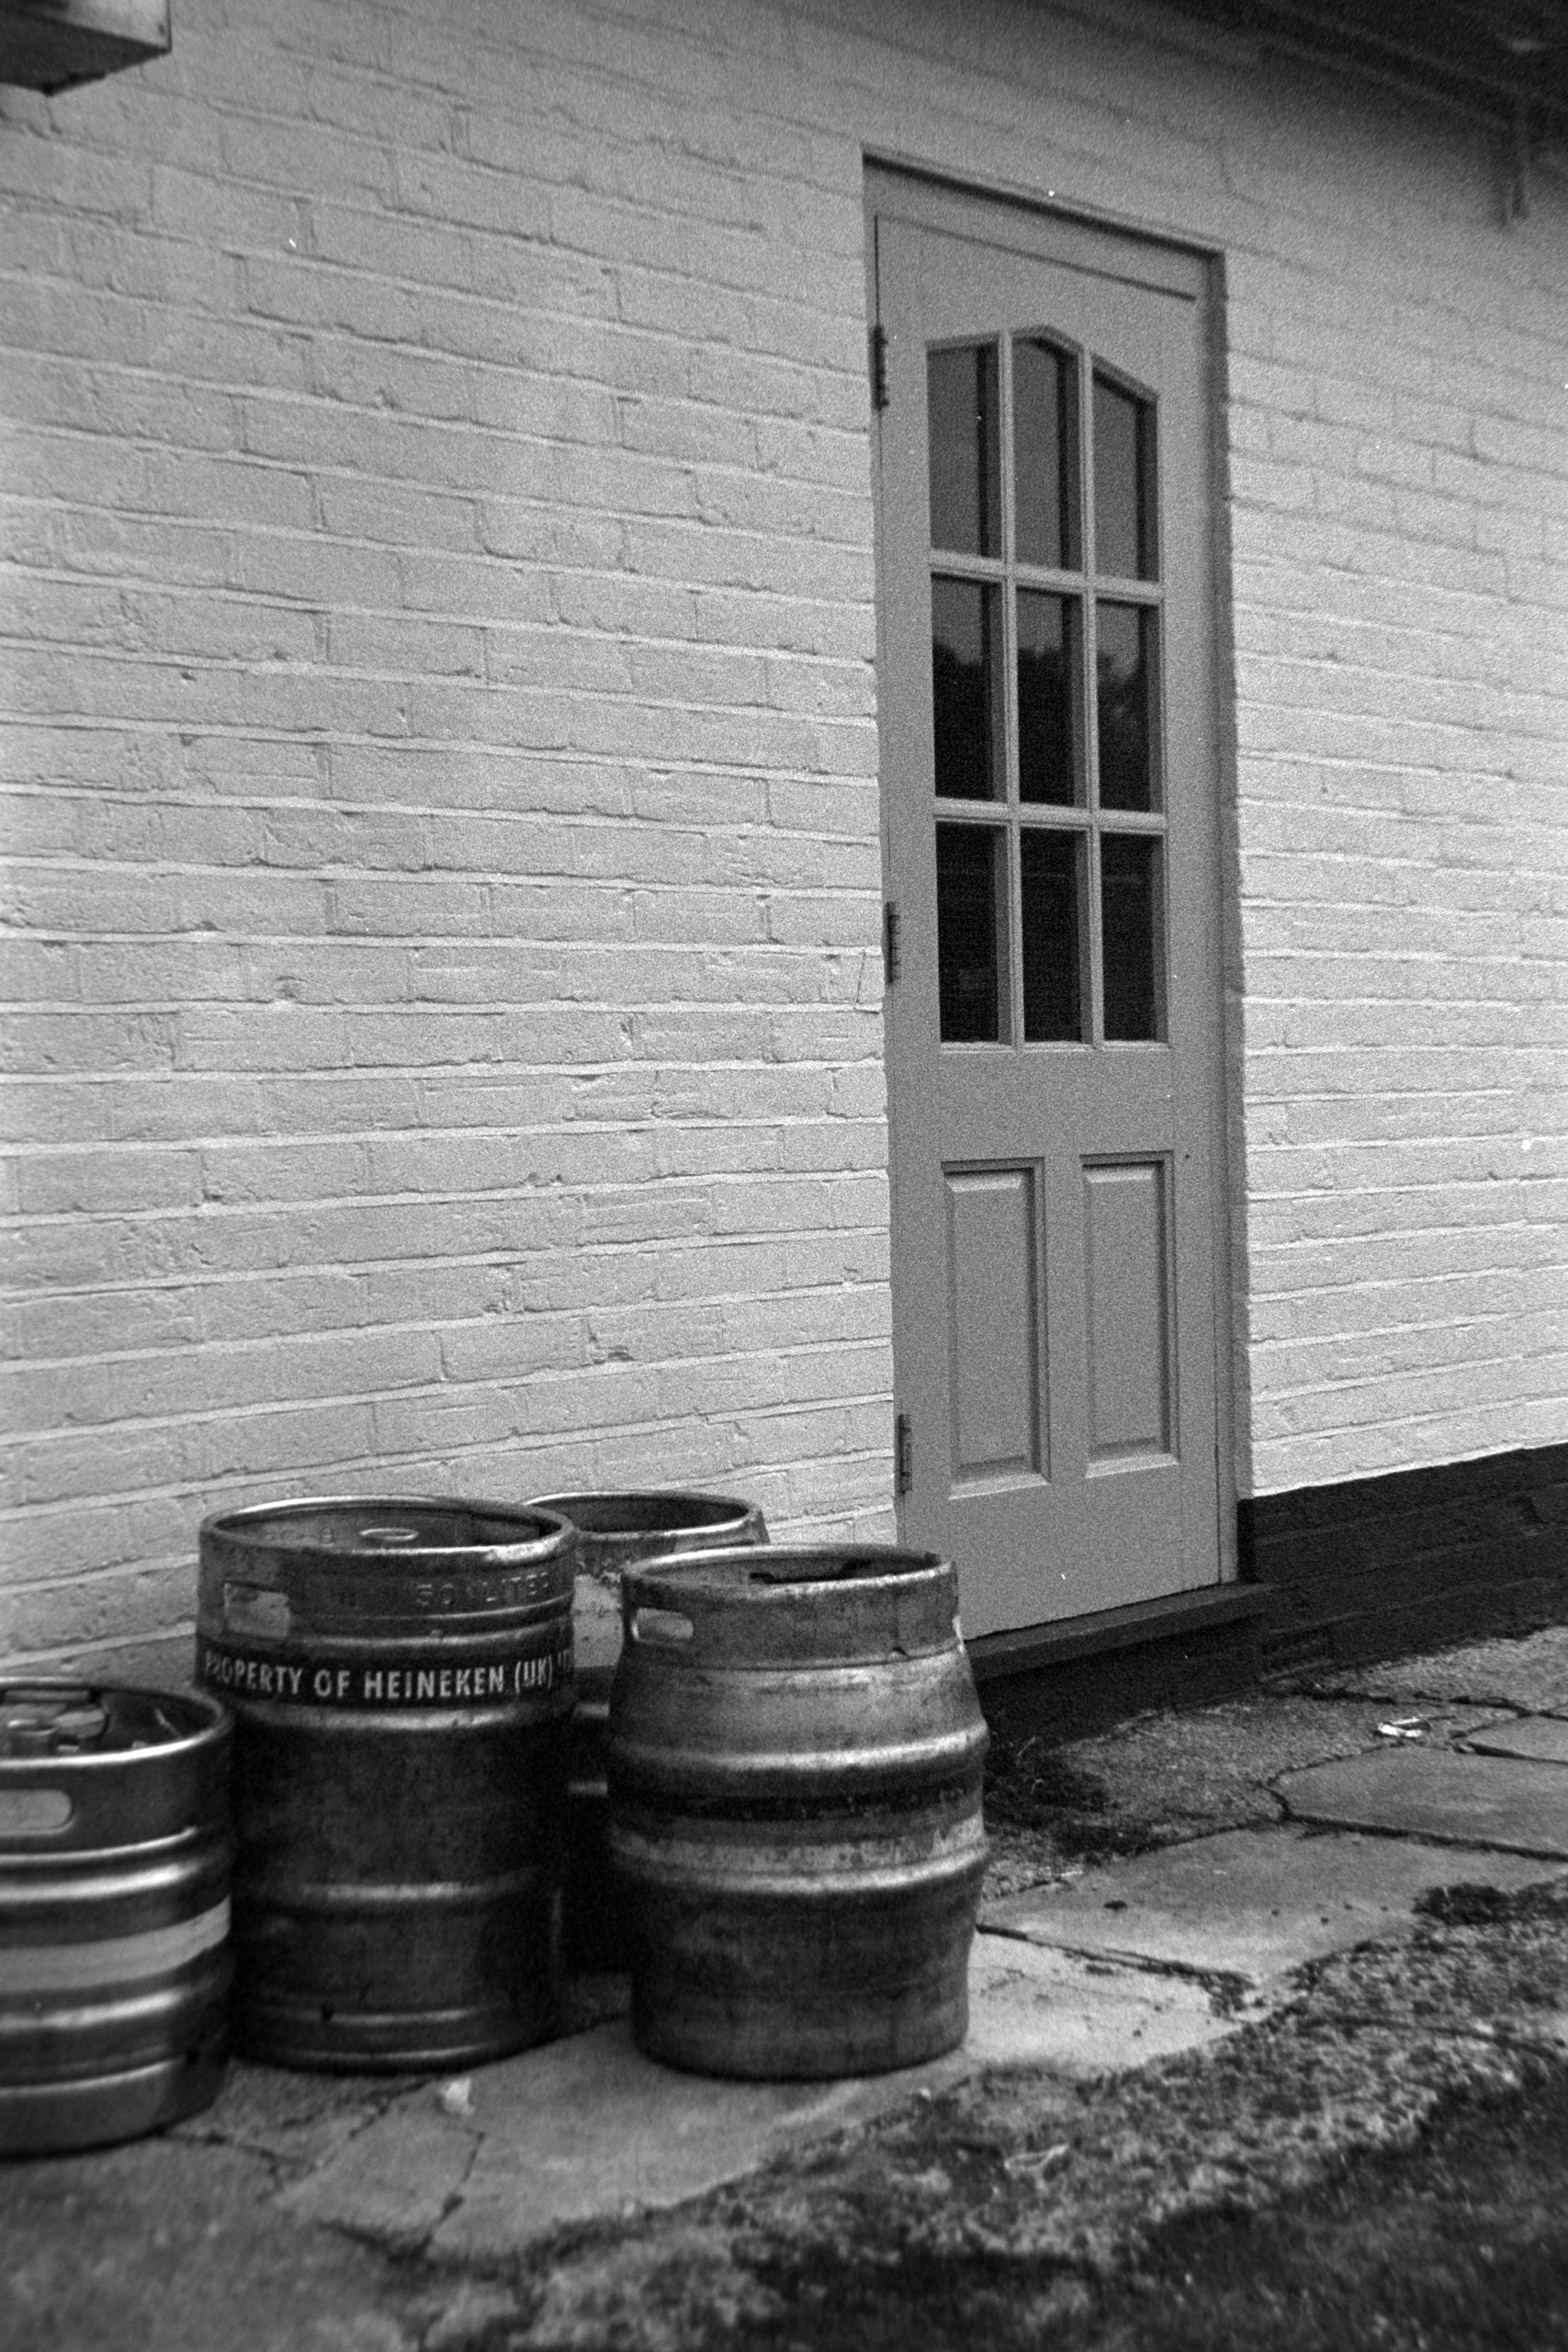
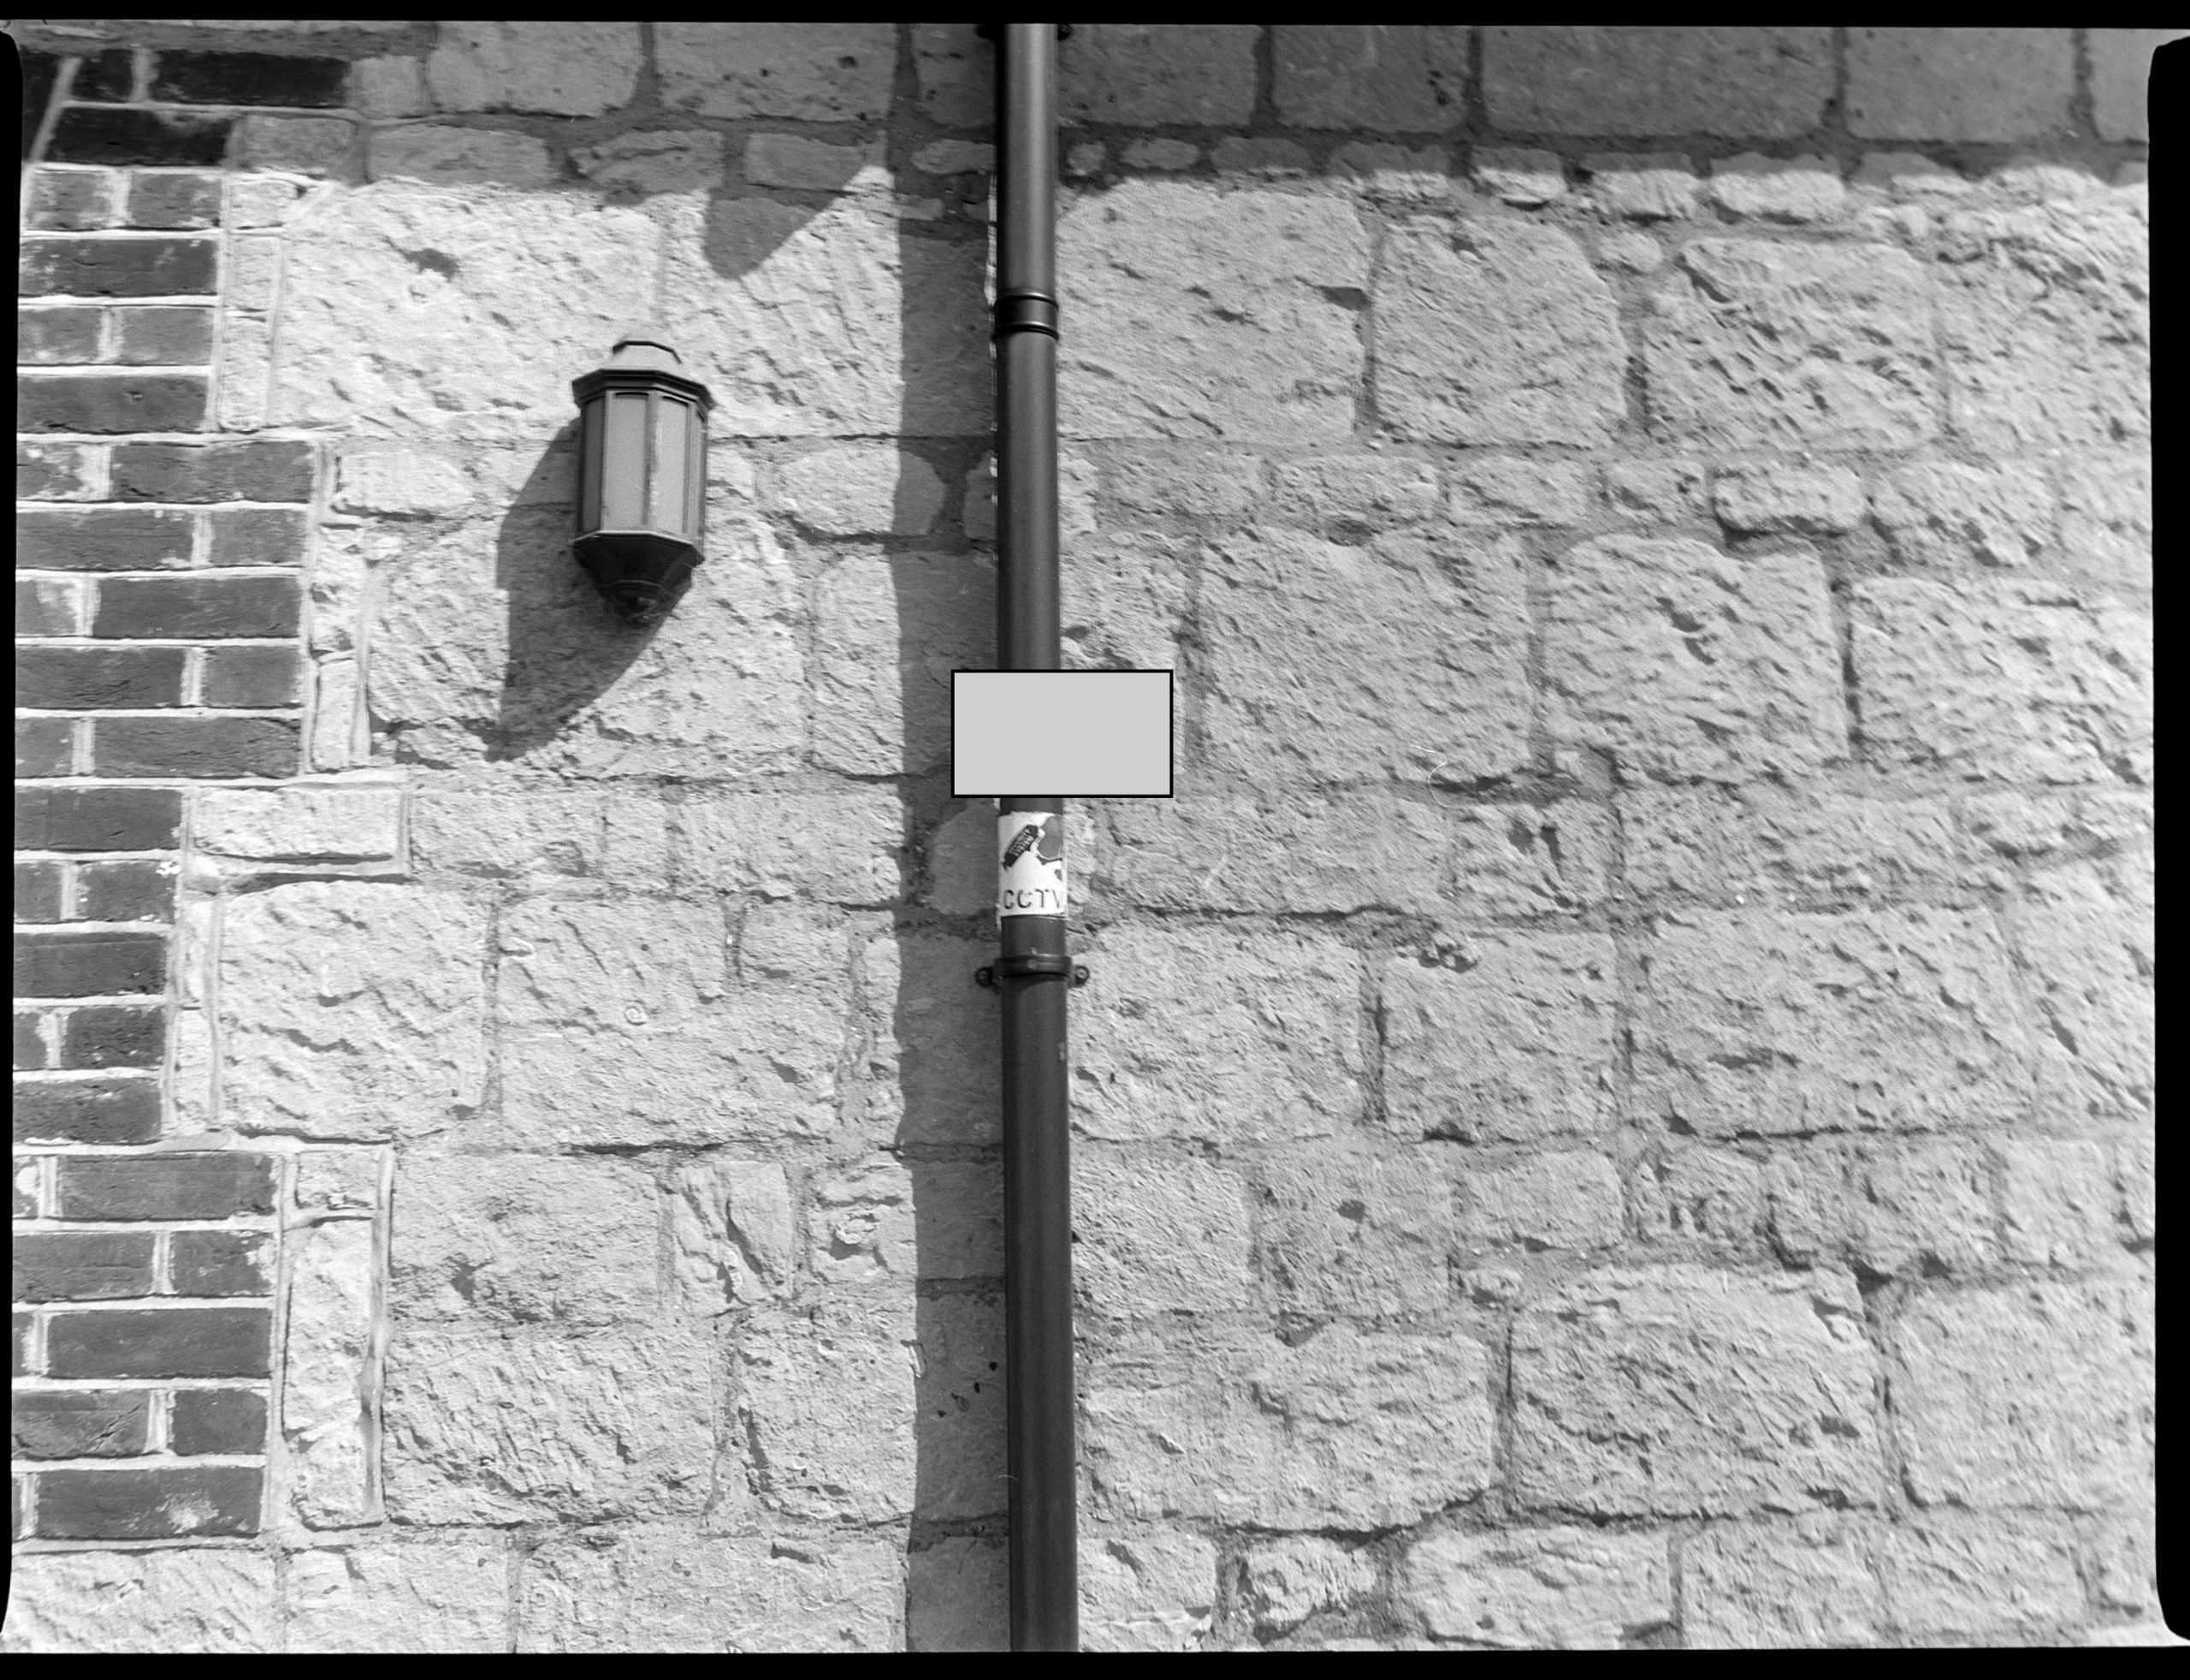
7. Drain Pipe. Gray Card placed next to drain. f11 1/30th
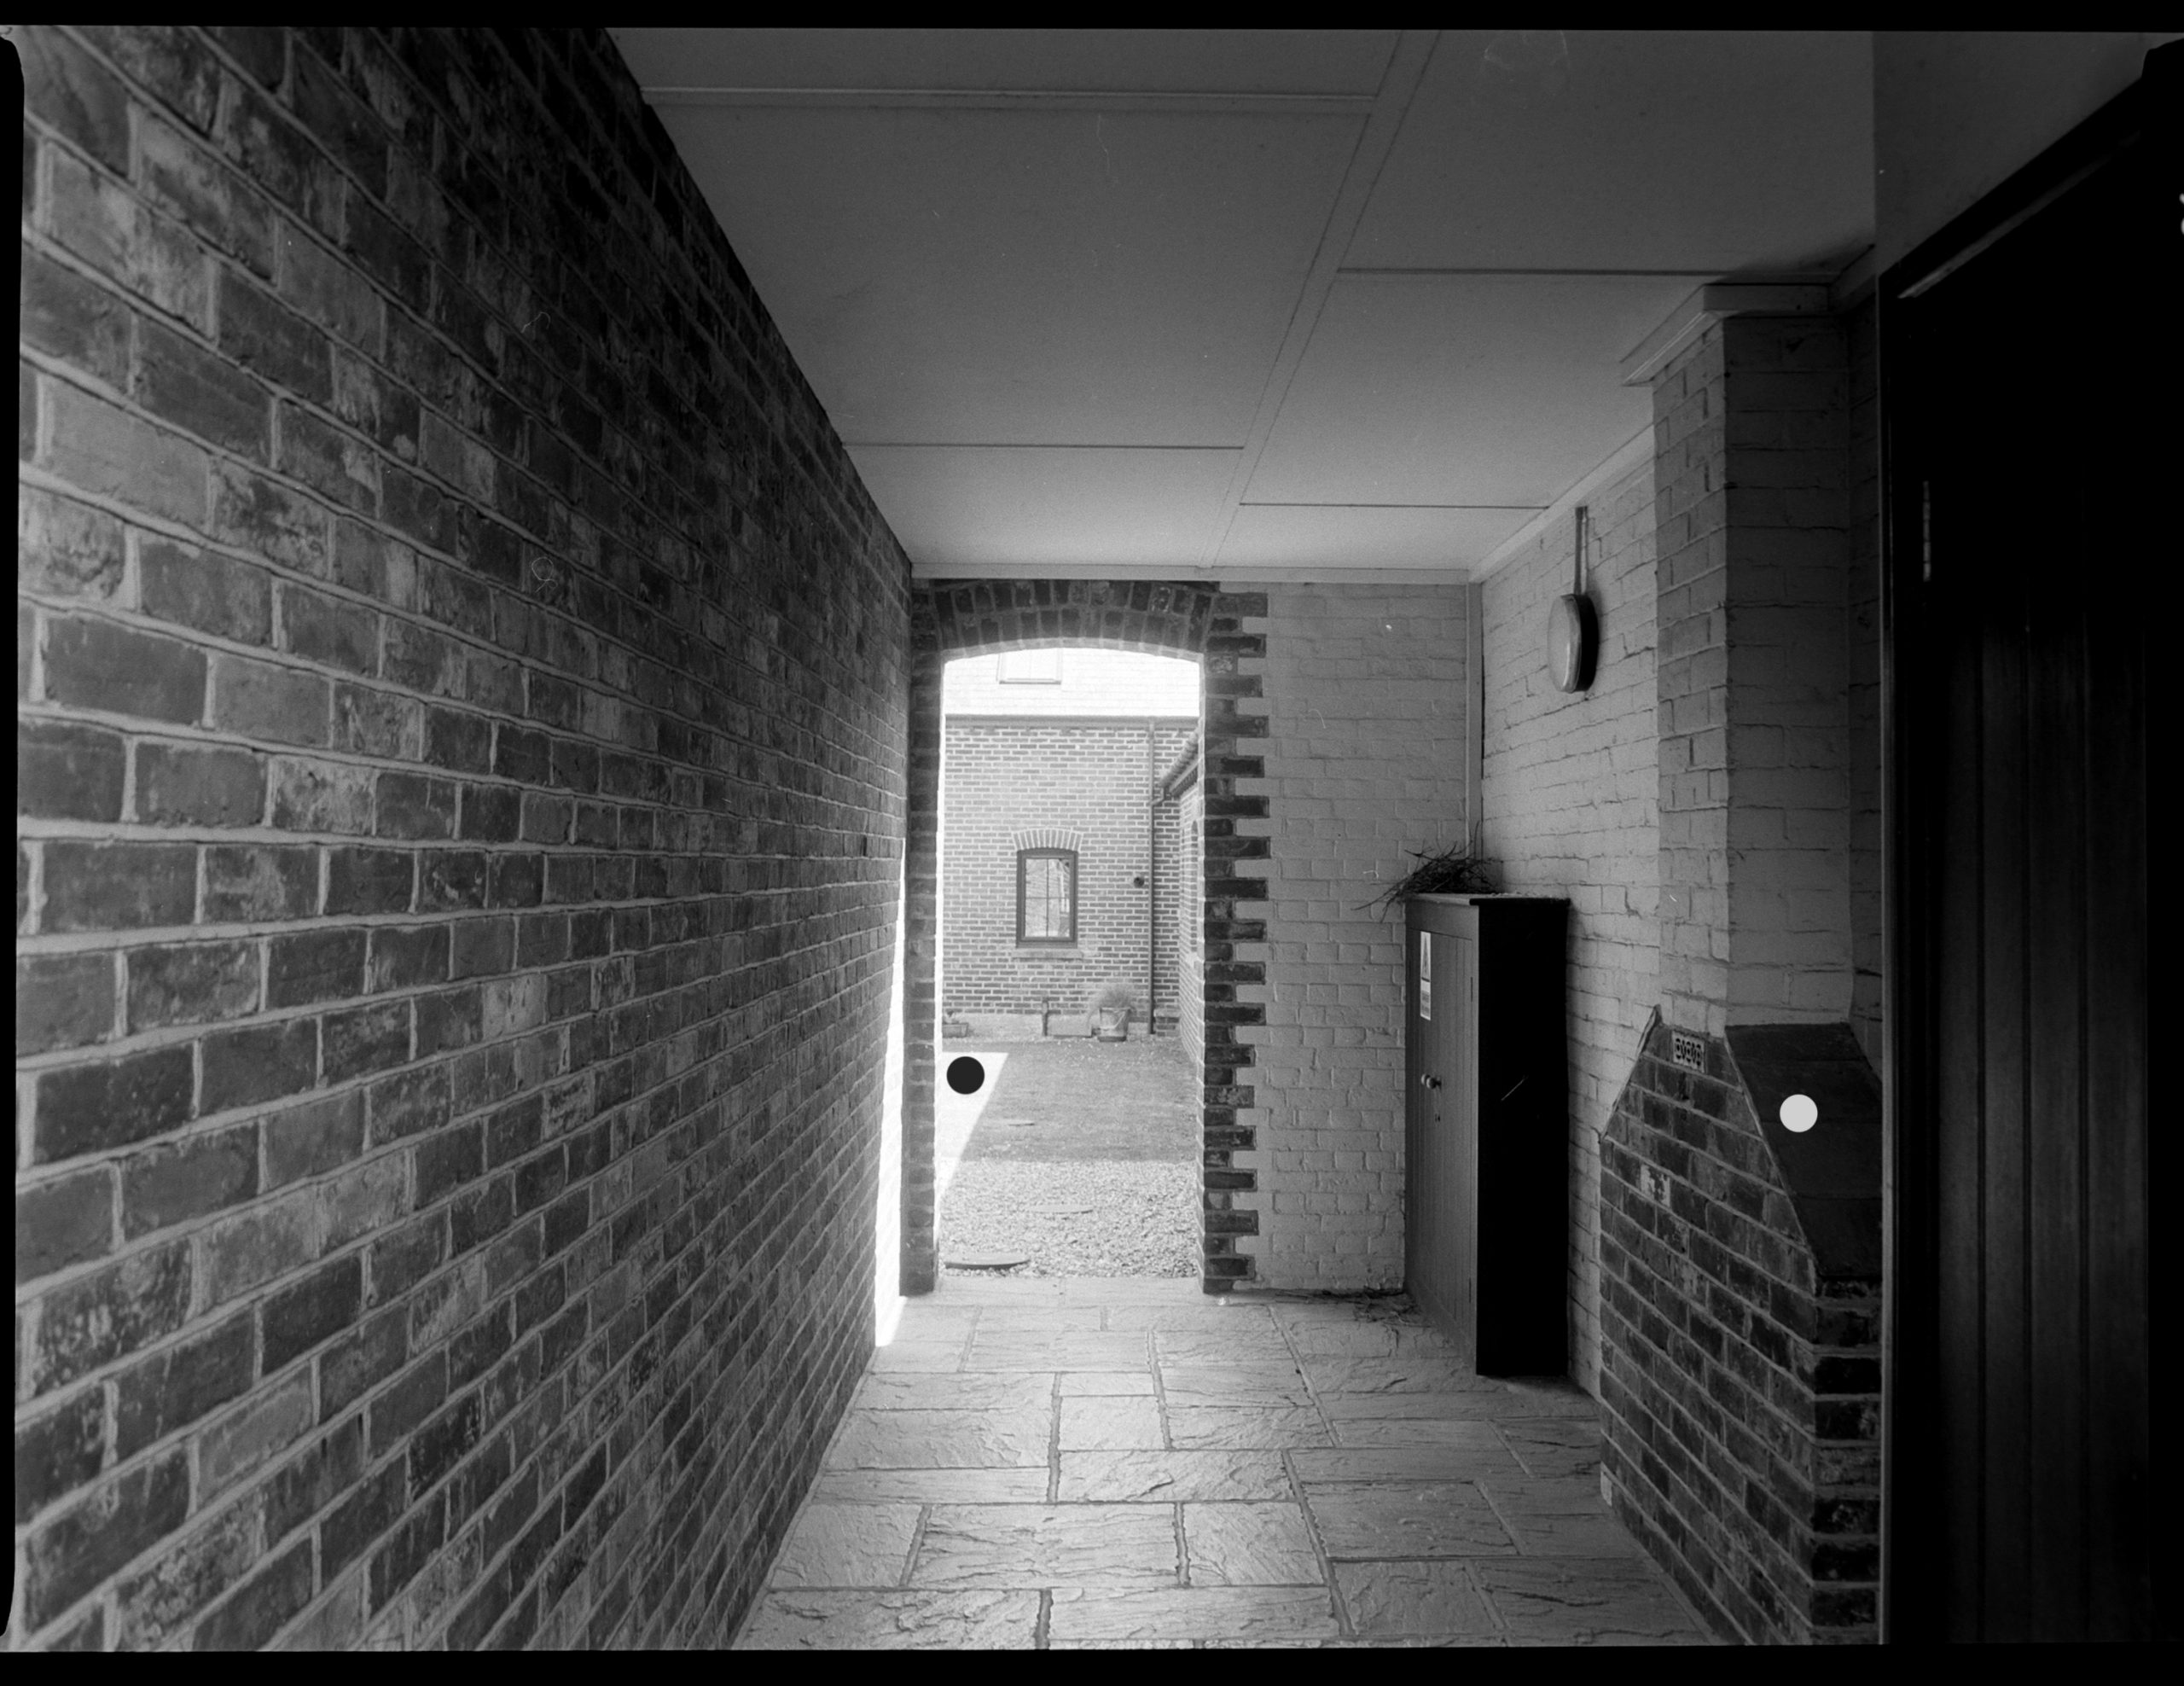
Alley. Another tricky scene. I metered on the bright area and then a shadow area and took the average. F11 1/2s EXP
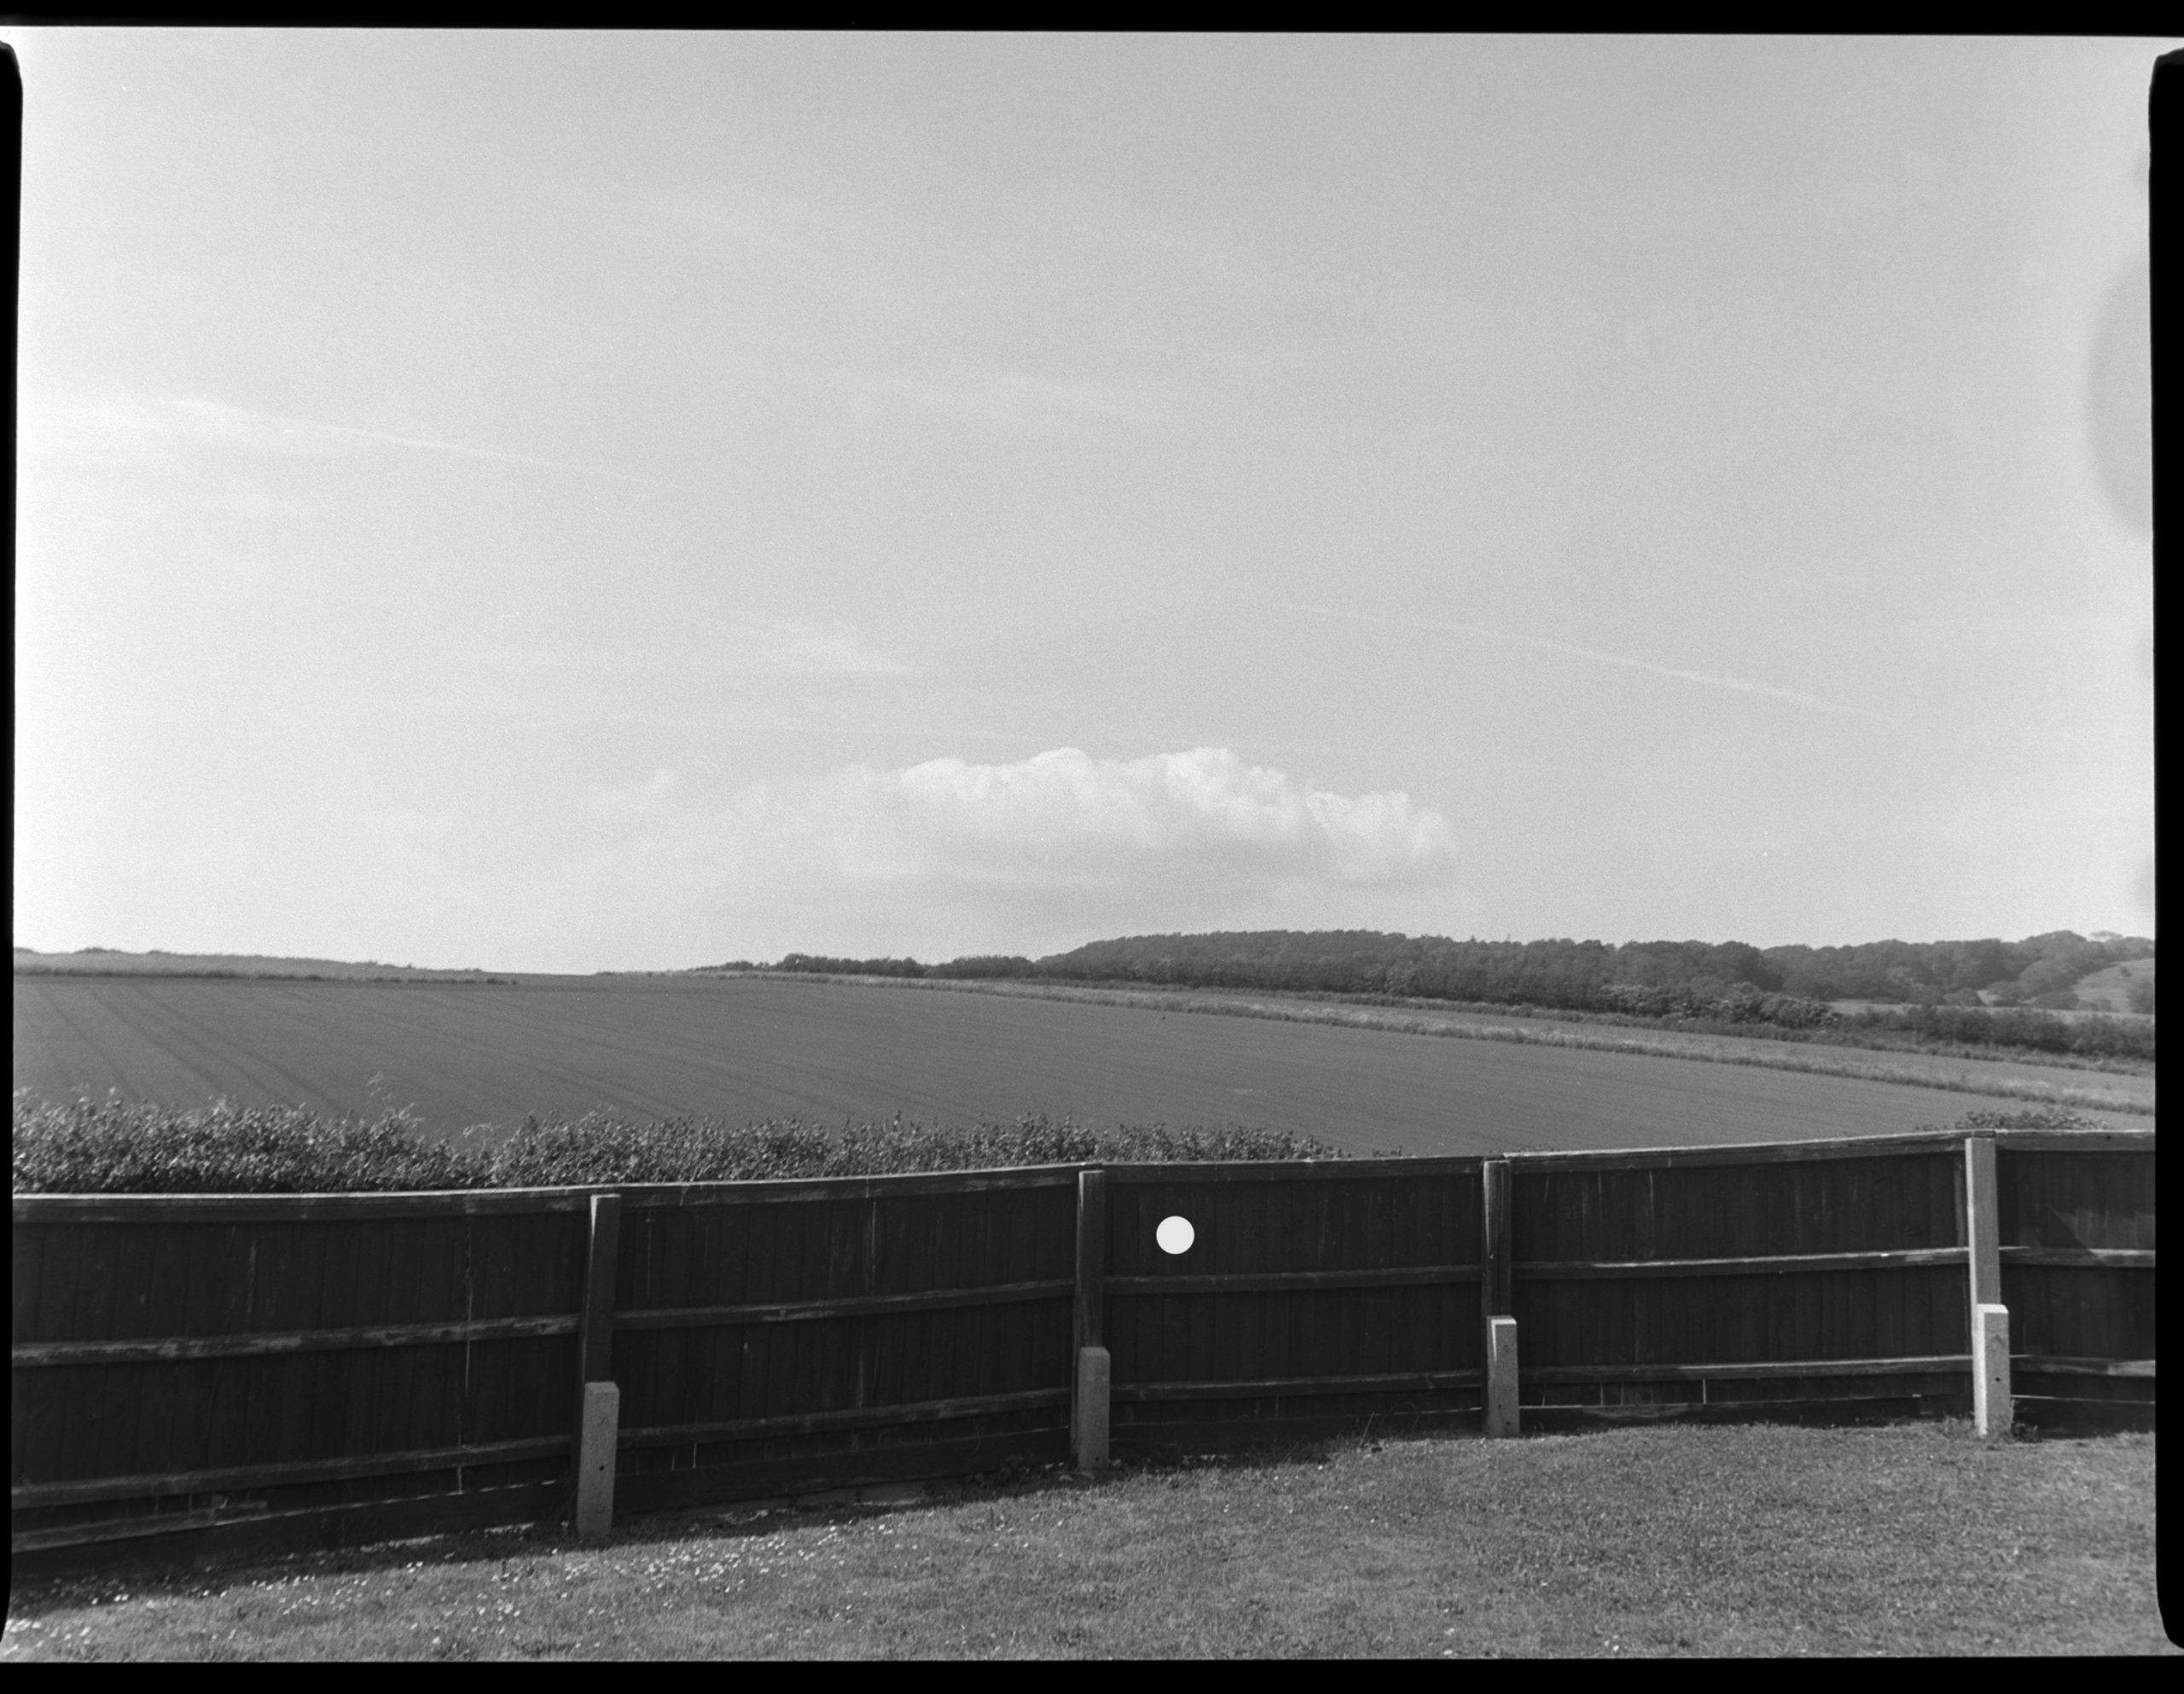
9. Fence and Sky. In this scene I spot metered on the fence. Meter returned f5.6 1/15th EXP. But of course that is middle grey. I didn’t want the fence to be middle grey so I stopped down 2 stops to f11. Did well.
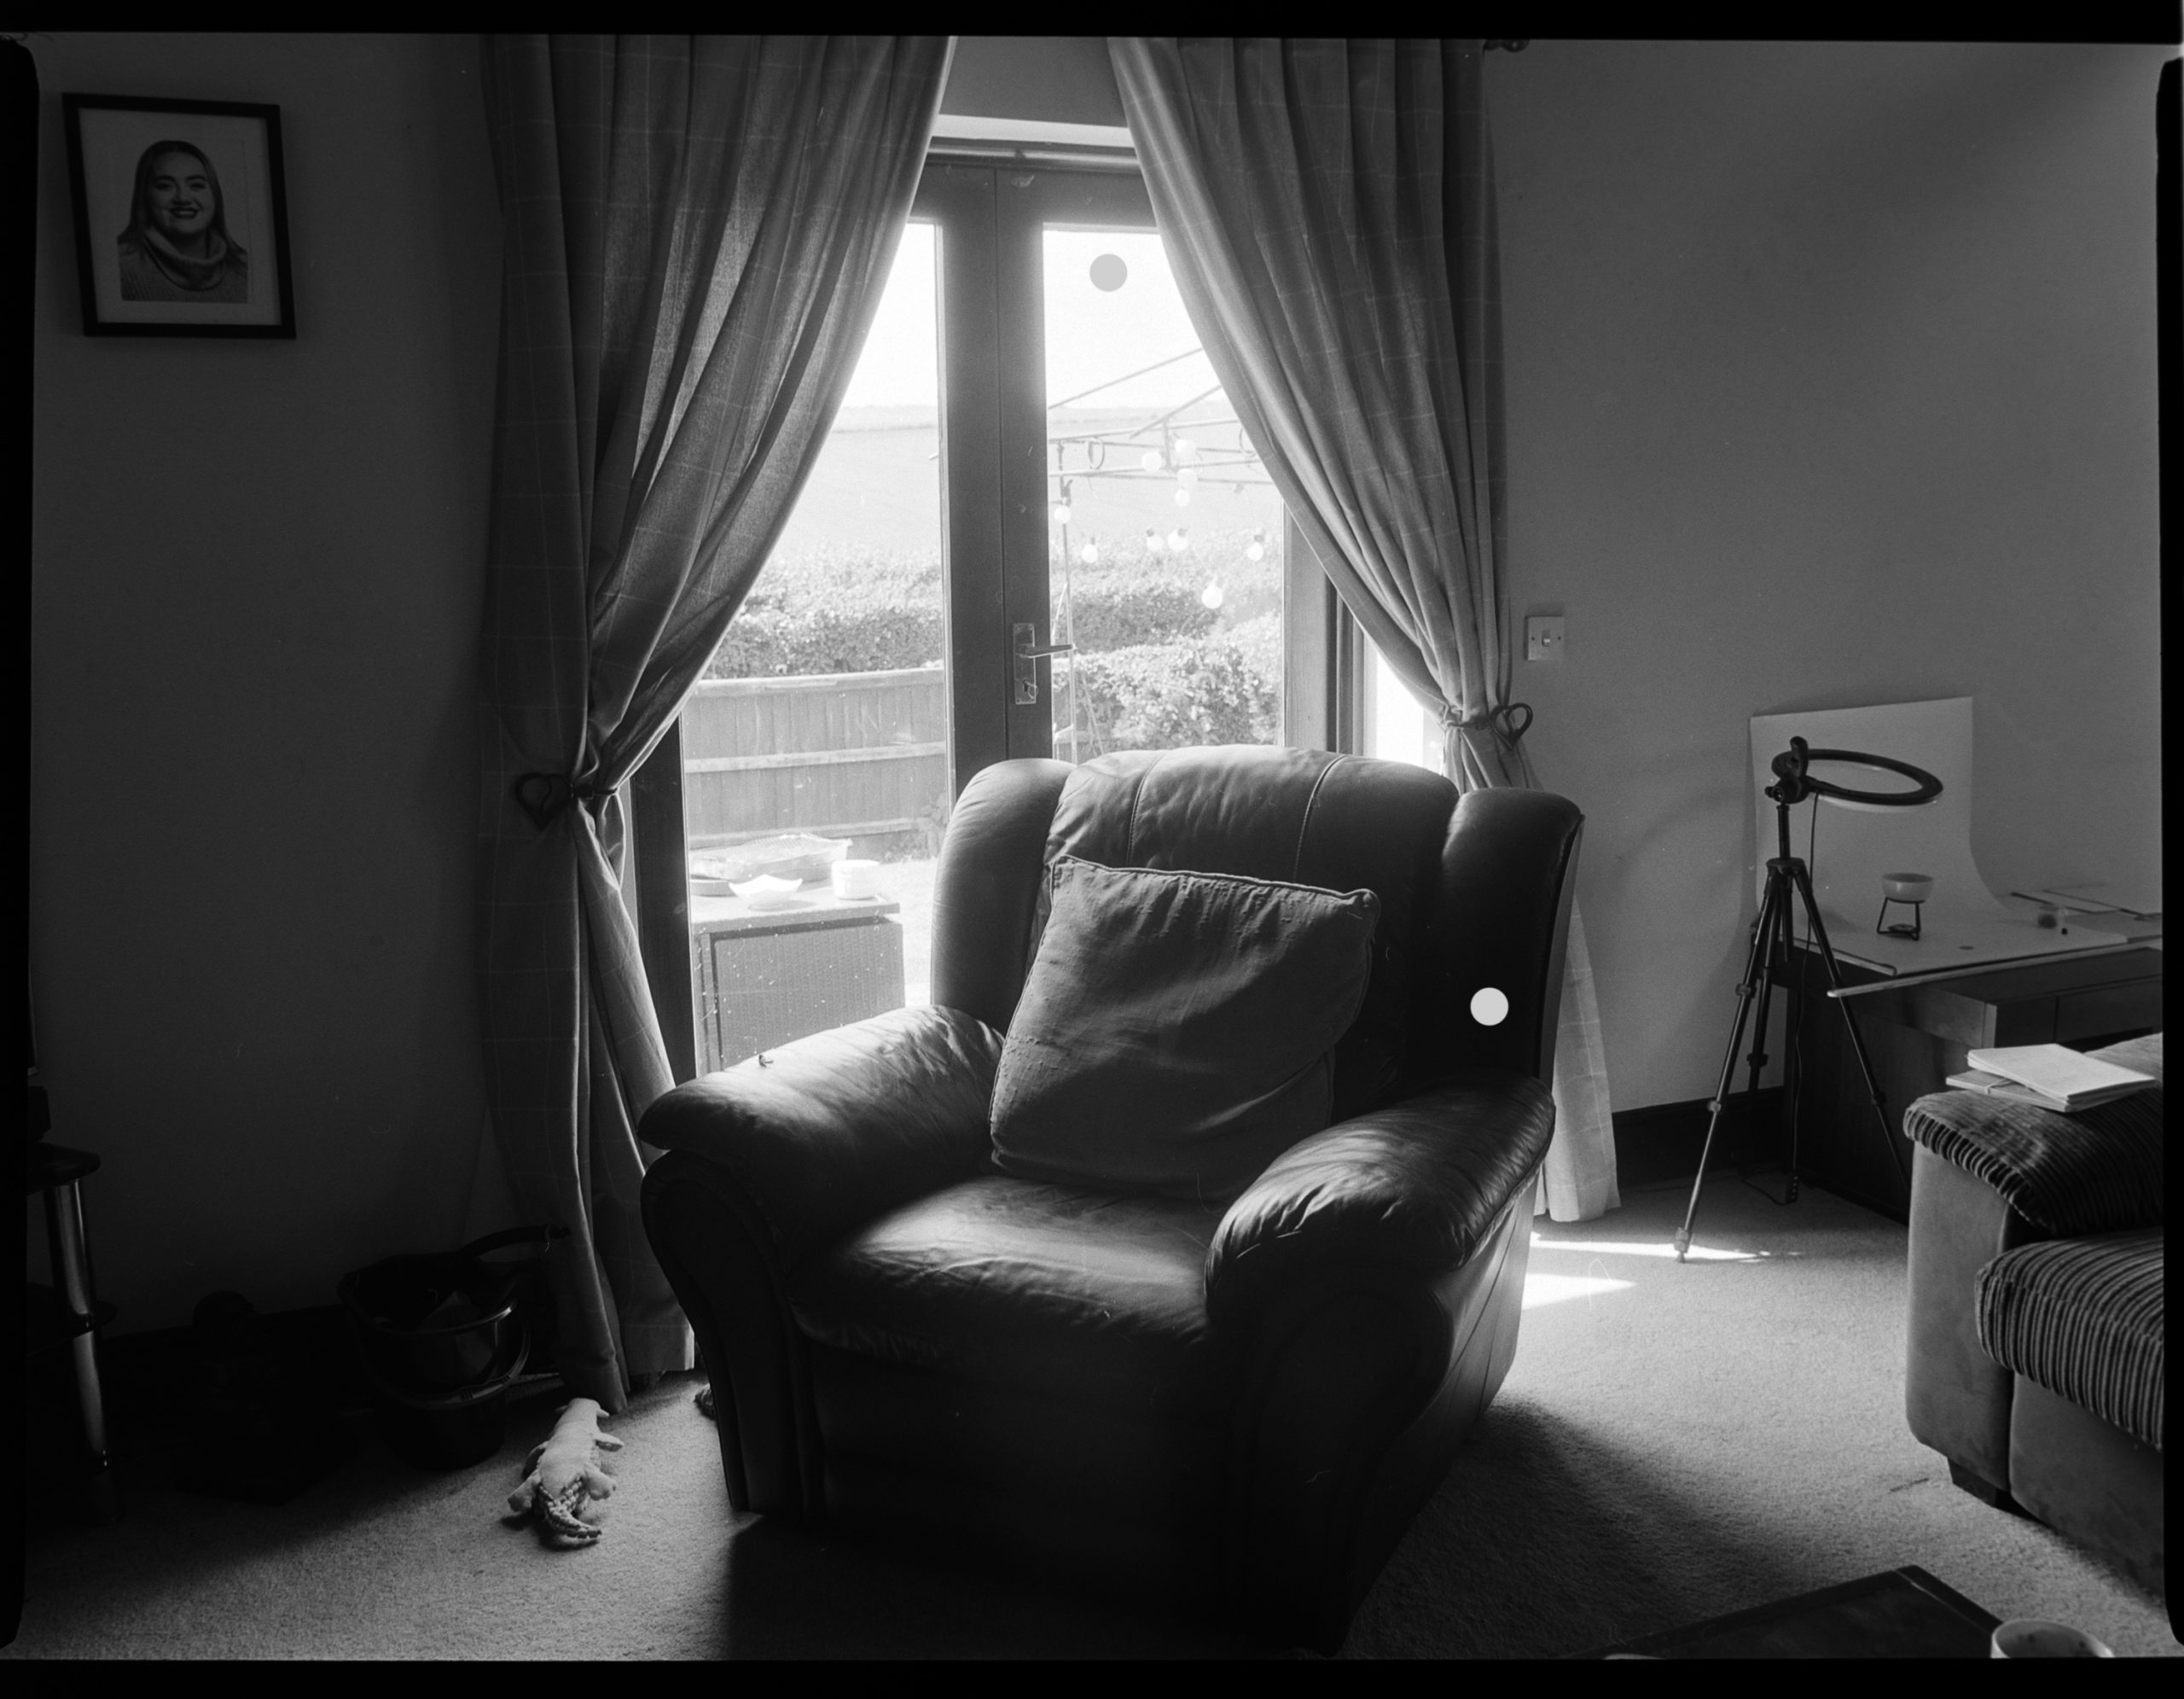
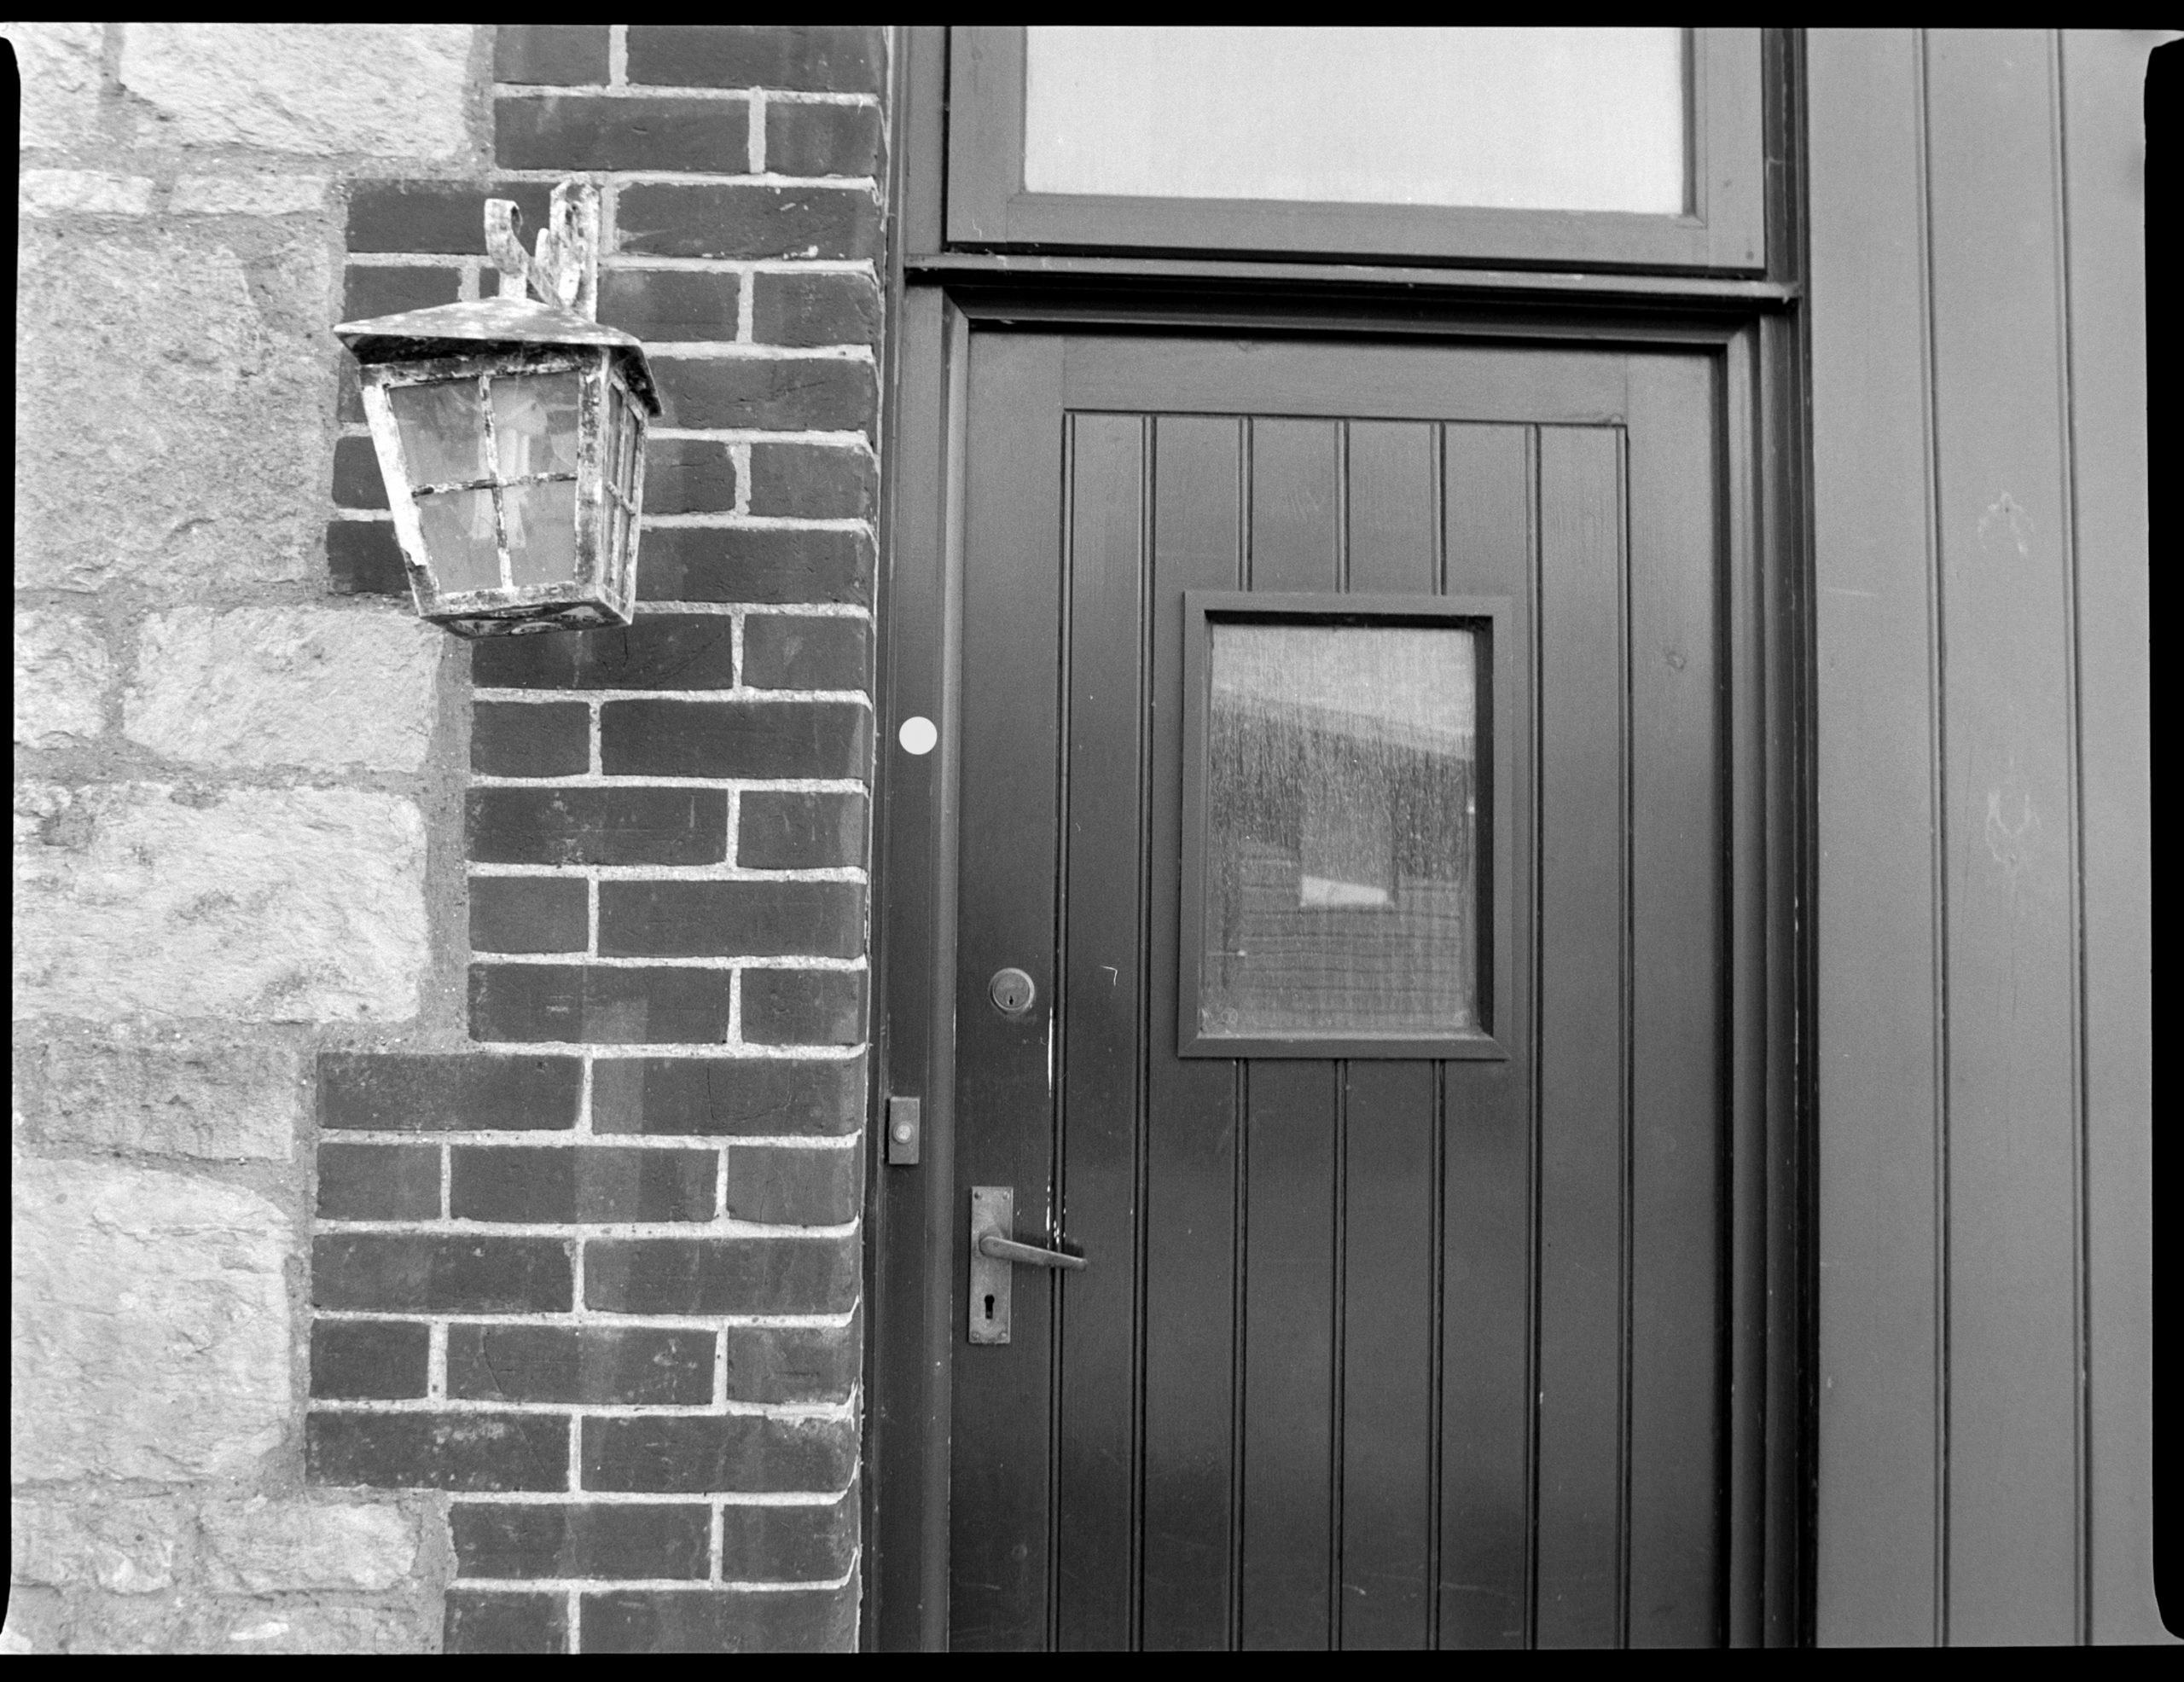
10. Back Door. Again I spot metered on the back door and stopped down 2 stops to make it darker than middle grey.
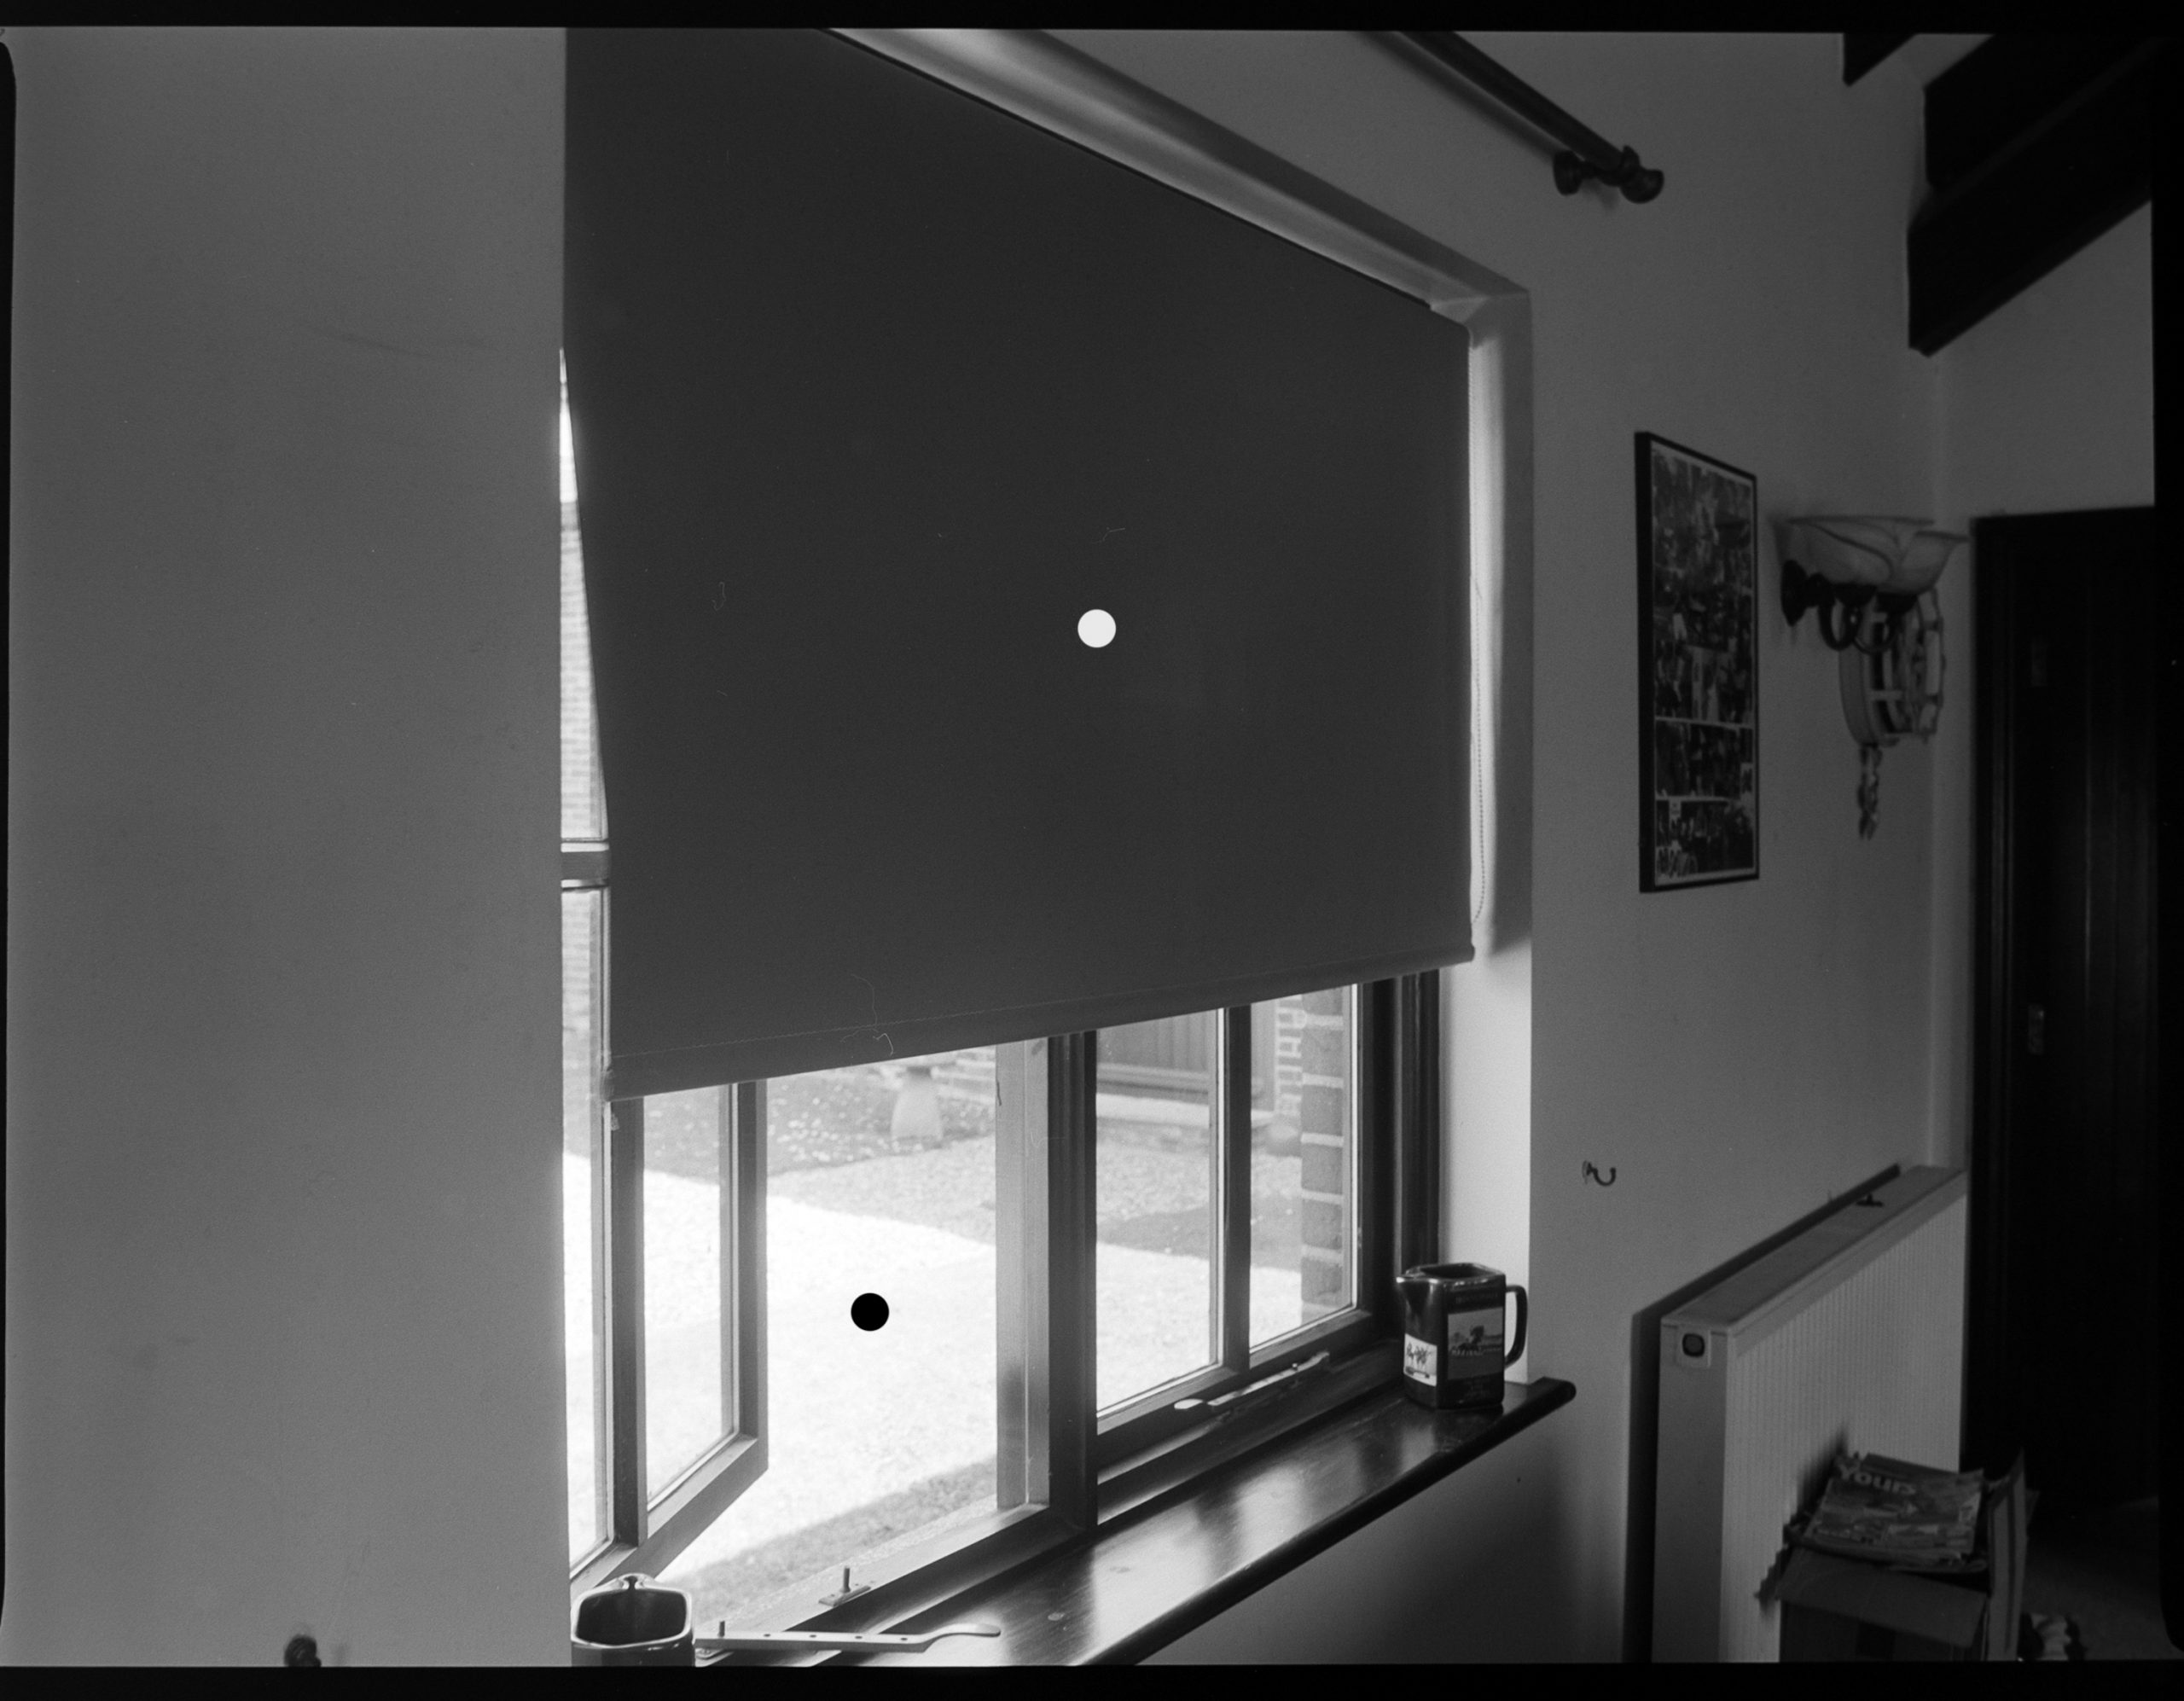
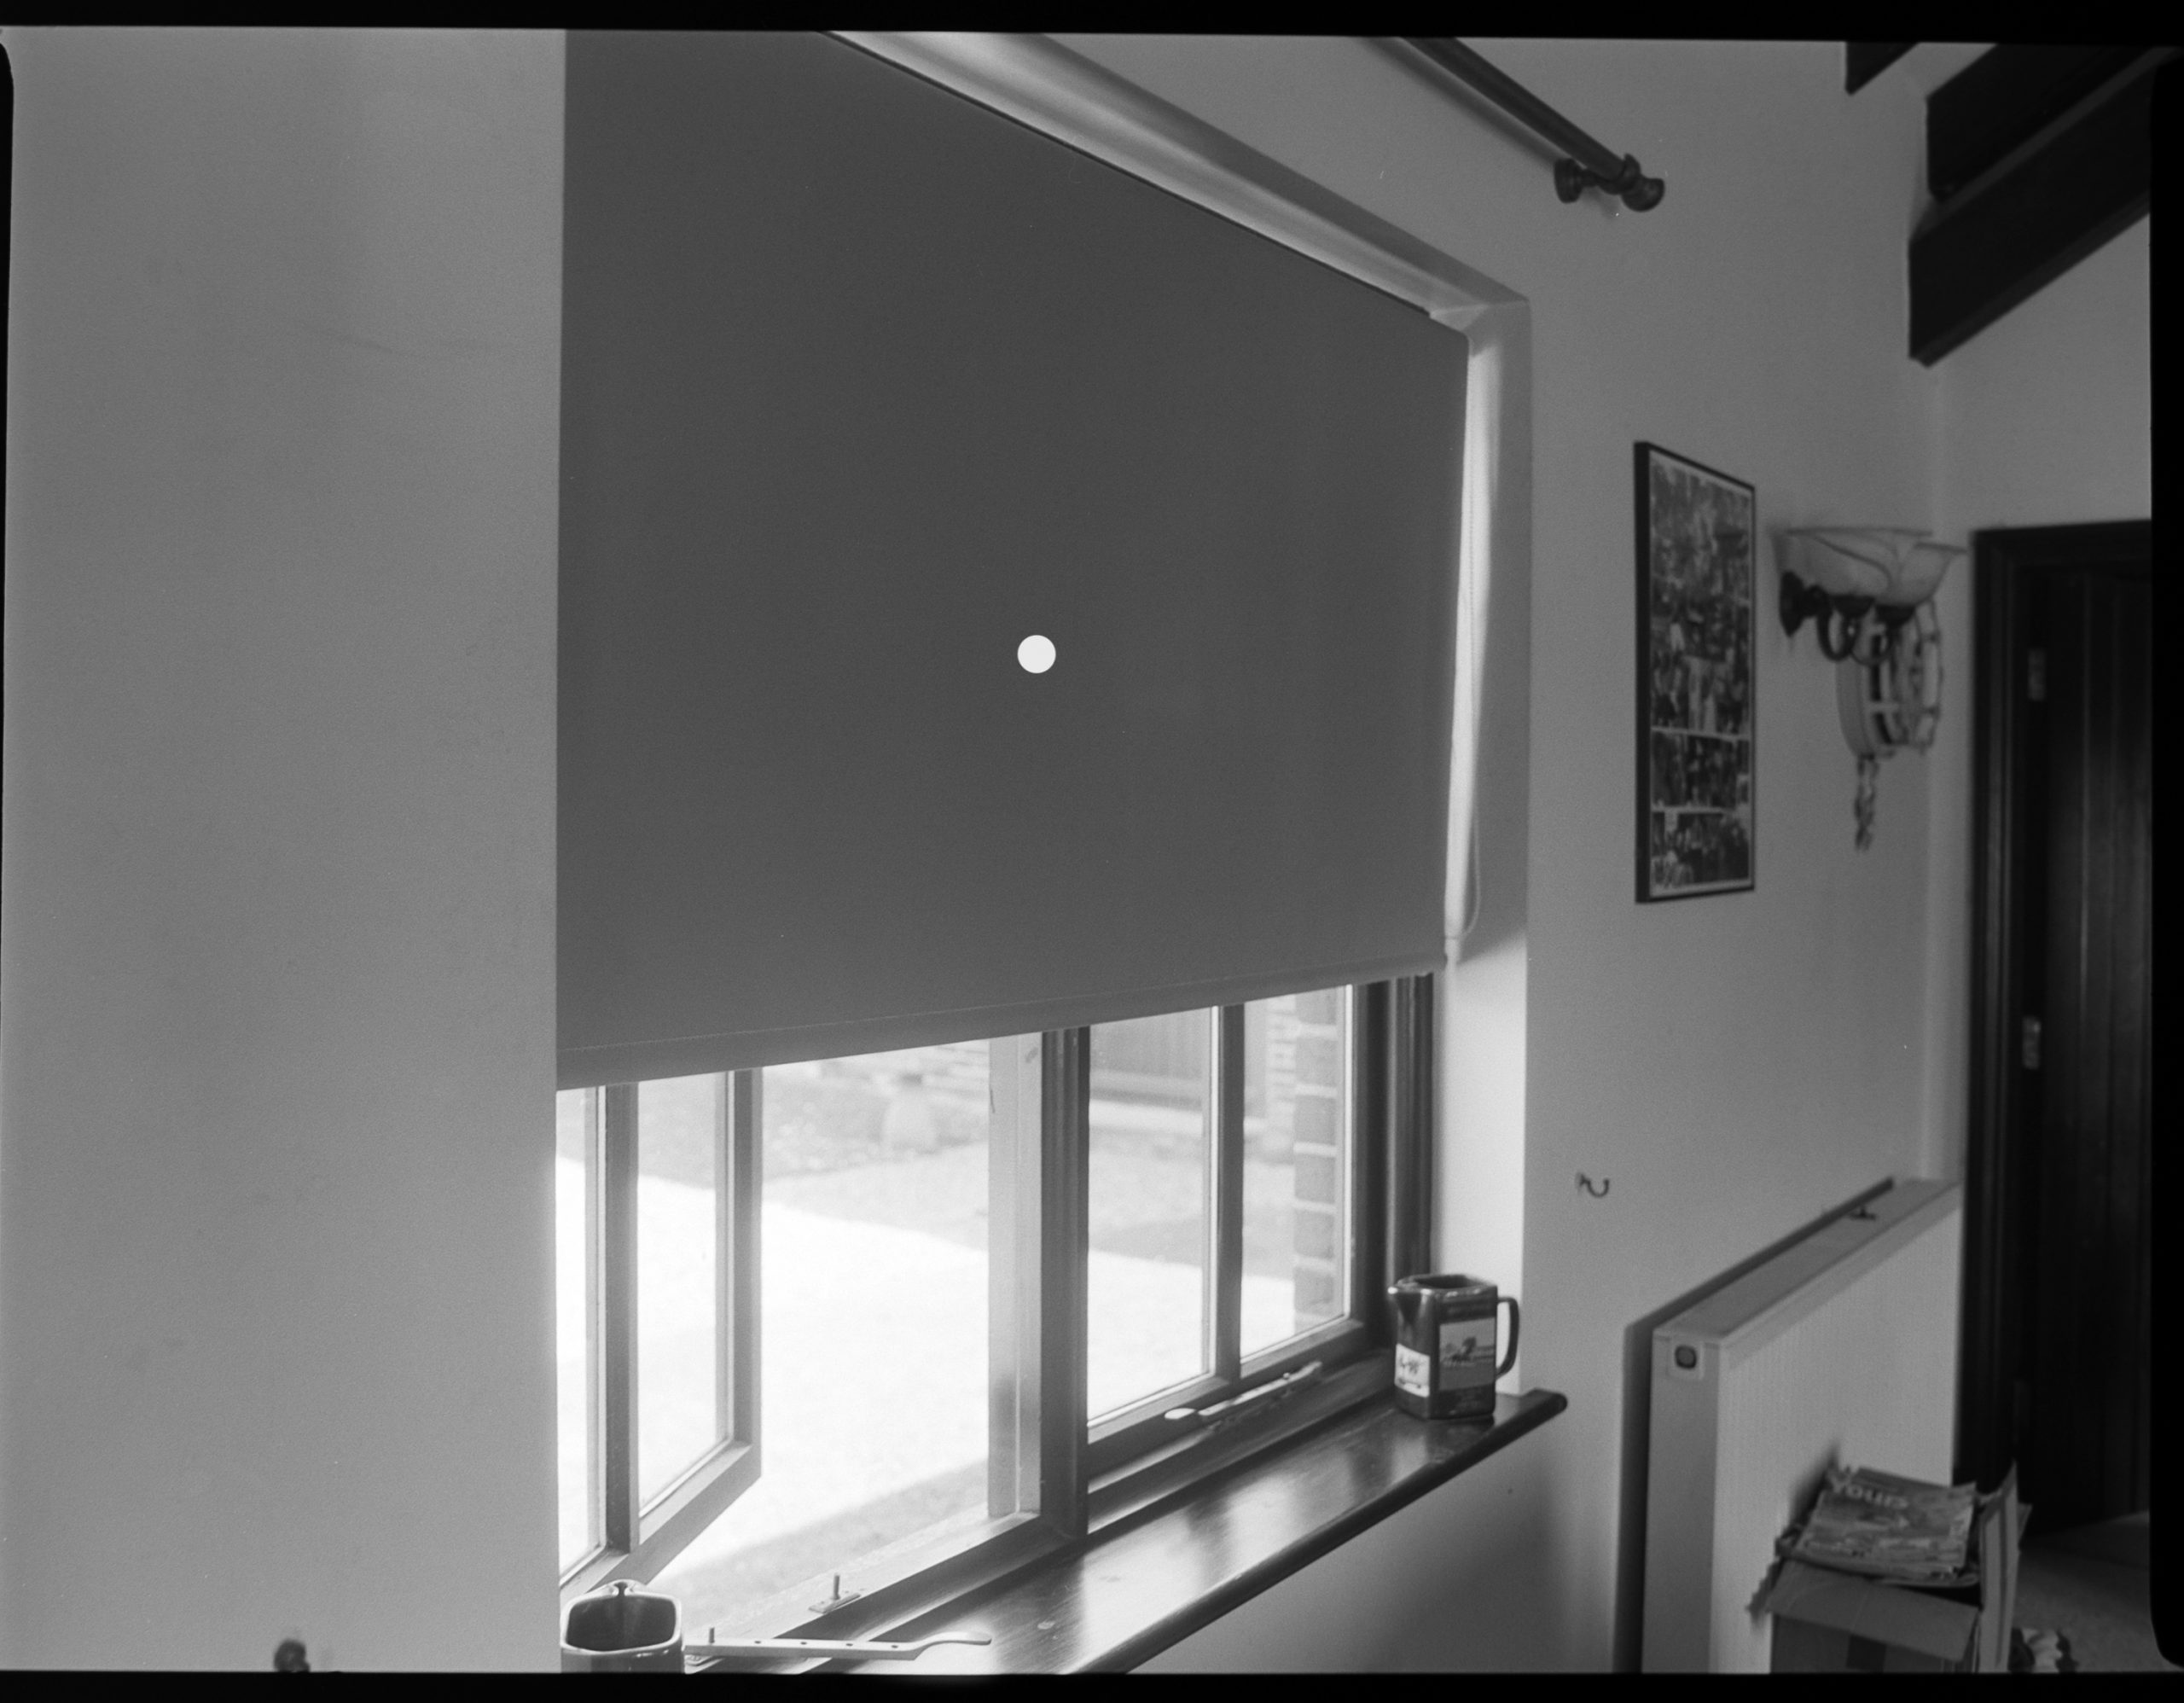
11. Window. Spot meter on the Bright area. Spot on the shadow area. Shoot the average. F11 1/4s EXP
12. This time I spot metered on the curtain and stopped down 2 stops from what the meter said. F5.6 1/4s EXP. Didn’t do as well as averaging. The outside was blown out.
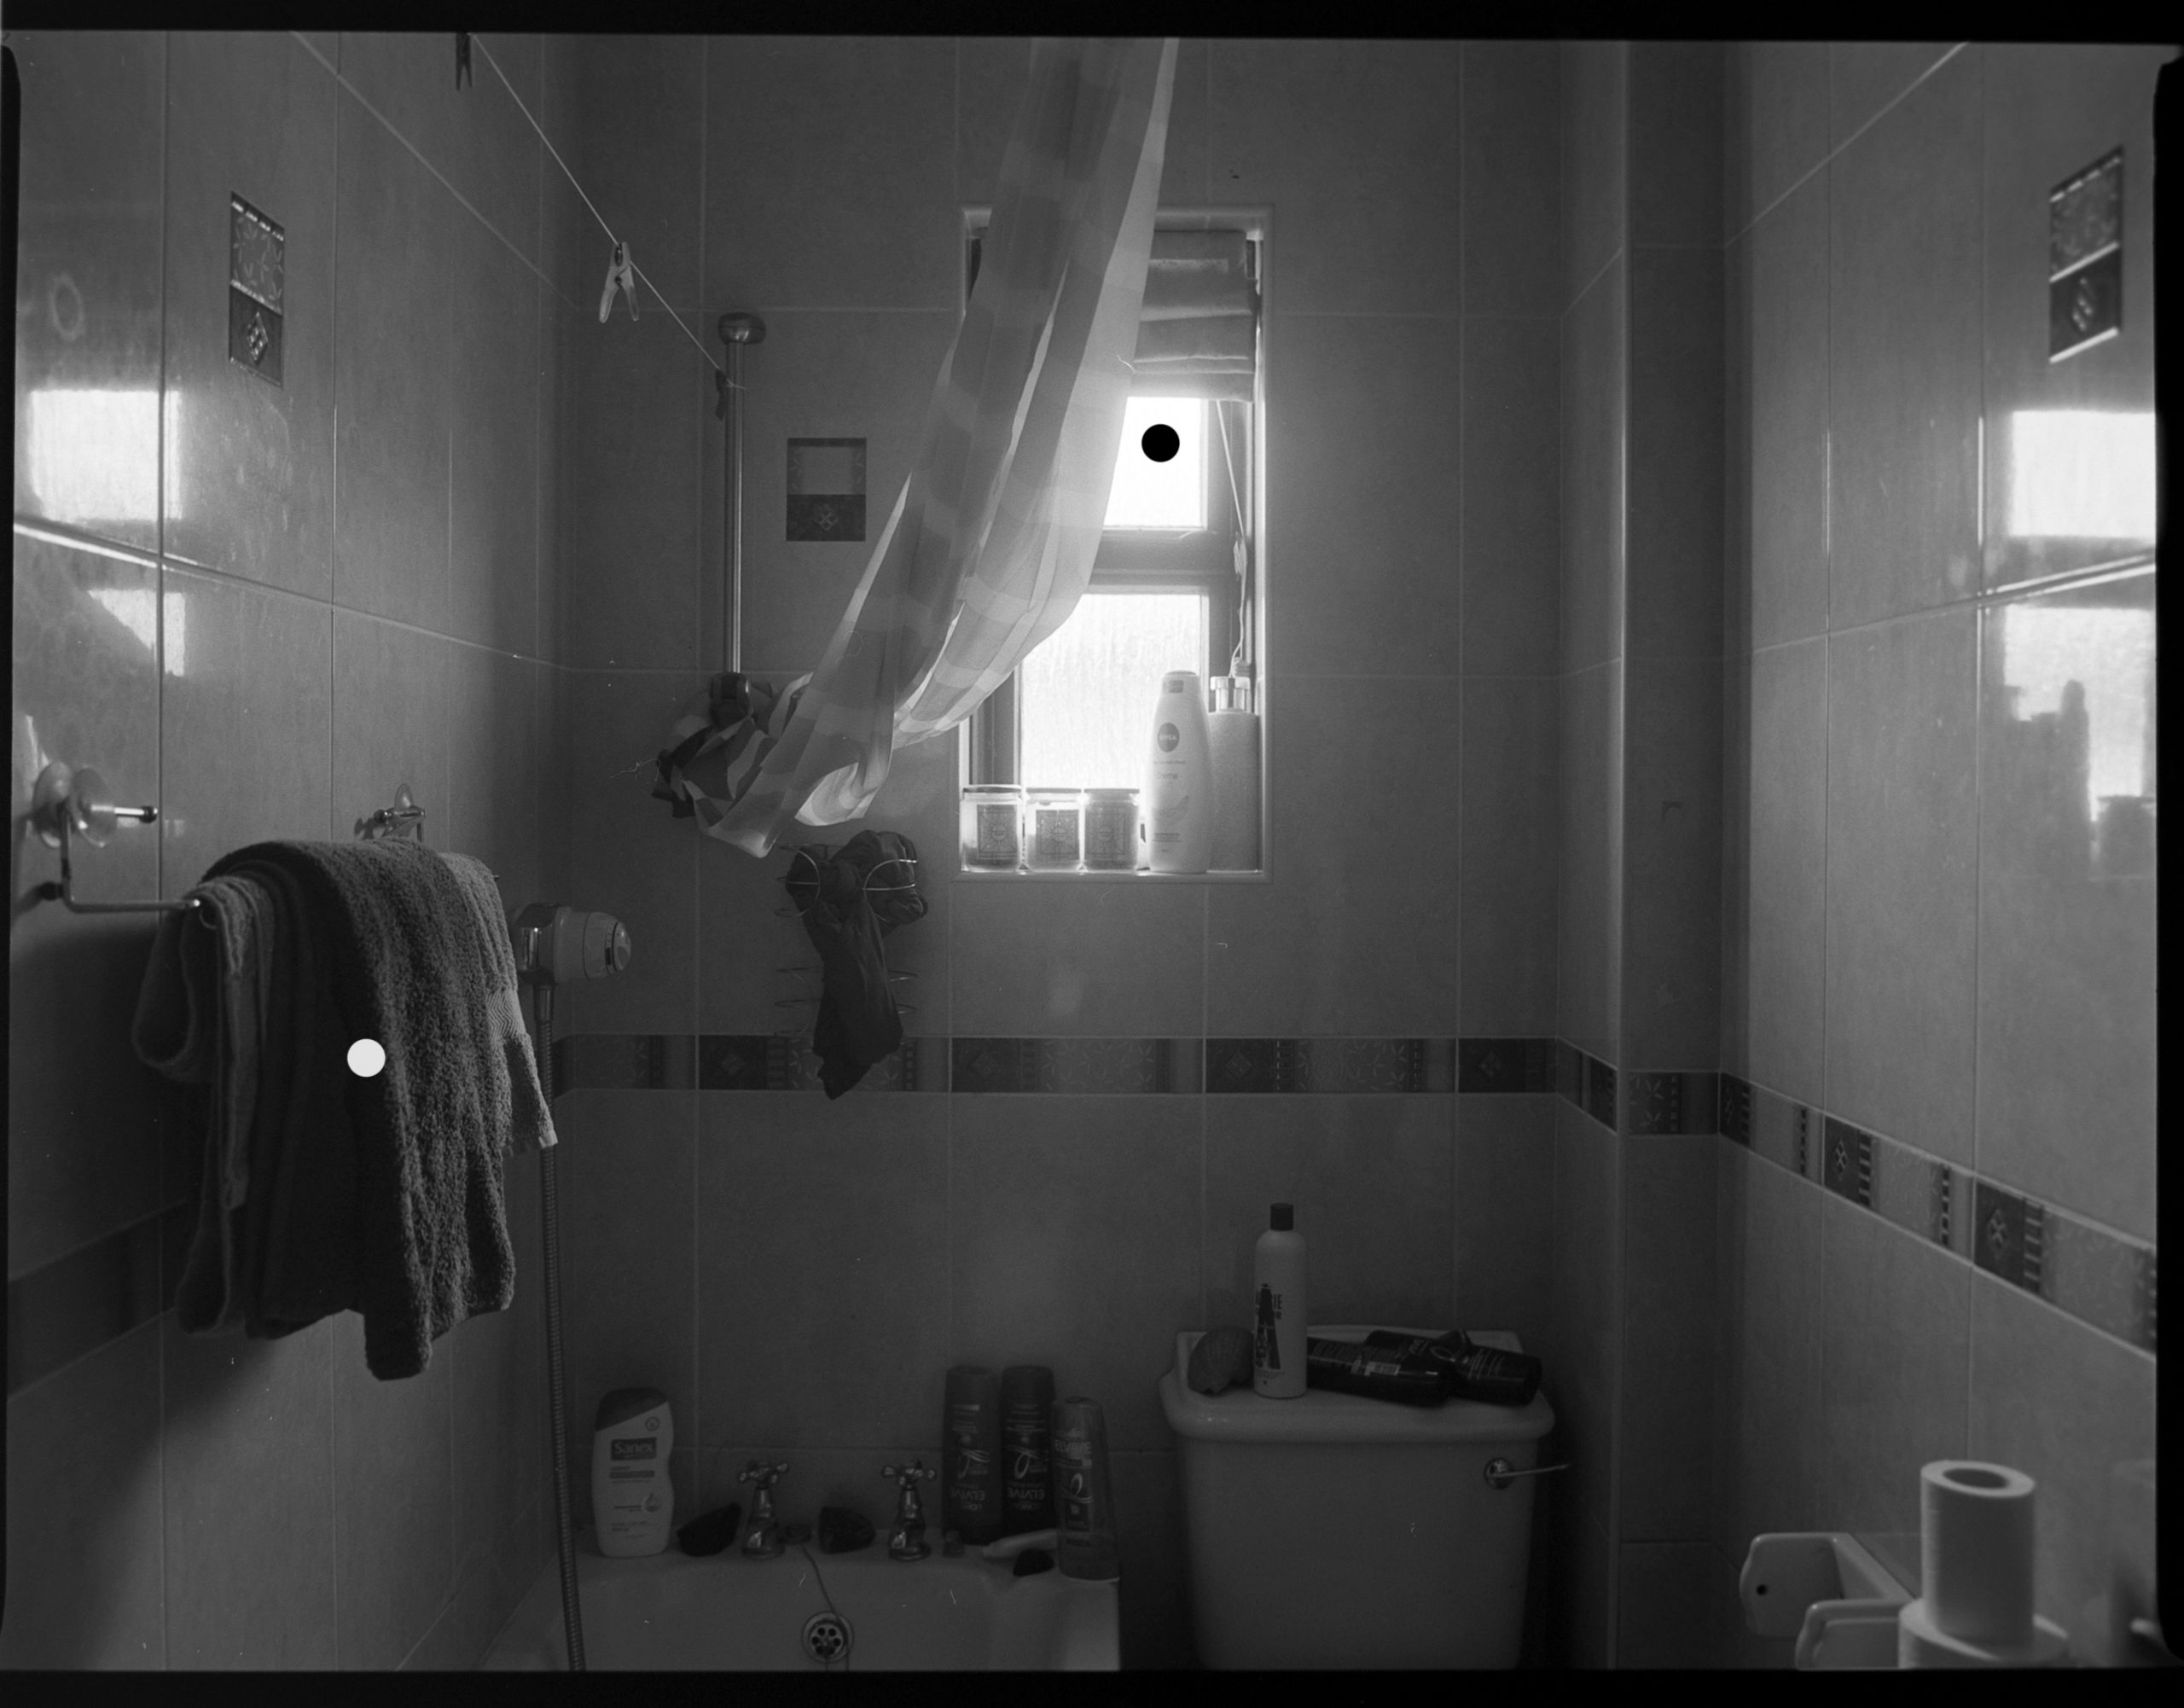
13. Bathroom. Spot meter on the Bright area. Spot on the shadow area. Shoot the average. F5.6 1/4s EXP
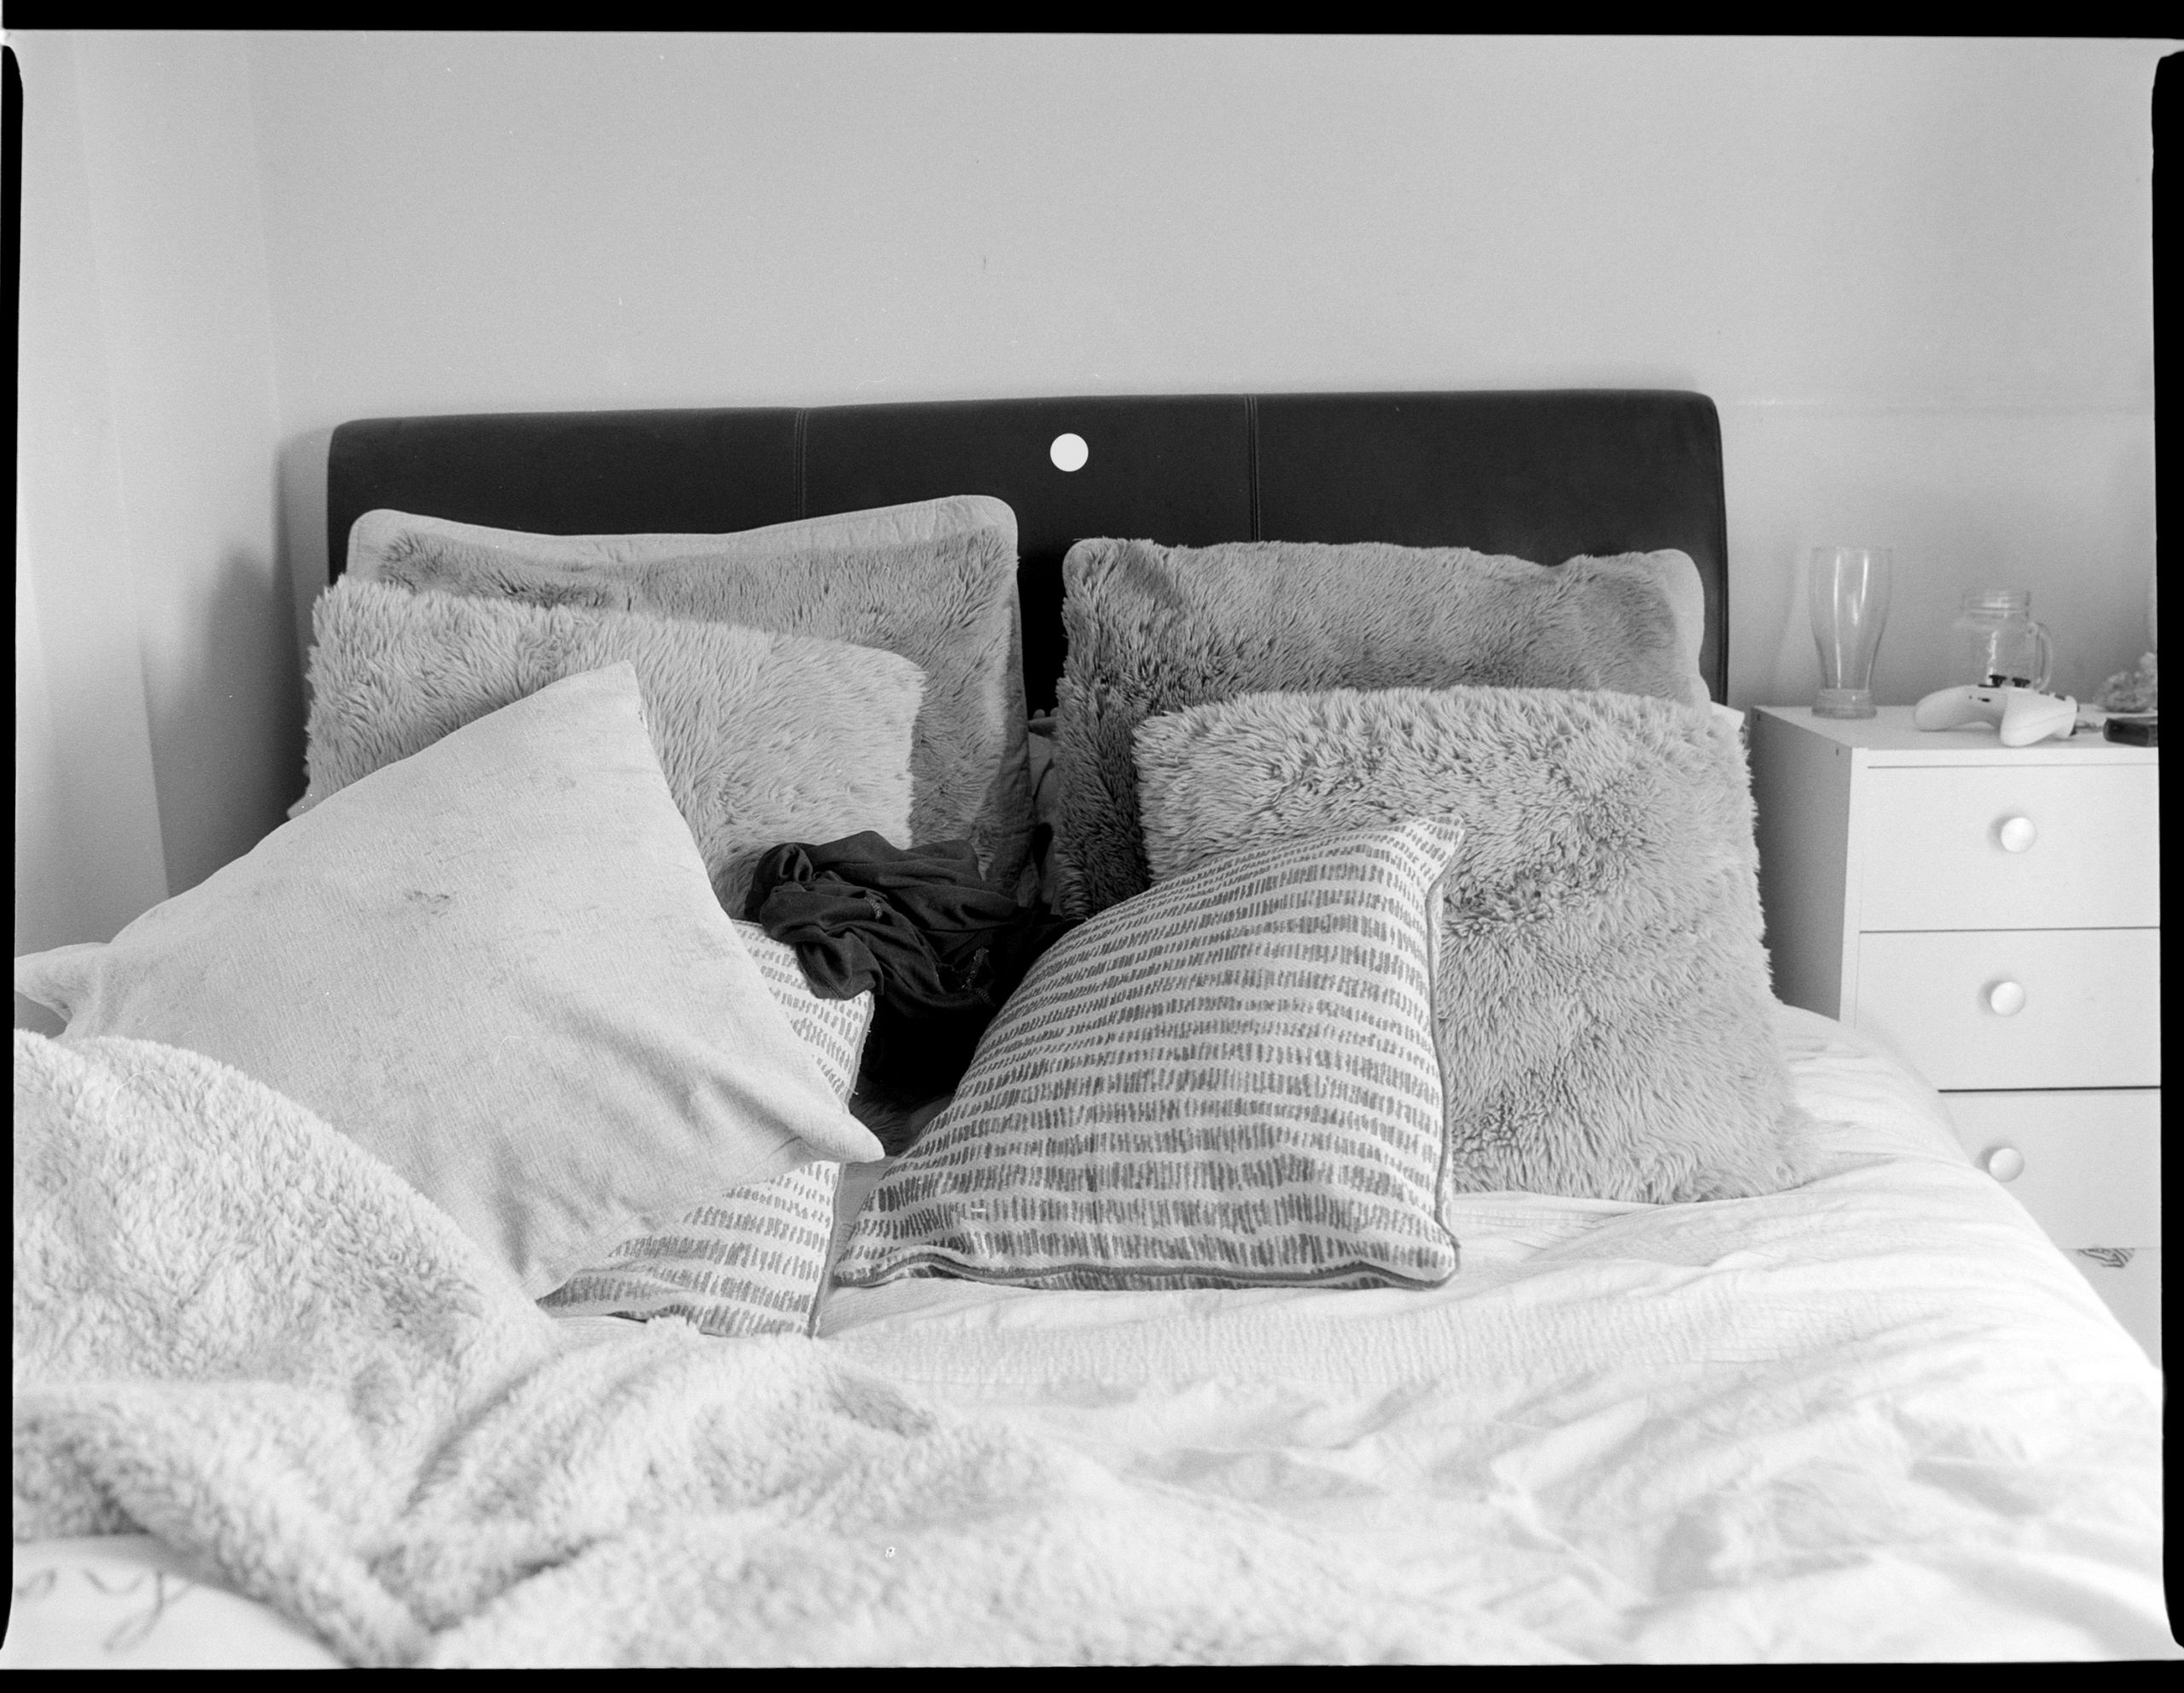
14. Bedroom. Spot metered on the headboard. Again, middle grey the meter gave me and I stopped down two stops f5.6 1/2s EXP.
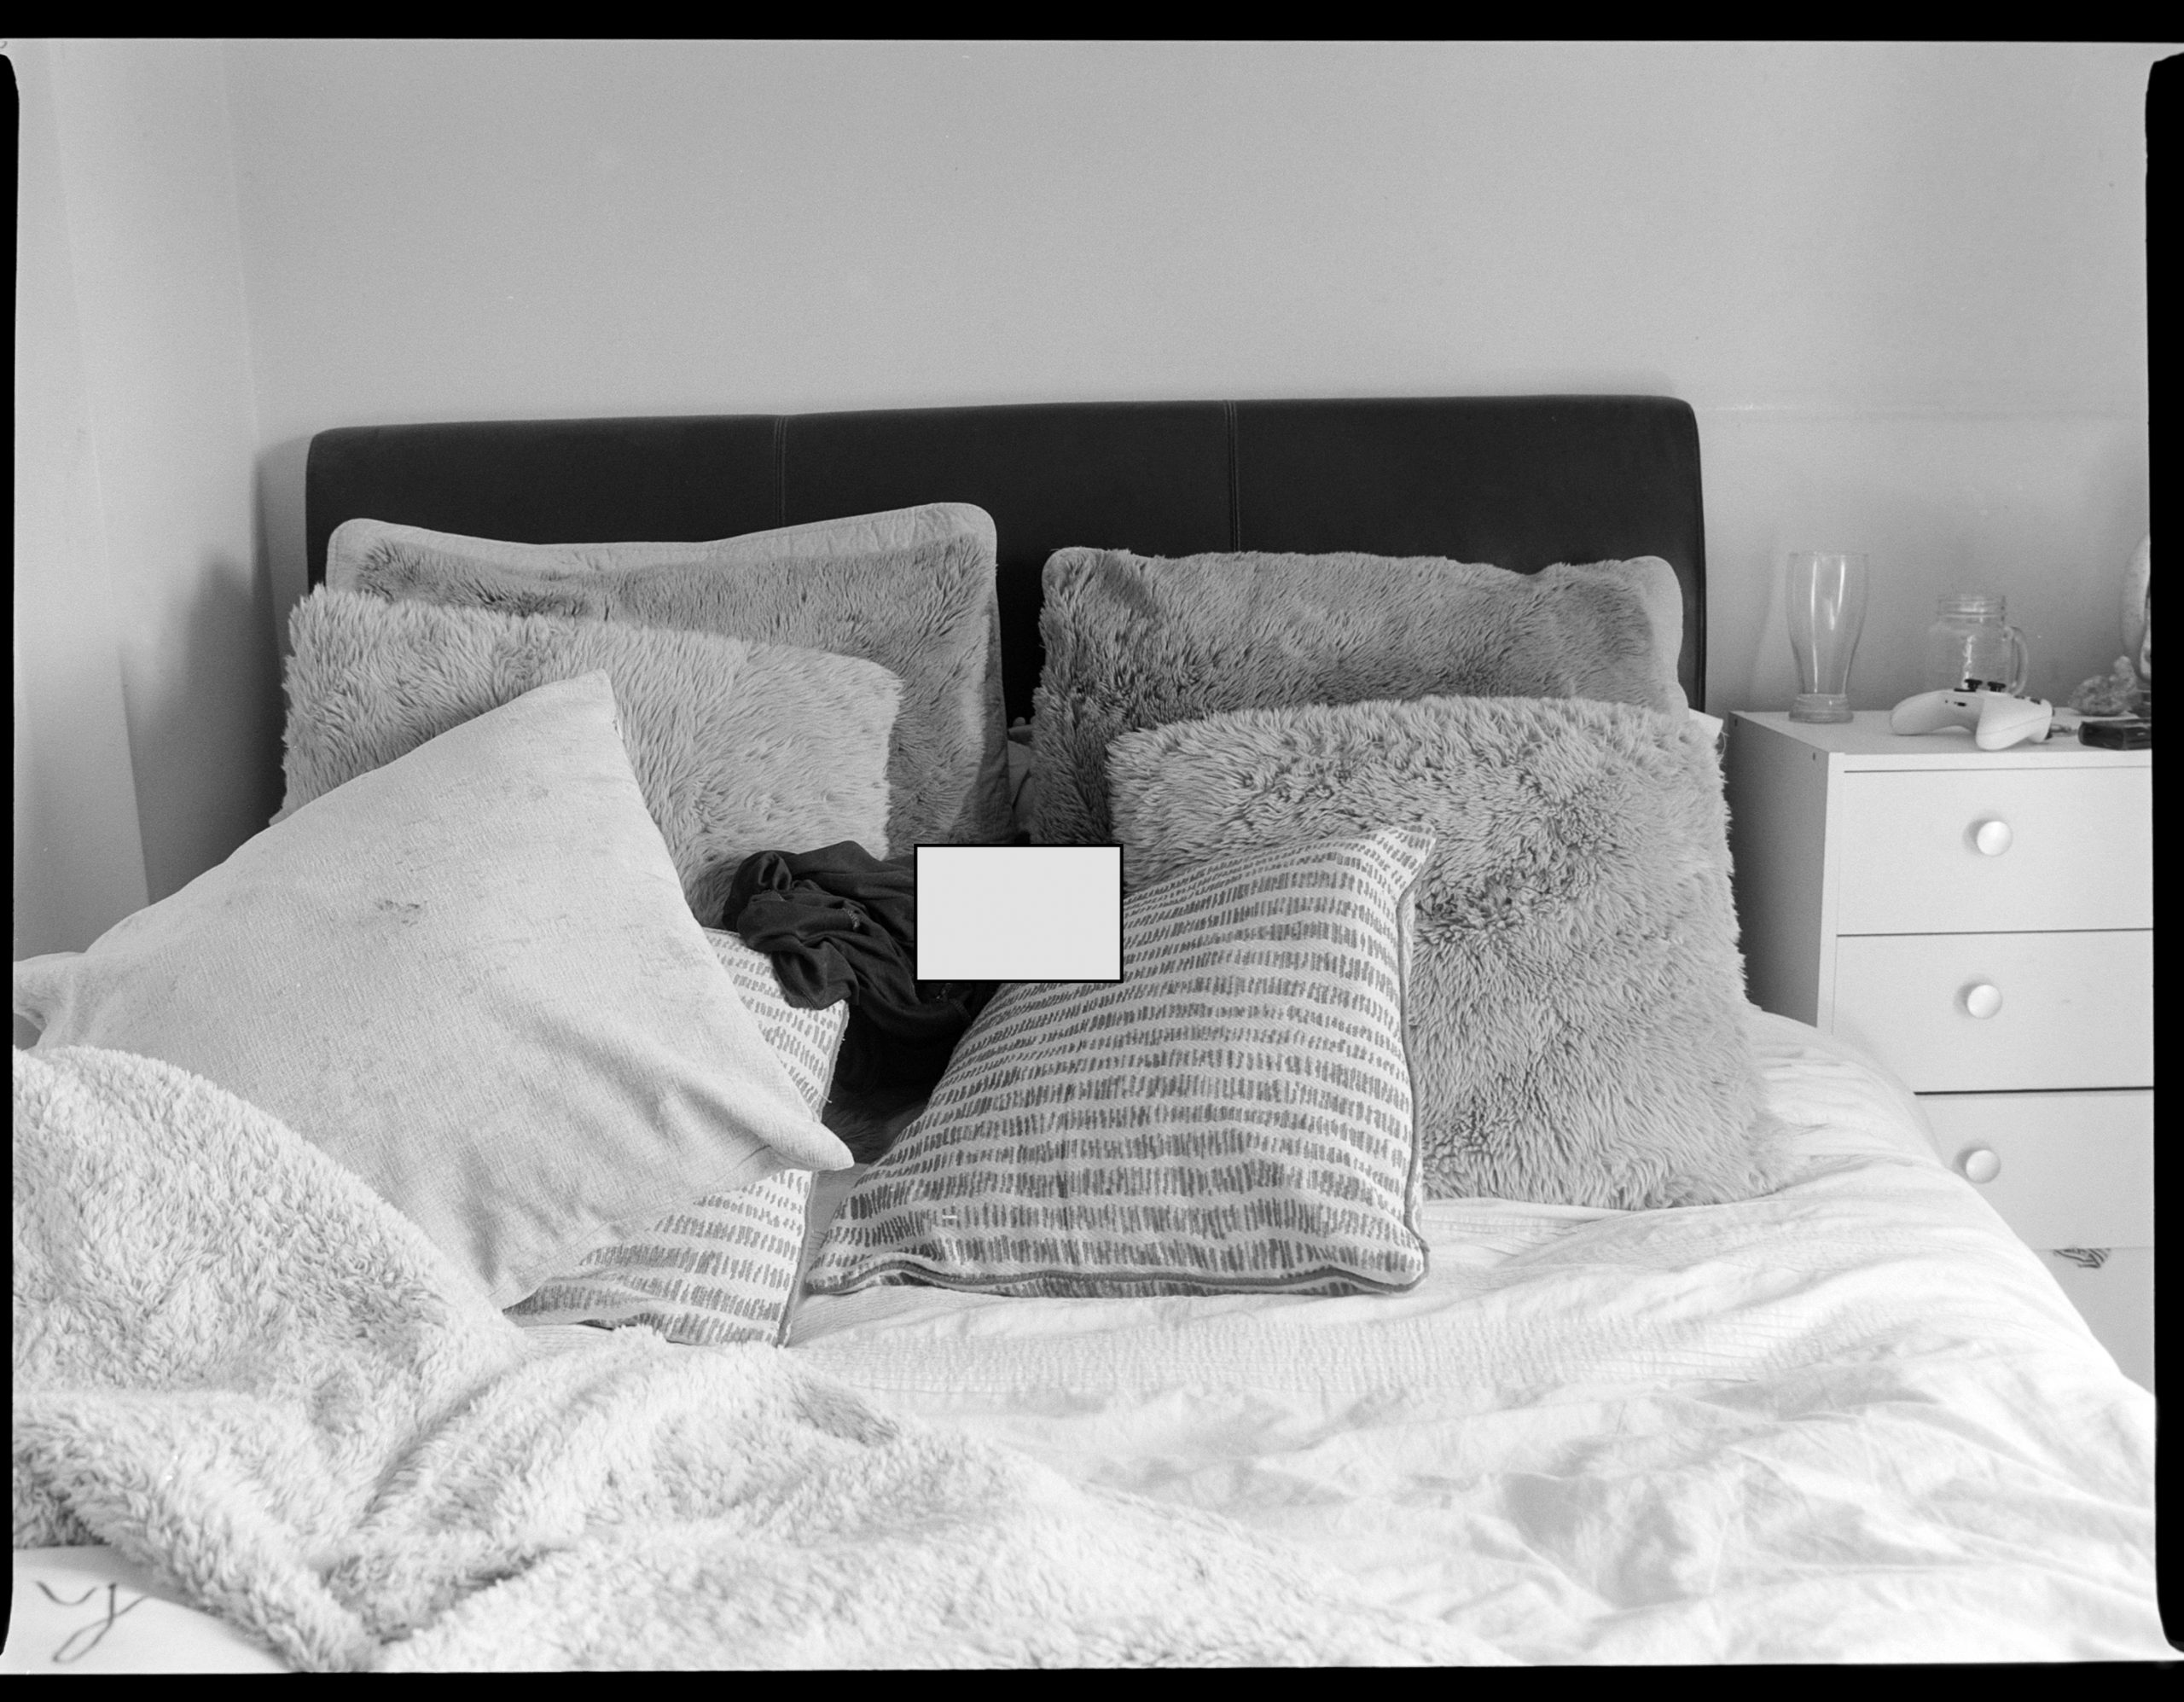
15. This time I used a grey card to meter from. This time the meter read f11 1/2s. I found this interesting. Both look very similar despite 2 stops.
So these are the kind of things I play with when I’m bored or wondering about things. Had I shot this film at 80 ISO and developed normally some of these images would have looked for more contrasty losing detail in the shadow areas. By pulling the film I was able to stop the development building up too heavy in the shadow areas making life easier when scanning or in the darkroom making prints.
Adox CHS 100 II a few shots
Thanks to SFLaB Patron, Tim Soderstrom, Texas, that sent me some 3D Printed negative carriers for my enlarger in the darkroom and also a roll of Adox CHS 100 II to shoot.
I have shot this film before but many years ago. From what I remembered
Adox state on their website the following –
BLACK AND WHITE FILM WITH A CLASSIC LOOK
We have tried to match CHS 100 II as closely as possible to CHS 100 type I featuring:
- a rock solid classic emulsion system which has been out there for decades
- a sensitization close the one of the old CHS 100
- a single layer emulsion
- the same base material including the option of reversal processing
- an optimized backside coating to fully prevent light piping if the film is loaded in subdued light
- a special anti halation layer between the emulsion and base for enhanced sharpness
- a full set of formats from 35mm to ULF off the shelve
- a state of the art cascade coating avoiding all problems associated with older
I guess they have to say something and out of all the above I like the “a rock solid classic emulsion system which has been out there for decades” quote.
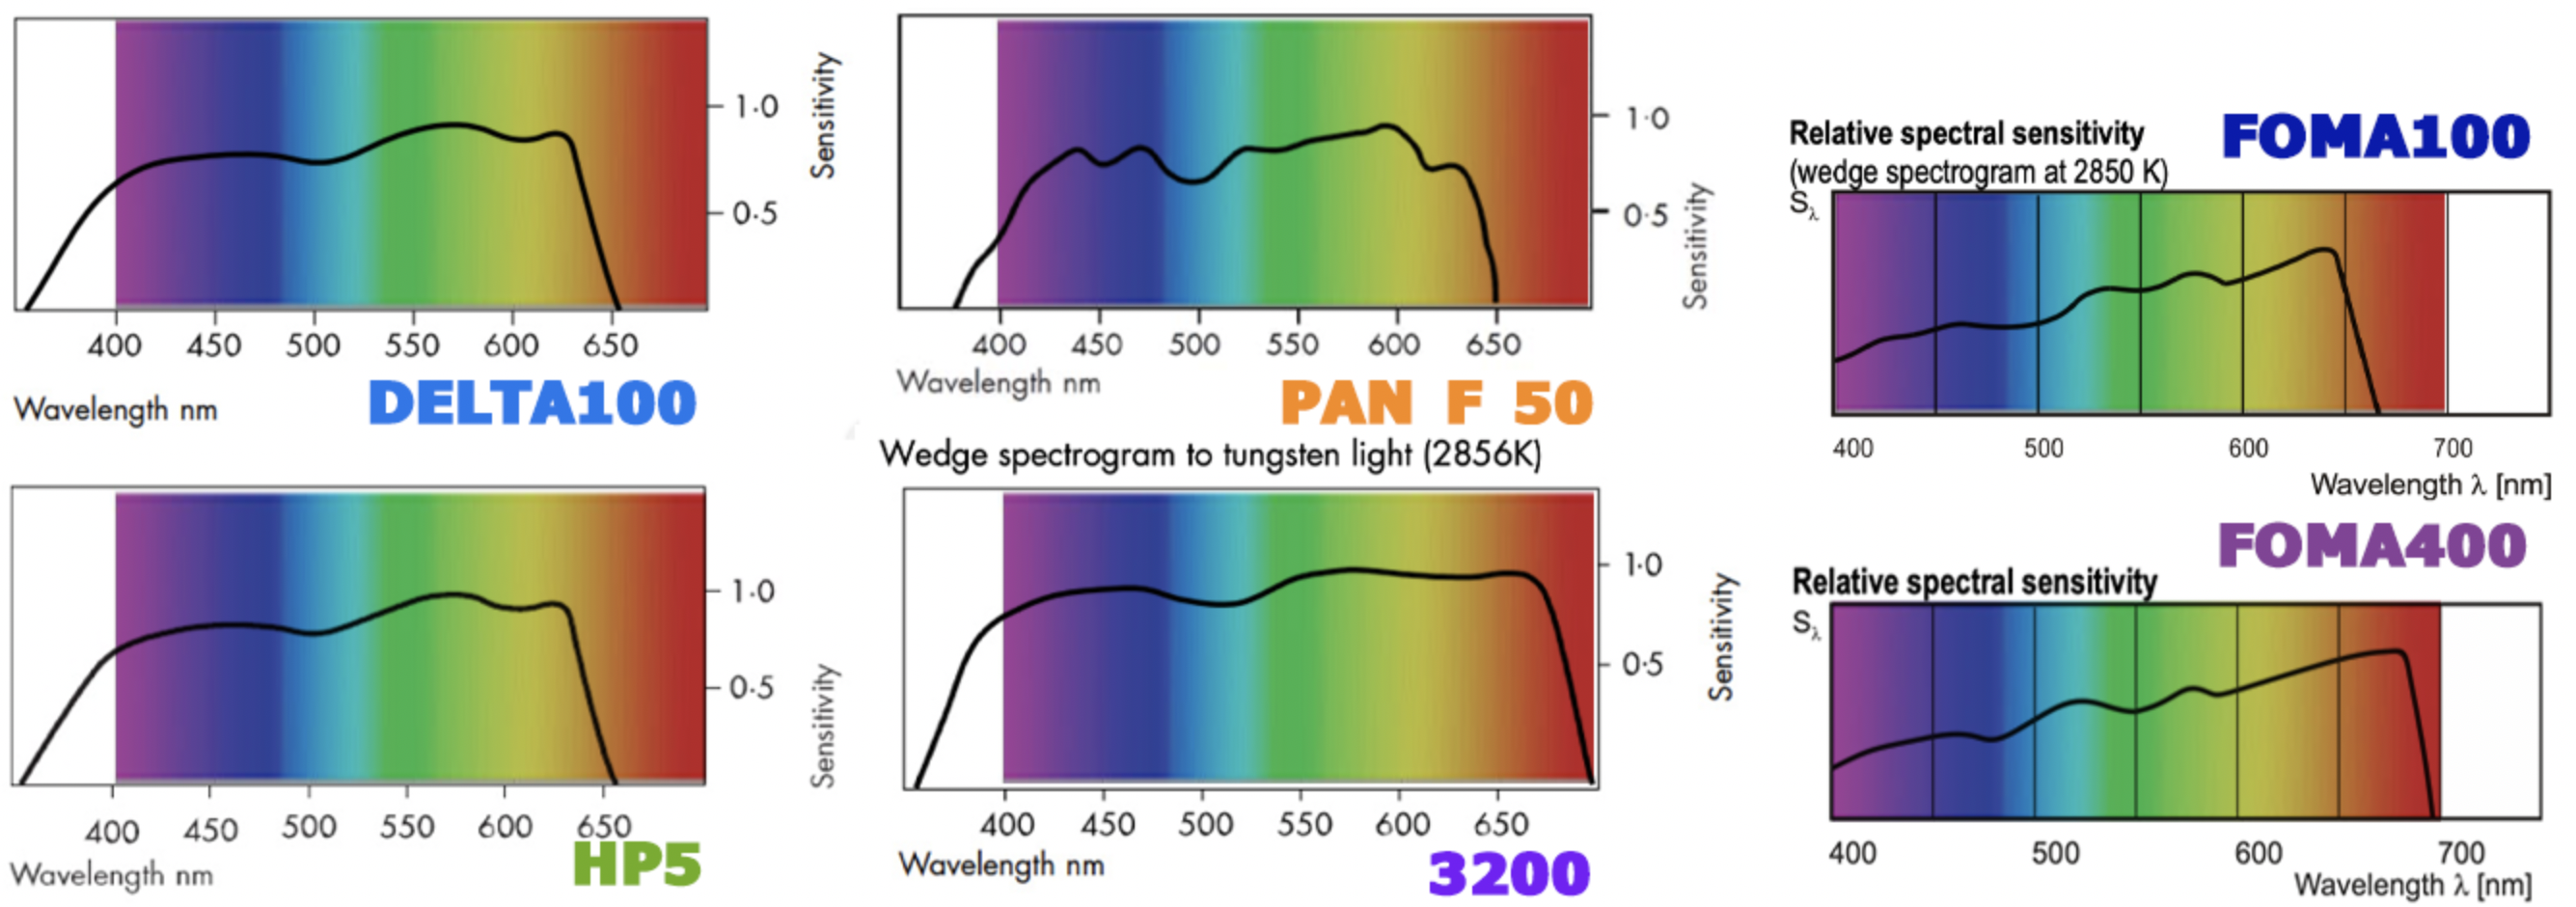
Looking at the data sheet for this film and reading that, as Adox say, “ADOX CHS 100 II is an orthopanchromatically sensitized B/W film with classical grain and a sensitization optimized for greyscale separation” I was interested in the visible spectrum. I always look at this of a film if the information is available.
It’s Orthopanchromatic as, unlike Pan Film, FP4, HP5 etc, it has a reduced red sensitivity. So in a sense you are getting a slight mix of the two.
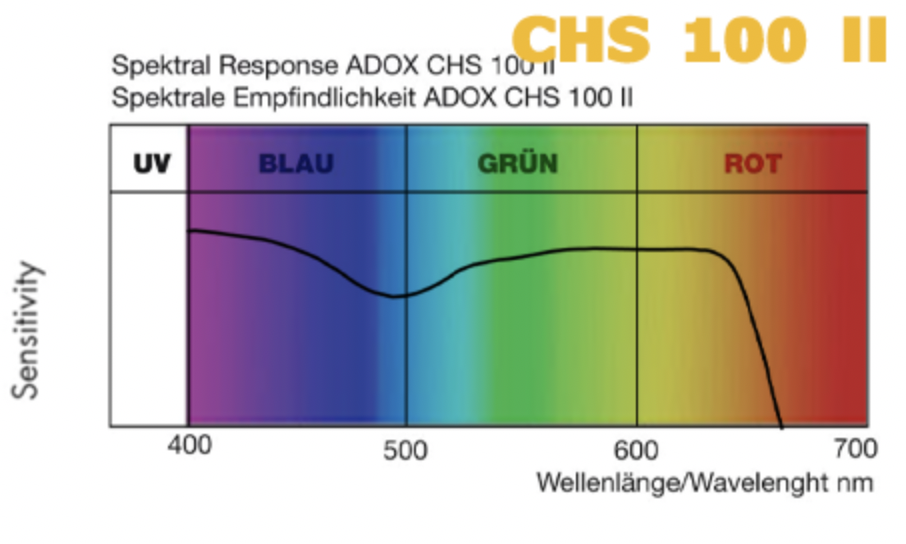
Check out that dip in the purple/blue area compared to other films. That’s packing in some contrast!
So with that in mind I went out on a sunny day with the film loaded in a Nikon F5 to find some subjects where I could see good separation. I developed these in XTOL 1:1 at 20° for 8 minutes as recommended on the data sheet. I can’t see a recommended developer for this film. But it’s a start.
All of these photographs were taken in aperture priority mode and centre weighted metering. Locking the exposure where I needed, developed and scanned using my DSLR.
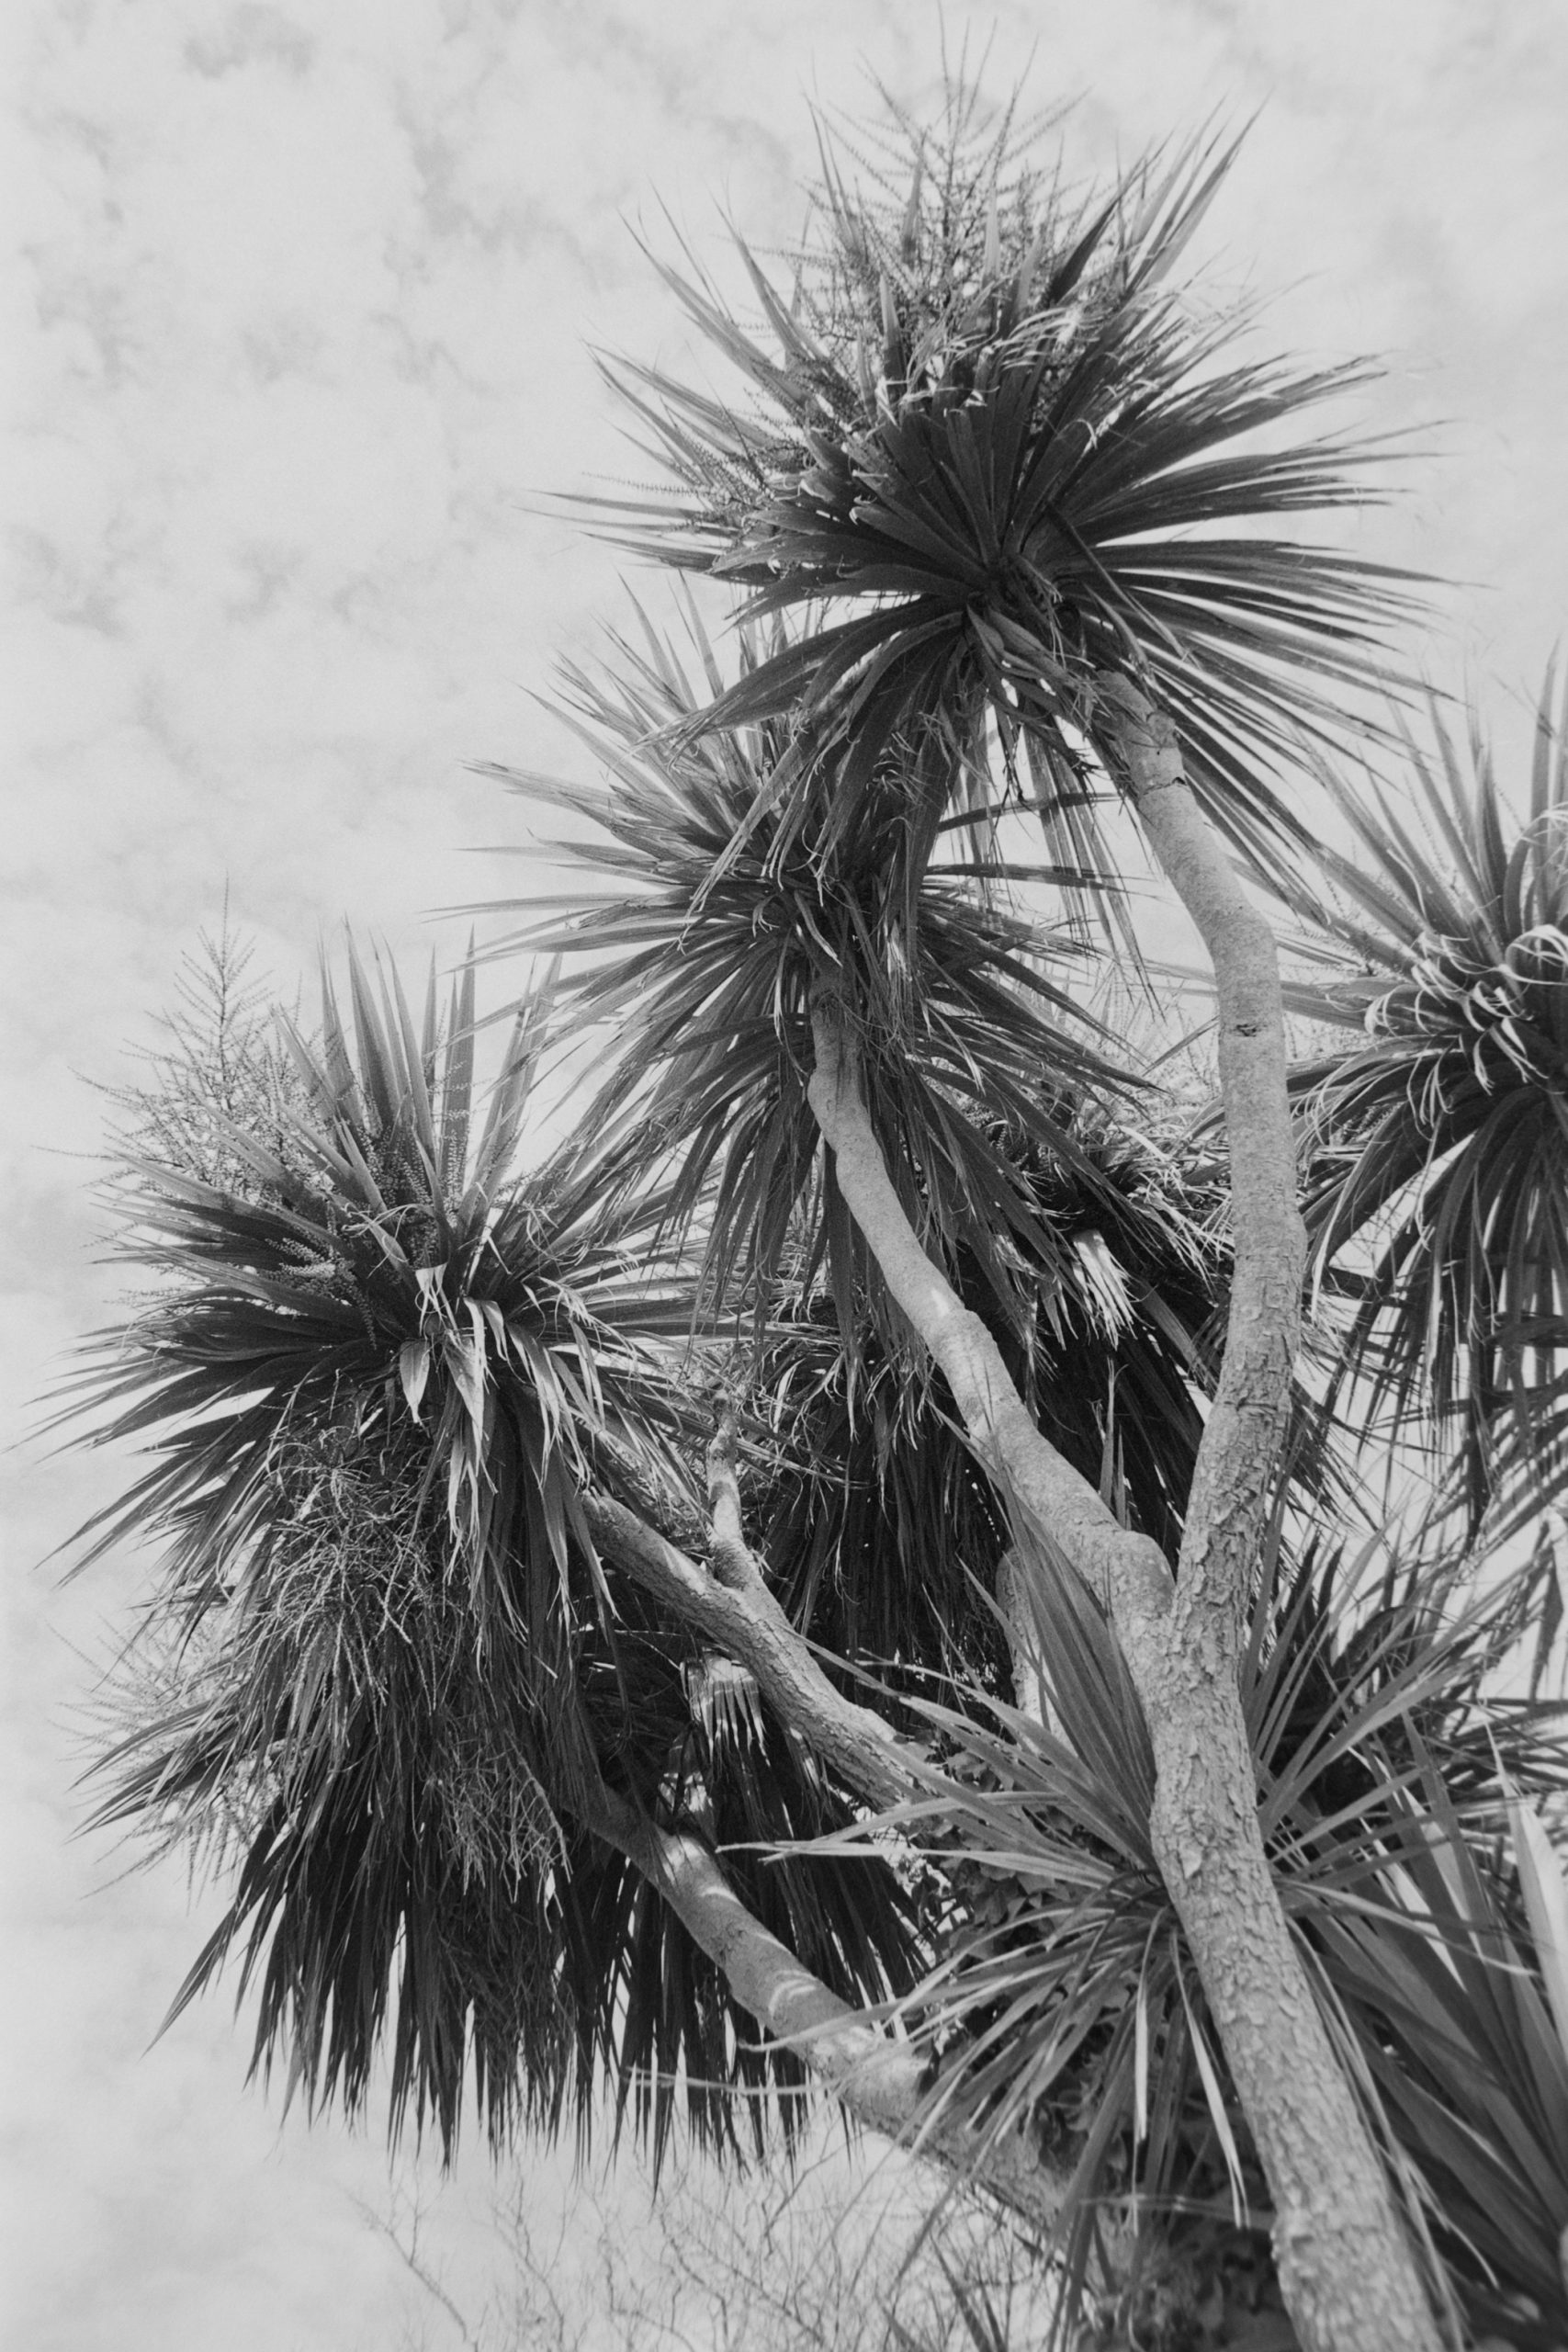
Palm Trees. Wonderful separation here. I metered between the shadows and the sky for an average.
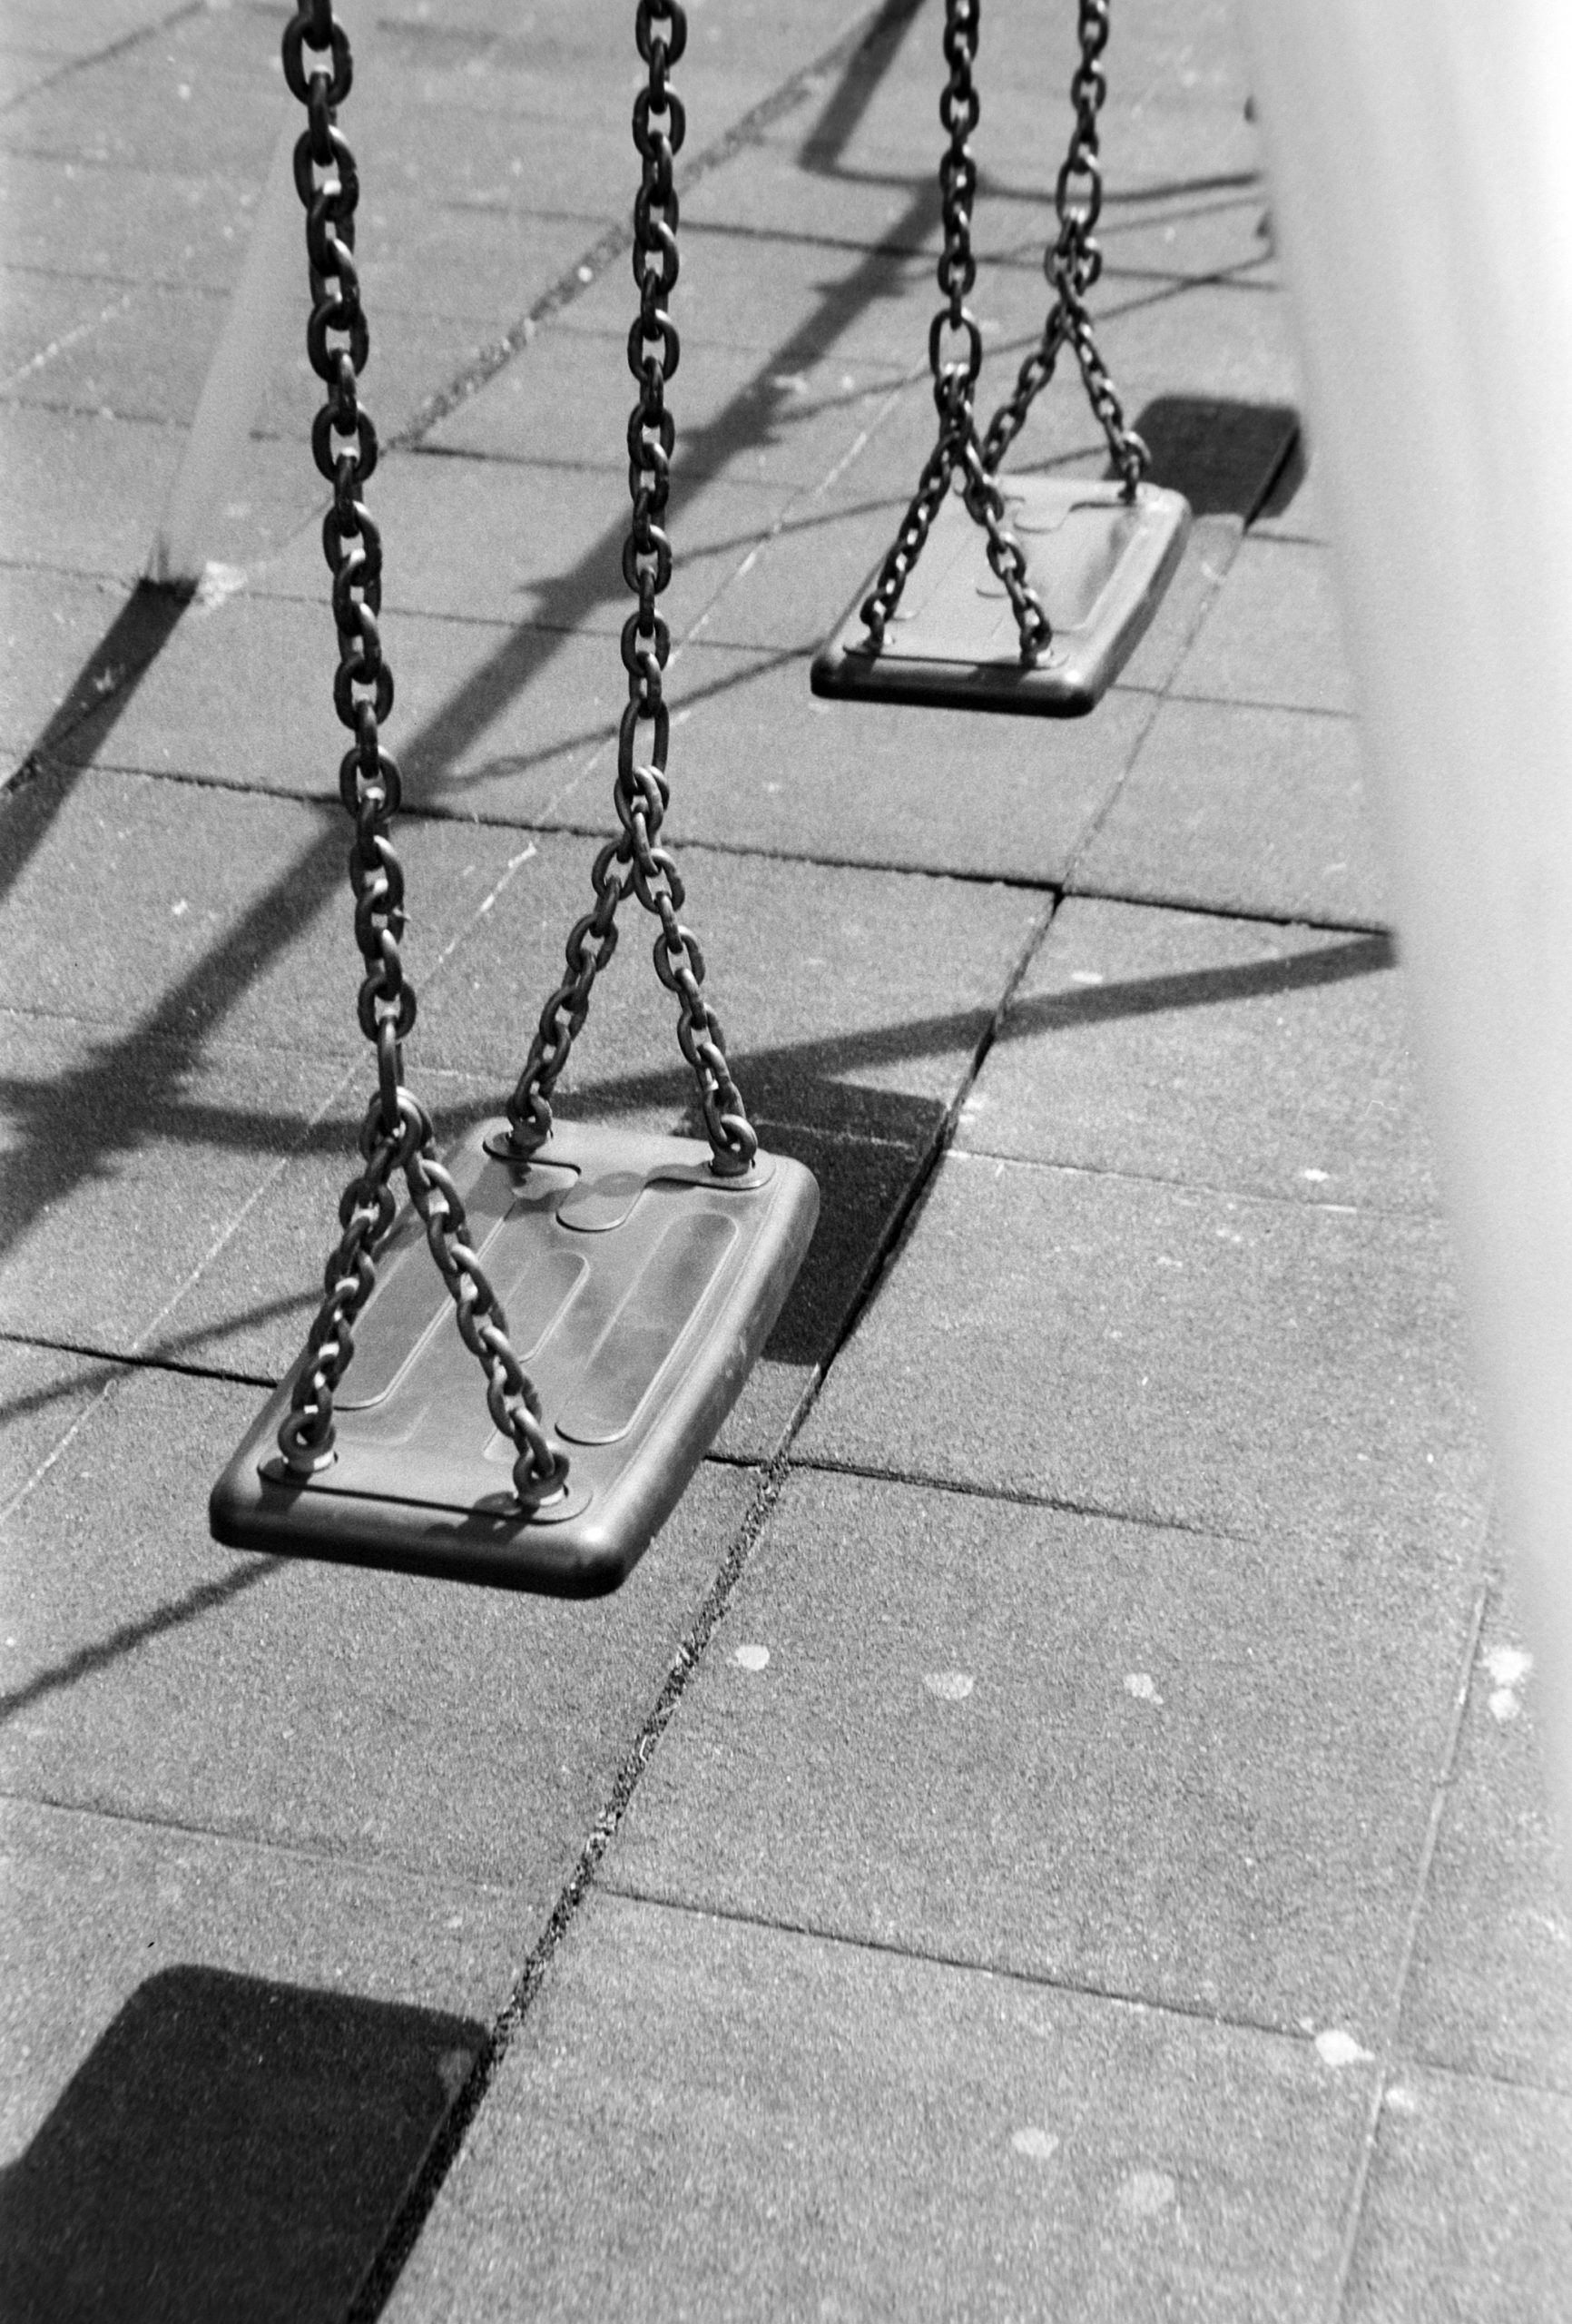
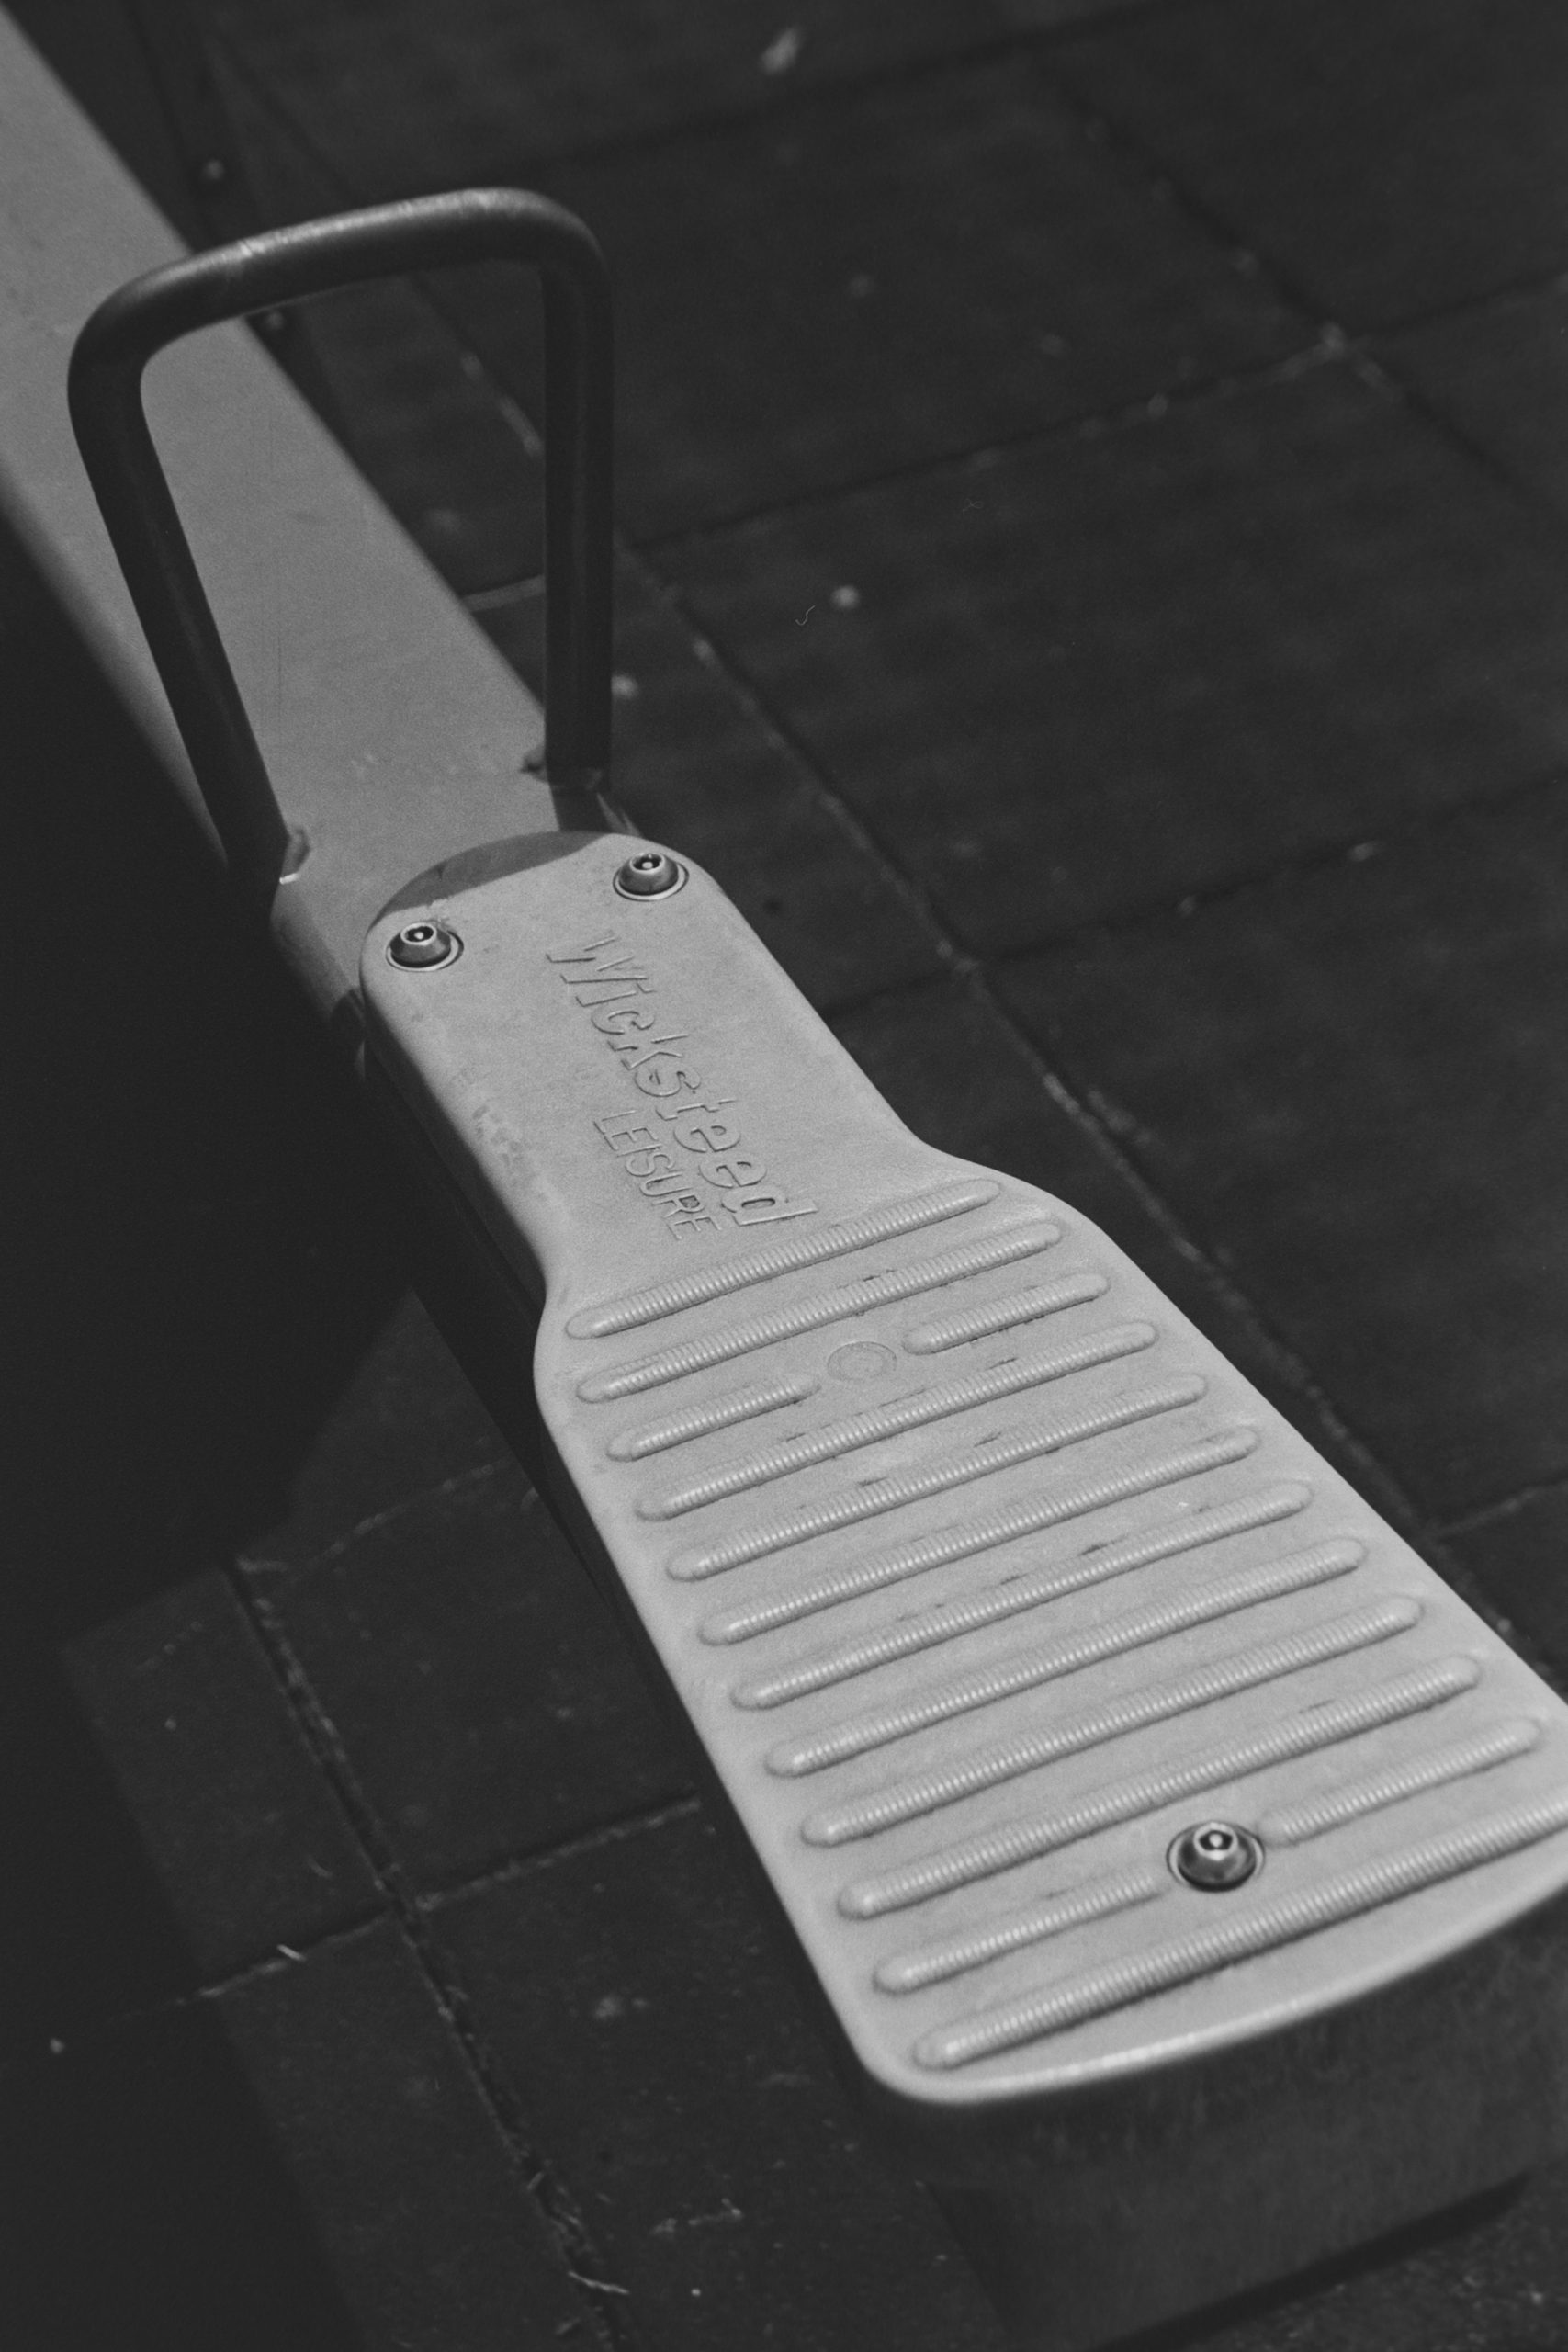
Swings. A dark silver chain and jet black seat and floor. Sun was bright. I can almost see a silvery look in the seat. Again good separation.
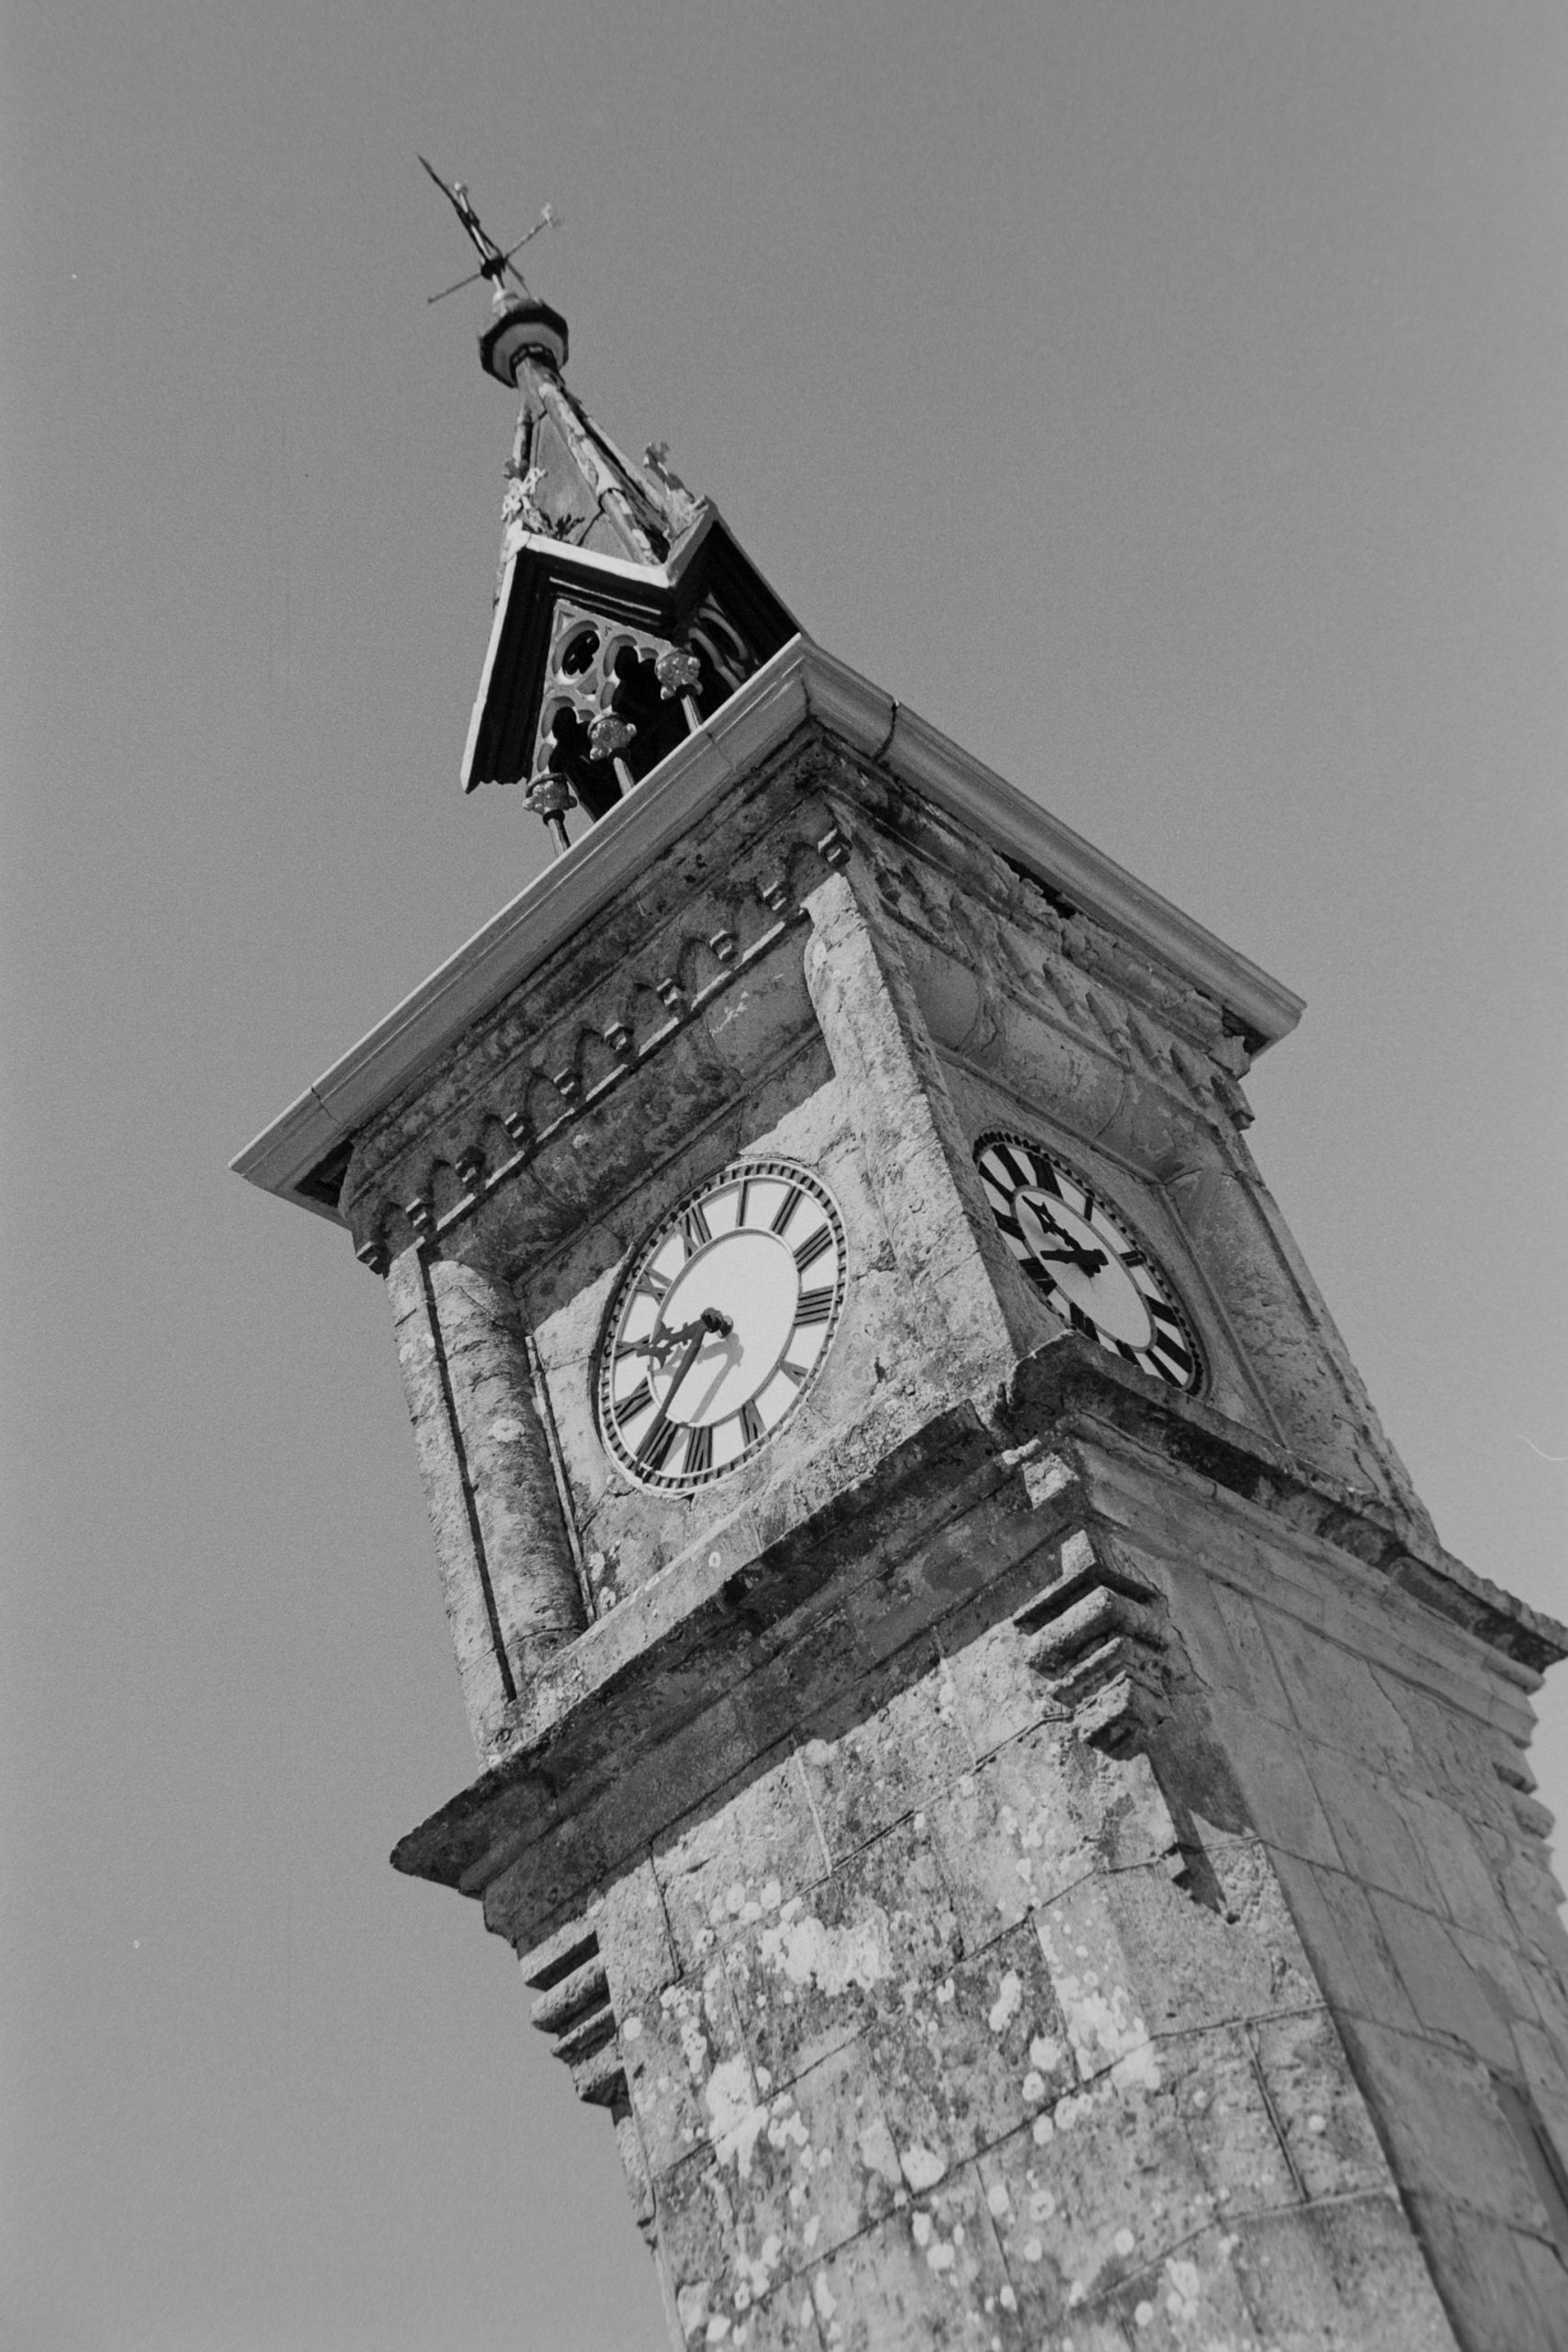
Clock Tower against a blue sky. The tonality is great. And I can now see that steep dip at the blue end of the spectrum in the sky. FP4 would have rendered the sky a bit lighter.
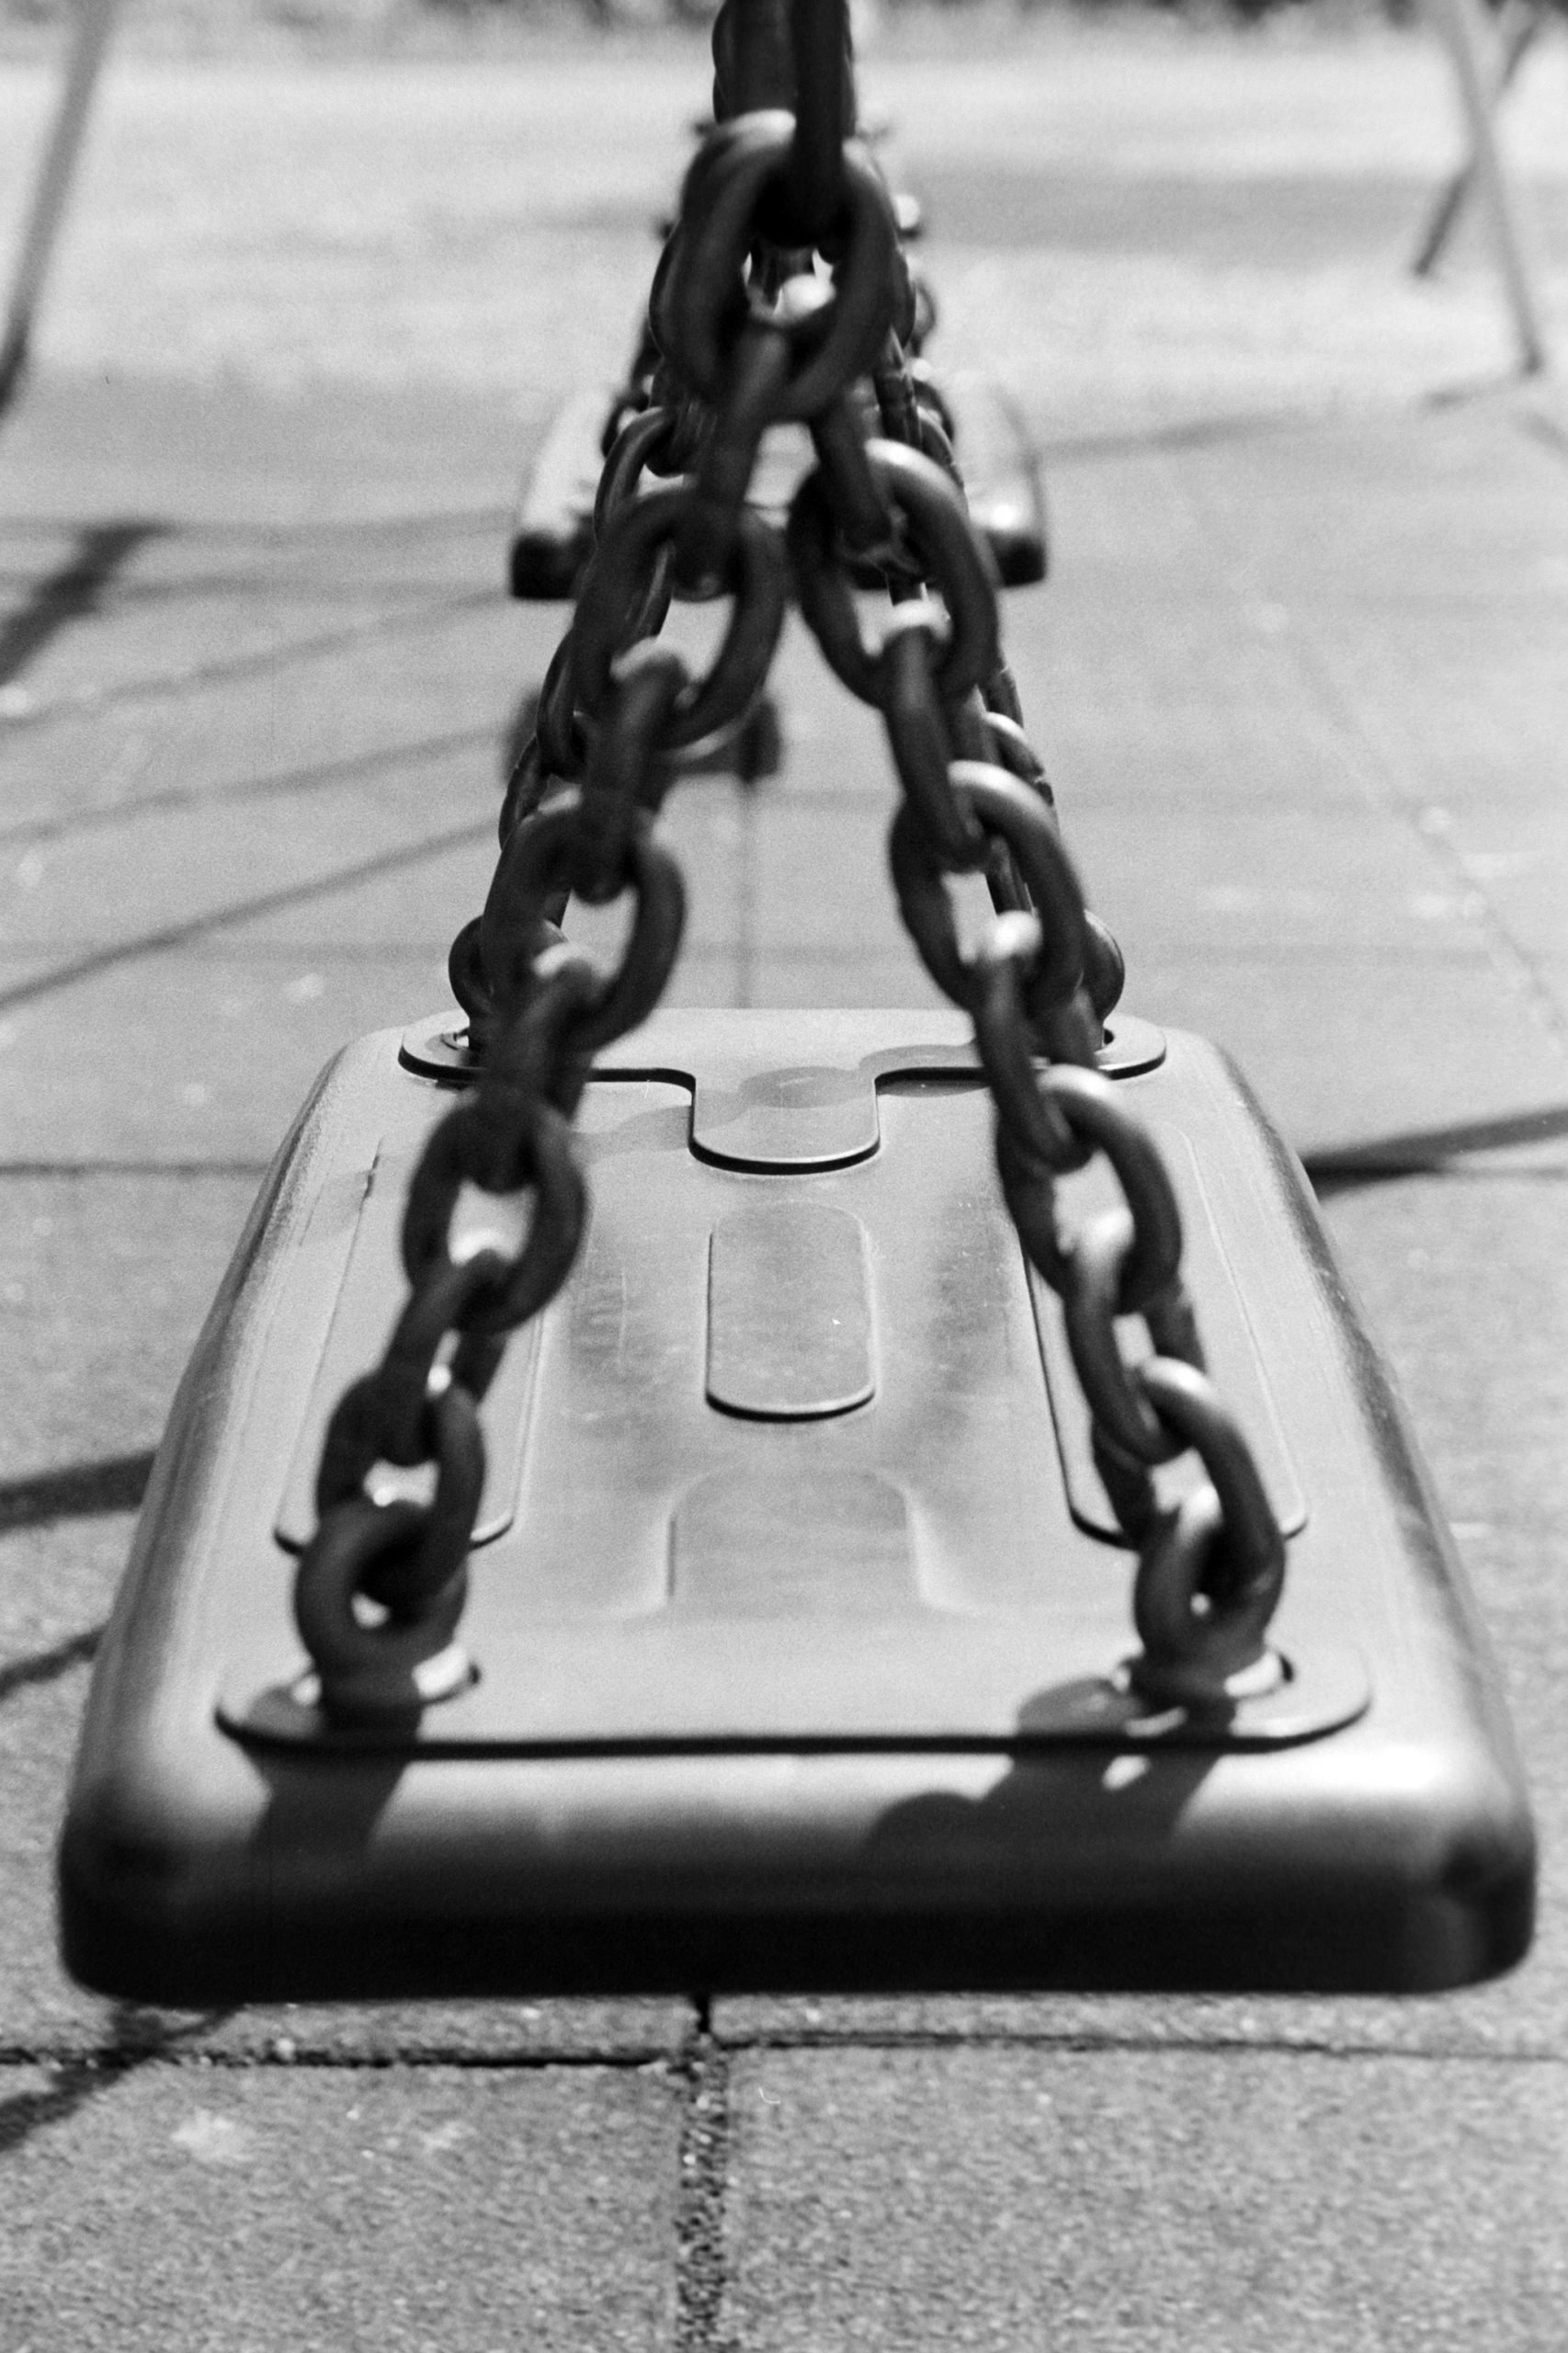
Back to the Swing. That silvery look on the black seat is more detailed here.
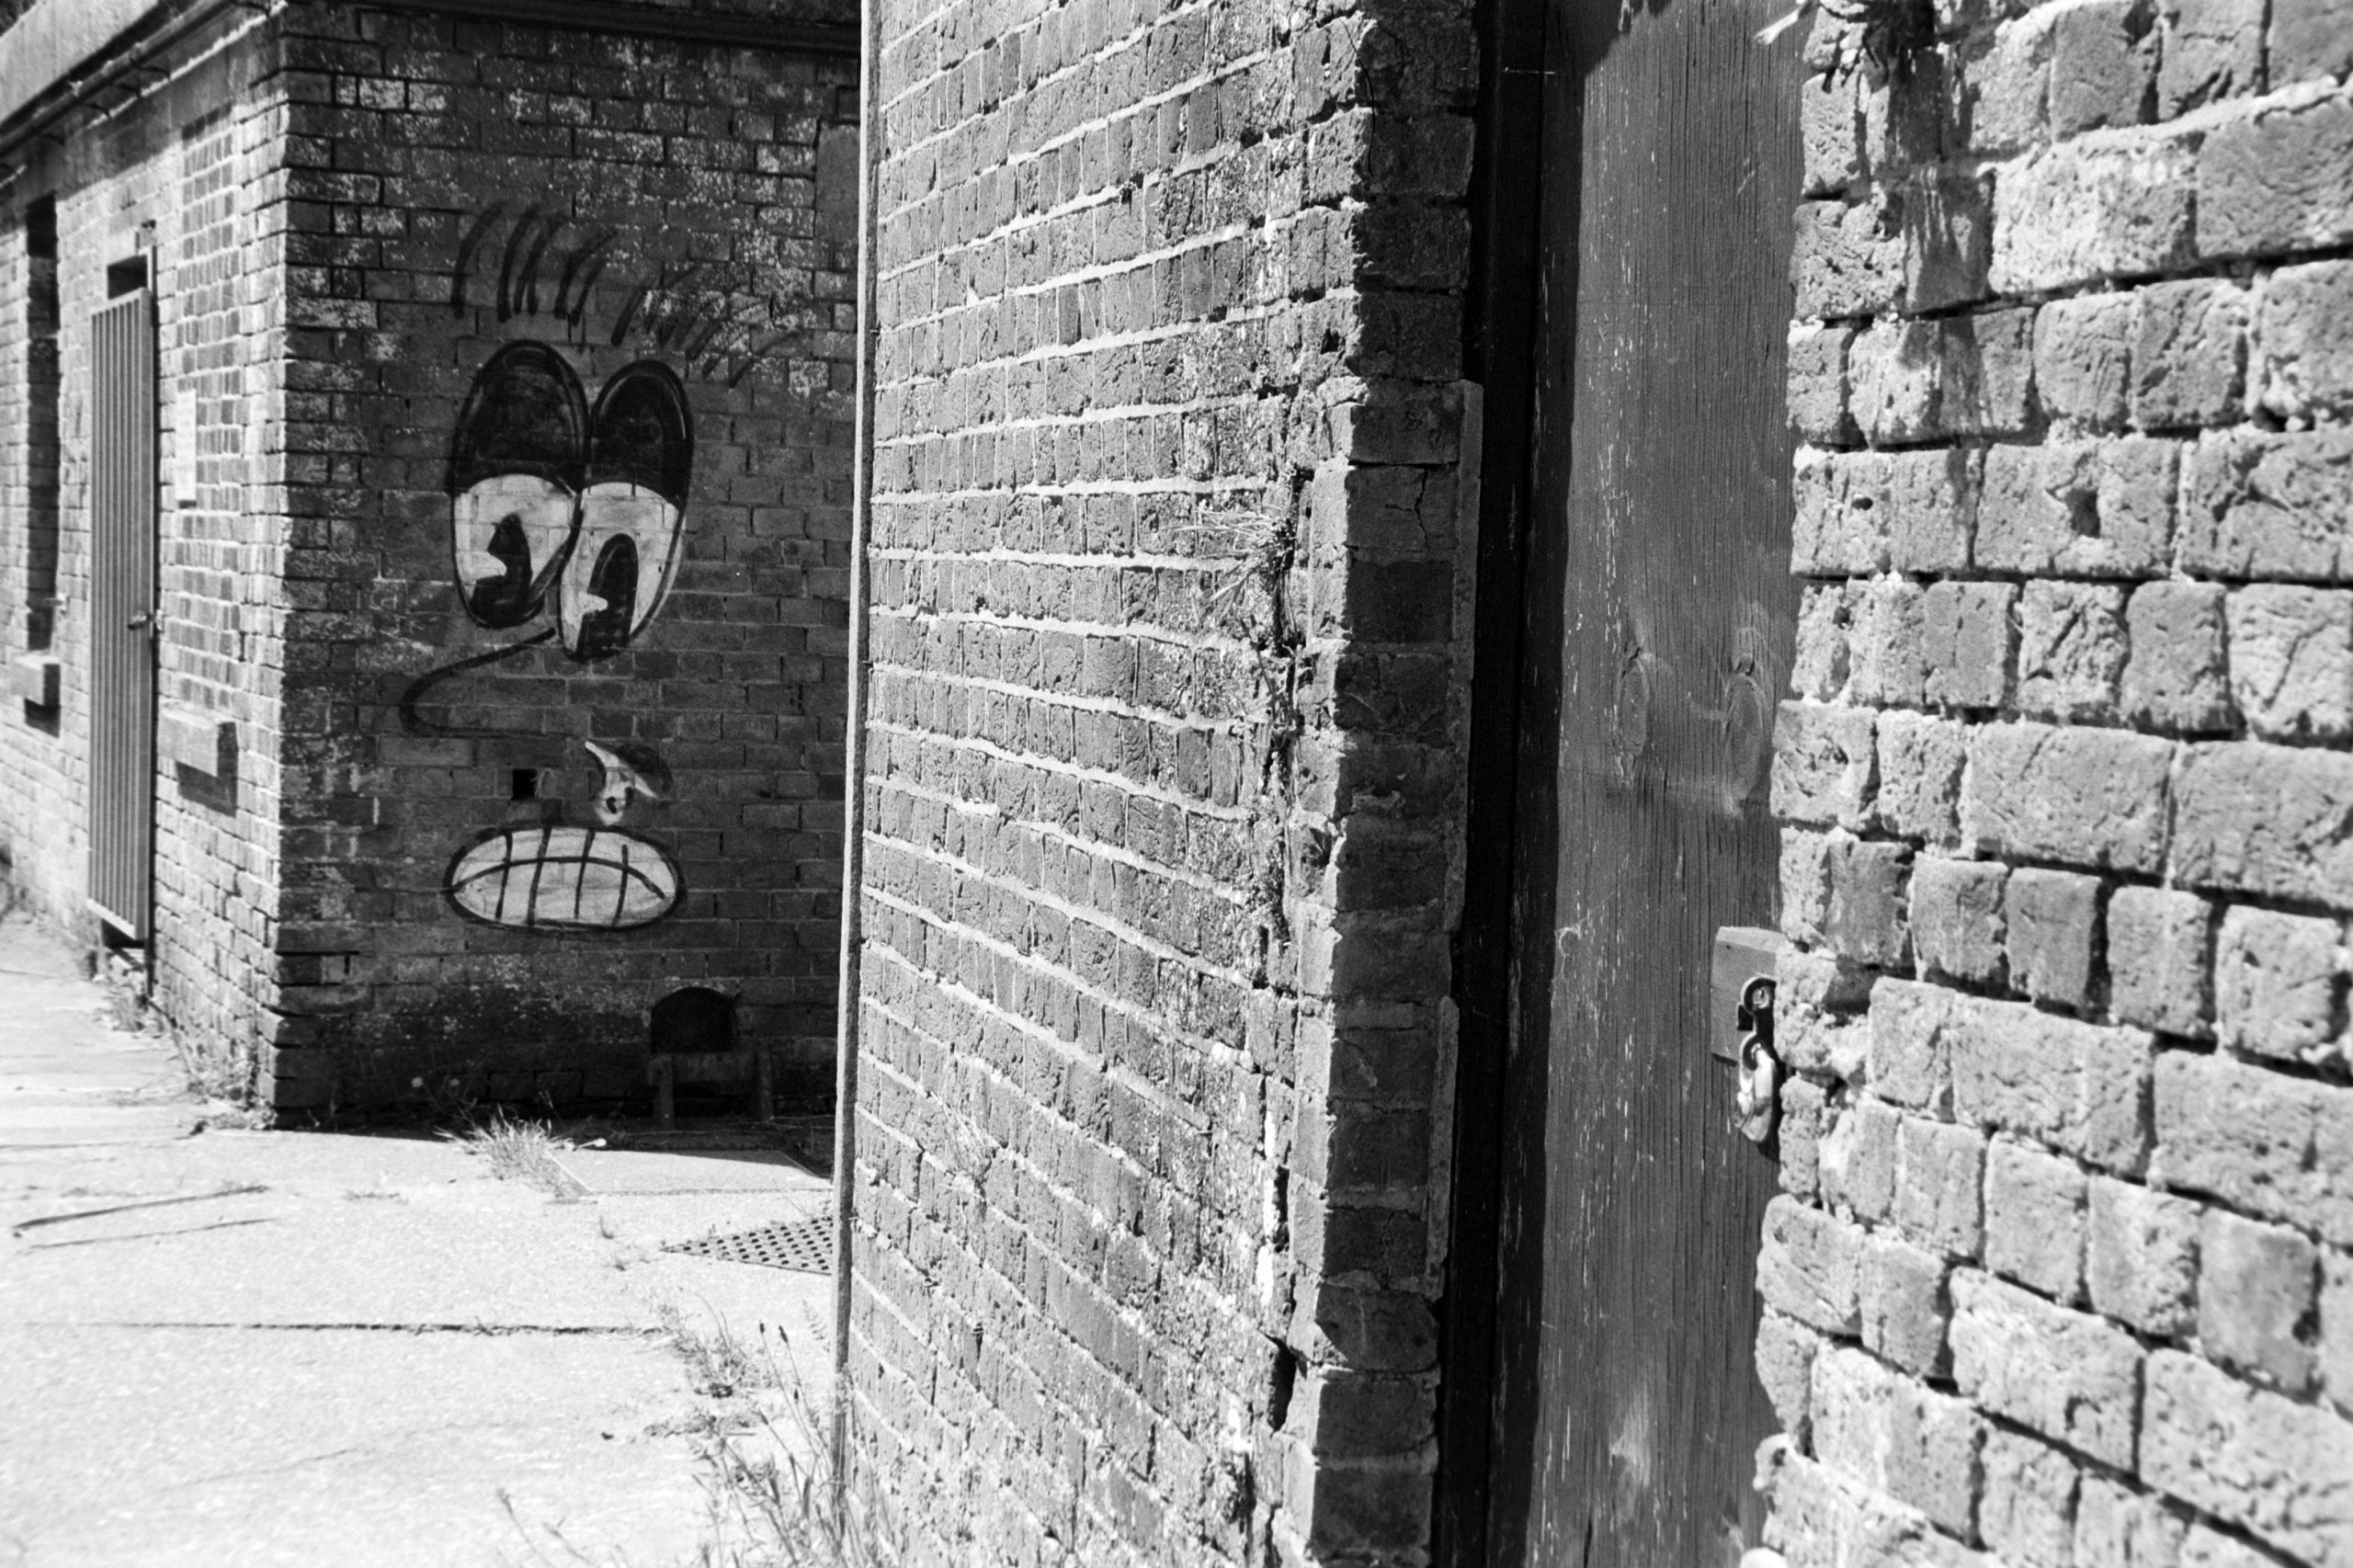
A Brick Wall. This wall is a light red with distressed brickwork making a lot of the bricks a shade of pale. So not a deep red where we will see the Ortho kicking in but the darker bricks in this scene are red. Nice face too. What a great way to spoil this classic brickwork.
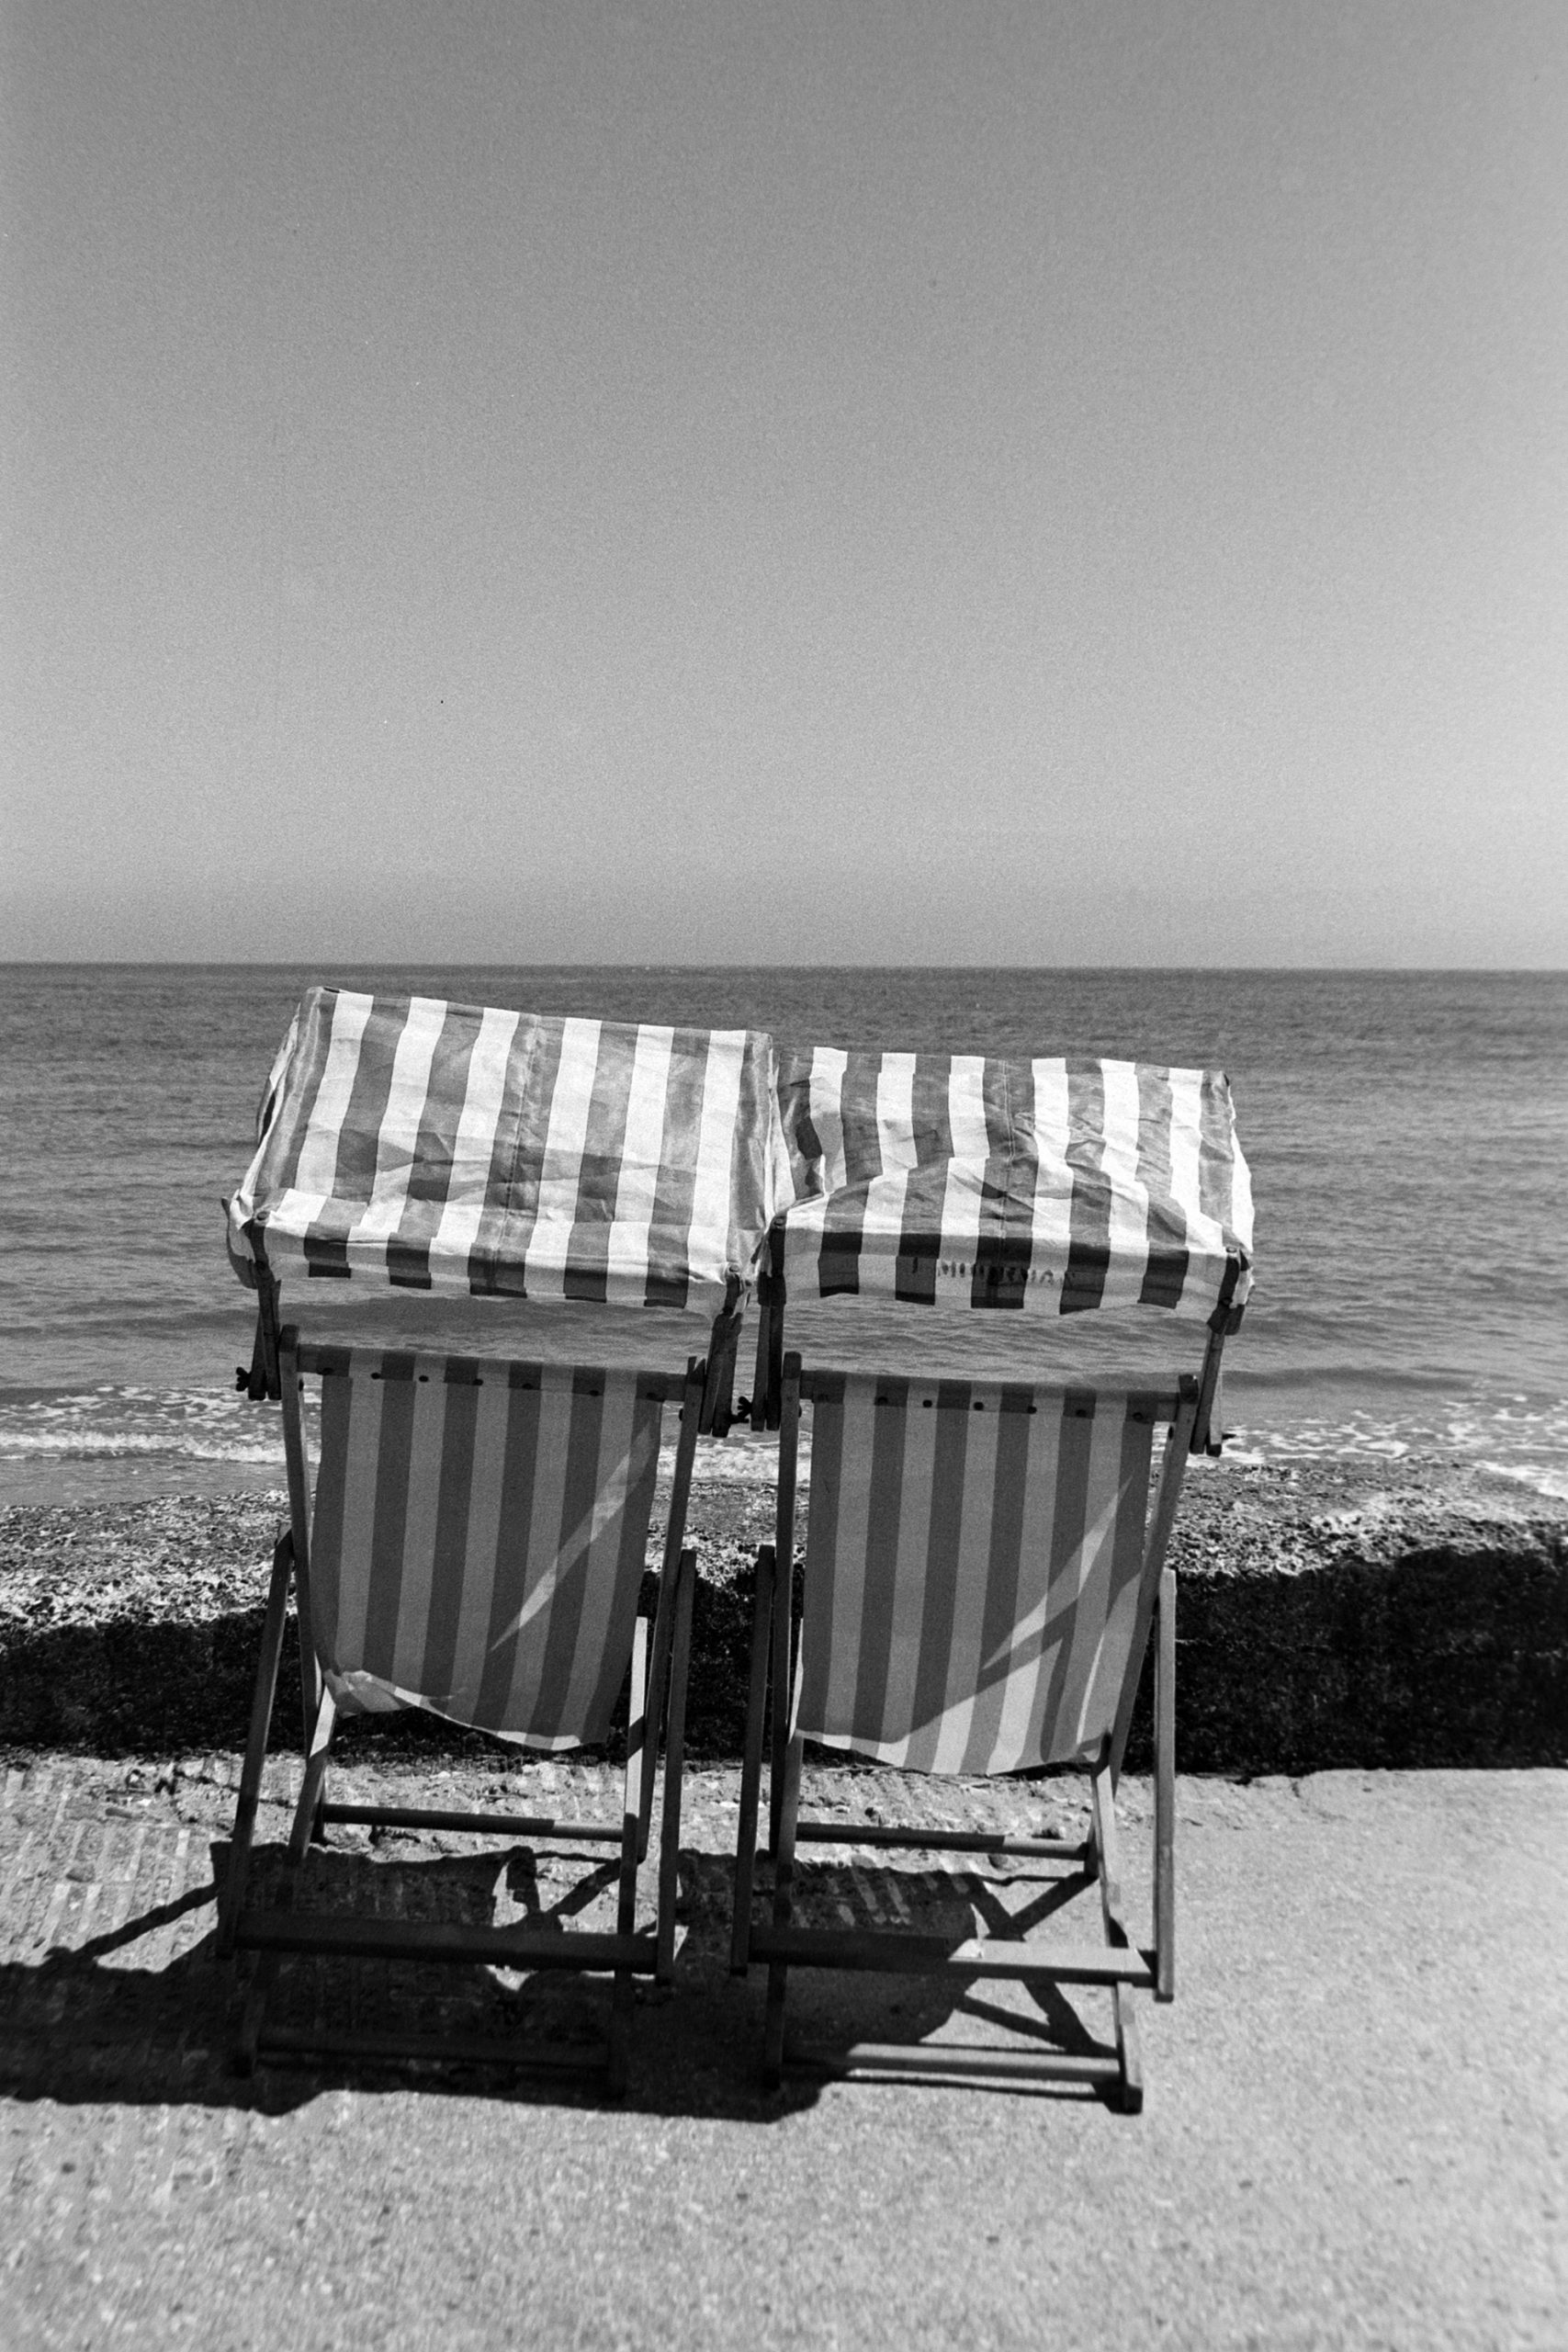
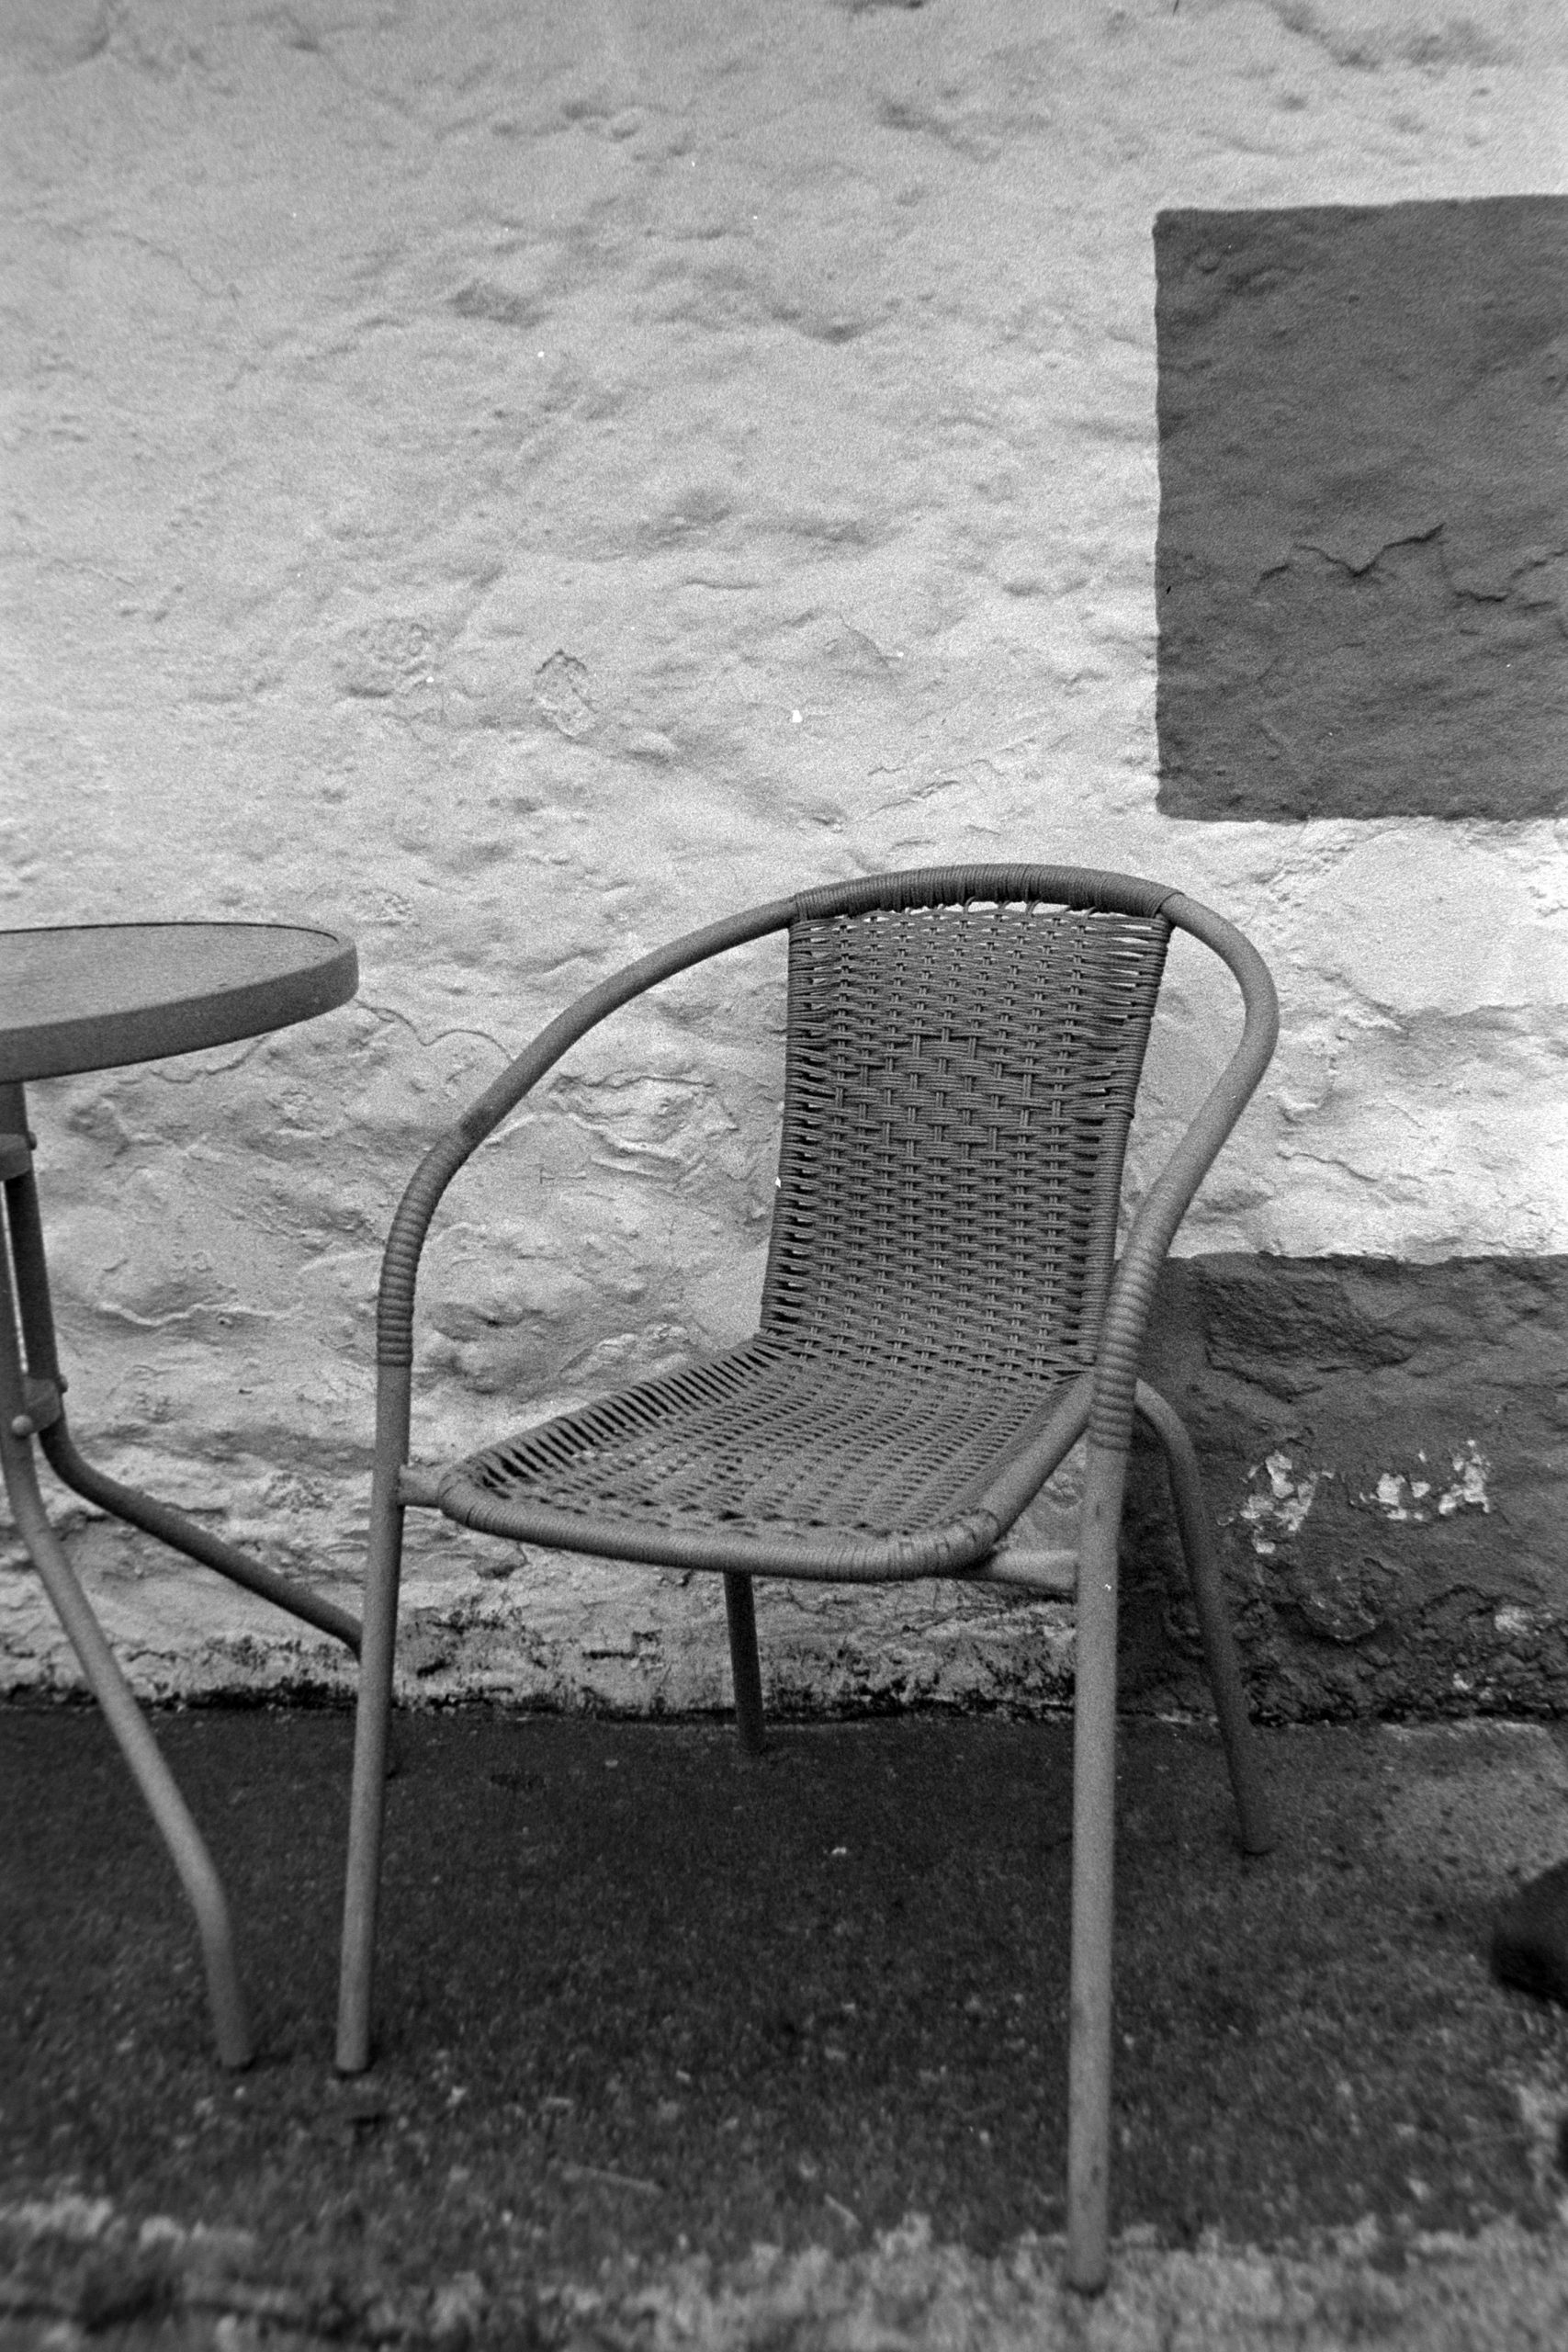
Deck Chairs. Back to the Blue again. These Deck Chairs are Blue and White Stripes. Along with a blue sea and sky. Harsh shadows but separation is still there. Again the blue’s appear darker giving the appearance of contrast.
See Saw. The seat is Yellow. I metered on the seat which was bright in the sun. I can still see detail in the photograph.
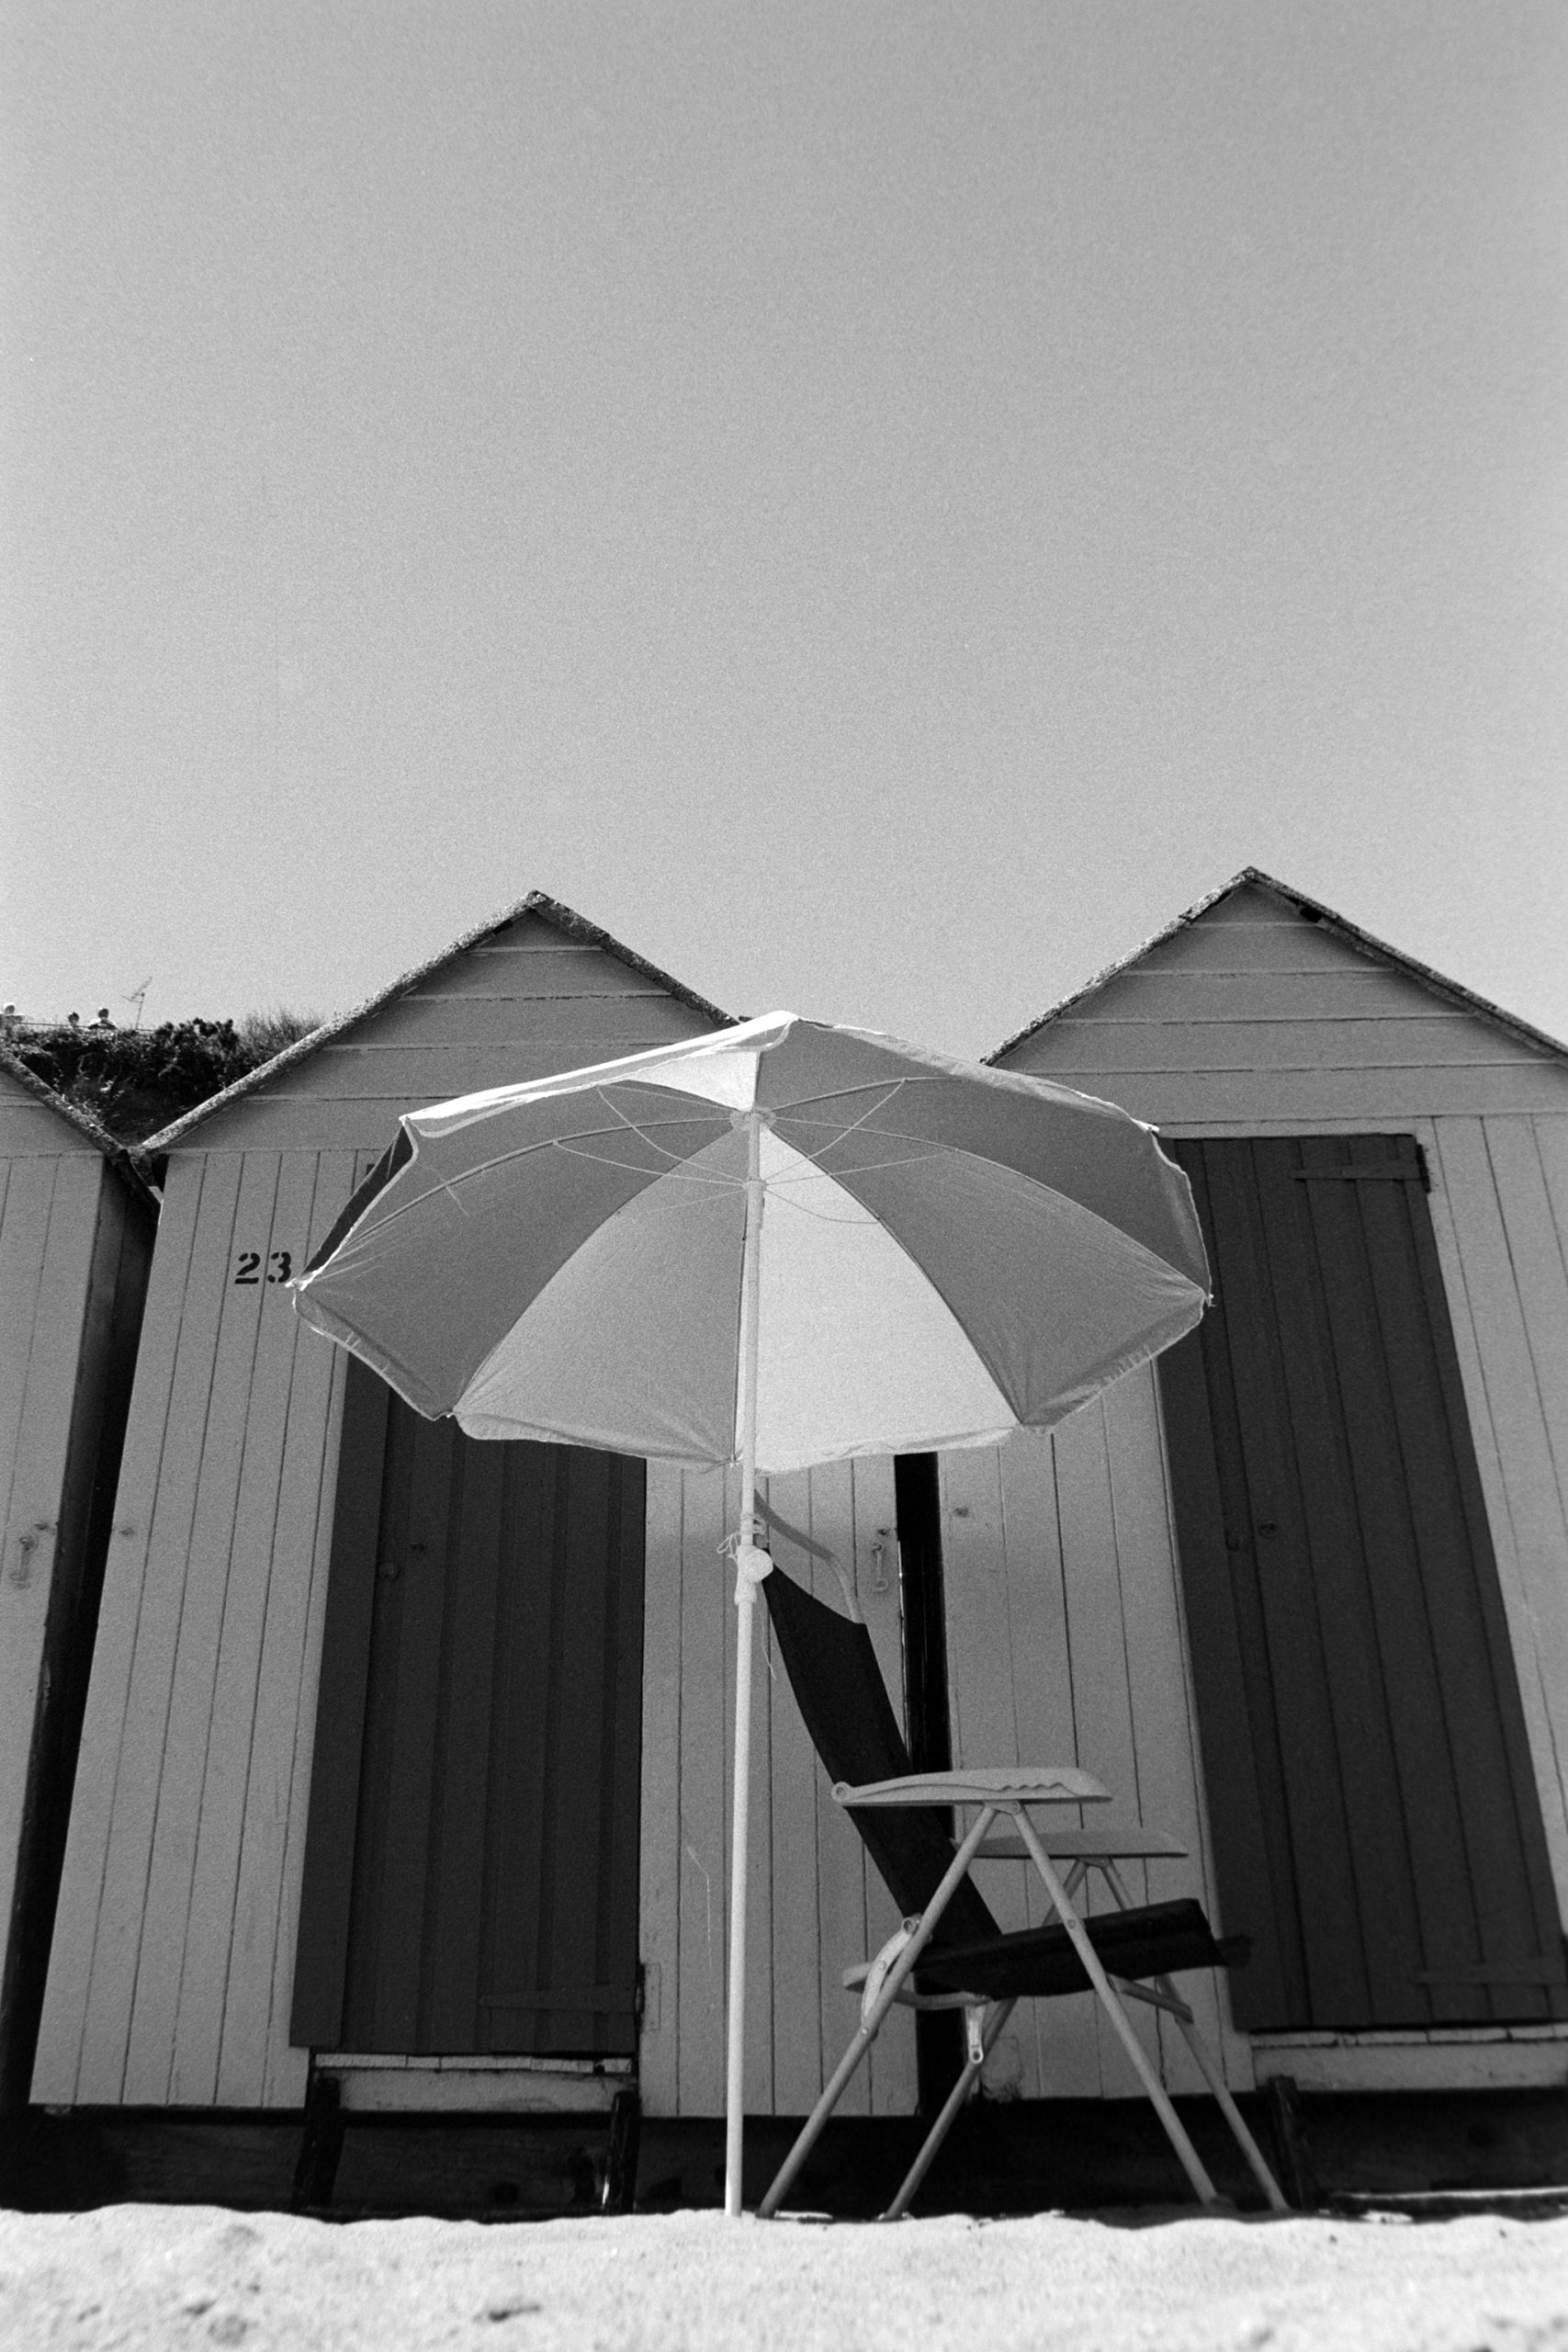
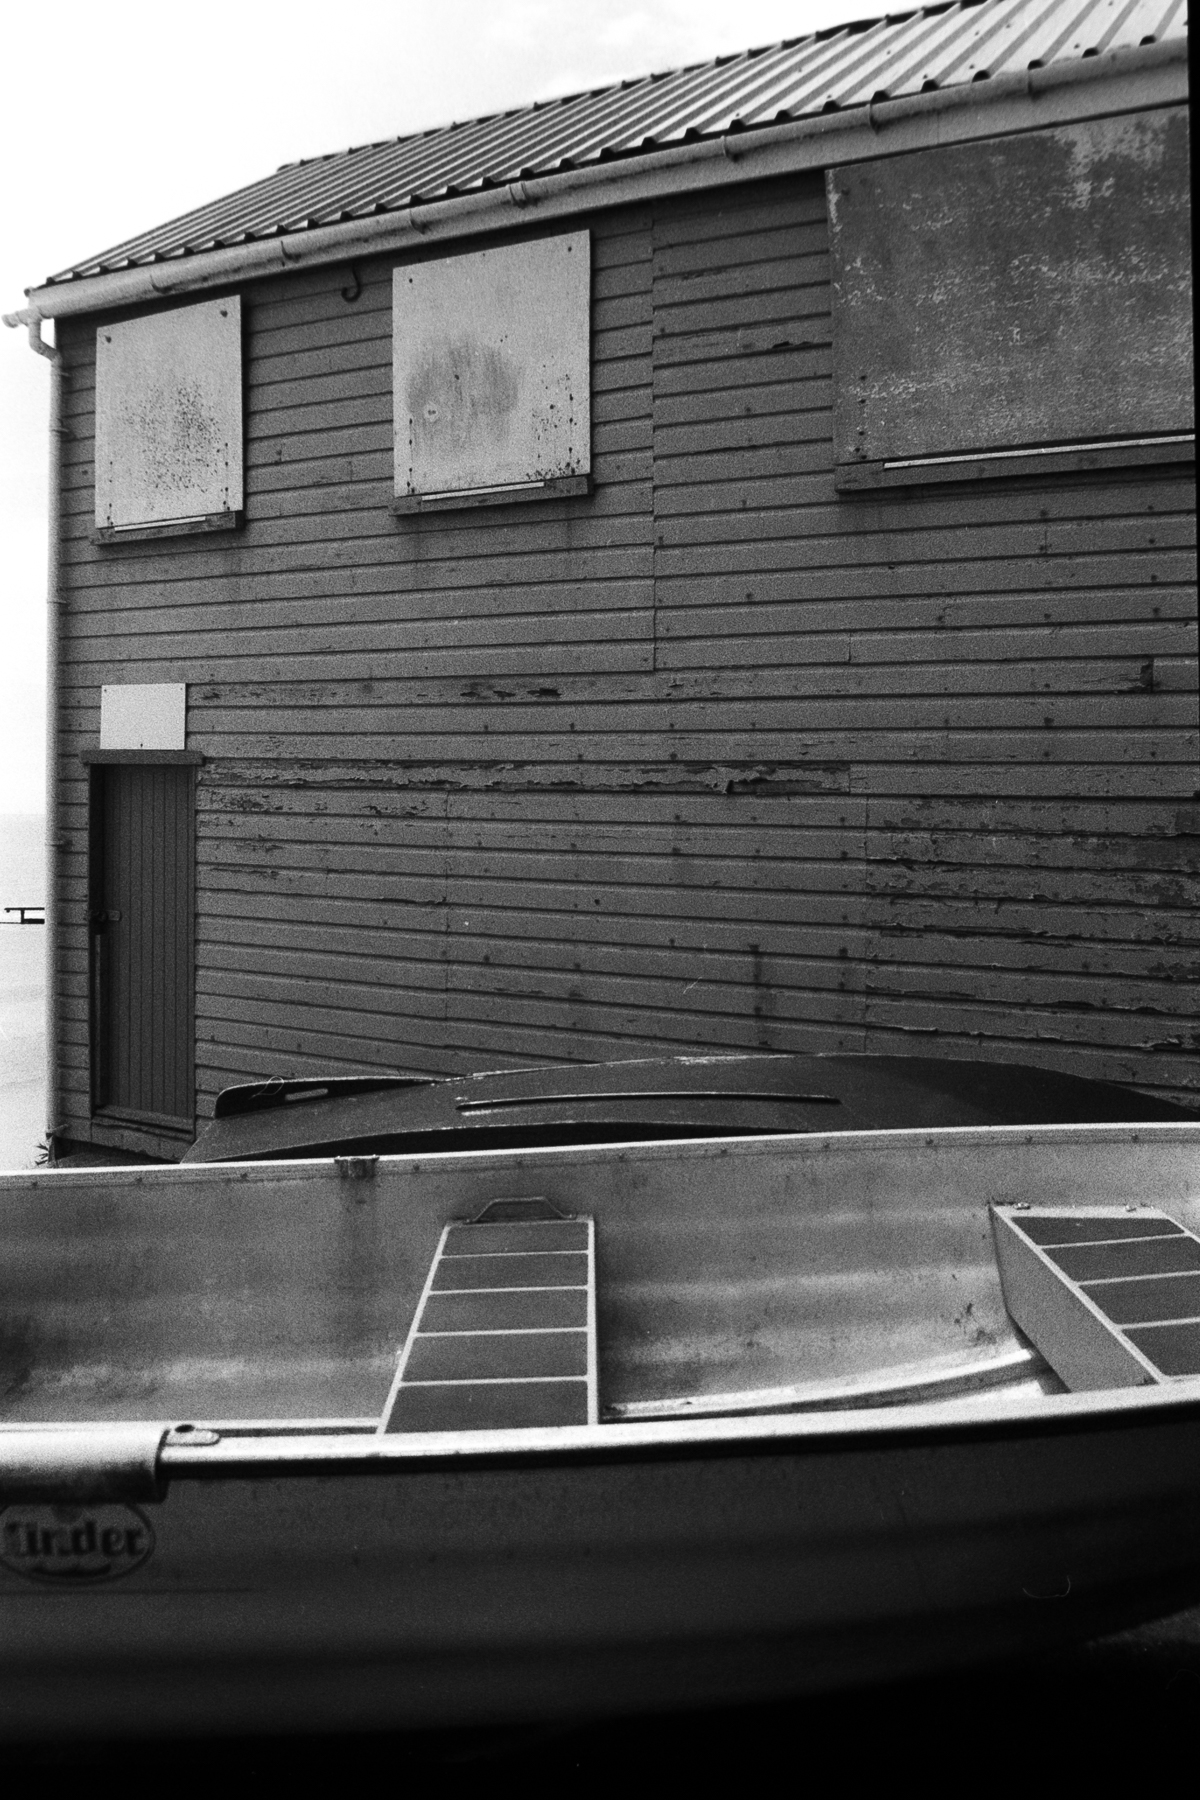
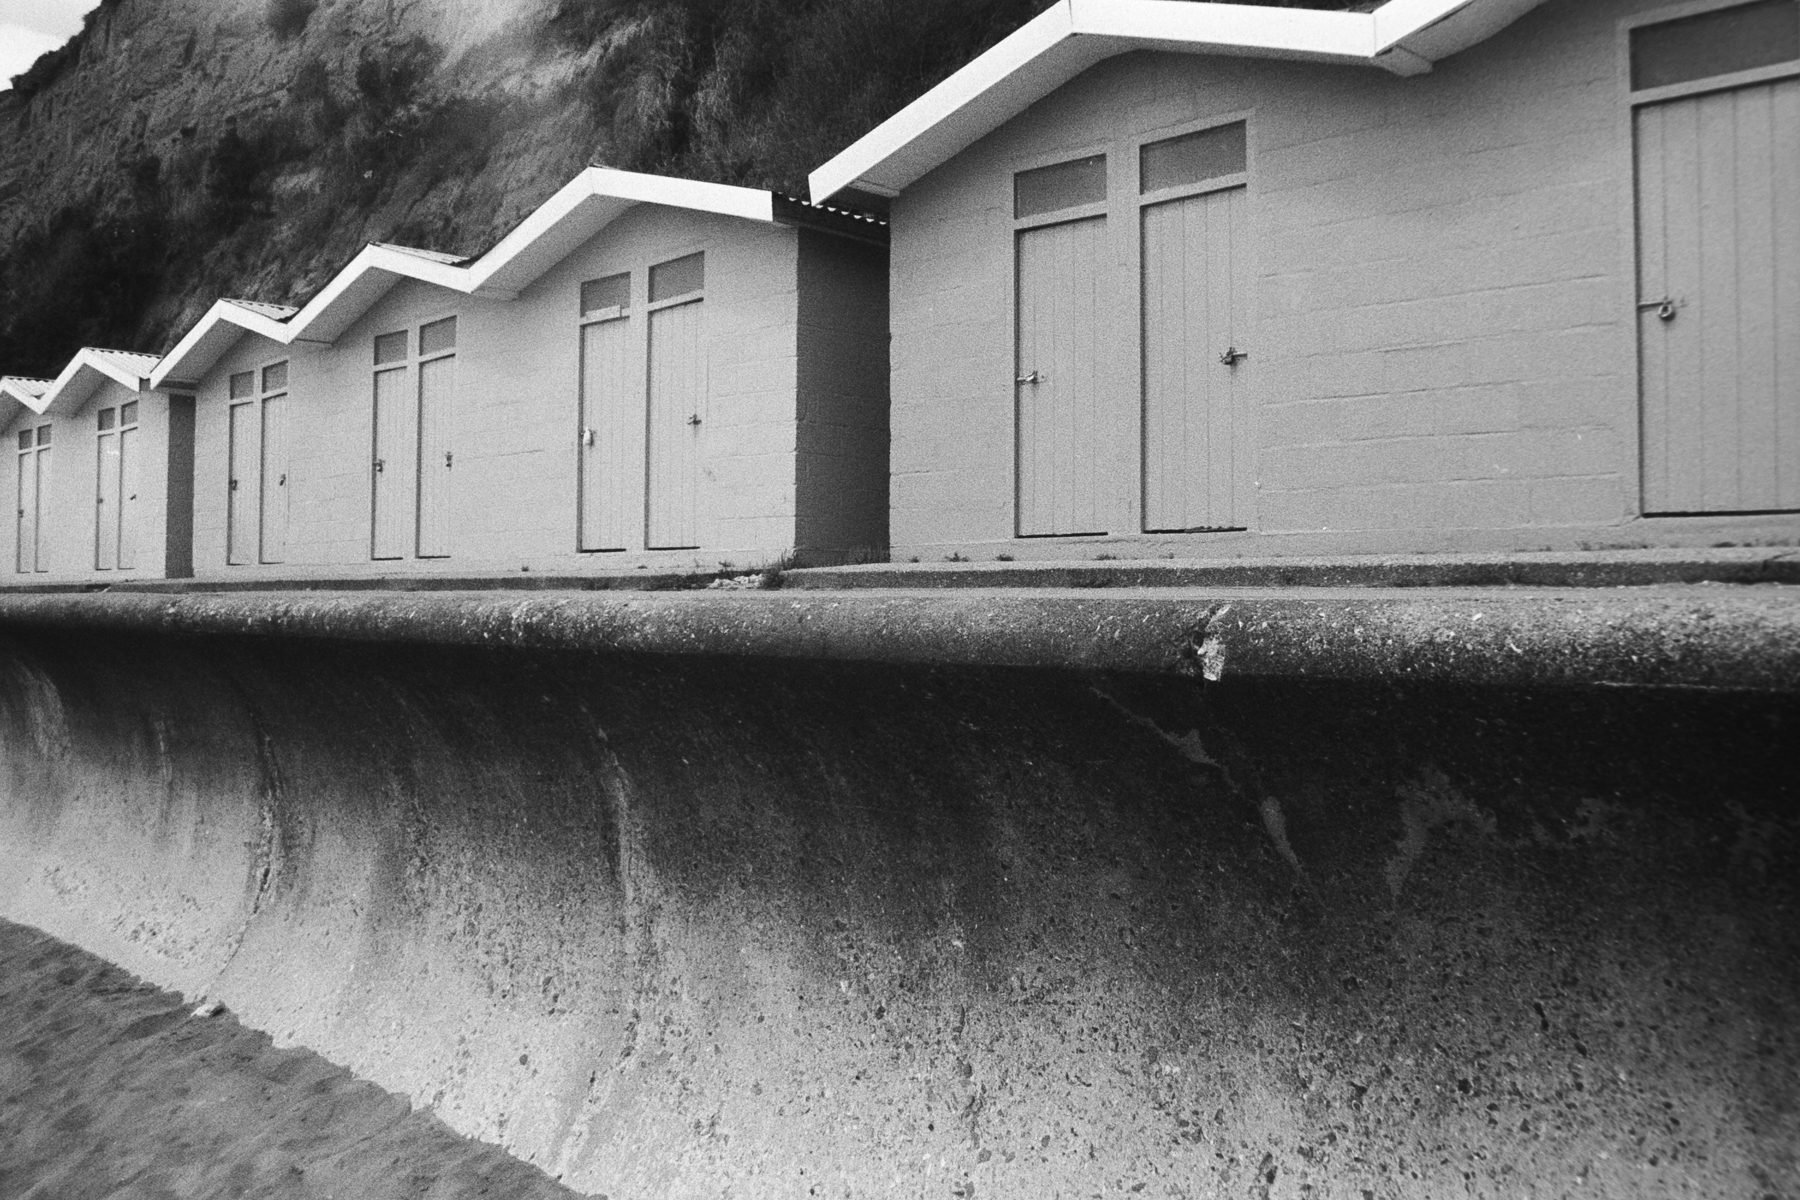
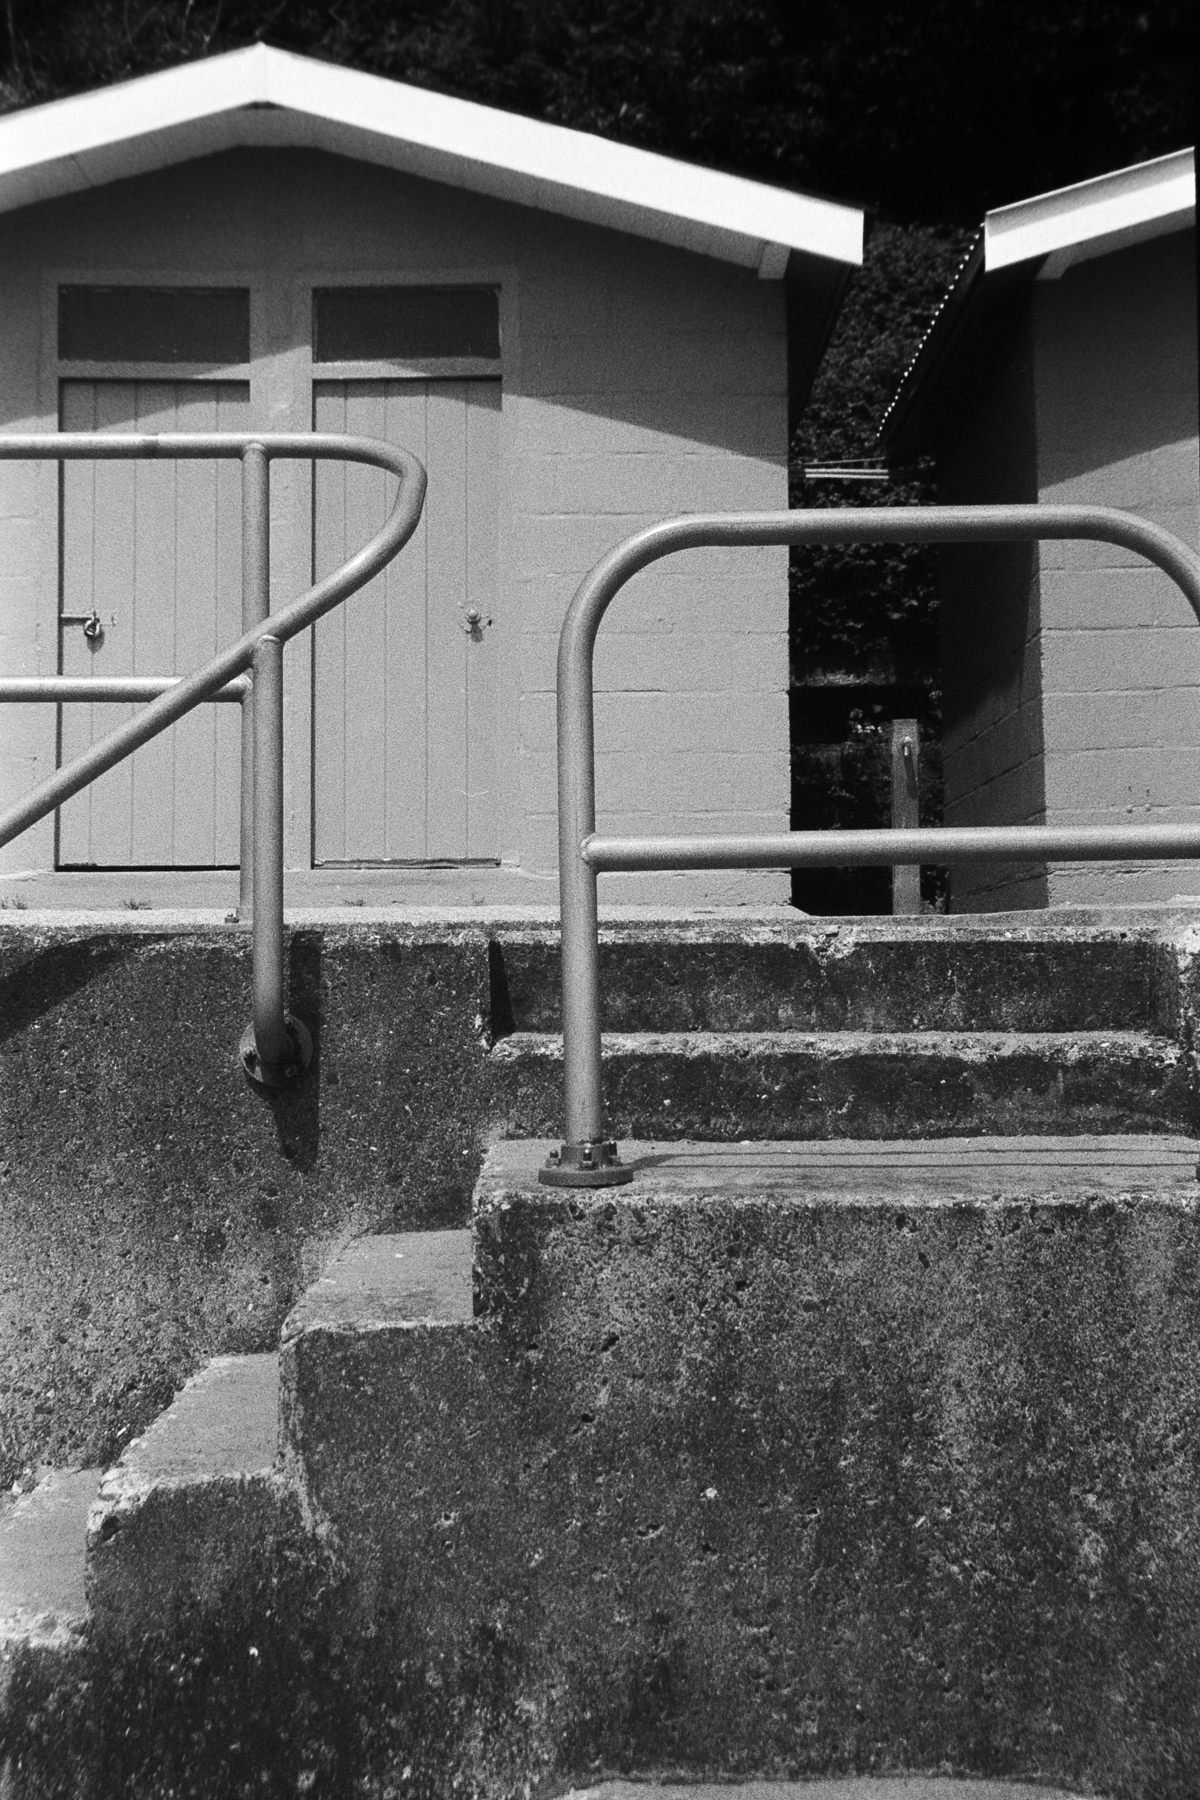
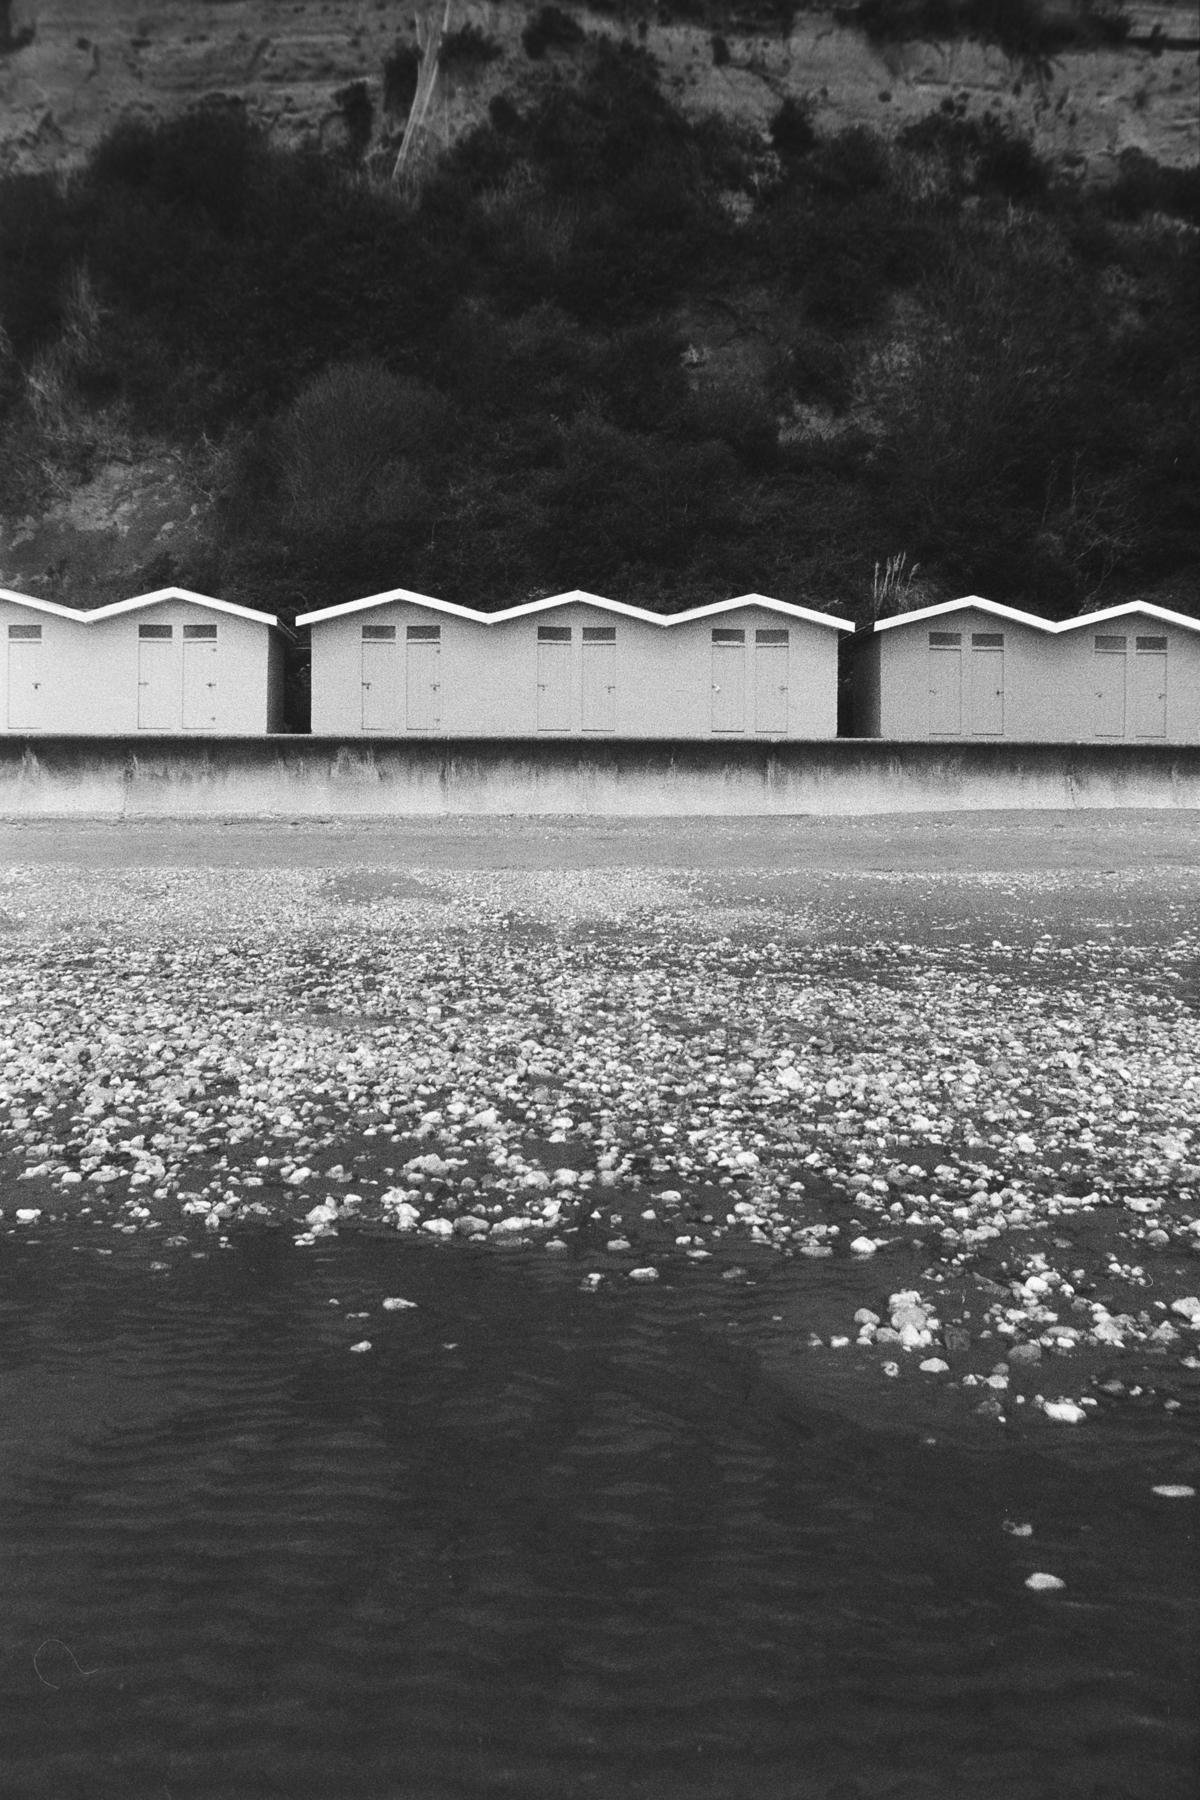
Beach Huts. The doors are Blue.
Kayak. A total blue scene.
I really want to give this film another try so will be looking at getting some more in time. And maybe try with Rodinal and also Adox’s FX-39 developer. And also find scenes of Red and Blue. Or maybe a portrait!
Straight away I can see the images with good contrast and tonal separation and… sharp too! And it’s not a bad price when you look around. I can see some online stores selling this film for around £6 -£7 a roll. That’s if they have it in stock! But a film well worth having a look at.
Portraits with Cinestill XX (Kodak XX)
I love venturing into unknown territory with Film Photography. I’m always up for a challenge. If the results are good great, if not then there is more playing to be done.
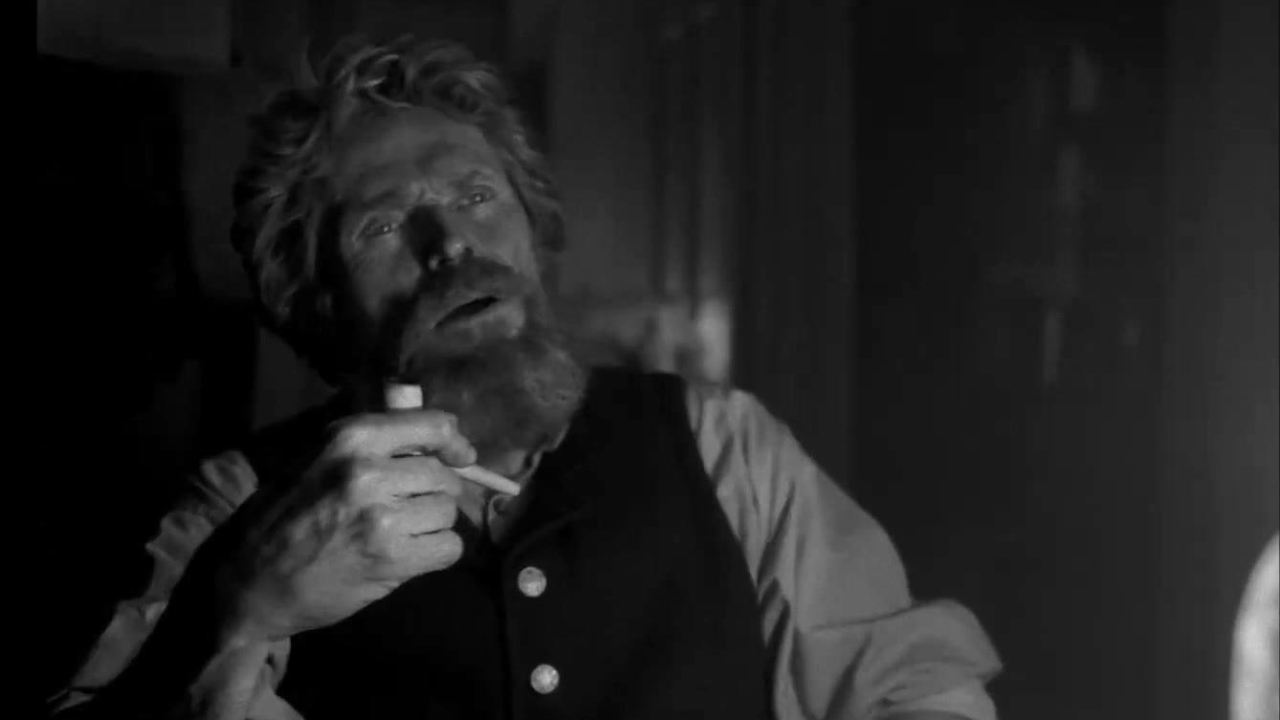
An SFLaB Subscriber sent me two rolls of Cinestill XX Film. Which is actually Kodak BWXX Film and used in various motion picture films one being a Black & White Film, The LightHouse (2019). A strange film but wonderfully lit and shot.
So with two rolls of 120 to play with I needed to know where I stood with shooting and developing it.
I sourced some info online and I found a thread where a photographer shot this film at 800ISO and developed in XTOL 1:3 at 30° for 13 Mins. The photograph they showed had all the detail I liked. Strong blacks and strong highlights too with a sweet grain. I thought, That’ll do me for a start. Even though on the box it says EI200 Indoor and EI250 Outdoor.
Being inspired by the Lighthouse Film I thought I would try a portrait as my test, just to see if this photographers development and EI800 would work for me.
My daughters Boyfriend was over so I decided to use him for my subject.
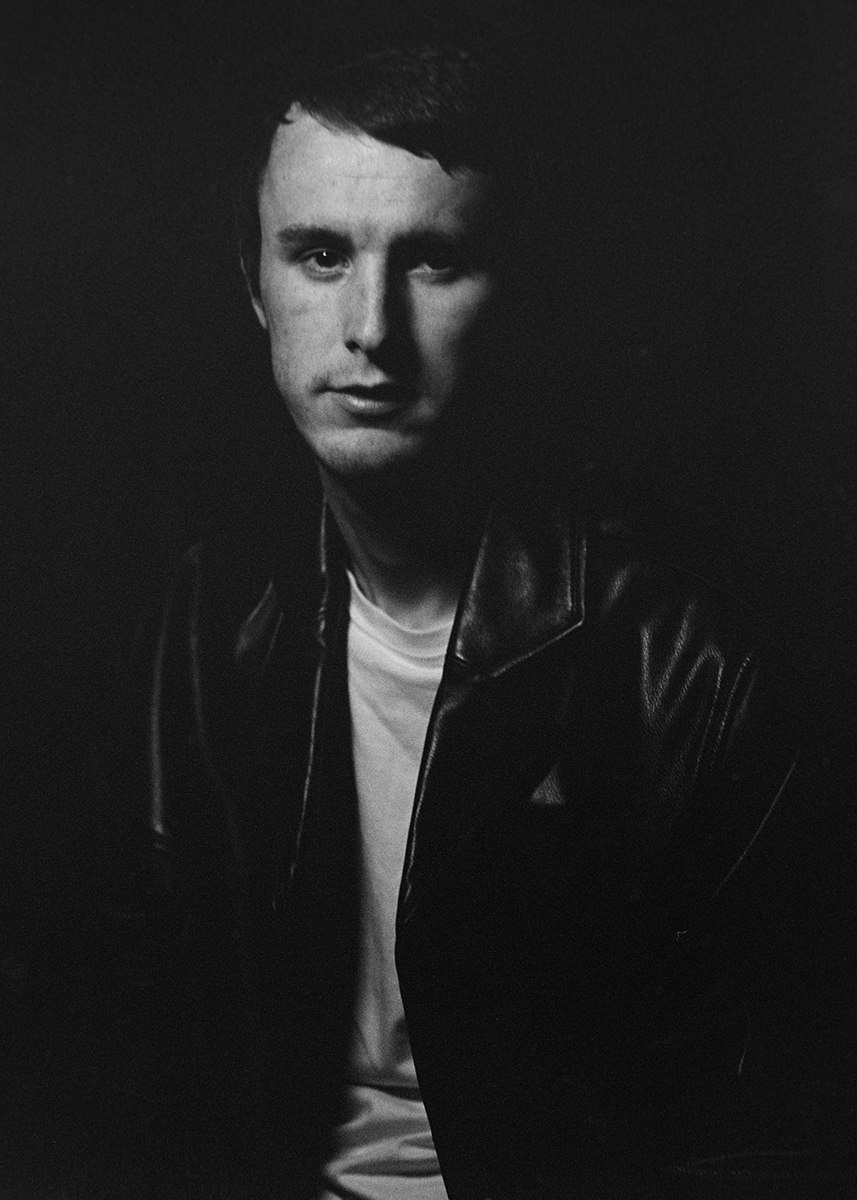
I set up a simple scene indoors and loaded the film into the Bronica ETRS Camera and put on a 250mm lens and used two LED light panels for my lighting. I also put a black leather jacket on the poor lad hoping to catch some sheen from the lighting.
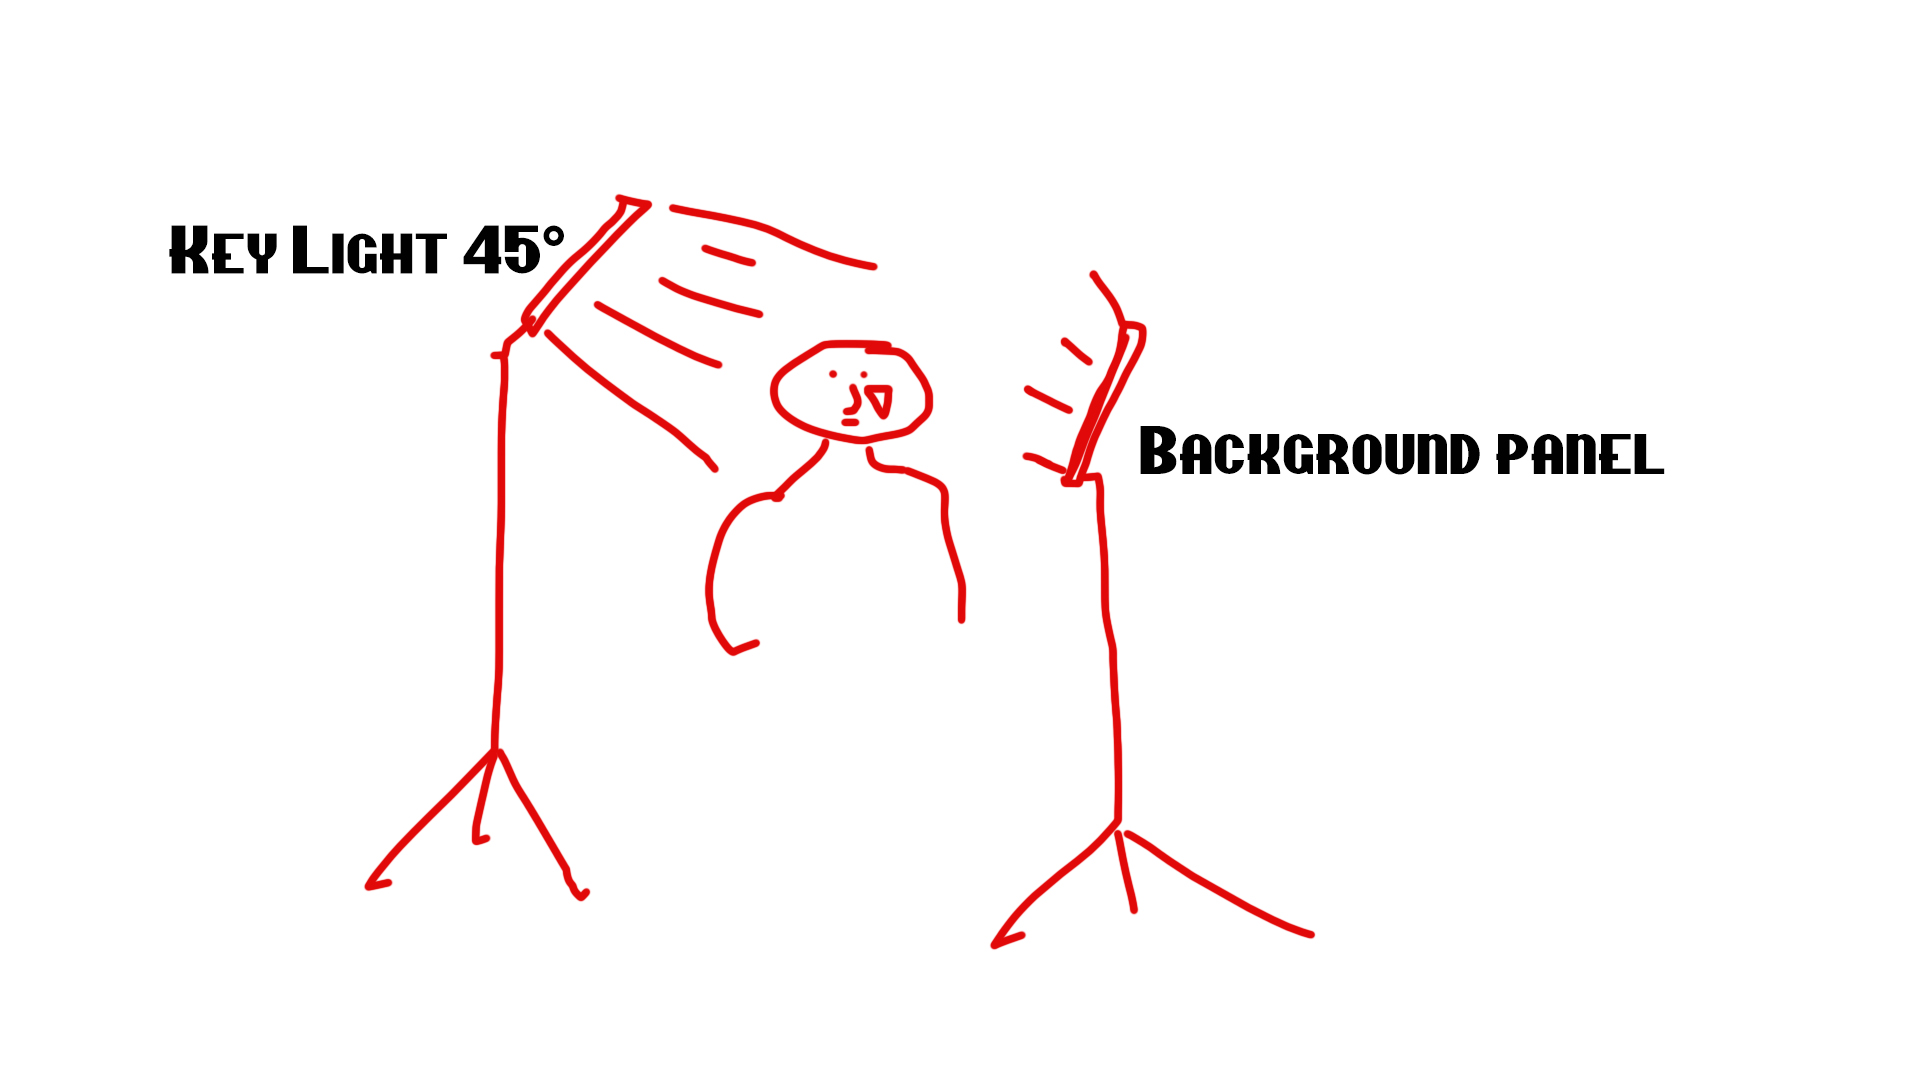
So I went with the Key Light looking down at 45° angle to create a Rembrant look just enough so I had catchlight in one eye and a glint of white in the other. The background panel was on it’s lowest power lighting a curtain a few feet away from the subject. Simple set up.
I then used a grey card next to Jacobs face and metered the Keylight. I got a reading (800ISO) of f/5.6 at 1/30th shutter. Too slow for a portrait but I went for that.
I used the whole roll and took my first shot at the metered value and then went 1, 2 and 3 stops under. (1/60th, 125th, 250th) then I went 3 stops over (1/15th, 1/8th, 1/4th). Crazy for a portrait I know but I am just looking for exposure to work with my developer. Which ever speed looks best then that is how I will rate the film next time.
Here are the results after DSLR scanning.
First set with a leather jacket and fluffy collar.

Metered 1/30th 
1/60th 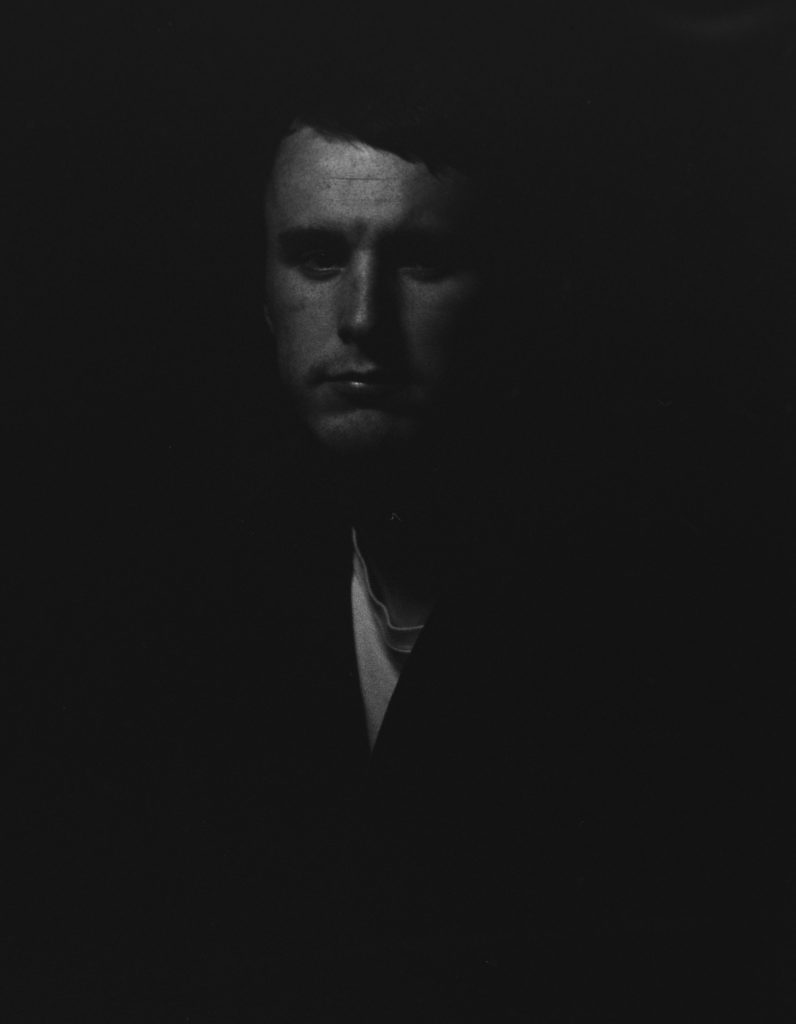
1/125

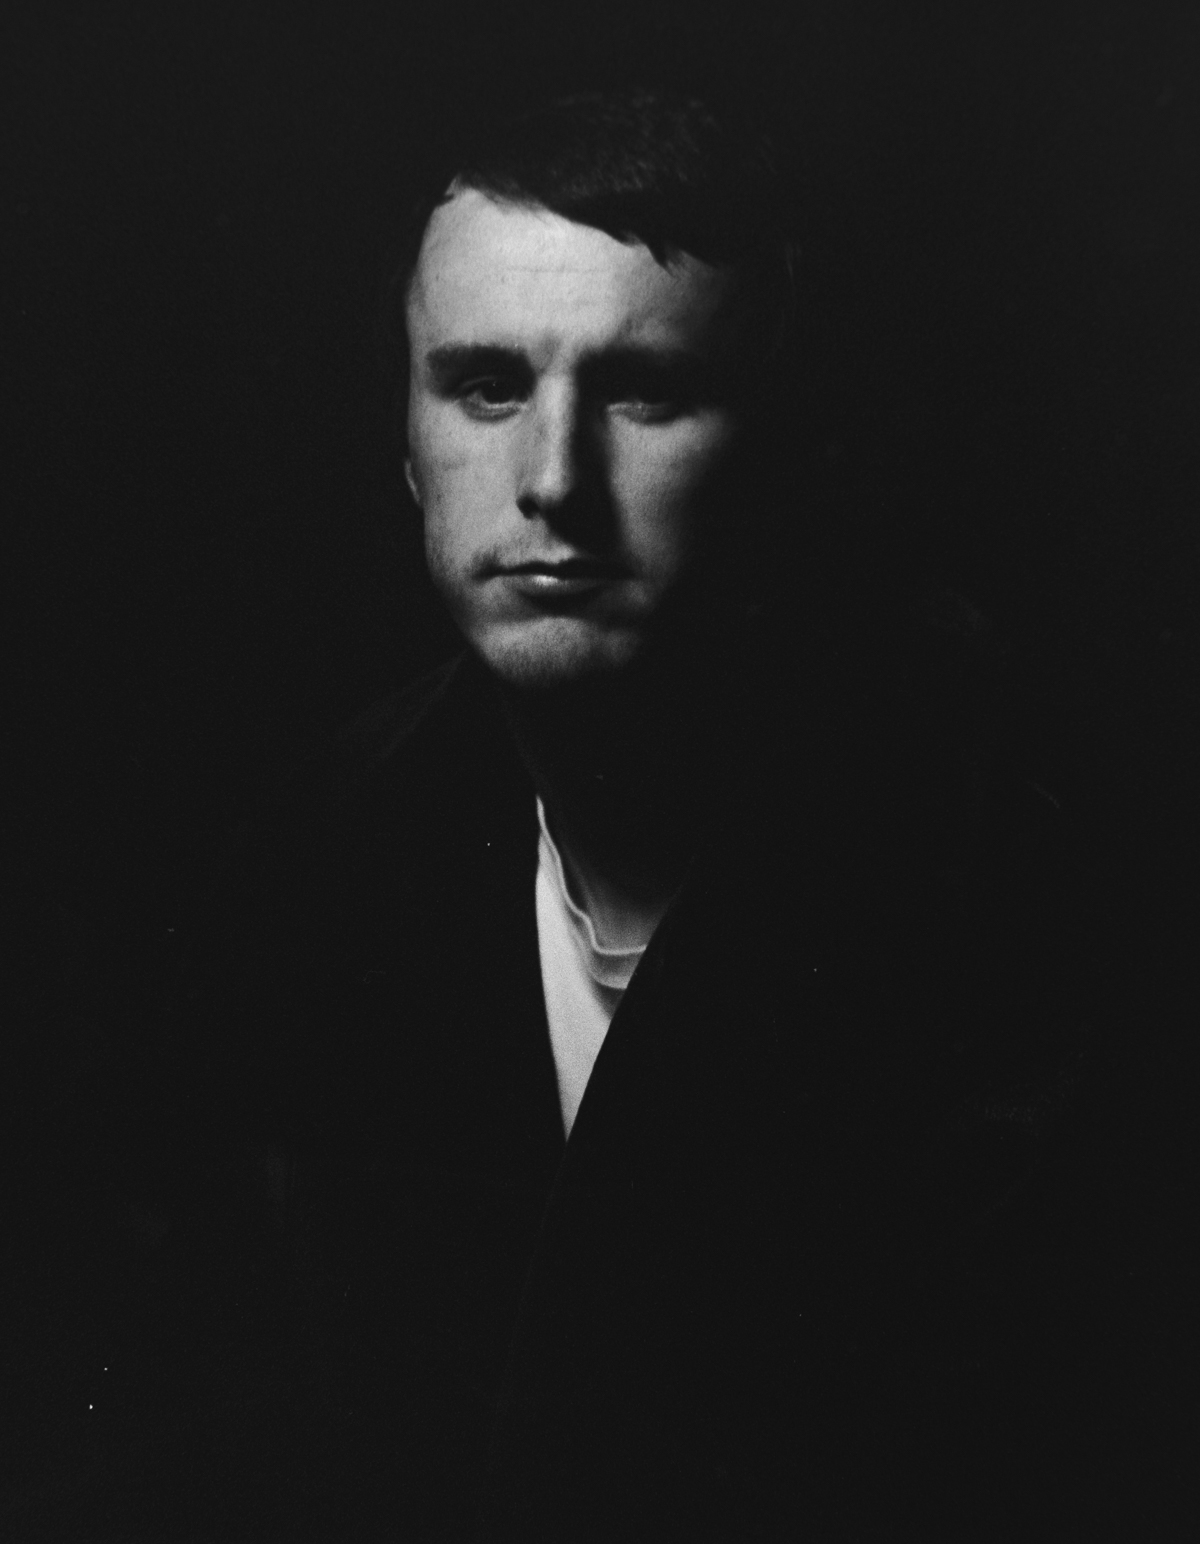

1/250th

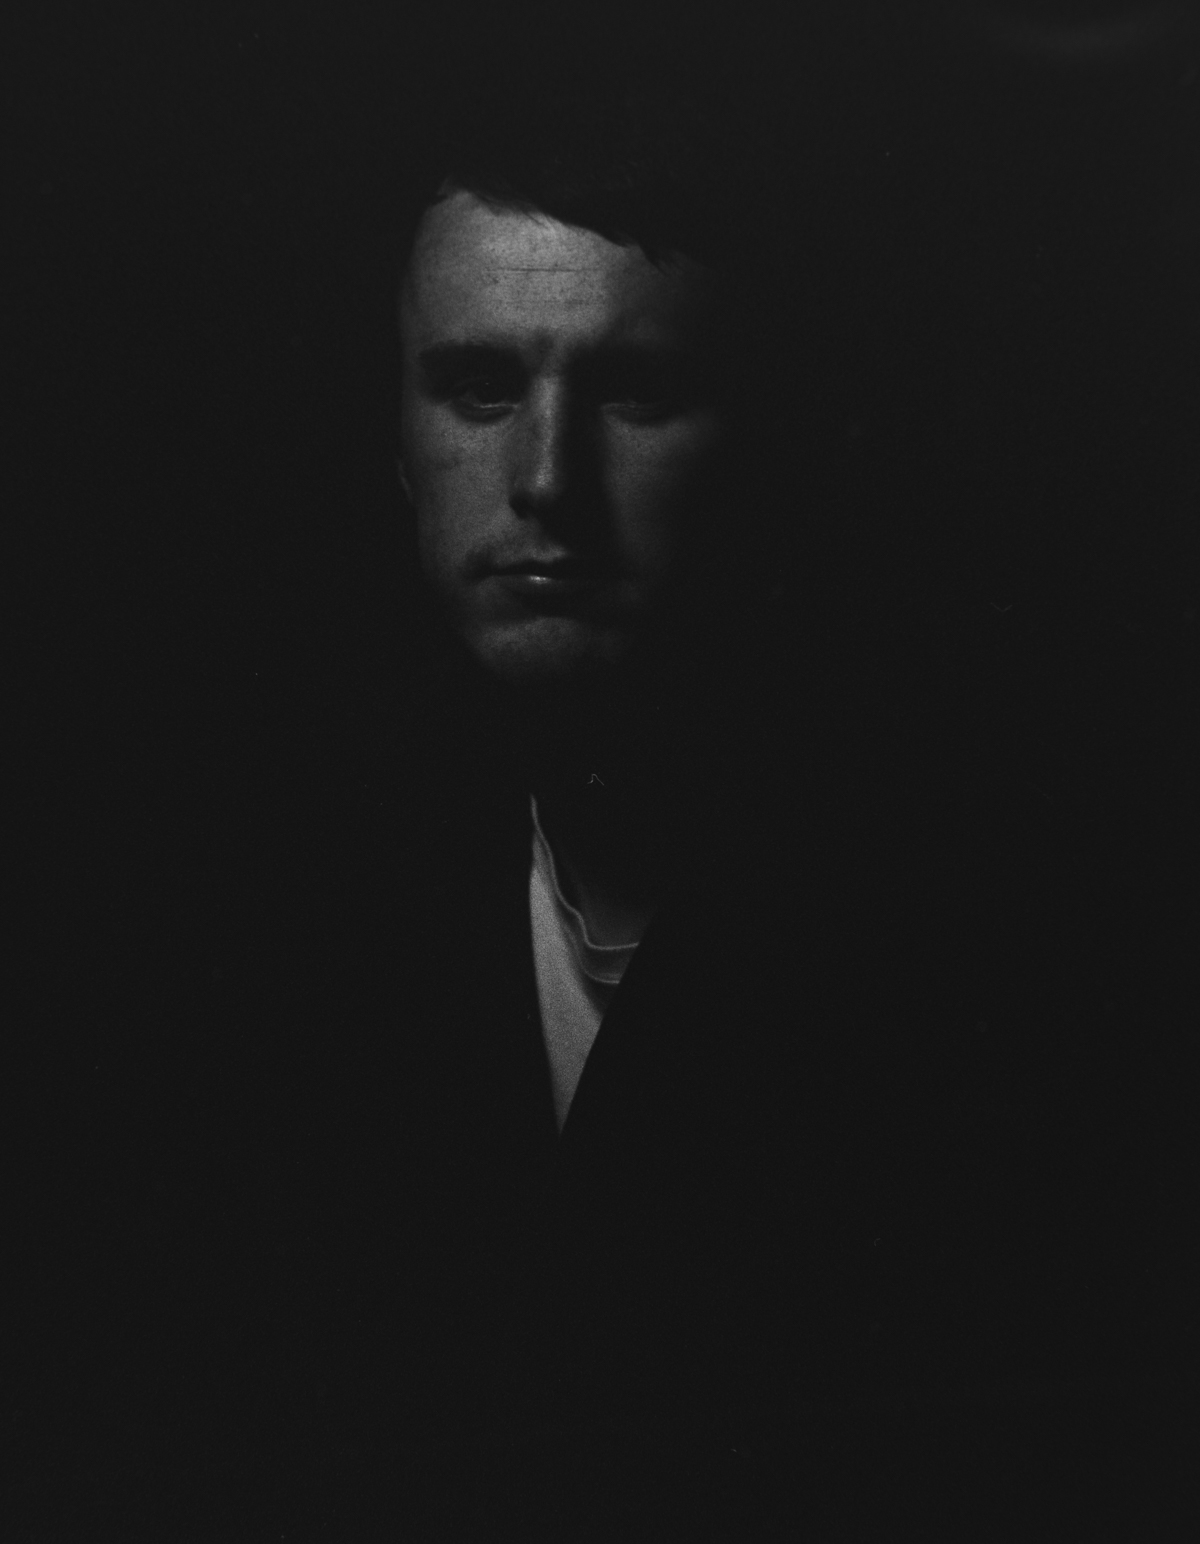
1/15th 
1/8th 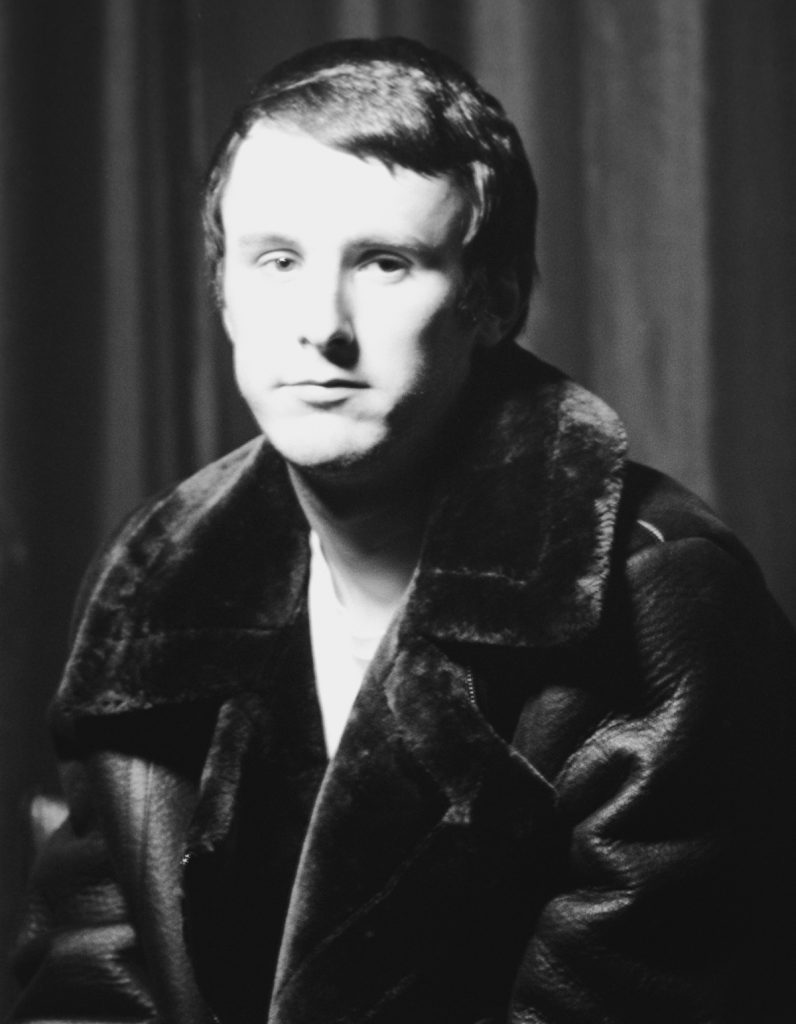
1/4th


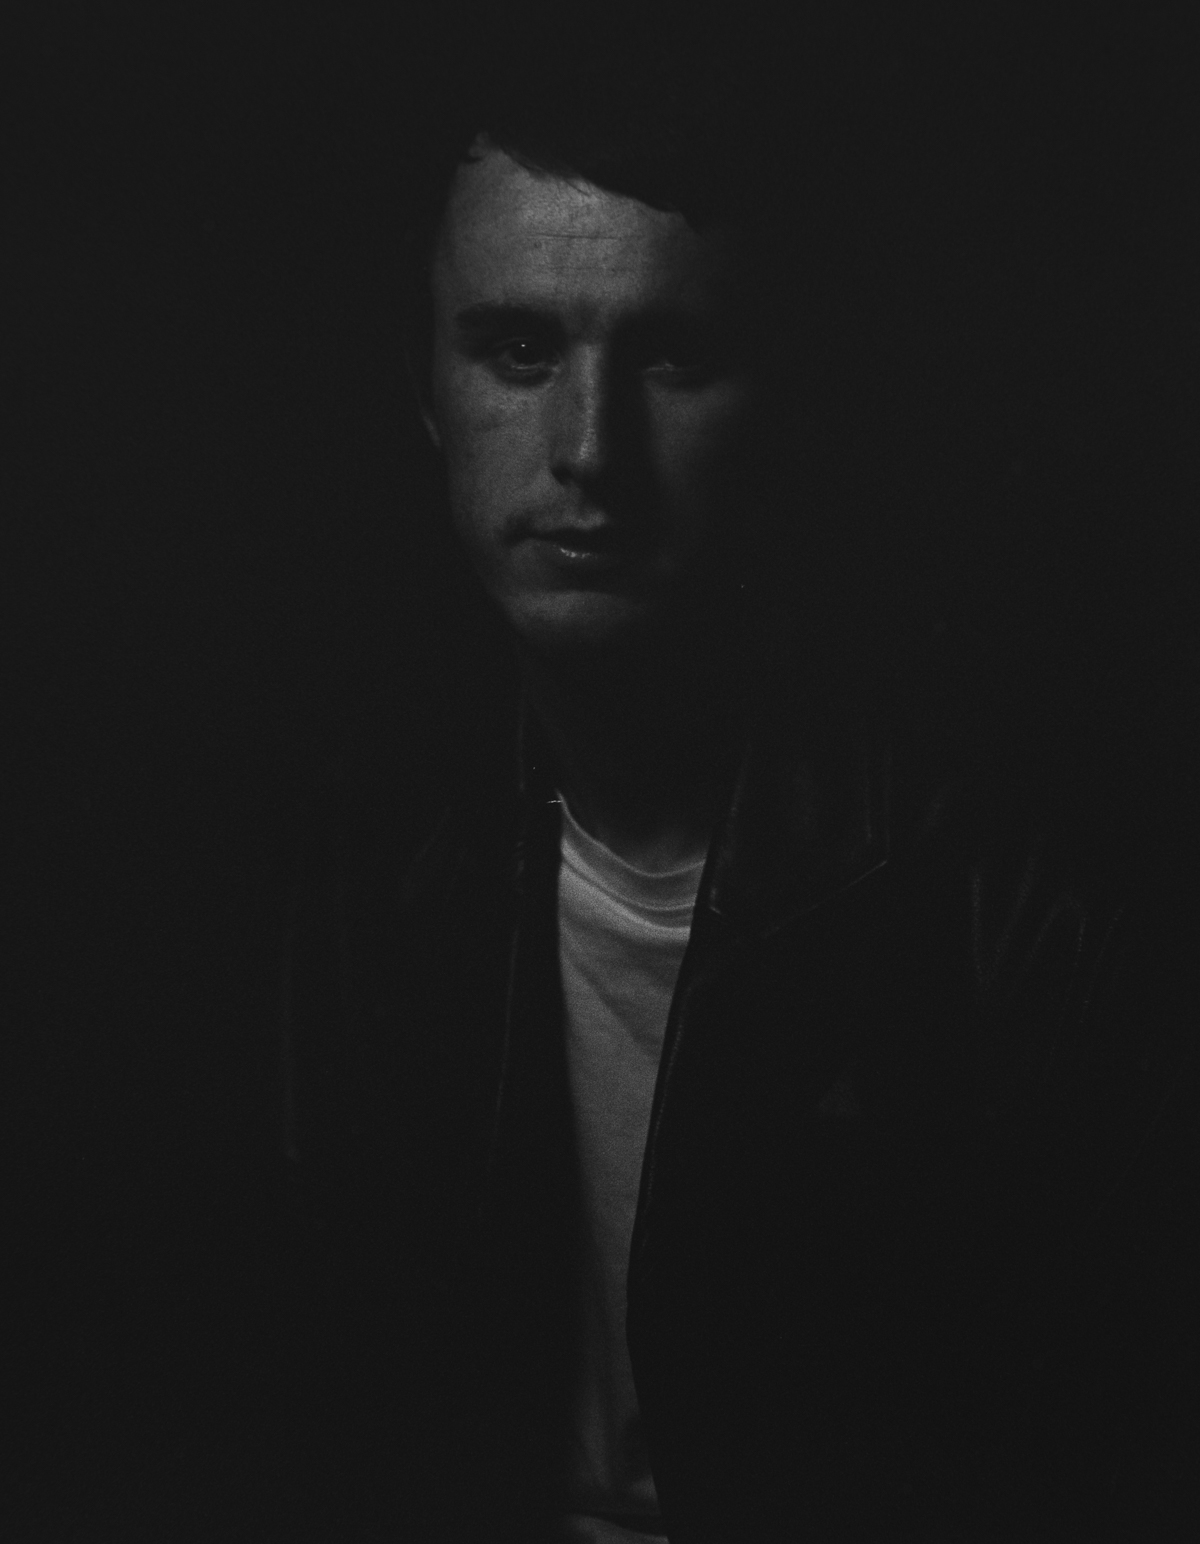
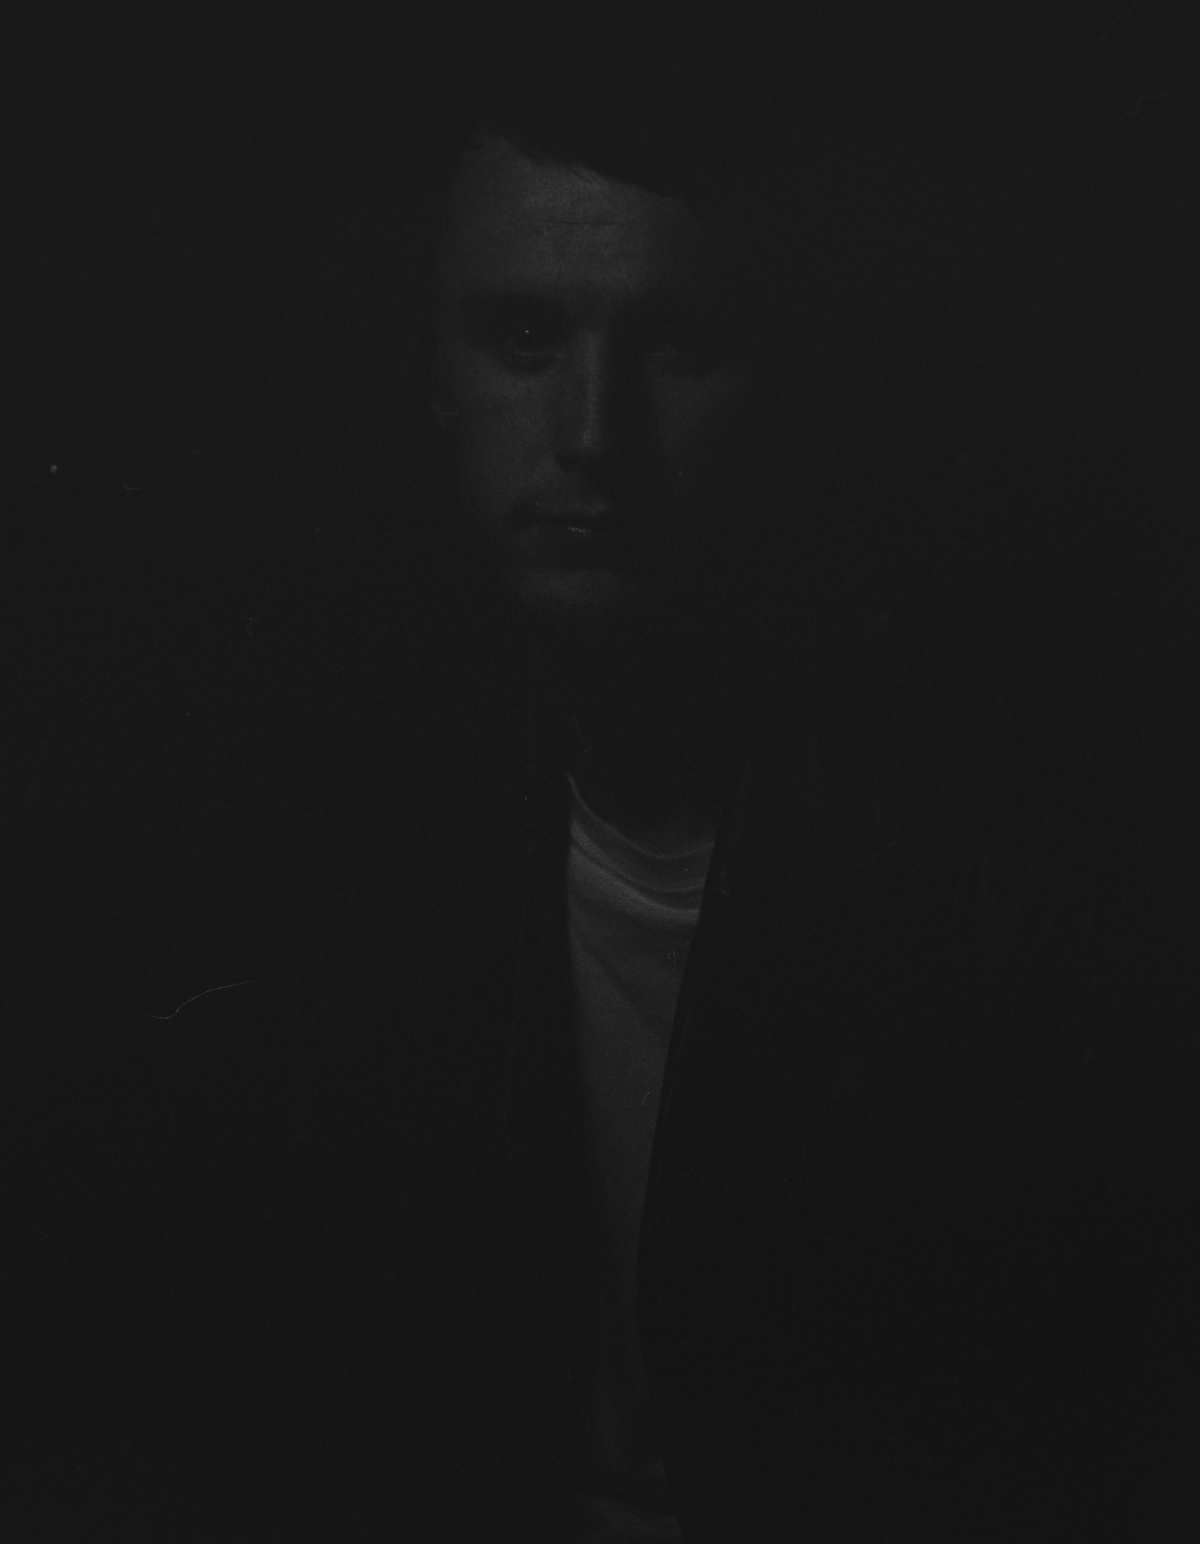
Second set with a Black Leather Jacket.

1/30th (metered) 
1/60th 
1/125th


1/15th 
1/8th 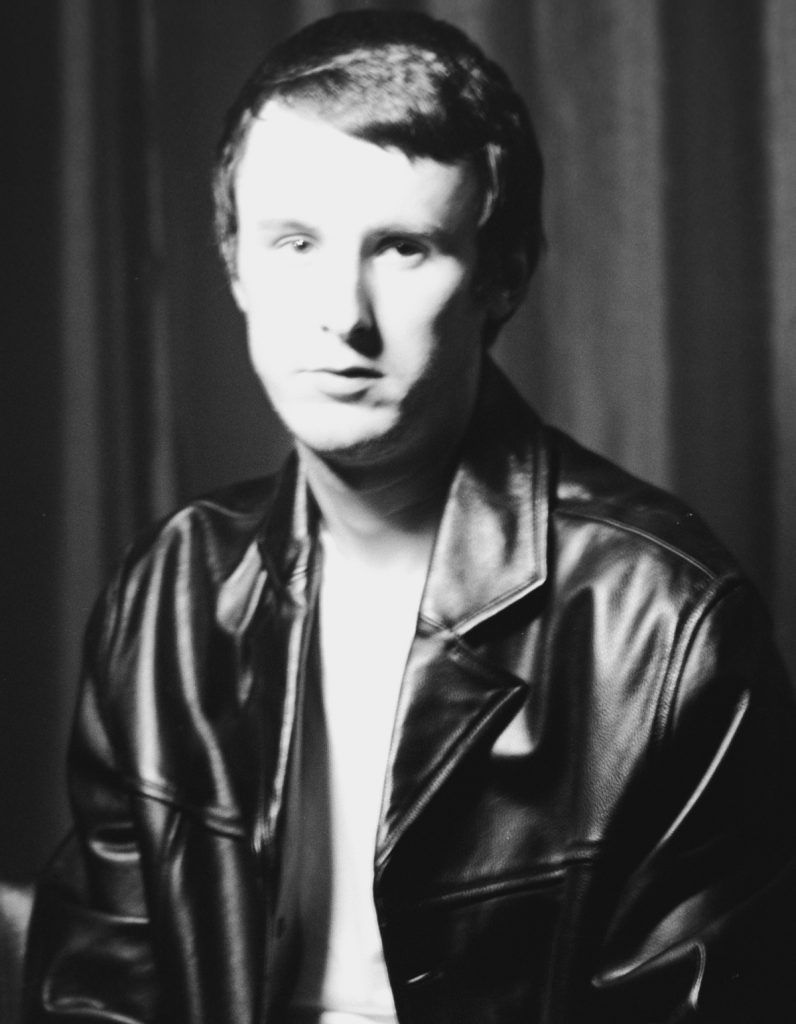
1/4th


I lit Jacob in such a way that it was very subtle yet enough for me to see a catchlight in his right eye and some white in the other. But not enough to spill over his left shoulder. So the light is wrapping around his face.
So 1/30th of a second at f/5.6 was my metered exposure. But I forgot to allow for the 250mm lens I was using. I had to allow an extra stop of light for that. Which brings my metered exposure to 1/15th at f/5.6 and you can see the exposures at 1/15th are looking great. Apart from motion blur!
So I am happy with the metering and shooting this film at 800ISO and developing in XTOL as mentioned above. I have another roll to shoot which I am intending to find a suitable subject soon. I am thinking of something lit by streetlight or maybe another portrait. Except this time, if it’s a portrait, the lighting has to be at least 4 stops brighter to get me to f/8 and 125th speed!
I think this is a lovely film for a classic portraiture look with rich blacks and bright highlights and a sweet grain too.
Fomapan 400 and Rodinal
Using a Nikon F5 in Aperture Priority Mode I shot half a roll of Fomapan 400 on a light overcast and sometimes bright moment day. I developed the film in Rodinal 1:25 for 5.5minutes at 20°. 10 Second Inversions to start and then 5 Inversions each minute after. I used water as a stop bath and Ilford Fixer. Then washed as normal.
I used my DSLR to scan the negatives and made slight adjustments to the contrast in Lightroom.
The film renders nice tonality and detail with nice sharpness too. The grain is very noticeable in Rodinal.
Here are my images for reference.


Long Exposures on Film!
If you haven’t seen my video on how I make long exposures on film then here is the link to the video on YouTube.
I say much in the video but here is a written version for those that are starting out in Film Photography and are stumped, as I once was, with long exposures.
Before I got into Film I used to shoot a lot of long exposures on Digital. Living around beaches it’s an easy subject for long exposure photography. My process was simple. Plot up with a tripod and cable release, find a suitable composition, select an aperture, usually around f/11 and then start testing my shutter speeds whilst looking at the back of the screen to see which shutter was best for my ISO and Aperture. Then start snapping away! You couldn’t go wrong. On the back of the camera is a screen so I could see instantly what my photographs looked like. The only trouble with this was I would come back from the beach after sunset with loads and loads of images to scroll through on the computer. Then I’d pick a few I liked and send the rest to the trash! And I would generally have some beautiful images with nice wispy sea creeping up toward the lens.
When I started getting into Film Photography I cam across a problem. METERING! A film camera has no digital screen to look at. And although some have a meter inside by way of a needle or coloured dots I couldn’t figure out how to shoot a long exposure and get a good result. Until I learned how to use a handheld meter.
My first attempt at long exposures on film was a disaster. I metered correctly but my negatives were always under exposed. I then learned about Reciprocity Failure. Tricky for that word to sink in at first. Then it made sense.
Unlike Digital Cameras, Film is made of a Silver Emulsion and for light to absorb its way onto that emulsion it takes time. Not for quick exposures but for longer exposures. Usually for exposures longer than 1 second. So with that in mind, if I am taking long exposures on film and my metered time is 10 seconds I need to feed the emulsion on the film a longer time than 10 seconds for the light to soak into the film. Okay. That makes sense. To me at least!
The meter doesn’t know I am shooting film. It doesn’t care either. It just gives me a value (Aperture and Shutter Speed) to set into the camera according to the ISO or Film speed I am shooting. With digital that 10 seconds is all I need. But with Film I need to work out how much longer I need to expose past that 10 seconds for the films “Reciprocity Failure”. The contact term for this phenomenon.
And it’s very easy to work out but not every film has the same emulsion and therefore each film has a different reciprocity failure time. In which case if you go online and look for the data sheet for the film you want to shoot you will find the reciprocity failure time guide. It looks a bit tricky at first but its quite easy.
Let’s look at Ilford FP4. After finding the reciprocity chart on Ilfords website. Here it is. Note the bottom is your metered time and the side is adjusted time. And let’s say we have used our light meter and for that 125 ISO film we have F/11 at 10 Seconds exposure time. (f/11 10s). It’s easy to use the chart.
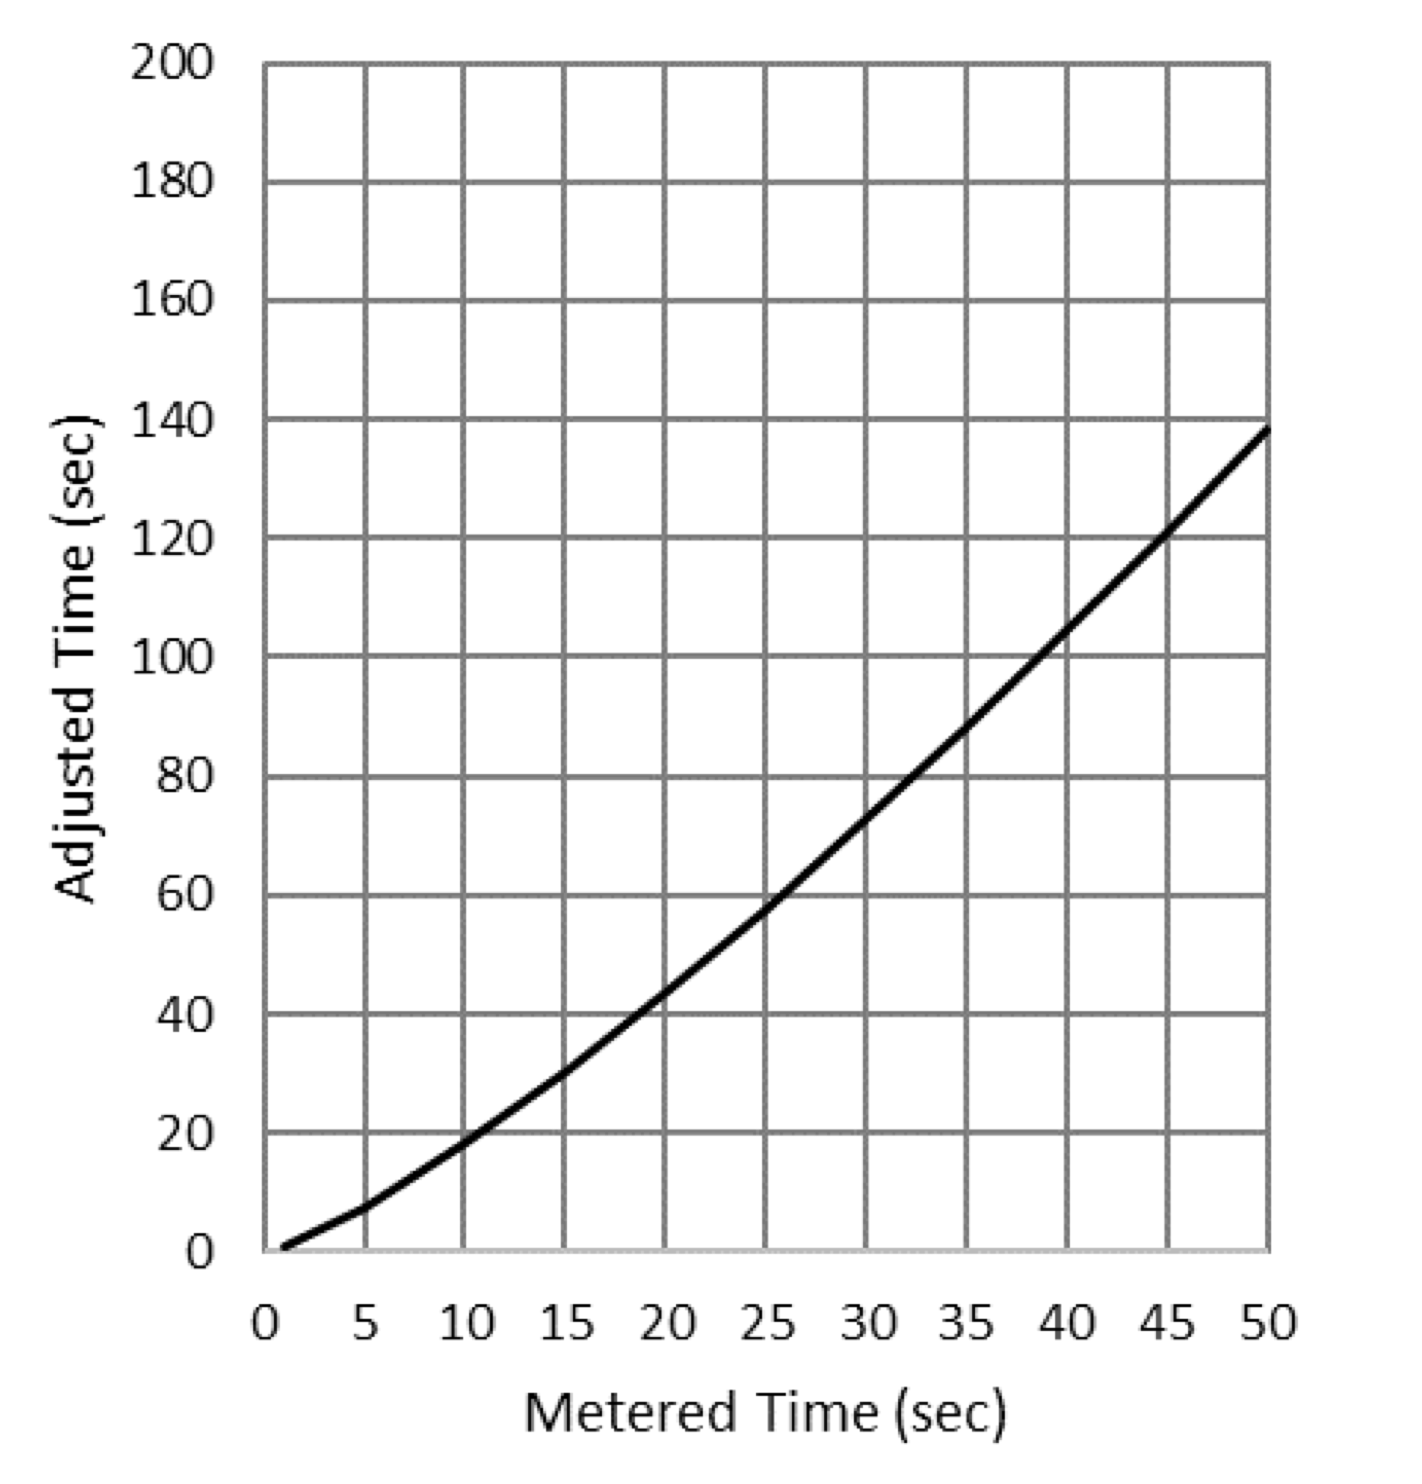
Take your 10 seconds at the bottom. Meet where the curve is and go along. I make it about 18 seconds.
So for the scene I have metered with Ilford FP4 I would need to expose my scene in camera for 18 seconds. That should give me a proper exposure allowing for reciprocity failure. Simple!
Ilford have an even easier chart on their website but you need a scientific calculator to work it out. Unless you’re a brain box in the maths department!
Here it is. Looks a bit tasty doesn’t it. But again, its easy to work out and I find this chart very useful for the Ilford Films. Except Ortho 80. Thats not on the chart.
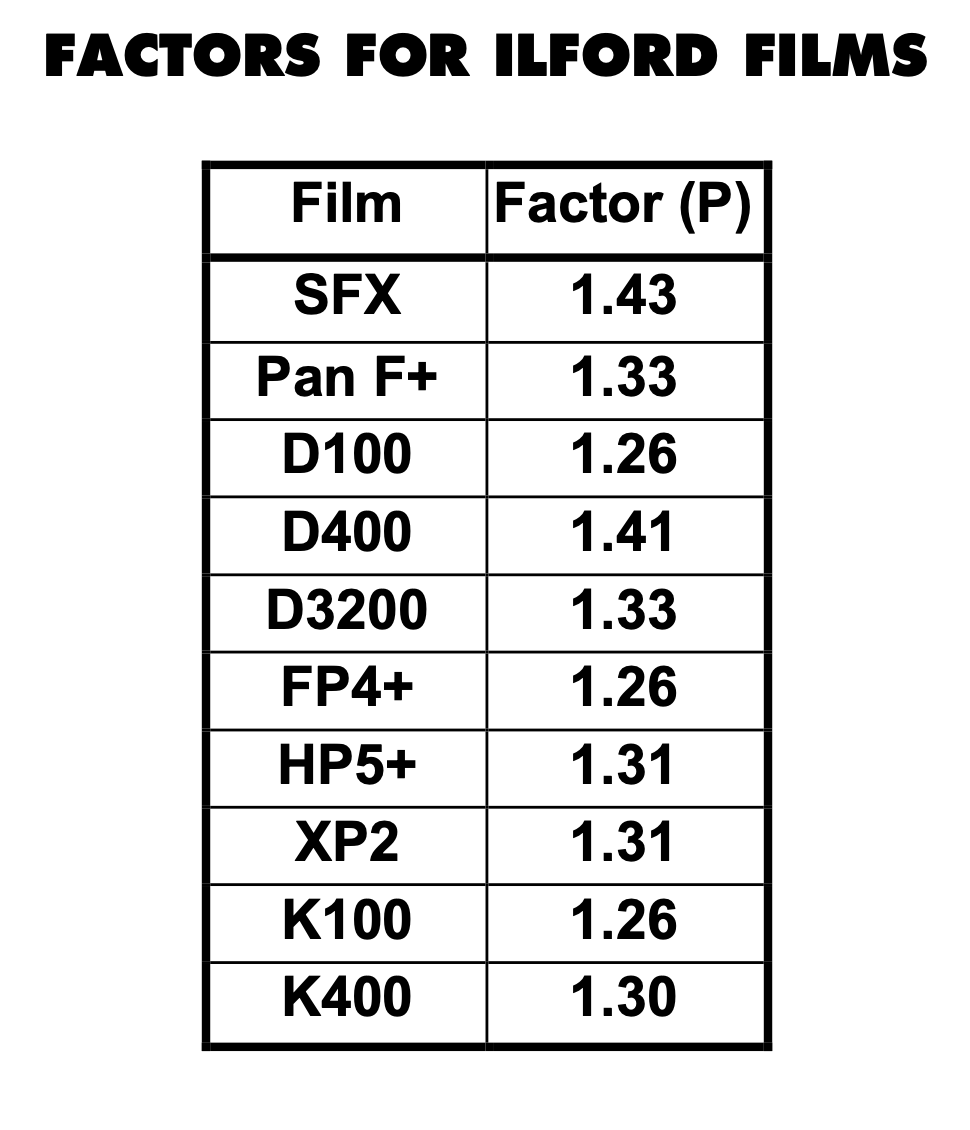
So the above chart you simply use a scientific calculator or app (I use my app on my phone).
My Ilford Film gives a factor of 1.26. So all I need to do is put into my calculator my metered time to the power of 1.26.
So, 10 (my metered time) x/y 1.26 = 18.197 (18 Seconds). You can see the X/Y button in orange.
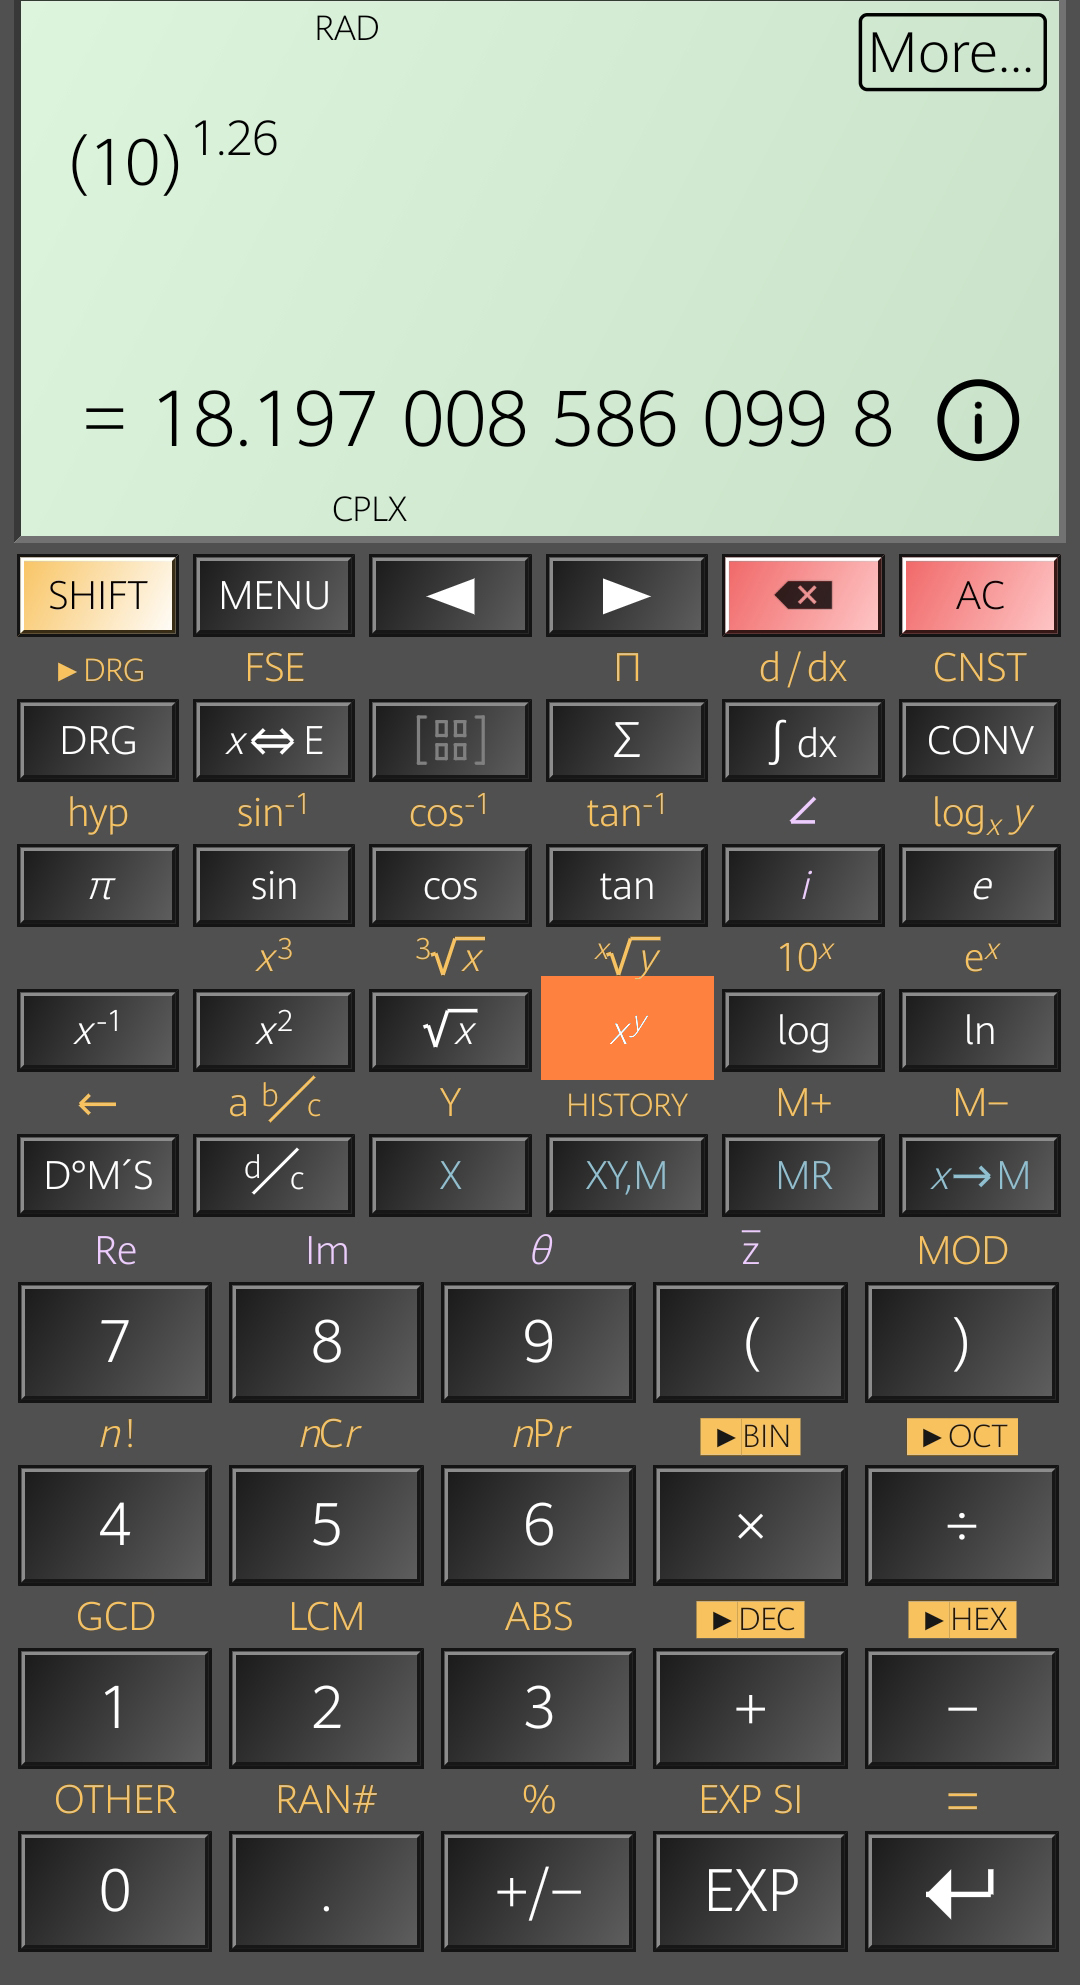
And it’s as easy as that.
I have cheat sheets for myself where I calculate times from 1 second to 20 seconds and write it down which saves me doing the calculations when I am taking my pictures.
Just remember all film emulsions are different and have different reciprocity times. Some are very long times such as Foma Film. And also Fuji Acros has brilliant reciprocity where you don’t need to allow for reciprocity for exposures up to 2 mins long! Incredible stuff.
I hope this has helped SFLaB subscribers.
Patterson Agitation Stick Development
Are you a Twiddler when you develop?
The other day I received a comment on one of my videos from Don Bennet where I showed some inversions during development and it was suggested to use the agitation stick rather than normal inversions to prevent the dreadful leaks. Something I have never used before. So I thought I’d give it a go and put it side by side.
So I made a video shooting HP5 and Developing in Rodinal one where I twiddled and the other where I inverted normality. This was just to see if there would be any difference and mostly to see if the twiddle would work!
Two tanks, exactly the same temp and same amount of developer and times. And I had both tanks on the go at the same time.
For the twiddle I rotated the the reel clockwise 5 times each minute.

I noticed the twiddled tank was slightly lighter and so far so good. I can trust the twiddle! Or can I?
I then went off the next day and shot a roll of 120 Foma 200 and developed in 510 Pyro for 6 and a half minutes twiddling for the first 10 seconds and then 5 turns each minute. I twiddles one way and then the other.


Here are two images I scanned from the developed film. I appear to have uneven development which is a shame as I would have liked to have printed a couple from that roll.
I can only assume that this was caused by insufficient agitation during the development. Which brings me to my initial thought of twiddling. Is there enough fresh developer getting over the film during inversions. Obviously not in this case of medium format.
I then, as if by magic, received a comment from Gianni in Italy on the video saying that the twiddle method works for 35mm but not so good for medium format! Interesting.

So I found that interesting.
For now I think I am going to steer clear of the twiddling but may still experiment with 35mm film but not chance another roll of 120 film.
What do you guys think ?
Roger.